Sunday, December 31, 2006

World Peace (Cookies) in the New Year

Technically, I still have through today to bake Christmas cookies, right? Who's gonna stop me? The Diet Police won't be issuing calorie violations until next week. And they won't start running the gym membership and weight loss program commercials on an endless loop until then either, nor the low-fat, lightened-up recipe programs on the Food Network for a few more days. So I say, what better way to ring in the New Year than with COOKIES?! And I made two winners this afternoon. The first I happened upon, of all places, at NPR's website. I had heard a program that aired recently with Dorie Greenspan promoting her new cookbook. The particular cookie featured was rugelach, but when I did a search for the recipe, I happily discovered some wonderful-sounding sable recipes as well. I will get to the "plain" sables and their variations (pecan, spice, and lemon) in good time, but today, we wanted something chocolately in the house. So I tried the cookies formerly known as Korova Cookies but re-dubbed World Peace Cookies when a taster decided that one bite of these exquisitely chocolatety gems could bring together all nations and peoples. What an appropriate sentiment as we usher in 2007! The cookies remind me quite a bit of the beloved Mexican Chocolate Icebox Cookies, but richer and more chocolatey, with a bite of saltiness instead of the heat from cayenne and cinnamon.

The second cookie I made was a white chocolate macadamia variety. I have been jonesing for some of these since I brought home real white chocolate chips from Trader Joe's just after Thanksgiving. And macadamia nuts are one of my favorite foods in the whole world. You know, I spent four years in Hawaii as young child (from infancy to age four), so of course, I don't remember much about it. But I still love swimming in the ocean, going barefoot, and eating things like rice and macadamia nuts (not necessarily together, but then again, that doesn't sound bad...a kind of tropical pilaf, perhaps?). In any case, Anna at Cookie Madness must have been on the same wavelength, as she baked two different versions of macadamia cookies this week (one with white chocolate and one with butterscotch chips). I took guidance from both recipes and sort of amalgamated the two with one or two teeny adaptations of my own. They turned out just heavenly! The secret? Browning then cooling the butter back to a solid form before making the cookies. YUM! If there is anything in the world better than the flavor of browned butter, I'm sure I don't know what it is! It adds such a nutty, salty flavor with overtones of caramel that pairs perfectly with the macadamias and the white chocolate. Delish! The recipes follow.

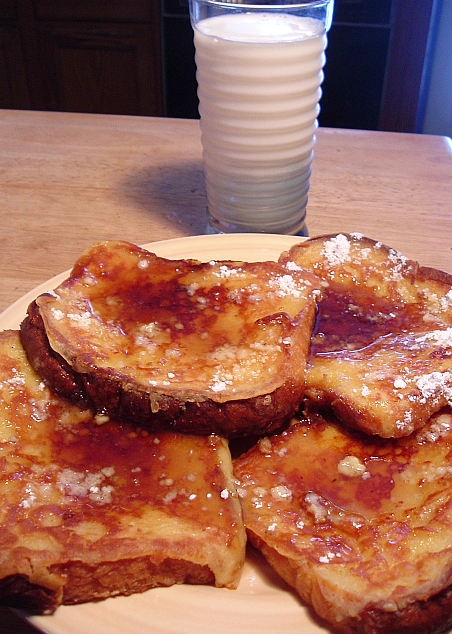
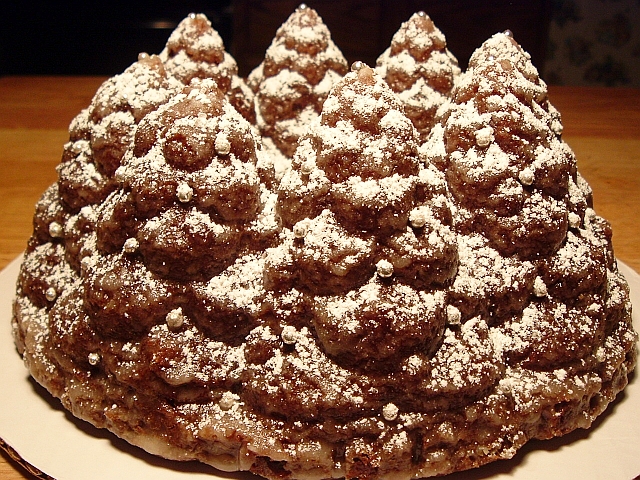
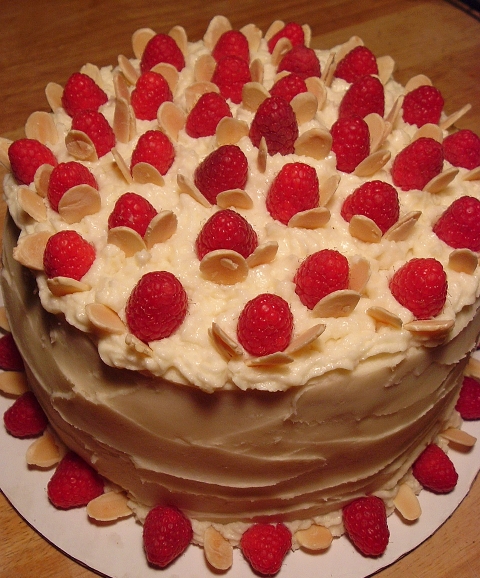
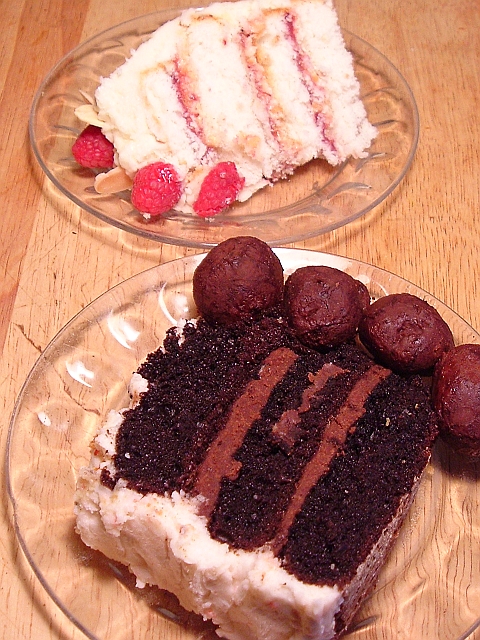
HAPPY NEW YEAR, everyone! (And don't let them take your Christmas cookies away until they pry them from your cold, dead hands!)
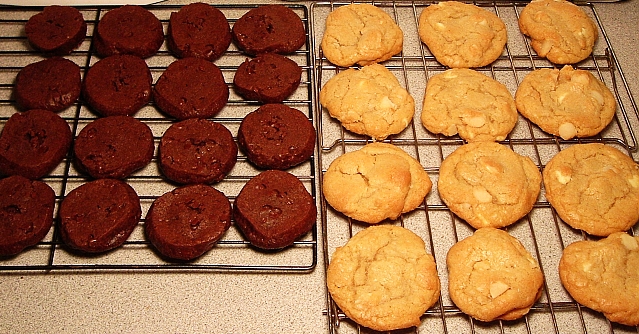
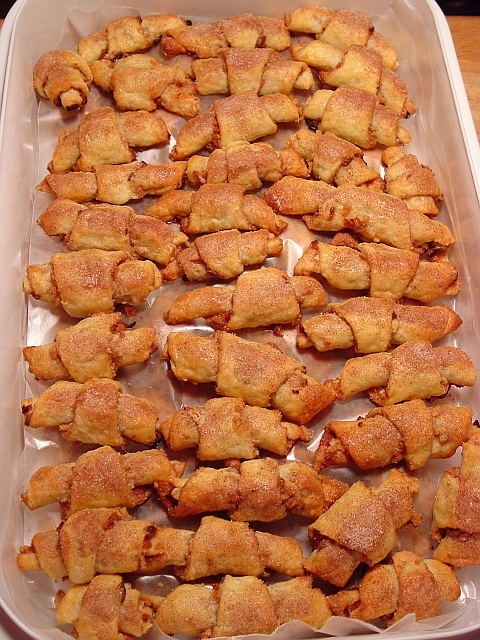

World Peace Cookies

(Source: Dorie Greenspan on www.npr.org)

1 1/4 cups all-purpose flour
1/3 cup unsweetened cocoa powder
1/2 teaspoon baking soda
1 stick plus 3 tablespoons (11 tablespoons) unsalted butter, at room temperature
2/3 cup (packed) light brown sugar
1/4 cup sugar
1/2 teaspoon fleur de sel or 1/4 teaspoon fine sea salt
5 ounces bittersweet chocolate, chopped into chips, or a generous 3/4 cup store-bought mini chocolate chips

Makes about 36 cookies (I only got 16 out of each roll=32)

Sift the flour, cocoa and baking soda together.

Working with a stand mixer, preferably fitted with a paddle attachment, or with a hand mixer in a large bowl, beat the butter on medium speed until soft and creamy. Add both sugars, the salt and vanilla extract and beat for 2 minutes more.

Turn off the mixer. Pour in the flour, drape a kitchen towel over the stand mixer to protect yourself and your kitchen from flying flour and pulse the mixer at low speed about 5 times, a second or two each time. Take a peek -- if there is still a lot of flour on the surface of the dough, pulse a couple of times more; if not, remove the towel. Continuing at low speed, mix for about 30 seconds more, just until the flour disappears into the dough -- for the best texture, work the dough as little as possible once the flour is added, and don't be concerned if the dough looks a little crumbly. Toss in the chocolate pieces and mix only to incorporate.

Turn the dough out onto a work surface, gather it together and divide it in half. Working with one half at a time, shape the dough into logs that are 1 1/2 inches in diameter. Wrap the logs in plastic wrap and refrigerate them for at least 3 hours. (The dough can be refrigerated for up to 3 days or frozen for up to 2 months. If you've frozen the dough, you needn't defrost it before baking -- just slice the logs into cookies and bake the cookies 1 minute longer.)

GETTING READY TO BAKE: Center a rack in the oven and preheat the oven to 325 degrees F. Line two baking sheets with parchment or silicone mats.

Working with a sharp thin knife, slice the logs into rounds that are 1/2 inch thick. (The rounds are likely to crack as you're cutting them -- don't be concerned, just squeeze the bits back onto each cookie.) Arrange the rounds on the baking sheets, leaving about 1 inch between them.

Bake the cookies one sheet at a time for 12 minutes -- they won't look done, nor will they be firm, but that's just the way they should be. Transfer the baking sheet to a cooling rack and let the cookies rest until they are only just warm, at which point you can serve them or let them reach room temperature.

SERVING: The cookies can be eaten when they are warm or at room temperature -- Greenspan prefers them at room temperature, when the textural difference between the crumbly cookie and the chocolate bits is greatest -- and are best suited to cold milk or hot coffee.

STORING: Packed airtight, cookies will keep at room temperature for up to 3 days; they can be frozen for up to 2 months.

White Chocolate Macadamia Nut Cookies
(Source: Cookie Madness )

2 sticks butter (Anna used salted, and so did I)
1 cup packed brown sugar
1 cup granulated sugar
2 large eggs
1 teaspoon vanilla
2 tablespoons whole milk
2 2/3 cups all-purpose flour
scant 1/3 cup cornstarch
1 teaspoon baking soda
1/4 teaspoon salt (could omit salt altogether if using salted nuts)
1 generous cup halved macadamia nuts (I used the roasted and salted kind)
1 cup white chocolate chips (real ones, not "white morsels")

First, brown the butter. Place butter in a saucepan and heat over medium until the butter melts, smells good and turns brown around the edges. This should take about 3-5 minutes. Butter might foam up a bit. Remove from heat and pour butter into mixing bowl. Place mixing bowl in refrigerator for two hours or until butter is just set but still kind of soft. If you leave it in longer, you’ll need to soften it again. (I used a fairly shallow bowl, and the cooling time was just over an hour.)

Add both sugars to the bowl of a stand mixer with the butter and cream together. Beat in egg, vanilla and milk. Sift together flour, cornstarch, baking soda and salt. Stir flour mixture into butter mixture just until incorporated. Mix in toasted macadamia nuts and white chocolate chips. (Then this is an optional step, but I chilled my dough for at least an hour before baking off the cookies--I always think this is best with buttery doughs.)

Drop dough by rounded tablespoons onto a Silpat (or parchment)-lined pan. Bake at 375 degrees for 12 minutes (11-13 – check at 11). Remove to a wire rack to cool.

Makes about 4 dozen.


Saturday, December 30, 2006

A CI Breakfast Bonanza, or Never Too Many Eggs in One Day!

Hey, Gina, what are you doing for your holiday break from school?

<----You're looking at it! Prunelle the PBGV captures the essence of my non-activity here as she snuggles in a sleeping bag. (Remember the tragedy of the broken oven? The next chapter is going to be the tale of the busted propane heating monitor! BRRR!) I haven't even been doing much in the way of exciting cooking either, since we have been mostly subsisting on all of the leftovers and holiday goodies. But one thing that I do enjoy when I have some time off of work is making indulgent breakfasts, as you may have noted from the previous post about Eggs Benedict. Well, today, it was all about making some "f#ckin' FRENCH TOAST!" (Movie reference, anyone?) I consider myself a master of the art of French toast, but I tried a different recipe this morning. I have recently rediscovered a couple of cookbooks on my shelf from the publishers of Cooks Illustrated, and this French toast is from The America's Test Kitchen Cookbook. I don't know about you, but I just love Cooks Illustrated in all its forms--magazine, cookbooks, and their website, especially the message boards where I get lots of good ideas and recipes and foodie fellowship. If you've never read any of their stuff, it's quite fascinating how they take a recipe and test it many different ways before concluding that they have achieved the best version. And the fascinating part is how they describe in lively and humorous detail exactly where each previous version fell short of the ideal and why. So for those of us always searching for the very best version of a dish, this can be a huge shortcut, a big time- and money-saver.

As for the CI French toast, interestingly, their recipe is almost exactly like my own version. I thought I was the first one clever enough to add some flour to the egg dunk to make a more substantive crust, I always add a little sugar and vanilla (and eschew cinnamon), and I am a firm advocate for using some type of sweet, eggy bread like challah, brioche, or today I used a Hawaiian sweet loaf. And besides warm maple syrup, I also like a little powdered sugar sprinkled on for good measure--takes me back to my childhood. This is a superlative French toast, trust me. Sometimes you don't need really fancy things with goat cheese or pine nuts or arugula or shaved truffles all piled up in a tower on your plate. Sometimes you just need a really excellent interpretation of a beloved classic. Sometimes, you just need some f#ckin' French toast! ;-)

French Toast
(Source: The America's Test Kitchen Cookbook)

Makes 4-5 challah slices, 6-8 sandwich slices (I made 6 thick Hawaiian bread slices and I needed to double this recipe!)

1 large egg
2 tablespoons unsalted butter, melted, plus extra for frying
3/4 cup milk
2 teaspoons vanilla extract
2 tablespoons granulated sugar
1/3 cup unbleached all-purpose flour
1/4 teaspoon table salt
4 - 5 slices day-old challah bread (3/4-inch-thick) or 6 to 8 slices day-old sandwich bread

1. Heat 10- to 12-inch skillet (preferably cast-iron) over medium heat for 5 minutes (I used a big electric skillet). Meanwhile, beat egg lightly in shallow pan or pie plate; whisk in butter, then milk and vanilla, and finally sugar, flour, and salt, continuing to whisk until smooth. Soak bread without oversaturating, about 40 seconds per side for challah or 30 seconds per side for sandwich bread. Pick up bread and allow excess batter to drip off; repeat with remaining slices.

2. Swirl 1 tablespoon butter in hot skillet. Transfer prepared bread to skillet; cook until golden brown, about 1 minute 45 seconds on first side and 1 minute on the second. Serve immediately. Continue, adding 1 tablespoon butter to skillet for each new batch.

As you can imagine, with a breakfast like that, there was no need for lunch today. But by dinner time, I felt compelled to continue my breakfast motif, and the Cooks Illustrated breakfast theme in particular. You see, I was rummaging around in the big freezer, looking for something to make for dinner, and I found an orphaned corned beef, leftover from last spring when I bought an extra one at a St. Patrick's Day sale price. I have never in my life made corned beef hash, but I have been hankering for some, so I thought I'd tried my hand at it. Once again, I turned to the good people of CI, this time, to a cookbook called American Classics. Despite the fact that it took an inordinate amount of time to cut and chop everything (though my new Rachael Ray knife made it that much less tiresome!), and I accidentally broke one of my egg's yolks as you can see (ugh!), it was really good! I would definitely make this again, especially as a breakfast-for-dinner meal that I like to do when I'm working and don't have time for a big breakfast in the morning. If you'd like to try it for yourself, here's the recipe:

Corned Beef Hash
(Source: American Classics)

2 pounds russet potatoes, peeled and cut into 1/2-inch dice
1/2 teaspoon salt
2 bay leaves
4 slices bacon, diced
1 medium onion, diced
2 medium garlic cloves, minced
1/2 teaspoon fresh thyme leaves, minced (dry works nearly as well, but use half as much)
1 pound corned beef, minced (pieces should be 1/4-inch or smaller, thick slices of corned beef from the deli would be fine here)
1/2 cup heavy cream
1/4 teaspoon hot pepper sauce (or maybe one teaspoon?! chickens!)
4 large eggs (up to 6, I think)
salt and pepper

1. Bring the potatoes, five cups of water, salt and bay leaves to a boil. Once boiling, cook the potatoes for four minutes, then drain and set aside.

2. Cook the bacon in a large, nonstick skillet over medium-high heat for a couple of minutes until the fat starts to render. Add the onion and cook until softened and slightly browned, about eight minutes. Add the garlic and thyme and cook for less than a minute. Add the corned beef and stir to combine. Mix in the potatoes, reduce the heat to medium, then pour the heavy cream and hot sauce over everything. Loosely pack the hash down with a spatula and cook undisturbed for four minutes. Invert the hash, one section at a time, folding the browned parts back into the hash. Continue this process until the potatoes are cooked through and everything is sufficiently browned to your liking.

3. Crack each egg over the top of the hash and sprinkle them all with salt and pepper. Reduce the heat to medium-low, cover and cook until the eggs are set, about six minutes. Serve in wedges with an egg on top of each section. Serve immediately.

Tuesday, December 26, 2006

Merry Christmas! (Redux)

So...how was your Christmas? Ours was low-key but very nice. We started our day with a late breakfast--brunch really--featuring the miraculous Christmas eggs. In fact, one of the Ameraucanas presented us with a special blessing on the very day, the first blue egg of the season (lower right in photo). To showcase our eggy bounty, I decided that Eggs Benedict would be just the ticket. Of course, I realized too late that we were lacking English muffins, so I used some Texas toast instead. And I also used honey ham instead of Canadian bacon. Actually, even more than Eggs Benedict, I love Eggs Copenhagen, which I first had at a charming bistro in the New York's Theatre District called Pigalle. Instead of ham or Canadian bacon, you swap out smoked salmon, and you have Eggs Copenhagen. DELISH! But whatever you pair your eggs with (it could be asparagus or artichoke hearts for you veggie folks out there), it's all about the Hollandaise. My favorite version comes from a cute little volume by Linda Kay Bristow called Bread & Breakfast, and the recipe is entitled Carol's Hollandaise Sauce. Carol Mickelsen is, apparently, the innkeeper of the San Benito House in Half Moon, California, and the following is her amazing Hollandaise recipe:

Carol's Hollandaise Sauce
(Source: Bread & Breakfast, Linda Kay Bristow)

4 egg yolks
1 tablespoon lemon juice (or two!)
1/2 pound (2 sticks) butter, cut into small chunks
1 tablespoon Dijon-style mustard (I prefer whole-grained...I like how it looks)
1/3 cup sour cream
dash salt (I would omit this...it's plenty salty without)
dash white pepper (I just use black as it already has the mustard grains in there)

In the top of a double boiler, whisk together egg yolks and lemon juice, gradually adding the butter. Continue stirring. When mixture has thickened, add the mustard, sour cream, salt (if using), and pepper. Serve over Eggs Benedict or your favorite vegetables.

*Note: I half this recipe, and it still makes enough sauce for 3 or 4 people!

After brunch, we snuggled in for an afternoon movie fest, waiting for neighbor Ken to get done with his barn chores before we opened presents. Then we played board games (Pictionary and Taboo) until it was time to consume the Christmas feast that I posted about yesterday. Fun! So what did you all get for Christmas? I think my friends and loved ones were sending me a strong message with my gifts. ;-) I got three new heavy-duty cake pans, The King Arthur Flour Cookie Companion, one of those rabbit-ear pepper mills, and a fabulous pasta assortment from a company called Rossi Pasta. There were six pastas (angel hair, pumpkin spice fettucine, wild mushroom linguini, parsley garlic fettucine, leek and onion linguini, and Italian spice linguini) along with one jar of vodka sauce. Yum! I don't know much about this company out of Marietta, Ohio, but apparently, they make signature pastas for the likes of Harry & David and Williams-Sonoma. I will try them out and let you know. But the best present of all, from roomie Cyd and neighbor Ken, was this:
That's right. Try not to hate. It's the Rachael Ray knife set! I know that she can be saccharine and annoying, but I have always envied her for her orange Santoku knives from Furi. And now I think I am going to have to spring for the seven-inch, too, I think (on sale for $58 at Amazon!). Love them!

Once again, I hope everyone had a wonderful Christmas and that you got everything that you wanted. (If not, that's why God gave us the after-Christmas clearance sales!)

Monday, December 25, 2006

Merry Christmas!

MERRY CHRISTMAS, everyone! I hope those of you who celebrate Christmas are having a very joyful one. I still feel like I'm in hustle-and-bustle mode myself. Yesterday, I ran around to all the neighbors delivering cookies, and this special peppermint brownie tree to the nice farmer behind us who lets us use part of his property to house the chickens and plant vegetables in the summer. (Thank you!)

Then today, I zipped around town, delivering another Raspberry Almond Torte to Janice's house for the Feast of the Seven Fishes with her family, and also dropping off some bittersweet fudge sauce for my chocoholic friend, Angela. I also popped in on June and Tom to deliver some gifts, but I'm afraid none of those were homemade. For June, I got a copy of Elf which I love so much and she has never seen, and also some chocolate-covered dried sour cherries from my last Trader Joe's pilgrimage. For Tom, I got canned tamales (I know, I know, but he loves them for some reason, and June won't allow him to buy them for himself!) and also the best raspberry jam in the world from the dog-catcher/jam-maker in Mooers. I used to think his quad-berry with four different kinds/colors of raspberries was the best. But the last time I was up there, he gave me a sample jar of his low-sugar raspberry, and I swear, that stuff tastes just like fresh raspberries! (And Tom is always complaining that he loves raspberries, but not raspberry-flavored things. This ought to change his tune!) After the Konda-Foleys, it was off to the traditional Christmas Eve Chinese food dinner before the candlelight and carols service at the Lutheran church.

Sounds like a full Christmas Eve, eh? But after we got home from church, I still had to prep the roast beast with a wet rub made of garlic, salt, black pepper, whole-grain mustard, balsamic vinegar and olive oil. Cyd also made the batter for her gorgonzola popovers (it's better if it sits overnight). And finally, I needed to bake my pies. Since it will be a very small affair tomorrow with just me and the roomie, her friend, Rachel, and our dear next-door neighbor, Ken, we are keeping it very simple and just including our personal favorites. Shrimp with a spicy remoulade will be the pre-function. Then we will have the rib roast but instead of Yorkshire pudding, we'll have the gorgonzola popovers (a tried-and-true Martha recipe). We'll also have herbed red potatoes (that's right, with fresh herbs from the garden--might as well!), brussel sprouts with bacon (ick--those are for Cyd), and succotash for me (which Cyd hates). Then, for dessert, we will have the very best pecan pie in the whole world--yes, I'm brazen enough to make that claim!

As I have posted about before, the recipe I use comes from my beloved friend, Kurt, by way of, I believe, Betty Crocker? But I have made adaptations to the recipe over the years, like increasing the amount of pecans (more is more!), adding a pinch of salt, and using half dark and half light corn syrups (or, even better, using the new brown sugar-flavored Karo corn syrup). Other adaptations I have made even more recently, largely due to Anna over at Cookie Madness, herself an obsessive pecan pie baker and addict. Her insistence on toasting the pecans and browning the butter beforehand took my pecan pie to a whole new level! But the best change that I have made to the recipe comes from living so near to Quebec. Across the border, they don't fear lard as we do, and they embrace the ultra-flakiness that a lard crust provides. The best-selling brand of lard in their stores seems to be something called Tenderflake, and the same company also makes frozen pie shells. The package says that they are deep-dish pie crusts, but that is a laughable claim. Not only are they small (eight inches?), but they are very shallow. So I make one recipe for the pecan pie filling, but divide it into the two smaller shells. As I am the sort that likes a very low goo-to-nuts ratio, this is a PERFECT solution to the problem of too much of the gelatinous goo. Along those same lines, I am trying one more tip from Anna about using potato starch in place of flour as a thickener. She says that it makes the filling less wobbly and jelly-like but still soft and supple. We'll see. I tried it this time, and the filling seemed to bake up the same way. (I'll let you know more about the taste and texture after we sample the pies tomorrow.)*

Whatever you're cooking and serving for the big day tomorrow, I hope you enjoy your meal surrounded by friends and family and joy and peace.

MERRY CHRISTMAS!

*Follow-up: Anna was right, as usual. The potato starch worked perfectly in the pies. It made a soft but less gelatinous filling that tasted great. I definitely recommend trying it as a thickener for your favorite pies.


Thursday, December 21, 2006

Cookie Party!

Well, it's almost upon us now, the big C-day! Are you ready? I am proud to announce that--mainly thanks to Cyd--we finally have the last of the Halloween down (gasp!), a little bit of external holiday trim on the house, and we even have a tree put up. Oh, it's bare, with no ornaments or lights, and no presents underneath, for that matter, but it's up! And it smells good, too. So with three days left, we are right on schedule (tee hee). A sure sign of the season is that yesterday was the (hopefully, annual) Padula Christmas Cookie Swap at my dear friend Janice's house. But the big props must go to her amazingly talented daughter, Dominica, who gets the golden apron this year. You cannot believe how full-on Martha she went for the affair yesterday! Just look at the table that greeted us when we walked in, down to the recipe card and mini-rolling pin favors and the personalized cookie place cards! TOO FABULOUS!

And though the guests came just to exchange cookies, we were surprised and delighted with a delicious Italian luncheon to boot! We began with two kinds of stromboli, ham and cheese and salami and cheese, then there was a delicious green salad with pears, pistachios, and dried cranberries. The main dish was something that Dominica christened a "mansagna"--kind of a cross between manicotti and lasagna. Basically, it was a lasagna but made with crepes instead of pasta. So even though it looks heavy, it ends up being much lighter and not as overwhelmingly filling. For dessert, in addition to the authentic Italian Padula cookie assortment, Dominica made my new favorite dessert, the walnut tart from the faculty holiday party a couple of weeks ago. That night, after the party, I actually took two pieces of it home with me to share with Cyd, but it was SO good that I ended up eating both of them myself! It's actually a very simple tart with few ingredients, but it tastes like a cross between baklava and pralines. I have been begging for the recipe since that party, and Janice and Dominica were so sweet to give me a cute little recipe binder as a Christmas gift, and the first recipe in it was the blessed walnut tart! I will share the recipe below, but first, look at the cookies that we swapped after the meal.


For those of you unfamiliar with the logistics of the traditional cookie exchange, everyone bakes a dozen of the same kind of cookie for each invitee. We had six guests in attendance, so I baked six dozen apricot and walnut rugelach. Then, if you're not as stressed out as I was yesterday (grades were due at school, and I was under the gun!), you should package each dozen individually so that it's easier on your host(s) and guests. Of course, my beloved friends, Janice and Dominica, had extra treat bags available for use by forgetful losers like yours truly. :-( Then everyone gets one dozen cookies from every other party guest, and you leave with six dozen different kinds of yummy cookies (my personal haul is pictured there to the right). Now, if that's too much temptation to leave around your house, then you can assemble mix-and-match cookie trays for your friends or, as in my case, for your neighbors. What a fun and helpful holiday activity, eh? Thanks, Padulas! Same time next year? ;-)

Dominica's Walnut Tart
(Source: A Taste of Home Dec/Jan 2002)

Crust:
2 cups flour
3 tablespoons sugar
3/4 cup cold butter
2 egg yolks, lightly beaten
1/4 cup cold milk

Filling:
1 1/2 cups sugar
1 1/2 cup heavy cream
1/2 teaspoon cinnamon
1/4 teaspoon salt
2 cups coarsely chopped walnuts (I haven't made this yet myself, but I am always in favor of toasting nuts a bit beforehand to bring out their flavor)

In a bowl, combine flour and sugar. Cut in butter until mixture resembles coarse crumbs. Combine egg yolks and milk; stir into flour mixture until blended. With lightly floured hands, press dough onto the bottom and up the sides of a 12-inch tart pan with a removable bottom. Line the shell with foil. Bake at 375 degrees for 12-15 minutes until lightly brown. Meanwhile, in a saucepan, combine sugar, cream, cinnamon and salt. Bring to a boil over medium heat, stirring constantly. Remove from heat and add walnuts. Remove foil from pastry shell and pour filling into the pastry. Bake for 20-25 minutes or until golden brown.

*Dominica recommends using less filling and pastry overall and making another smaller tart with the remainders. Otherwise, she believes that the filling in the tart becomes too thick and gooey, more like pecan pie. She prefers the filling to be thinner and set up more. Just an idea...

Wednesday, December 20, 2006

Happy Hanukkah!

I have been invited to a holiday cookie party tomorrow, and there are six invitees, so each of us needs to bring six dozen cookies to swap. We got a preview of my friend June's gingerbread cut-outs tonight at pub trivia, and they were spicy and delicious! But the thought of rolling out, cutting, and then frosting 70 cookies made me want to take my own life. I am still making batches of toffee for relatives and another cranberry-orange pound cake for my roomie's parents, so I needed something less involved for my cookie offering. I honestly considered Rice Krispie treats at one point (fancy ones, mind you, with Froot Loops and Rainbow Pebbles and such, a la Alexis Stewart). But when I was at the health food co-op yesterday, I spotted a beautiful bag of finely-diced dried apricots, and I had a vision. I would make a version of one of my favorite holiday cookies, that Jewish and/or Eastern European favorite, rugelach. Rugelach is made with a rich, unsweetened cream cheese dough, filled with cinnamon sugar, nuts, and/or some kind of fruit. You roll out small rounds of dough, sprinkle on the filling ingredients, cut into triangles, and then roll each cookie up, not unlike canned crescent rolls. The recipe I use is from 1999's Holiday Baking Magazine from Woman's Day. This fabulous magazine is also the source of my croissant bread pudding recipe. I am absolutely OBSESSED with holiday baking magazines--I need a 12-step program! Anyway, the original recipe is for rugelach filled with hazelnuts and brown sugar, but I play fast and loose with this template. This time, I swapped out toasted walnuts for the filberts, and added an equal amount of the diced apricots for good measure. Whatever you fill yours with, they would be perfect for your cookie swap, holiday party, and particularly, for Hanukkah (I think our Jewish friends are up to six candles as of tomorrow night, if I am not mistaken).

Hazelnut and Brown Sugar Rugelach
(Source: Holiday Baking Magazine, 1999)


For the pastry:
1 cup unsalted butter, at room temperature
1/2 lb. cream cheese, at room temperature
1/4 teaspoon salt
2 cups all-purpose flour

For the filling:
1 1/3 cups hazelnuts (or walnuts or pecans)
1/3 cup firmly packed brown sugar
1/3 cup granulated sugar
2 teaspoons ground cinnamon
4 tablespoons (1/2 a stick) unsalted butter, melted and cooled

* 1 1/3 cup dried apricots, finely diced (or dried fruit of your choice), optional

For the topping:
1/4 cup granulated sugar
3/4 teaspoon ground cinnamon
1 egg white, beaten with 1 tablespoon water (I used a whole egg)

To make the pastry, in a large bowl, combine the butter and cream cheese. Using an electric mixer set on high speed, beat until smooth. Mix in the salt. Reduce the speed to low, add the flour, and mix just until a dough forms. Turn the dough out onto a floured work surface. Using floured hands, form the dough into a log. Cut into 4 equal pieces. Flatten each piece into a disk and wrap separately in plastic wrap. Refrigerate until firm, at least 2 hours or as long as overnight.

Preheat an oven to 350°F. To make the filling, spread the nuts on a baking sheet and toast, stirring occasionally, until they deepen in color, about 10 minutes. Let cool, then chop finely. Increase the oven temperature to 375°F.

Butter 2 baking sheets (I prefer to use Silpats instead). Let the dough disks stand at room temperature for about 10 minutes to soften slightly. Meanwhile, in a small bowl, mix together the brown sugar, granulated sugar and cinnamon.

Flour 1 dough disk and place between 2 sheets of waxed paper. Roll out into a round 10 inches in diameter and 1/8 inch thick. Remove the top sheet and brush the dough with the melted butter, then sprinkle with 3 tablespoons of the brown sugar mixture. Top with about 1/3 cup of the nuts (and 1/3 cup dried fruit, if using). Using a rolling pin, gently roll over the filling to help it adhere to the dough. Cut the round into 12 wedges (a pizza cutter works great). Starting at the wide end, roll up each wedge. Transfer to a prepared baking sheet (you can get 18 of them on one half-sheet pan), arranging the cookies point-side down and spacing them 1 inch apart.

To make the topping, in a small bowl, mix together the granulated sugar and cinnamon. Brush the cookies with the egg wash, then sprinkle with the cinnamon-sugar topping.

Bake until golden brown, about 20 minutes (I baked two trays at a time, rotating halfway through the baking time, and mine took 22-24 minutes). Transfer the cookies to wire racks to cool. Repeat with the remaining dough, filling and topping. Store cookies in an airtight container at room temperature for up to 5 days. Makes 4 dozen cookies.

Tuesday, December 19, 2006

Scenes from the Latter Days, Take Two

Ok, now we've gone over into going crazy! I went to check on the chickens tonight, and LOOK at what I found:

This is just the weirdest thing ever! Chickens laying at Christmas! Next, the moon will turn to blood, frogs will fall from the sky, and the locusts will swarm! (But in the meantime, we'll have delicious omelettes.)

Monday, December 18, 2006

Signs of the Apocalypse, or A (Weird but) Convenient Truth?

What in the name of all that is holy is going on here? Next week is CHRISTMAS, for crying out loud, and this is what I have discovered in my herb garden! That's right, I have HERBS growing in my herb garden in DECEMBER! Now this may not seem shocking to some of you in southern climes. Indeed, my friend, Rosanne, in Miami Beach planted her tomatoes this weekend. But I live six miles from the border of Quebec! This is unprecedented and downright ridiculous! Pictured are Italian parsley, silver sage, and lime thyme (yes, yes, I have rosemary, too, but it's in a pot inside). A quick glance around the garden also revealed another variety of thyme, some marjoram, a little Swiss chard, and even a few wild strawberries starting to come back. BIZARRE! Not that I'm complaining, mind you. With the price of fuel oil and propane these days, this "tropical" weather is nothing short of a Christmas miracle for my budget. Furthermore, my chickens are loving being outside every day. Usually, by this time of year, they are literally cooped up all the time. So we are all, human and animal alike, enjoying the delay of winter's onset. But it's unsettling nevertheless. At best, it's proof of global warming. At worst, it feels like a sign of the end times! Doo doo doo doo, doo doo doo doo...(Twilight Zone theme).

Friday, December 15, 2006

Margarita and Karaoke Party in the Break Room!

Ok, so our division party was more like Angela's Nutcracker Christmas party, but it was still nice. Knowing that a potluck during finals week means a lot of snacks and pre-fab foods, I decided to depart from my normal dessert mode and make an entree. Boy, was I glad I did! Mine was the ONLY casserole there amid the various salads and appetizer-type items. And I'm very glad that I chose something very filling that was enough to serve everyone. Of course, I was up until all hours last night making holiday treats for my co-workers, so the casserole couldn't be anything too complicated. I decided to take one of my favorite recipes--the so-called "blond enchiladas"--and rework it into a layered dish. Instead of rolling each of the enchiladas like I usually do, I just squared off the tortillas with kitchen shears, and layered them with the meat and cheese filling and the sauce. I also threw in a can of corn and a can of black beans to make the dish go farther. It turned out EXCELLENT! I don't know that I will ever bother to roll the enchiladas again!

Blond Enchilada Casserole

one pound of ground beef
1/2 cup chopped onion (1 large)
2-4 garlic cloves, minced
1 teaspoon salt
1 (15 oz.) can corn, drained
1 (15 oz.) can black beans, drained (but not rinsed!)
1 teaspoon cumin (plus any other desired spices)
1 cup (8 oz.) prepared taco sauce (your favorite brand/heat level)
2 cups shredded cheese
8-10 six-inch flour tortillas
4 tablespoons butter
4 tablespoons flour
1 tablespoon instant chicken bouillon (I prefer to use soup base)
1 1/3 cups water (or more...to reach desired consistency)
2/3 cups sour cream

Brown the beef, onion, and garlic together, remove from heat, drain off any excess oil, then stir in the salt. Add the corn and black beans and cumin. (I think I added some other spices, too, like black pepper, a pinch of cayenne, a teaspoon or so of chili powder, and some Cajun seasoning--basically, anything that caught my eye in the spice cupboard! Use your imagination and the flavors that you like and taste as you go.) Then stir in the taco sauce and one cup of the cheese. Set aside.

In a saucepan, melt the butter--blend in flour and bouillon and cook for about a minute, whisking constantly. Stir in the water. Cook and stir until thickened. (It won't take long!) Remove from heat, and add the sour cream, whisking until smooth. Add a little more water if it looks too thick--you want it to be pourable, like a bechamel, which is basically what it is.

Use kitchen shears to make square tortillas. In the bottom of a 9x13 baking dish, spoon a little of the sauce and spread it around to coat the bottom of the pan. Layer in three or four tortillas (arranging them so that there are no gaps), then spoon on half of the meat and cheese mixture. Ladle on another spoonful or two of the sauce and spread it evenly over the filling with a spatula. Add another layer of tortillas, the rest of the meat mixture, and a little more sauce. Top it with one final layer of tortillas, the remaining sauce, and the other cup of cheese.

Bake uncovered at 350 for 15 or 20 minutes, or until everything has warmed through, the cheese has melted, and is starting to brown around the edges, and the whole thing starts to puff up a bit. Cut and serve (of course, it will cut easier if you let it cool for a bit before you serve).

*This is also a great make-ahead meal. Just assemble it, cover with plastic wrap and refrigerate until you're ready to bake it off. But then it might need a half an hour or more in the oven. This could serve eight people for dinner or sixteen at your office holiday potluck! ;-)

As for the Yuletide treats for my fine colleagues, I decided to screw my courage to the sticking place and try my hand at almond toffee. I tried it once, maybe a decade ago, with disastrous results. But I had two things going for me this time. One, I am a better cook now after another ten years of experience. And two, I had access to a recipe from two of my favorite food sources and blogger pals, Anna from Cookie Madness, and Joe at Culinary in the Desert/Country who also makes Anna's toffee every year. The only real differences that I can see in their recipes was that Joe makes a double batch at a time, adds the almonds into the toffee mixture a wee bit later than Anna does, and uses less salt. There may also be minor discrepancies about when to stir and when not to stir, and foil for the pan versus parchment paper, but essentially, they are making the same toffee. And if it's good enough for them, I was game to try! Now Anna does warn us that the candy does not always set up properly, despite one's best efforts, and that always scares me. I mean, who wants to spend all that money on butter and nuts--not to mention the time and energy (all that stirring!)--to have it not turn out? I also didn't have a back-up plan if the toffee didn't come out right. And I think you already know me well enough to know that I'd rather die than be found empty-handed on a major holiday! So the toffee just had to work. And TA-DAH...it did! YIPPEE!!

I looked at both Anna's version of the recipe and Joe's, and in the spirit of peace and coming together at the holidays, I recommend an amalgamation of the two. Plus, I have one or two ideas of my own. The first is a warning. It's best to let your butter come to room temperature before you begin the recipe. I did this for the first two batches, then decided to make a third batch and had to take another pound of butter out of the freezer. I didn't think it would affect anything, as you melt the butter first anyway. But the consistency of the last batch was different as it cooked, and when it was completely cooled, about half of the chocolate did not adhere to the toffee! Boo! So my warning to you is not to use frozen butter. But I also have one shortcut for you. If you want to chop up some bars of best-quality chocolate as Anna and Joe do, go for it. But I used bittersweet Ghiradelli chips, and it worked out just fine. Let me walk you through the rest of the process:

Anna's Almond Toffee

4 sticks butter (Anna and I both used salted)
2 cups sugar
1 cup water (Anna says warm, which I used)
1 teaspoon salt (Joe uses only half a teaspoon, but I love the salty/sweet thing)
3 cups sliced almonds, divided (shopping tip: it takes exactly 2 lbs. for three batches of this recipe)
1 teaspoon baking soda
16 ounces semi-sweet or bittersweet chocolate chips (Anna and Joe both used chopped up bars of milk chocolate, I believe, and Joe uses only 12 ounces--but nothing exceeds like excess at the holidays!)

Preheat oven to 350 degrees.

Evenly spread 1 cup sliced almonds onto a baking sheet and place in the oven for 6-8 minutes until they turn a light brown, stirring occasionally, so they do not burn. When done, cool and roughly chop the sliced almonds.

Cover a 10X15" pan with foil and set aside. (Anna uses parchment here, and I think I might have to agree with her. I had to use two pieces of foil to cover my sheet pans. Along the seam down the middle, some toffee seeped down, and I had quite a time trying to get those teeny strips of foil off the bottom of the toffee after it cooled. Just a thought...)

Place butter in a large, heavy-bottomed saucepan (I used a smallish stockpot) and melt over medium heat until it starts to bubble and you can smell a pleasant nutty aroma. Stir in sugar, water and salt. Attach a candy thermometer (use one of those heavy-duty, Taylor brand thermometers, not a cheap, crappy one--knowing the exact temperatures of the candy is what will determine whether it turns out or not!) inside the pan and leave the heat on medium, bring to a boil without stirring (Anna and I both stirred occasionally to no ill effect.)

When the temperature reaches 245 (Anna says 240, but waiting another second or two might be good so that the almonds don't become overdone), stir in the remaining 2 cups (untoasted) almonds and stir constantly until the temperature reaches 295. Anna says that the thermometer should be rising slowly but steadily, and if it's not moving at all, turn the heat up bit by bit until the mercury starts to rise.

When at 295, remove pan from heat and carefully stir in baking soda. Quickly pour into the prepared pan, gently pushing it into the corners and evening it out with the back of a spoon or with a large, offset spatula. This will begin to set very fast so don't mess around too much, says Joe.

Sprinkle chocolate over the top of the hot candy and let set for five minutes. Using a large, offset spatula, spread the softened chocolate evenly over the top. Sprinkle with the crushed almonds and let cool at room temperature for an hour. Place in the refrigerator and let sit for at least a couple of hours (or overnight) so that the chocolate can set. Break into chunks with a knife or your hands. Package prettily and present!


This recipe (which is a double-batch for Anna!) makes about 30 good-sized chunks of toffee, so I put about five pieces in each goodie bag as a gift. It was enough, but just enough, I think. I would have liked to have added another piece or two to each bag. So I got about six gift bags out of this batch, but you might plan for just four or five if you want to be very generous. As it was, I ended up with 18 treat bags for my co-workers from three batches of the recipe above. Just to help you plan...

Sunday, December 10, 2006

Cakes, cakes, and more cakes!


Last night was the faculty Christmakwaanzukkah/end-of-the-semester party at the local Elks' Club. In a town of limited party spaces, the Elks have about the best location in a lovely old Victorian home near the lake. But the food there is sometimes mediocre at best. So I joined the planning committee this year, and our goal was to step the menu up a notch or two and make a few more elegant choices. And I think we were fairly successful. For examples, instead of pizza rolls and Buffalo wings and crackers and cheese, we ordered Swedish meatballs, crab-stuffed mushrooms, bruschetta, a huge, gorgeous antipasto salad (with mozzarella, shaved parmesan, ham, salami, prosciutto, olives, and so on, all dressed with vinaigrette and mounded up on baby greens), and of course, the ubiquitous veggie tray. Then for entrees, we chose a vegetarian pasta primavera, Seafood Newberg with saffron rice, roast pork with some sort of Jack Daniels sauce (some liquor or another--I forget which--but it was tasty!), scalloped potatoes, prime rib, and green beans almondine. For banquet food, I must admit that it was all quite good, and certainly an improvement over previous years.

The other big change we made was in our dessert choices. Every year, we pay three or four dollars extra a head for a teeny dish of the same institutional crisp (apple or berry). So back in September, in a moment of lunacy, my friend, Janice, and I decided to make all of the desserts for the affair ourselves. It seemed reasonable at the time. We each would only have to make three or four cakes of our choosing. Of course, we didn't really think through the logistics of having to bake four cakes during the crunch of finals at the very end of the semester! Actually, it was five cakes for me last week, including the roomie's birthday cake! Yegads! I did try to undertake my tasks systematically by baking and freezing the layers ahead of time, and then glazing and frosting and decorating bit by bit over a week's time. Still, it was quite a project! I would never be able to handle a cake business, I know that. But it was very rewarding, because we produced wonderful desserts for about half the price, and it was fun to see all of the party guests wander by and admire the dessert buffet all evening. Janice made (back row) a carrot cake, some sort of Italian ricotta cheesecake, German chocolate cake, and a walnut tart (middle row, right). Then I made (middle row left) lemon-glazed gingerbread in my new Holiday Trees Nordicware pan that my sweet friend, Lee Ann, gave me for my birthday back in October. I also made (front row from left) a chocolate peppermint cake with dark chocolate layers, a mint truffle filling and candy cane frosting, a tangerine-glazed cranberry creamsicle pound cake castle (using another fabulous Nordicware pan that Lee Ann gave me!), and a white layer cake with raspberry almond filling. Whew! The recipes are as follows:

Cranberry Creamsicle Pound Cake

2 sticks butter, softened
1/3 cup shortening (I use butter-flavored Crisco)
5 large whole eggs
3 cups sugar
1 tsp baking powder
1/4 tsp salt
3 cups all-purpose white flour (measure on the 3rd and last sift)
zest of 2 oranges, very finely grated (preferably, with a Microplane/wood rasp)
1 cup whole milk (If you want to live dangerously—and I always do—half and half makes it melt in your mouth!)
1 tsp vanilla
1/4 teaspoon fiori de sicilia (an extract with citrus and vanilla flavors--you can order some from King Arthur Flour), optional
2 cups fresh cranberries, halved

Preheat oven to 325. Spray or grease bundt pan and lightly flour entire surface. (Or the Pam with flour for baking makes it even easier!) Cream butter and shortening together at slow mixer speed. Add sugar and eggs, one at a time, alternating with the sugar. Begin and end with sugar. Scrape bowl often. When all added, set mixer on high speed for exactly four minutes. Sift flour three times, adding baking powder and salt on last sift, then measure three cups. Whisk the orange zest into the flour mixture and set aside. Add the vanilla and the fiori di sicilia to the milk and stir. Add the milk and the flour mixtures to the bowl, alternating ingredients, beginning and ending with flour. Spoon batter gently into the prepared pan and smooth the top with a spatula.

The cake will take about 1 hour and 15 minutes to cook depending on your altitude, humidity and oven calibration. Test by inserting a knife or tester. It's done when it comes out a little oily but no batter. Cool on rack precisely 10 minutes and turn immediately out on a plate. Let it cool a bit, and then glaze with the recipe below.

Tangerine Glaze

3 cups powdered sugar
1/2 cup freshly-squeezed tangerine juice
1 tablespoon butter
splash of vanilla, optional
*You could also add the zest of two tangerines to this, but I wanted a very smooth finish on this molded cake, so I didn't this time.


Whisk the powdered sugar and tangerine juice together until smooth. Add the butter and microwave on high for 30 seconds to one minute (until butter is melted). Add a splash of vanilla, and whisk again until smooth. Coat pound cake with every last bit of the glaze (using a pastry brush is very helpful here), then let cool until set before serving.

Old-Fashioned Gingerbread
(Source: Laurie Colwin's Home Cooking)

The following recipe makes one nine-inch cake:
1. Cream one stick (1/4 pound) of sweet (unsalted) butter with 1/2 cup of light or dark brown sugar. Beat until fluffy and add 1/2 cup of molasses.
2. Beat in two eggs.
3. Add 1 1/2 cups of flour, 1/2 teaspoon of baking soda and one very generous tablespoon of ground ginger (more or less, according to taste, but this makes it very gingery). Add one teaspoon of cinnamon, 1/4 teaspoon of ground cloves and 1/4 teaspoon of ground allspice.
4. Add two teaspoons of lemon brandy. If you don’t have any, use vanilla extract. (Lemon extract will not do.) Then add 1/2 cup of buttermilk (or milk with a little yogurt beaten into it) and turn batter into a buttered tin.
5. Bake at 350 degrees F. for between twenty and thirty minutes (check after twenty minutes have passed). Test with a cake tester, and cool on a rack. This is great with a lemon frosting or glaze.

Lemon Glaze


3 cups powdered sugar
1/2 cup freshly-squeezed lemon juice
zest of 2 lemons, very finely grated
1 tablespoon butter
splash of vanilla, optional

Whisk the powdered sugar and lemon together until smooth. Add the lemon zest and butter and microwave on high for 30 seconds to one minute (until butter is melted). Add a splash of vanilla, and whisk again until smooth. Coat pound cake with every last bit of the glaze (using a pastry brush is very helpful here), then let cool until set before serving.

Vanilla Bean Layer Cake with Raspberry-Almond Filling

Dear friends, I confess that this was a bit of a cheater cake, as I started with a boxed mix. I used a classic white cake but added a scraped vanilla bean to the batter before baking. I made two eight-inch rounds, and split those in half to make four layers. To fill and frost the cake, I adapted a recipe from Cook's Illustrated:

Butter Frosting

24 tablespoons unsalted butter (3 sticks), softened but still cool
6 cups confectioners'sugar (1 1/2 pounds)
1 1/2 tablespoons vanilla extract
1 1/2 tablespoons whole milk
pinch salt

Raspberry-Almond Filling

1 1/2 cups blanched slivered almonds (7 1/2 ounces), toasted and chopped coarsely
1 cup raspberry jam (preferably, seedless)

Beat butter, confectioners’ sugar, vanilla, milk, and salt in bowl of electric mixer at slow speed until sugar is moistened. Increase speed to medium-high (high if using handheld mixer); beat, stopping twice to scrape down bowl, until creamy and fluffy, about 1 1/2 minutes. Avoid overbeating, or frosting will be too soft to pipe.

For the Filling: Combine 1 1/2 cups of the prepared frosting with the almonds in small bowl and then spread 1/3 of the mixture over first layer. Carefully spread 1/3 cup of jam on top (but don't go all the way to the edge or it will ooze over the sides!), then cover with second cake layer, and so on. Spread frosting over top and sides of assembled cake. Pipe any remaining frosting around the perimeter of the cake at the base and the top. Add fresh raspberries and sliced almonds to decorate.

Chocolate Peppermint Cake

Again, I began this cake with a boxed mix--dark chocolate fudge--baking three nine-inch layers. Then I filled them with two layers of mint ganache.

Mint Ganache

Makes 3 cups
While the ganache is cooling, you'll need to stir it as instructed; otherwise, the ganache around the edge of the bowl will harden and the center will remain liquid. The finished ganache should have a consistent texture.

12 ounces Nestlé semisweet chocolate morsels
2 cups whipping cream
1/2 teaspoon light corn syrup
1 teaspoon peppermint extract

1. Place chocolate morsels and cream in a heavy saucepan. Cook over low heat, stirring constantly with a rubber spatula, until combined and thickened, between 20 and 25 minutes. Increase the heat to medium low; cook, stirring, 3 minutes more. Remove pan from heat.
2. Stir in corn syrup and peppermint extract. Transfer frosting to a large metal bowl. Chill until cool enough to spread, about 2 hours, checking and stirring every 15 to 20 minutes. Use immediately.

After filling the cake layers with the chocolate mint ganache, I frosted the sides and top of the cake with cream cheese frosting--the one from Cyd's birthday cake in the last post--but I replaced the buttered pecans with eight candy canes that I pulverized in the food processor. Then I decorated the top of the cake with two more candy canes that I busted up into small pieces, two whole candy canes, and some colorful sparkling sugar. And since I had some ganache leftover, too, I formed some truffle balls and rolled them in cocoa powder and put some around the cake and a few on top.


Cyd's Big Day, or One Frosting, Two Cakes!

Last Friday evening, some friends gathered at a cozy local pub to celebrate a very auspicious occasion--the anniversary of the birth of my roommate, Cyd. Now I won't tell you how old she is now, as that would be indelicate. But I can tell you that the number ends in zero, and it was quite a traumatizing number for the poor thing. We antagonized her further by making her wear a silly birthday hat and a button with flashing lights that proclaimed her new age to all onlookers. That was great fun for us. But before you think us too unkind, she did get a very special birthday cake by request. She asked for a carrot cake, and if I do say so myself, I think I produced the best one that I've ever made! I started with what I believe it the best carrot cake recipe in the world, the Fourteen Karat Cake from The Junior League Centennial Cookbook. And then, in an absolutely inspired move I feel, I decided to frost it with my favorite frosting from my personal favorite cake, Chocolate Velvet Cake with Cream Cheese-Butter Pecan Frosting. As a sidebar, the Chocolate Velvet Cake requires an interesting technique whereby you pour hot water into the batter, which melts the butter, sugar, sour cream and chocolate into this gloriously smooth confection that yields a rich but feather-light chocolate cake. Top that with butter pecan cream cheese frosting (that's real buttered pecans, mind you!), and you've got a slice of heaven on your plate! And I am not even big on cake myself. But we're not talking about me--we're talking about Cyd! So back to her carrot cake. Well, the combination of the carrot cake with the butter pecan frosting was just divine! (Never too many nuts, that's my motto--second only to never too much garlic!) All of the celebrants Friday night seemed to feel that it was the best carrot cake that they'd ever had. I'll let you be the judge. But the butter pecan frosting is a winner, no matter what kind of cake you put it on!

Fourteen Karat Cake
(Source: The Junior League Centennial Cookbook)

2 cups all-purpose flour
2 teaspoons baking powder
1 1/2 teaspoons baking soda
1 teaspoon salt
2 teaspoons cinnamon
4 eggs
2 cups sugar
1 1/2 cups vegetable oil
2 cups grated carrots
1 (8 1/2 oz.) can crushed pineapple, drained
1/2 cup chopped nuts (I double this!)

Preheat the oven to 350 degrees. Grease and flour three 9-inch cake pans.

Sift the flour, baking powder, baking soda, salt and cinnamon. Beat the eggs in a large bowl with a wire whisk. Add the sugar and oil and beat until combined. Stir in the flour mixture, then fold in the carrots, pineapple, and nuts. Turn into prepared pans and bake for 35-40 minutes, or until the cakes shrink slightly from the sides. Cool in the pans for 10 minutes, then turn out and cool completely on wire racks. Frost with cream cheese frosting, or better yet, with cream cheese-butter pecan frosting!

Cream Cheese-Butter Pecan Frosting
(Source: Southern Living Magazine)

2 cups chopped pecans
1/4 cup cup butter, melted

2 (8-ounce) packages cream cheese, softened
1/2 cup butter, softened
2 (16-ounce) packages powdered sugar
2 teaspoons vanilla extract

Stir together chopped pecans and 1/4 cup melted butter. Spread in an even layer in a 13- x 9-inch baking pan. Bake at 350° for 15 minutes or until pecans are toasted. Remove from oven, and let cool. Beat cream cheese and 1/2 cup butter at medium speed with an electric mixer until creamy. Gradually add powdered sugar, beating until light and fluffy. Stir in pecans and vanilla.

Chocolate Velvet Cake
(Source: Southern Living Magazine)

1 1/2 cups semisweet chocolate morsels
1/2 cup butter, softened
1 (16-ounce) package light brown sugar
3 large eggs
2 cups all-purpose flour
1 teaspoon baking soda
1/2 teaspoon salt
1 (8-ounce) container sour cream
1 cup hot water
2 teaspoons vanilla extract

Melt semisweet chocolate morsels in a microwave-safe bowl at high for 30-second intervals until melted (about 1 1/2 minutes total time). Stir until smooth.

Beat butter and brown sugar at medium speed with an electric mixer, beating about 5 minutes or until well blended. Add eggs, 1 at a time, beating just until blended after each addition. Add melted chocolate, beating just until blended.

Sift together flour, baking soda, and salt. Gradually add to chocolate mixture alternately with sour cream, beginning and ending with flour mixture. Beat at low speed just until blended after each addition. Gradually add 1 cup hot water in a slow, steady stream, beating at low speed just until blended. Stir in vanilla. Spoon cake batter evenly into 3 greased and floured 8-inch round cake pans. Bake at 350° for 25 to 30 minutes or until a wooden pick inserted in center comes out clean.

Cool in pans on a wire rack 10 minutes; remove from pans, and let cool completely on wire rack. Spread Cream Cheese-Butter Pecan Frosting between layers and on top and sides of cake. Garnish, if desired.

Yield: Makes 12 servings

Friday, December 08, 2006

Great party dish to share...

No, I am not ignoring you! It's term paper week at school, and besides being BURIED ALIVE under final papers, speeches and projects, I have also been baking like a mad fool into the wee hours at night. I will tell you all about those efforts in a subsequent post, but I just wanted to share one of my new favorite recipes that I think will help folks out during this hectic holiday season.

The last big project in my intro-level communication course is a short, persuasive speech where the speaker has to try to sell the audience a product that can't cost more than a nickel. It's obviously a lighthearted assignment meant to add a bit of fun at the end of a long semester, in addition to helping them getting a little more public speaking experience. In any case, over the years, I have acquired the BEST recipes from this class, as many times, the student will give us a sample of some tasty treat or another, and then sell us the recipe for five cents. In this manner, the other day, a student named Ashleigh introduced me to a great new appetizer that would be fabulous at your holiday gatherings. It's called Hot Buffalo Chicken Dip, and it tastes just like hot wings! Plus, it only has a few ingredients, and it doesn't take much time to prepare. I made some last night to munch on during a marathon baking session, and it was just delicious! The recipe is below....I hope you like it as much as I did.

Oh, before I post the recipe, I want to give a quick holla to my roommate, Cyd, on her birthday! Pictures of the cake and the associated recipes will follow soon, but in the meantime, HAPPY BIRTHDAY, Cyd!!! :-D

Hot Buffalo Chicken Dip

2 (8 ounce) packages cream cheese, softened
1 cup ranch dressing (I think blue cheese would be good, too...and more authentic!)
3/4 cup hot sauce, such as Frank's Red Hot (I cut this down to 1/2 cup, and it was still PLENTY spicy!)
2 teaspoons granulated garlic (optional, but delicious)
2 (10 ounce) cans chunk chicken, drained (or leftover baked or deli rotisserie chicken, shredded/cut into very small pieces)
1 1/2 cups shredded Cheddar cheese (I like a very sharp one for this)

You'll want to get your cream cheese really soft for this (might even want to micowave it a bit). Mix together the cream cheese, hot sauce, ranch dressing and granulated garlic. Try to get it as smooth as possible (although it will melt in the oven, so don't obsess). Then stir in the chicken and cheese. Spoon into a baking dish, and bake at 350 degrees until it's melted and bubbly and browned on the edges. Serve with tortilla chips or crackers and/or celery sticks. Easy and YUMMY!

Friday, December 01, 2006

Crab with a "K"

Hello, everyone! I want to start off by saying how kind everyone has been to drop me notes of sympathy this week at the passing of my old friend, Percy. I was truly touched by the outpouring of compassion, and it has really been helping me get through this difficult time. So thanks again.

Now, onto a food-related topic, eh?? Ok, I have a confession to make. I love krab. No, not crab, though I love the real deal in all its forms. In fact, I grew up on Dungeoness in my beloved homeland of Oregon. My mom and I often visited the coast (Bandon-by-the-Sea was our special place), and we never failed to come back with several of the tasty little monsters, in addition to some Bandon cheese, of course. Also, when I used to visit my dear friend, John, in Sonoma County, we used to drive over to nearby Bodega Bay and buy fresh crab right off the docks from a gnarly old character of a fisherman (read: Fish Nazi). And if we were very lucky, he'd also have the tastiest little langostines that I have ever eaten--but that's another story. Still, I enjoy the imitation crab--surimi, if you will. I don't love it more than real crab. I love it as its own entity. Kind of like Taco Bell...I don't love it better than "real" Mexican food. But I still love it as its own category of trashy cuisine.

I think my fondness for krab began in graduate school back in Seattle at the beginning of the 90's. First of all, I was an impoverished student, and it was CHEAP. Secondly, I was doing the Weight Watchers thing back then, and as krab is essentially nonfat and high in protein, you could have a lot more of it than other kinds of meat. Indeed, to this day, I make an excellent stir-fry pasta dish with krab that hails from those early days. I am also a fan of fish tacos and nachos made with surimi. And I enjoy a seafood salad made with imitiation crab, too. But last weekend when I was staying in Enfield, Connecticut, I had dinner at a really great Chinese buffet called the Royal Buffet that had all types of delicious dishes. But my favorite thing on the buffet was this kind of a seafood gratin bake that featured krab and corn and lots of cheese. Simple, really, but man, was it good! So I have had it in my mind to try to recreate a similar dish at home, and below is what I came up with. This is a rare "quick and easy" recipe from me that is also inexpensive, so I hope it will help folks out during this busy holiday season. It's even elegant enough to serve for guests, unless they have crab with a "k" issues. But if so, why are you hanging around with snooty people like that anyway? Get some better people around you and cook for them instead! ;-)

Oh, wait, one more thing...speaking of trashy cuisine. Have you all tried the new vanilla Frosty at Wendy's yet? I've always enjoyed the traditional Frosty, despite its lack of chocolatey-ness (more on the lines of a Nestle Quik shake, isn't it?). But the vanilla version is just delish! Super-creamy and very vanilla-y and quite a bit less expensive than other kinds of blizzards, cyclones, or concretes, I might add. Yes, you can get mix-ins, but I don't see the need. It's delightful on its own. So there's a little holiday gift for you, from Wendy's and me. Ooh, ooh! And I've just remembered one more seasonal goodie recommendation. If you are lucky enough to live near or have access to a Trader Joe's, you simply must try their Candy Cane JoJo's! These are their house brand Oreo-type cookie, but with a mint-flavored filling including crushed up bits of candy cane. If you like the Girl Scout Thin Mint, this will definitely be your cup of tea! Ok, ok...now onto the Krab Gratin:

Krab and Corn Au Gratin

Bechamel:
1 stick butter
3 tablespoons flour
2 cups whole milk
1/4 cup parmesan cheese, freshly-grated (don't you DARE use that nastiness in a can!)
pinch of salt
few grinds of pepper (to taste)
1 teaspoon granulated garlic (or two!)
1/4 teaspoon cayenne pepper (up to 1/2)

1 pound imitation crab (or real lump crab or a combo of crab and other seafood like shrimp or scallops)
2 cups corn (cooked, if fresh or frozen, or a drained can will do fine)
2 cups shredded cheddar cheese

Preheat the oven to 350 degrees. Spray a 9 x 13 casserole dish with pan spray and set aside. In a large saucepan, melt the butter. Add the flour and cook until the mixture starts to take on a little color (golden, not brown), whisking frequently. Slowly add the milk and cook until mixture thickens, whisking constantly. Turn off the heat and add the parmesan, salt, pepper, garlic, and cayenne. Whisk until smooth. Add the imitation crab (or seafood of your choice) and the corn to the sauce and fold everything together gently. Pour into the prepared baking dish, top with cheddar, and bake for 30 minutes or until everything has heated through and the cheese has melted and started to brown just a bit around the edges. Serve over pasta or rice or biscuits (I used some lovely pappardelle from Trader Joe's that I picked up in Hartford, CT last weekend).