Last weekend, after the dog shows at the Meadowlands, my lovely friends Jaymie and Audrey invited me to spend the night at their gorgeous Victorian mansion in Washington, New Jersey, about an hour west of NYC. And that evening, one of best friends, Tony, and his fiance', Larry, came for dinner, as did one of Jaymie and Audrey's neighbors, Jewels, who I was happy to meet in person, having only known her from an online book club on Facebook.
The dinner was nothing short of magical. We gathered at the table around 7pm for snacks and wine, and we didn't leave the table until midnight, having feasted and laughed and relished each other's company for hours. As a bonus, between Audrey and Jaymie and Tony and Larry's dogs, there was a tiny yapper to warm each guest's lap after the meal. (Tee hee.) The entree' was a terrific lactose-free beef stroganoff that was surprisingly good (Jaymie is off dairy these days). Audrey made it with cultured almond milk in place of sour cream, which added a delicious nuttiness that really complimented the earthy mushrooms and also gave it a hint of sweetness. And there was a green salad with a yummy citrus vinaigrette that Jewels made.
Over dinner, I learned that Jewels was a graduate of CIA in Hyde Park, NY and owns her own catering business called
AngelFood. Even more exciting was the news that Jewels had also brought dessert, a cocoa nib, chocolate and berry dacquoise (from Chef Elizabeth Falkner of Citizen Cake and "The Next Iron Chef") that was among the best desserts I've ever had in my life! I had been stressing over what to make for
my friend Lee Ann's 50th birthday, as it needed to be very special and something other than traditional cake and frosting, because she doesn't care for it. The light bulb went on, and I asked Jewels whether a mere mortal who did not attend culinary school might be able to replicate the dacquoise. She assured me it was possible, and guess what? It was!
In fact, this dessert really isn't all that hard. It just takes FOREVER! I think it took me about 10 hours from start to finish (actually, it was longer, as I made a stupid mistake on the meringue layers and had to remake them--UGH!). But much of that is passive time, such as letting the meringues dry in the oven overnight and letting the layers chill in stages. It would be a much more humane project if you did it over two or even three days in stages. That will be my strategy the next time I make it. Ok, so let me break down the process for you...

The first step is to make the two meringue layers. Right out of the gate, it all went horribly wrong for me, as I accidentally added a tablespoon of baking soda to the whipped egg whites instead of corn starch (the boxes look the same)! Thus, the meringues didn't rise, and they ultimately tasted like, well, urine is a fairly accurate descriptor. So I shed some tears and put in an emergency call to Jewels who gently broke the news that I would have to start again. I was worried that I didn't have enough cocoa nibs to make a second batch, but she said that the 3/4 cup the recipe calls for was overkill, and she was right. I would use 1/2 cup at the most in the future.
By the bye, I found cocoa nibs at my local health food co-op, but of course, you could also acquire them from many sources on the internet. My last bit of advice on this part is to coat the pan and parchment paper liners with a generous amount of flour-added baking spray, and you'll have no problem releasing them later. And do NOT skimp on the overnight drying time, because if the meringues are moist at all, they may dissolve when layered next to the mascarpone cream. After all, they are mainly sugar and egg whites.

This is stage one of putting the cake together: the bottom layer is one of the meringues topped with some of the chocolate glaze. Then it goes in the fridge to set up for a half hour before continuing the assembly. I forgot to take a picture of the next step, but you spread on half of the mascarpone cream on top of the chilled ganache.

The next phase involves a chocolate chiffon cake layer topped with blood orange marmalade. However, I am not crazy about the chocolate-orange combo, and Jewels used blackberry jam on hers, which was scrumptious. So I topped mine with black raspberry jam instead. For those of you that don't think you like any kind of fruit with your chocolate, I encourage you to try a berry jam with this. It somehow gives the chocolate flavor more depth and richness and makes it...more chocolaty.

On top of the chocolate chiffon cake and jam, you add the other half of the mascarpone cream, and this is where it gets very scary! You must pray to the deity you serve, and somehow manage to get this very tender (and now heavy with toppings) layer on top of the bottom layers of meringue, chocolate, and cream. My cake broke on one side in the transfer, but I think once it all got squished together, no one was the wiser(she feebly tries to convince herself). I recommend placing the layer on waxed paper, and then using two wide but thin pancake turners to help you lift, move and place it. GOOD LUCK!
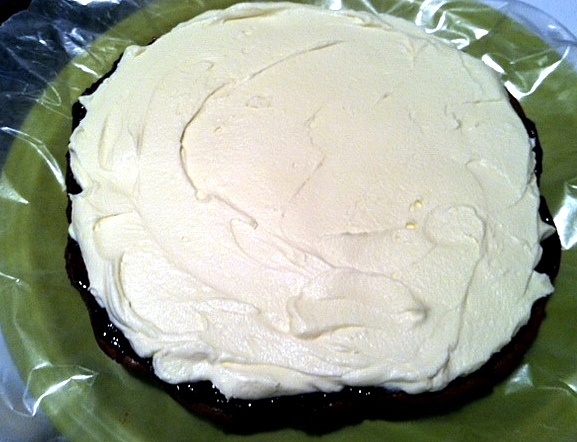
 Once you have, by some miracle, transferred the chocolate cake layer (look closely, and you can see the big crack in mine), you put the other cacoa nib meringue on top of the whole shebang, and it should look something like this (with cream exploding out of the sides, naturally) before you commence with the frosting/glazing.

And this is what it looks like with a crumb coat of the chocolate glaze. Yes, yes, I realize that it looks like something a third grader might make, but bear in mind, it still needs a finishing coat of glaze once this has set up, and the last step (pouring smooth chocolate over the whole affair) will cover a multitude of sins.

And TA-DAH, here is the finished product! I guess I should have reheated the glaze a bit longer so that it poured over and smoothly coated the dacquoise, but I was afraid of getting it too hot and having to wait for it to cool down again (and I need to get myself to work!). So I basically just frosted the cake with one more coat of chocolate. Jewels suggested that I could have smoothed it all over with a hot spatula, but I didn't have time--I barely got to class on time as it was! Even so, I think it looked alright, and would have been that much prettier with a ring of fresh berries around the base. Oh well...next time.

You need to chill the cake very thoroughly for it to slice properly, and Jewels recommends freezing it to make it easier (though I didn't have that much room in my freezer). At the restaurant where we had the birthday party, I tried slicing it with a large serrated knife that I wiped between each slice, but the top layer of ganache was fairly thick, and I ended up crushing it as I cut down and mashing some of the cream out. UGH! However, the taste was DIVINE, and none of the guests complained.

Jewels recommended that you cut the cake in sixteen slices (as it is so rich), and twelve people opted for a slice at the party. So I brought the last quarter of the cake home, and tried to figure out a different way to slice it so that you could see the pretty layers better when serving. The secret, as it turned out, was a HOT knife, reheated and wiped clean between each cut. That worked like a charm! Of course, I am a perfectionist, and it annoys me that I did not get the bottom layer of mascarpone cream spread evenly, but oh well...that will give me something to shoot for next time. However, someone is going to have to have another VERY significant occasion before I have the strength to attempt this cake again. And yet, all the labor was certainly worth it in the end. It truly is CRAZY DELICIOUS!
Cocoa Nib, Chocolate and Berry Dacquoise
(Source: adapted from Elizabeth Falkner, Bon Appétit, February 2009
Meringues:
Nonstick vegetable oil spray
1 cup powdered sugar
1 tablespoon cornstarch
3/4 cup cocoa nibs* (about 2 1/2 to 3 ounces), finely ground in spice mill or small coffee grinder
1/2 teaspoon coarse kosher salt
3/4 cup egg whites (about 6 large)
1/4 teaspoon cream of tartar
1/4 cup sugar
Chocolate chiffon cake:
Nonstick vegetable oil spray
1/2 cup sugar, divided
1/4 cup all purpose flour
1/4 cup unsweetened cocoa powder
1/4 teaspoon baking powder
1/8 teaspoon baking soda
1/8 teaspoon coarse kosher salt
1/3 cup canola oil or other vegetable oil
2 large eggs, separated
2 tablespoons water
Mascarpone whipped cream:
1 1/4 cups chilled heavy whipping cream
1 8-ounce container mascarpone cheese**
1/4 cup powdered sugar
2 teaspoons vanilla extract
Glaze:
6 ounces bittersweet chocolate, chopped (use a high-quality chocolate, like Callebaut)
3/4 cup heavy whipping cream
3 tablespoons water
3 tablespoons unsweetened cocoa powder
2 tablespoons light corn syrup
3 tablespoons unsalted butter, room temperature
Blackberry or black raspberry jam
Fresh berries (for garnish)
For Meringues:
Preheat oven to 300°F. Line bottoms of two 9-inch-diameter cake pans with 1 1/2-inch-high sides with parchment paper; spray parchment with nonstick spray. Sift powdered sugar and cornstarch into medium bowl; whisk in ground cocoa nibs and 1/2 teaspoon coarse salt. Beat egg whites and cream of tartar in large bowl until thick and foamy. Adding 1 tablespoon sugar at a time, beat until stiff but not dry. Fold in cocoa nib mixture. Divide meringue between prepared pans, spreading evenly.
Bake meringues 1 hour. Turn off heat. Keeping oven door closed, leave meringues in oven overnight to dry (meringues will deflate slightly).
Chocolate chiffon cake:
Preheat oven to 32 degrees F. Line bottom of 9-inch-diameter cake pan with 2-inch-high sides with parchment paper; spray parchment with nonstick spray. Combine 1/4 cup sugar and next 5 ingredients in medium bowl; whisk to blend.
Whisk 1/3 cup oil, egg yolks, and 2 tablespoons water in large bowl to blend. Stir in dry ingredients. Beat egg whites in another medium bowl until soft peaks form. Gradually add remaining 1/4 cup sugar, beating until stiff but not dry. Fold whites into yolk mixture. Transfer batter to prepared pan.
Bake cake until tester inserted into center comes out clean, about 25 minutes. Cool in pan 15 minutes. Turn cake out onto rack; peel off parchment. Cool completely. DO AHEAD: Can be made 1 day ahead. Wrap in foil; store at room temperature.
For mascarpone whipped cream:
Combine all ingredients in large bowl. Beat just until mixture holds soft peaks (do not overbeat or mixture will curdle). Cover and chill at least 1 hour and up to 2 hours.
For glaze:
Place chocolate in large microwave-safe bowl. Combine heavy whipping cream, 3 tablespoons water, unsweetened cocoa powder, and light corn syrup in heavy medium saucepan. Whisk over medium heat until blended and just beginning to boil. Pour mixture over chopped chocolate; let stand 1 minute, then stir until smooth. Whisk in butter. Let glaze stand until thick enough to spread, 15 to 20 minutes.
Place 1 meringue on platter, flat side down; spread 1/2 cup glaze over. Refrigerate until chocolate is firmly set, about 30 minutes. Spread half of mascarpone cream (about 1 1/2 cups) over chilled chocolate. Refrigerate 10 minutes. Place cake layer on work surface; spread with 1/2 cup marmalade, then remaining mascarpone cream. Carefully place cake layer atop meringue on platter. Top assembled cake with second meringue, flat side up. Spread 1/3 of glaze over top and sides of cake in thin even layer. Refrigerate until coating sets, about 30 minutes.
Heat remaining glaze in microwave just until pourable but not hot, 5 to 10 seconds. Carefully pour glaze over cake, spreading to coat evenly. Chill cake until glaze sets, at least 1 hour. DO AHEAD: Cake can be made 3 days ahead. Cover with cake dome and keep refrigerated.
Cut cold cake into wedges. Serve with fresh berries.
* Bits of shell-roasted cocoa beans; available at many specialty foods stores and from chocosphere.com.
** An Italian cream cheese; sold at many supermarkets and at Italian markets.

 Dinner will be a classic Hollywood steakhouse meal a la The Artist: Pan-Seared Porterhouse Steaks with Béarnaise (the sauce adds a French twist as homage to Hugo) and Twice-Baked Potatoes.


 Minny's Chocolate Pie