"At that time, Antony Fortuny still suspected that part of the boy's mental deficiencies were due to his diet, which was far too influenced by his mother's French cooking. It was a well-known fact that the richness of buttery foods led to moral ruin and confusion of the intellect." --The Shadow of the Wind, Carlos Ruiz Zafon
Tuesday, March 31, 2009
Apres-NOLA and Copycat Cafe Cuisine
Secondly, though I offer no specific recipe, I will also share a picture of the yummy and spicy fish dish that I threw together one night after returning home from Louisiana. I began with two fillets of a farmed catfish called swai which I sprinkled with my house BBQ seasoning and coated in my favorite fish fry (dry) mix from Price Chopper. Then I pan-fried the fillets until GB&D, and served them over steamed white rice that I drizzled with olive oil and tossed with perhaps as much as a half cup of chopped fresh herbs from the Aerogarden (parsley, dill, thyme and basil). Then I topped the fish with my homemade escabeche. So easy, so fresh, and SO GOOD!
Finally, I do want to share a couple of real recipes that I've made recently in homage to some of my favorite cafe treats. Awhile back, I shared a good copycat recipe for my beloved Starbuck's peppermint mocha. Now I've found one that approximates their very popular coffee cake, and as a bonus, it's a bit of a "cheater" recipe, as it starts with a box mix. This one is easy, delicious, and perfect for a brunch or bake sale.
Starbucks-Like Coffee Cake
(Source: Picky Palate)
1 box yellow cake mix (plus ingredients on back of box)
2 sticks cold salted butter
2 1/4 cups flour
1 1/2 tablespoons cinnamon
1 3/4 cups brown sugar
1 1/2 tablespoons vanilla
powdered sugar (for dusting)
Preheat oven to 350. Prepare cake mix in large bowl according to directions on box. Spray a 9X13 pan with nonstick spray. Pour batter into pan. Bake at 350 for 20-30 minutes or until center is just set.
While cake is baking, prepare the crumb topping. In large bowl of electric mixer combine, butter, flour, cinnamon, sugar and vanilla until all crumbly.
Immediately after cake is removed from oven, break crumb topping into marble size pieces with fingers, sprinkling over top. Put back in oven and bake an additional 10-15 minutes (topping will begin to look a little less wet/raw). Let cool fully then dust with powdered sugar, using a sieve. Cut into squares and serve.
Last but not least, I have been experimenting with my own version of the wonderful pistachio cookies that I first sampled on Christmas Eve at the Padulas that they acquired from the Fresh Market over in Burlington. I think I'm very close, and even if I weren't, these cookies are AMAZINGLY good! They are also very easy to make, yet impressive and elegant--fancy enough to serve as dessert at your next dinner party. However, they have one big drawback: they are SO expensive! A can of almond paste is five bucks and the small tub of pistachios that I bought was about nine dollars, so the cookies were nearly a dollar apiece! YIKES! Are they worth it? Well, I didn't have to make a three-hour round trip to Burlington, so there's that. And they are DEE-LICIOUS! But I guess you'll have to judge for yourself...once you've saved up enough money to buy the ingredients, of course. ;-)
Pistachio Macaroons
8 oz. almond paste
1/2 cup sugar
2 egg whites
1/2 teaspoon vanilla
3 1/2 to 4 cups roasted, salted and shelled pistachios--divided
Blend the almond paste and sugar until crumbly. Add the egg whites and blend until smooth. Mix in the vanilla, then two cups of the pistachios. Using a cookie scoop (2 oz. or about three tablespoons), form balls of dough, then roll each ball into the remaining 1 1/2 to 2 cups of pistachios. Bake at 325 degrees on Silpat-lined cookie sheets for about 25 minutes or just until the cookies begin to brown around the edges (they should still look a little soft in the middle). Cool completely on the pans, then store in airtight containers.
Yield: 16-17 cookies
Spring Break: Laissez les bon temps rouler!
Saturday
Napoleon House: Seafood Gumbo (excellent!), Muffaletta (the first stop on my self-declared Muffaletta Tour of NOLA was sub-standard and disappointing), and a Pimm’s Cup (the house cocktail--like grown-up lemonade with a cucumber garnish, very refreshing!)
Café du Monde: Beignets and Café au Lait (doesn't get much betta!)
Sunday
Omelette with Cream Cheese, Red Peppers, and Scallions (that my dear friend and hostess, June, made for me! YUM!)
Tammany Yacht Club’s Marina Café (Slidell): Green Salad with Homemade Creole Mustard Dressing (I will be replicating this dressing at home), Fried Shrimp and Fries with Thai Chili Mayo (24 big, fresh, crispy shrimp--wow!--that I made better by requesting the chili mayo from a different entree), and Sweet Tea
Chartres House (pronounced by locals as "Chowda House"): Corn and Crab Bisque (the ubiquitous soup of New Orleans that I dearly love)
Bread Pudding with Brandy-Soaked Raisins and Tipsy Sauce (that June made--so good!)
Monday
La Madeleine (Mandeville): Tomato-Basil Pasta Salad (yummy), Croque Monsieur (also yummy), and Tomato-Basil Soup (the house specialty, but needed a packet of sugar to counteract the acidity, IMHO)
O’Henry’s Food & Spirits*: Half-Pound Burger on Texas Toast with Swiss Cheese, Sauteed Mushrooms, and their famously creamy "Monica Sauce" and Fries (I couldn't eat seafood multiple times every day!)
*We ate our dinner at O'Henry's before taking the streetcar down to Tulane to see former Poet Laureate, Billy Collins, do a reading of his wonderful and often hysterically-funny poems. So fun!!
Camellia Grill: Grilled Pecan Pie with Bluebell Vanilla Ice Cream (there are no words)
Tuesday
Camellia Café (Slidell): Muffaletta (SUPERB! I daresay, better than Central Grocery--perhaps because it's toasted) and Shrimp and Squash Casserole (I am going to have to try and replicate this--kind of like Thanksgiving stuffing but spicier and with shrimp and squash involved, DELISH)
Gazebo Café: Margarita (frozen--perfect!)
Cochon*:
Paneed Pork Cheeks with Goat Cheese, Arugula & Beet Rosti (no pic, because we gobbled it up too fast--this was TO DIE FOR!)
Housemade Andouille with Grits, Baby Limas, Goat Cheese & Crushed Herbs (ditto)
Roasted Pork Shoulder Stuffed with Herbs, Wedged Potatoes, and Fried Spinach
Bacon Pralines (from their house boucherie around the corner--sinful!)
*This was my one "special" dinner, and I cannot say enough about this incredible restaurant! After dinner, I struck up a conversation with friendly house manager and fellow Chowhounder, Preston Trahan, and he procured for me an autographed menu from chef, Stephen Stryjewski, whose signature was prefaced with "Eat more pork!" (Tee hee...am I a foodie nerd, or what?) If you are able, RUN do not walk to Cochon, but I advise you to avoid ordering an entree and just get three or four small plates so that you get to sample more of their amazing fare!
Café du Monde: Frozen Café au Lait (a thousand times better than Starbucks' frappucinos!)
Wednesday
Surrey Café:
Lafitte Omelette with Brie and Avocado and a Lump Crabmeat Sauce, Hash Browns, and a Housemade Sesame Bagel (funky little joint, great food)
Kenny’s Seafood (Slidell):
Boiled Crawfish, Shrimp, Corn, Garlic Heads, Potatoes, Onions, Celery, Green Peppers and Spices (big family throwdown at June's sister's house--FUN!!!)
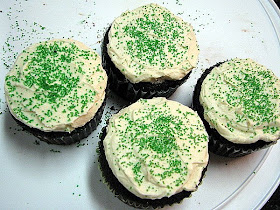
Irish Cupcakes (my contribution to the party and in honor of St. Pat's--recipe follows)
Thursday
Olive Garden (I know, I know! But it was June's sweet mother's choice, and she invited us to join her. What are you gonna do?): Salad & Breadsticks, Chicken and Gnocchi Soup (a new soup offering--pretty good), and Lasagna Fritta (really good--decadent!)
Dry Dock* (Algiers--not to be confused with the bar of the same name in Plattsburgh): Muffaletta (decent, but not a contender) and Sweet Potato Fries
*This is where we grabbed a bite near the ferry dock in Algiers right before we played the "hardest trivia game in New Orleans" at a little dive/English pub called the Crown and Anchor. There was truth in advertising, as the trivia was TOUGH! So we lost, but we sure had fun on my last night in New Orleans.
Irish Cupcakes
(Source: Smitten Kitchen)
Makes 20 to 24 cupcakes
Guinness Chocolate Cupcakes:
1 cup stout (such as Guinness)
1 cup (2 sticks) unsalted butter
3/4 cup unsweetened cocoa powder (preferably Dutch-process)
2 cups all purpose flour
2 cups sugar
1 1/2 teaspoons baking soda
3/4 teaspoon salt
2 large eggs
2/3 cup sour cream
Ganache Filling:
8 ounces bittersweet chocolate
2/3 cup heavy cream
2 tablespoons butter, room temperature
1 to 2 teaspoons Irish whiskey (optional)
Bailey's Frosting:
3 to 4 cups confections sugar
1 stick (1/2 cup or 4 ounces) unsalted butter, at room temperatue
3 to 4 tablespoons Baileys (or milk, or heavy cream, or a combination thereof)
Special equipment: 1-inch round cookie cutter or an apple corer and a piping bag (though a plastic bag with the corner snipped off will also work)
Make the cupcakes: Preheat oven to 350°F. Line 24 cupcake cups with liners. Bring 1 cup stout and 1 cup butter to simmer in heavy large saucepan over medium heat. Add cocoa powder and whisk until mixture is smooth. Cool slightly.
Whisk flour, sugar, baking soda, and 3/4 teaspoon salt in large bowl to blend. Using electric mixer, beat eggs and sour cream in another large bowl to blend. Add stout-chocolate mixture to egg mixture and beat just to combine. Add flour mixture and beat briefly on slow speed. Using rubber spatula, fold batter until completely combined. Divide batter among cupcake liners, filling them 2/3 to 3/4 of the way. Bake cake until tester inserted into center comes out clean, rotating them once front to back if your oven bakes unevenly, about 17 minutes. Cool cupcakes on a rack completely.
Make the filling: Chop the chocolate and transfer it to a heatproof bowl. Heat the cream until simmering and pour it over the chocolate. Let it sit for one minute and then stir until smooth. (If this has not sufficiently melted the chocolate, you can return it to a double-boiler to gently melt what remains. 20 seconds in the microwave, watching carefully, will also work.) Add the butter and whiskey (if you’re using it) and stir until combined.
Fill the cupcakes: Let the ganache cool until thick but still soft enough to be piped (the fridge will speed this along but you must stir it every 10 minutes). Meanwhile, using your 1-inch round cookie cutter or an apple corer, cut the centers out of the cooled cupcakes. You want to go most of the way down the cupcake but not cut through the bottom — aim for 2/3 of the way. A slim spoon or grapefruit knife will help you get the center out. Those are your “tasters”. Put the ganache into a piping bag with a wide tip and fill the holes in each cupcake to the top.
Make the frosting: Whip the butter in the bowl of an electric mixer, or with a hand mixer, for several minutes. You want to get it very light and fluffy. Slowly add the powdered sugar, a few tablespoons at a time. When the frosting looks thick enough to spread, drizzle in the Bailey's (or you may substitute milk) and whip it until combined. If this has made the frosting too thin, beat in another spoonful or two of powdered sugar. Ice and decorate the cupcakes.
Do ahead: You can bake the cupcakes a week or two in advance and store them, well wrapped, in the freezer. You can also fill them before you freeze them. They also keep filled — or filled and frosted — in the fridge for a day or two.
Thursday, March 19, 2009
A Couple of Quick Pickle Recipes While I'm Off Getting Pickled in NOLA!
First, I recently read something on a Cooks' Illustrated message board about someone who wanted a good recipe for "fire and ice pickles." The name intrigued me, so I did some Googling and have determined that they are sort of like a spicy version of a bread-and-butter pickle for those who don't want to go to the trouble of pickles from scratch. Many people also like to make these for quick, inexpensive holiday gifts, as each batch makes three pints. You could keep one for yourself and give two away to other pickle-loving friends.
Fire and Ice Pickles
(Source: adapted from Taste of Home)
2 jars (32 ounces each) dill pickle slices or spears (or buy whole pickles and slice them on a mandoline as I did--I like Mt. Olive)
4 cups granulated sugar (I don't care for sweet pickles, so I cut this by half=2 cups)
1 tablespoon hot pepper sauce (um...I used FOUR, so let's say "to taste")
1/2 teaspoon crushed red pepper flakes (again, to taste--as little as 1/4 t. up to a full teaspoon for the intrepid heat-seekers among you)
3 garlic cloves, peeled (I doubled the garlic, as is my way=6 cloves)
*I also added one large Vidalia onion, thinly sliced
Drain and discard juice from pickles. In a large bowl, combine pickles, sugar, pepper sauce and pepper flakes (and onions, is using); mix well. Cover and let stand 2 hours, stirring occasionally. Spoon pickles and liquid into 3 pint-size jars; add a garlic clove (or two!) to each jar. Cover and refrigerate one week before serving. Store in the refrigerator. Yield: 3 pints.
Secondly, I was reading another lovely little blog that I've discovered lately called Tea & Cookies, and the author was waxing rhapsodic about banh mi (Vietnamese sandwiches) and the do chua or "pickled stuff" with which they are garnished. I had to go to three different stores in Plattsburgh to find daikon, but I finally did (Hannaford, of course), and I whipped up a batch of the simple do chua pickled relish. The following evening, I made a quick meal of something I might call Banh Mi Wraps. Instead of the crusty baguette-type bread that is traditional for banh mi, I spread a sandwich wrap with a basil, cilantro and jalapeno mayo (just mix enough chopped, fresh herbs and nacho slices into the mayonnaise to suit you), a couple of thin slices of hot ham, some leftover roast pork that I sprinkled with soy sauce, lots of the do chua, and if I had had some, I would have added thin cucumber slices. Yum!
Do Chua (Vietnamese "Pickled Stuff") (Source: adapted from Tea & Cookies)
2 cups each, raw carrot and daikon radish, peeled and cut on a mandoline or in a food processor—or julienned by hand if you are really hardcore (don’t use a box grater, they will be too mushy)
1/2 cup distilled (white) vinegar (I used half rice wine vinegar)
1/4 cup granulated sugar
1/2 teaspoon salt
Toss all ingredients and let sit a while before eating (30 minutes to one hour). The vegetables will express some juice as they sit. Pack the vegetables in this brine/juice to store in the fridge. Lasts at least a week.
*For a simple salad idea, Tea recommends combining 1 1/2 cups of the prepared do chua with 1/2 to 3/4 cup fresh cilantro leaves, plus some thinly-sliced red peppers and/or onions. Besides being a fresh, crunchy side dish, I believe this would make a delicious garnish on top of grilled fish or chicken. (I'll have to try it and report back.)
With these two simple and delicious quick recipes, I bid you adieu so that you can get to pickling, and I can go back to pickling myself* here in the Crescent City! ;-) Laissez les bons temps rouler (at least until tomorrow)!
*For my tee-totalling friends who may begin praying for my deliverance from alcoholism, DO NOT BE ALARMED! New Orleans, despite its best efforts, has yet to turn me into a lush. Nor have I had to flash my goodies for flashy beads in the French Quarter, so looking for such a video on YouTube starring me will be fruitless. Then again, I have one more night to go! Hmm...
Friday, March 13, 2009
I don't know what this is...but I know it's GOOD!
Lately, I have gotten into the habit of making Friday night Pizza Night...HOMEMADE Pizza Night! Ok, not 100% homemade, but pretty darn close to it. I usually do my big shopping on Friday evenings, so I always grab some pizza dough from the deli, because by the time I get home at the end of a long week and get all the groceries and stuff put away, I don't have it in me to make anything involved. Pizza with a head-start on the dough just fills the bill--plus, I can have the leftovers for lunch on Saturday. Usually, I just top it with my new favorite sauce for pizza, the Chunky Basil Pasta Sauce that I put up this summer, then pepperoni because it's quick, and whatever veggies I dig out of the fridge that look tasty. But awhile back, I was watching an episode of "Ask Aida," and she made the most interesting pizza with roasted mushrooms and....wait for it....a fried egg on top! Its proper name may be Pizza alla Bismarck, which I gather means any kind of pizza served with an egg on top. In any case, Aida's version looked a bit strange but potentially yummy. And friends, believe me when I tell you, this pizza was AMAZING! I'm not sure that I'm not ready to declare it my favorite pizza of all time! I didn't follow Aida's recipe exactly, but I'll just say that I was "inspired by" her flavor combinations and techniques. Here's what I did, from the bottom up:
--dough drizzled with EVOO
--a cup of ricotta (preferably, homemade--but I used a purchased garlic and herb variety)
--a half cup of shredded parmesan (or romano or asiago or what you wish)
--a half pound of shredded mozzarella
--one pound or even a pound and a half of mushrooms--I sauteed mine in butter, then stirred in a couple of tablespoons each of homemade onion confit and balsamic vinegar, but you might wish to oven-roast your mushrooms (perhaps with some onions) in olive oil with a sprig of rosemary for about 20 minutes and then toss with the balsamic
--finally, the piece de resistance--top with a over-easy fried egg...or several of them! (crack eggs into a little EVOO or butter, cook until just set, then pour a couple more tablespoons of balsamic in the pan and reduce until syrupy--place egg(s) on pizza, break them so that the yolk makes a silky sauce, then drizzle everything with the reduced balsamic)
Seriously people, you MUST try this! It's sounds peculiar, but the flavors are out of this world!
Then for my traditional weekend baking project, I made a very traditional cheesecake, because I had been CRAVING cheesecake lately for some reason (does anyone really need a reason to crave cheesecake?). I tried a new (to me) version from the Joy of Baking which may become my go-to recipe, as the texture was just PERFECT--lusciously creamy while still maintaining density and structure. However, I used Ritz crackers for the base (I read about that idea on a blog somewhere, maybe Porter House?) because I thought it would give it a nice saltiness to balance the sweet. It did taste very good, but the crust went too soft too fast, so I won't be making that swap again. (Truly, I still prefer a low-carb nut crust best of all!) And then the only criticism I have of the Joy of Baking recipe was that it wasn't quite sweet enough for me--and I never say that! I am usually the one taking the sweetness level DOWN on things! But I served it with a lovely puddle of my slightly-too-sweet blackberry Earl Grey jam, so that solved the problem in a most delicious way.
New York Cheesecake
(Source: adapted from Joy of Baking)
Crust:
2 cups graham wafer crumbs or finely crushed vanilla wafers or gingersnaps (process whole cookies in a food processor until they are crumbs)
1/4 cup granulated sugar
1/2 cup unsalted butter, melted (hmm...I don't use more than a third of a cup or six tablespoons at most)
pinch of salt
Filling:
32 ounces (4 - 8 ounces packages) cream cheese, room temperature (use full fat, not reduced or fat free cream cheese)
1 cup granulated sugar (I would increase this by 1/4 to 1/3 cup)
3 tablespoons all-purpose flour
5 large eggs, room temperature
1/3 cup heavy whipping cream
1 tablespoon lemon zest (I used a few drops of lemon oil instead)
1 teaspoon pure vanilla extract
Topping:
1 1/2 cups sour cream (not low fat or fat free)
2 tablespoons granulated white sugar
1/2 teaspoon pure vanilla extract
pinch of salt
Grease, or spray with Pam, a 9 inch springform pan. Place the springform pan on a larger baking pan to catch any leakage while the cheesecake is baking. Preheat oven to 350 degrees with rack in center of oven.
For Crust:
In a medium-sized bowl combine the graham cracker crumbs, sugar, and melted butter. Press the crumbs evenly over the bottom and about 1 inch up the sides of the springform pan. Cover and refrigerate while you make the filling.
For Filling:
In bowl of your electric mixer place the cream cheese, sugar, and flour. Beat on medium speed until smooth (about 2 minutes), scraping down the bowl as needed. Add the eggs, one at a time, beating well (about 30 seconds) after each addition. Scrape down the sides of the bowl. Add the whipping cream, lemon zest, vanilla extract and beat until incorporated. Remove the crust from the refrigerator and pour in the filling. Place the cheesecake pan on a larger baking pan and place in the oven.
Bake for 15 minutes and then lower the oven temperature to 250 degrees and continue to bake for about another 1 1/2 hours or until firm and only the center of the cheesecake looks a little wet and wobbly. Remove from oven and place on a wire rack to cool (and deflate) for about fifteen minutes. In the meantime, turn the oven up to 425 degrees.
In a small bowl combine the sour cream, sugar, and vanilla extract. Spread the topping over the cheesecake and return to oven to bake for five more minutes. Remove from oven and carefully run a knife or spatula around the inside edge of pan to loosen the cheesecake (this helps prevent the surface from cracking as it cools).
Let cool completely before covering with plastic wrap and refrigerating. This cheesecake tastes best after being refrigerated for at least a day. Serve with fresh fruit or fruit sauces.
Makes one 9 inch cheesecake.
Tips: Sometimes the surface of the cheesecake cracks. To help prevent this from happening do not overbeat the batter, especially when creaming the cheese and sugar. Another reason for cracking is overbaking the cheesecake. Your cheesecake is done when it is firm but the middle may still look a little wet. Also, make sure the springform pan is well greased as cracking can occur if the cheesecake sticks to the sides as it cools.
Wednesday, March 04, 2009
My Name is Earl: A Summery Jam for Those Late Winter Blues
I turned to the jamming goddess, Christine Ferber, for inspiration, following her wild blackberry jam recipe, but increasing the fruit to about three pounds, because I used my handy-dandy new Roma strainer to make it seedless. In addition to the juice of one lemon, I also used the microplaned zest. And finally, I made an infusion of about ten ounces of boiling water and four Twinings Earl Grey tea bags, steeped for five minutes, and added it to the jam. I macerated everything overnight in the fridge, in the Ferber tradition, and I boiled it down for about twenty minutes the next day that yielded a softer set, which I prefer (25 minutes would probably do it for those of you who like a firmer jam).
I must tell you, the jam turned out AMAZING! I wasn't sure if the tea would come through, but it did, without being overpowering. It just added some delightfully earthy and citrusy notes to the jam. The only thing I would change next time is to cut the sugar back a bit, as it was a little on the sweet side for my tastes. And in reviewing my copy of the Ferber bible, I figured out why. Her recipe for wild blackberry jam calls for 3 3/4 CUPS not POUNDS of sugar! The 3 3/4 pounds that I accidentally used would have been about 8 1/2 cups or about double what she calls for! OOPS! However, I usually prefer a more traditional 50-50 ratio of fruit to sugar. So whereas I used 3 lbs. of fruit and about 8 1/2 cups of sugar in my first batch, I think I'll scale that back to about 6 3/4 cups sugar (=3 lbs.) next time, because my jam was just a little too sweet to my tastes, not WAY too sweet. But Ferber fans might like to take that down to as few as five cups. Either way, your efforts will surely yield one of the best jams that you have ever tasted!
Photo Credit: .ash. on Flickr
Wild Blackberry and Earl Grey Jam
(Source: adapted from Christine Ferber's Mes Confitures and inspired by the Little Red Bike Cafe)
10 oz. boiling water
4 Earl Grey tea bags (I used Twinings)
3 pounds wild blackberries (cultivated ones would be good, too)
6 3/4 cups granulated sugar (you could go as low as 5 cups)
zest and juice of one large lemon
1/2 teaspoon butter
Bring water to a boil, then steep the tea bags for five minutes. Squeeze the excess liquid out of the tea bags and discard. Set brewed tea aside while you prepare the fruit.
Pick over the blackberries. Rinse them quickly in cold water without soaking them. In a preserving pan, combine the blackberries, sugar, lemon zest and juice. Bring to a simmer. Pour into a ceramic bowl and stir in the tea. Cover the fruit with a sheet of parchment paper or plastic wrap and refrigerate overnight.
The next day, if you like, run the fruit preparation through a Roma-type strainer before cooking it down. (I used the berry screen, and I ran the pulp through a couple of extra times to get out every drop of berry goodness before discarding the remaining leathery fibers and seeds. Of course, if you like the seeds in your jam...never mind.) Bring this preparation to a boil along with 1/2 teaspoon of butter, stirring gently. Continue cooking on high heat at a full, rolling boil for 15 minutes, stirring constantly. Check the set on a cold plate (it's done when you push the jam and it wrinkles--mine took about 20 minutes). Put the jam into jars immediately, seal, and process for ten minutes in a boiling water bath.
Yield: I got seven half-pints, but remember, I accidentally used too much sugar in my first batch. So I'm guessing six jars?
Monday, March 02, 2009
Spreading the gospel of pie...
My big plan for the workshop was to make three pies: one single crust, one double crust, and one pre-/blind baked custard pie. For the single crust, I chose my very favorite, the pecan pie that I almost burned the house down making for Thanksgiving. For the double crust, I decided on cherry (recipe follows). I considered apple--it is the North Country after all--but I knew we wouldn't have time for the peeling and coring and slicing and all that jazz and still be able to do two other pies. Plus, I still had lovely pie cherries from the Hudson Valley in the freezer. And for the custard pie, I had to do my famous chocolate cream pie. Or at least, that was the plan...
Things started off well enough. I had a system of swap-outs that would have made any Food Network show proud. My plan was to make one of each pie in advance for the students to sample at the end of class and to make the three pies again as a group in class. Then we'd also make a couple of crusts by hand in class for them to get the feel for how to cut the fat in and how much water to add. And I'd also make a couple of crusts ahead of time for them to practice rolling out in class. So I made ten crusts in all on Thursday night to make the three pies on Friday night, and also to roll out and fit the crusts in the pans and chill for the pies that we'd make in class. Of course, wasn't it just my luck that I'd purchased a different kind of flour that I hadn't used before (and never will again--Robin Hood brand) which turned out to be a PAIN! It was almost like working with whole wheat flour; I couldn't get it hydrated enough, and even with extra water, it still cracked and crumbled. So the resulting crusts were more crisp than tender and flaky, but oh well. One thing I've learned over the years is that there's rarely a pie that's perfectly made without incident, but even imperfect homemade pie beats pre-fab pie hands down!
The next challenge was the oven. I used a professional convection oven (you know, that kind that looks like a glass-fronted cabinet of sorts), and that thing was a veritable FLAME-THROWER! It cooked things in about two-thirds the time, I'd say. I learned this the hard way after scorching the first blind-baked crust a bit. Of course, as I normally do, I used a pie shield and foil to try and prevent the over-browning. But the pie shields that I used were flimsy as heavy-duty foil, and the convection fan kept blowing them up and off, so they were basically useless. I got the hang of the oven eventually by turning the temperature down by 25 degrees, decreasing the bake times, and keeping an eagle eye on things as they baked, all while I was trying to talk to the class, roll out pie crusts, and remember everything that I needed to do. Whew!
But the biggest nightmare was when I discovered, mid-way through the class, mind you, that THE STOVE DIDN'T WORK! How was I to brown my butter and toast my pecans? I had to do it in the oven, of course. And we just made the cherry pie without pre-cooking the filling as I normally do. But there was no way to prepare the chocolate custard for the chocolate cream pie. I was so mad at myself for not making it ahead of time as I was thinking about doing the night before. But I figured that people who have only made pudding from a box might find the process of making homemade custard new and somewhat tricky, so I wanted to demonstrate it in class. As it turned out, I could only talk them through how to do it. (Boo hiss.) I guess it was all for the best anyway, as I charred the crust for that pie, and the class ran a little long as it was. Still, it was very vexing and more than a little embarrassing.
Nevertheless, we had a merry time. We made two crusts by hand so they could know what they should look and feel like. And one brave lady was even willing to practice rolling in front of God and everyone! I also demonstrated how to make a lattice crust (thanks to some helpful tips from my husband, Alton Brown). We ended the class by sampling all three pies, and it was SO wonderful to watch them genuinely ooh and ahh. Amazingly, three out of the four had never had pecan pie before (can you imagine?). And they really LOVED the cherry pie! But the most rewarding moment for me came when, after they had been making some noise about the ease of pudding from a box and pre-fab graham cracker crusts, they tasted their first forkful of my chocolate cream pie. You should have seen their faces--like kids on Christmas morning! All I could do was laugh and say, "See?" If you can't convince people of the glory of homemade pie just by talking to them, let them taste one, and they'll be instantly converted! And of course, I sent them all home with the leftovers so that they could share the gospel of homemade pie with their loved ones--my disciples, if you will. ;-)
After the ladies left, I spent some quality time doing the dishes and getting the kitchen back in order while the last pie finished baking. By the time I had everything loaded up and hauled back out to the car, it was going on 6pm! I had been up since 6am (my idea of hell), and all I wanted to do was go home and fall face down on the couch. My back was killing me and my dogs were barking! But I couldn't take all that pie home with me. So I drove straight over to my dear friends' house, the Padulas, and gave them a choice of pecan or cherry (Janice chose cherry, but she got outvoted by daughter, Domenica, and husband, Dom!). And then I headed a couple of blocks over to Lee Ann's (my officemate), and left the cherry pie for her to share with her hubby, two daughters, and her precious mom (who is also quite the baker herself, and took one look at my pretty pie and called me a show-off--ha!). I must say, despite my fatigue, it was fun driving around town, delivering pies that were still warm from the oven. I felt like a cross between Santa Claus and Martha! ;-)
By the time I got home, unloaded the car and put everything away, pottied and fed the dogs, pottied and fed myself, you would think that making another pie would be the LAST thing that I'd want to do. But I still had that one, albeit overly-crispy, pre-baked pie shell that never became a chocolate cream pie. I did bring home a couple of pieces of the chocolate pie that I had made the night before, so instead of making another one of those, I decided to go a different route. Something told me that what I needed to make was a BUTTERSCOTCH pie! I had made homemade butterscotch pudding before, but never a butterscotch pie. I used a recipe from Country Living's website. It turned out quite good, if a bit on the sweet side, particularly when garnished with some whipped cream and chopped Skor or Heath Bars. For my next slice, I may try a sprinkle of chopped, buttered pecans to cut the sweetness a bit and to add a slightly salty balance.
Butterscotch Pie
(Source: Adapted from Country Living)
1/2 cups butter
1 1/4 cups brown sugar (preferably, dark--and I will try cutting this to one cup next time)
1/4 cup cornstarch
3 tablespoons all-purpose flour
1/2 teaspoon salt
1/2 cup heavy cream
1/2 cup milk
4 egg yolks
1 teaspoon vanilla extract
1 baked pie shell
Melt the butter in a medium saucepan over medium heat until it begins to brown. Stir in the brown sugar. Add 1 1/2 cups hot water and whisk until the mixture comes to a boil. Continue to cook for 2 more minutes, remove from heat, and set aside. Combine the cornstarch, flour, and salt in a small bowl. Whisk in heavy cream and milk until smooth and pour into the butter mixture. Whisk continuously, over medium heat until the mixture comes to a boil and thickens — about three minutes. Remove from heat.
Lightly beat the egg yolks together in a medium bowl. Stream in a half cup of the hot mixture while whisking the egg yolks. Whisk the egg mixture with the milk mixture in the saucepan over medium heat for one minute. Remove from heat, strain through a fine sieve, and stir in the vanilla. Pour into the baked pie shell, and chill until set.
Top this pie with whipped cream and a sprinkle of toasted nuts or grated chocolate (or toffee bits!).
Classic Cherry Pie
1 1/4 to 1 1/2 cups sugar (to taste)
2 tablespoons corn starch
2 tablespoons tapioca flour
pinch of salt
4 cups pie cherries, drained (reserve juice)
1/2 teaspoon vanilla extract
1/4 teaspoon almond extract
few drops red food coloring, optional
1 tablespoon butter
pastry for two-crust 9-inch pie
Preheat oven to 425 degrees F. In a saucepan, whisk together the sugar, corn starch, tapioca flour, and salt. Whisk in about 1 1/2 cups cherry juice into the combined dry ingredients. Cook over medium heat, stirring constantly until thickened. Remove from heat. Gently stir in cherries, vanilla and almond extracts, and food coloring, if using. Let filling cool for 10-15 minutes. Pour filling into pastry lined pie pan. Dot with butter. Adjust crust, seal and vent. Place the pie on a Silpat or parchment-lined sheet pan on the lowest rack of the oven, and bake 15 minutes at 425 degrees. Then cover the edges with a pie shield or foil, turn the oven down to 375 degrees, and bake for another 50-60 minutes or until crust browns and filling begins to bubble thickly. Cool pie at least two hours to allow filling to re-thicken before slicing.