Saturday, January 26, 2008

Back to the deep freeze...

So much for that teaser 40-50 degree weather. We're back to hardcore winter in these parts. In fact, I was foolish enough to try and start a load of laundry a couple of days ago, but the drain pipe froze, and I couldn't finish it until today when it got back into the balmy 20's. (And not a moment too soon, as I was down to that last desperate pair of clean underpants--you know the ones--threadbare, ripped, hanging on by one overworked strand of elastic.) Also, as of Thursday, school is back in full swing, and I have hit the ground running as I do every semester. So these frigid and busy times mandate meals that are not too fussy to make and that stick to your ribs. Nothing fancy, just hearty fare to warm your cockels. Do girls even have cockels? Well, even if we don't, we can still be comforted by a pot of fabulous chili and a homemade cinnamon loaf for dessert.

When I make chili, I usually just throw a bunch of stuff into the pot until it looks and tastes right. But this time, I consulted the International Chili Society's website and perused many of the World Champion Chili Cook-Off recipes, gleaning excellent tips that I used to fashion what I feel is the best pot of chili that I have ever made. The only thing that would have taken it over the top would be if I had used tri-tip beef roast instead of regular ground beef. I'll definitely try that next time. But it was still marvelous as it was--rich, flavorful, and both sweet and hot, just like I like it! To make it easy and to give it that slow-cooked flavor, I simmered it in the crock pot all day, only adding canned beans to the mix about an hour before eating. Here is the recipe for you to try, but also to remind myself what I did this time so I can replicate it in the future.

World-Class(y) Sassy Chili

1 pound ground beef
1 large onion, diced
6 cloves garlic, minced
1 teaspoon dried oregano
1 tablespoon cumin
1/2 teaspoon cayenne
1/2 black pepper
1/2 cup (up to 10 tablespoons) dark chili powder
salt to taste
1 small can chopped green chilis (don't drain them)
1 large can crushed tomatoes
3 tablespoons brown sugar
1 teaspoon Tabasco (or to taste)
1 cup chicken broth
1 cup beef broth
juice of one lime (1-2 tablespoons)
2 cans dark red kidney beans (or light red kidneys or chili beans or what have you), drained

Brown the hamburger with the onion and garlic. When just browned, drain off the excess fat, then mix in all of the dried herbs and spices. Add the meat mixture to a crock pot, then the chilis in their juice, the tomatoes, brown sugar, Tabasco, and the broths. Stir together and taste to correct the heat and seasoning. Cook on low all day (6-8 hours or however long you're at work/away from the house). A half hour to an hour before serving, add the lime juice and the beans. Garnish with a handful of shredded cheddar cheese and a smattering of chopped onions. To make a more substantial meal, serve it over spaghetti (Cincinatti-style).

For dessert, I suggest something simple but satisfying. I found a recipe for a fine cinnamon swirl loaf in one of my holiday baking magazines that just fit the bill. It really is a quick bread--doesn't take any more time than a boxed cake mix, but it's infinitely homier. And who doesn't love streusel? No one, that's who! Even if you're not a seasoned baker, you should try making this. It's easy and darn tasty. And I think it looks fairly impressive; even though I over-swirled my marble, it still came out pretty. Try toasting a thick slice of it the following day--divine!


Cinnamon-Swirl Bread
(Source: Christmas Baking, BHG 2007)

1/3 cup sugar
1/2 cup finely chopped pecans or walnuts, toasted
2 teaspoons ground cinnamon
1 cup sugar
2 cups all-purpose flour
1 teaspoon baking powder
1/2 teaspoon salt
1 egg
1 cup milk
1/3 cup cooking oil

Preheat oven to 350 degrees. Grease and flour the bottom and sides of a 9x5x3 loaf pan. Combine 1/3 cup of sugar, nuts, and cinnamon. Set aside.

Combine 1 cup of sugar, flour, baking powder, and salt. In a separate bowl, beat egg. Then, stir in milk and oil. Make a well in the flour mixture and add the egg mixture. Stir just until mixed. Do not overmix.

Pour half of the batter into loaf pan. Sprinkle with half of the cinnamon mixture. Repeat. With a wide rubber scraper or spatula, swirl mixtures together with a down and up circular motion.

Bake for 45 to 50 minutes or until done (mine took an hour!). Cool in pan for about 10 minutes. Then, cool completely on a wire rack.

Thursday, January 17, 2008

Another Two-Week Project: Pickling Eggs

Back in October, I was invited to a friend's cabin out in the woods for some autumnal hiking and the last of the leaf-peeping before she closed the place down for the season. Everyone who came brought something to share, either a stand-alone potluck dish, or an ingredient for a cauldron of "stone soup." I think I brought several kinds of beans for the soup and a loaf of Aunt Elva's Banana Bread, if memory serves...and it doesn't always anymore! Regardless, the food was all yummy, especially eaten in front of the wood stove on a chilly but beautiful fall day. One of the foods on the buffet made by the hostess herself was a platter of strikingly-colored pickled eggs. Having only ever seen them in a big jar on bar counters or convenience stores (the hygiene issue and lack of refrigeration were always psychological barriers to my sampling them), I was intrigued. And they were gloriously magenta-hued from being pickled with beet juice. I had to try one! However, to me, the vinegar taste was much too strong (which is saying something, as I love vinegary things and everything pickled). But I liked the idea of the pickled egg, so I tucked that thought in the back of my mind for future research.

Flash forward to winter break. Now I have time to work on pickling some eggs. To begin, I found an interesting website where a scientist named Stan Woods compiled the results of his many egg-pickling experiments. I chose one recipe that he deemed his favorite to date to riff on. One of the main tips that I gleaned from his ground-breaking ovarian work was that the eggs can be pickled just as well in vinegar that has been diluted by half with water as those made in straight vinegar (which results in rubbery eggs with a too-acidic flavor). And the other big change I wanted to make was to not use beet juice. It makes the most beautifully-colored eggs, but I just don't care for the taste of beets beyond the bowl of authentic borscht in Montreal or the wonderful chlodnick that my precious Johnny makes (from the New York Times Cookbook by Craig Claiborne). So I wanted fabulous color, but using something other than beets. Thus, I was drawn to Stan Wood's recipe calling for balsamic vinegar. He reported that his eggs took on great color from the balsamic, and I love its flavor, too. So that was my starting point.

Pickling eggs is a surprisingly easy enterprise; it just takes patience--patience to peel 18 eggs and patience to wait two weeks for them to cure before you eat them up! First, I took a clean, half-gallon-sized wide mouth jar (I had several knocking around up in the attic, but I have seen them for purchase at Michael's, too) and layered in a dozen and a half hard-cooked eggs along with garlic cloves and onion slices. Then I made the brine, brought it to a boil, and poured it all over the contents of the jar. I closed it up and "parked it in the chill chest" (name that cook for a bonus point!) for two weeks. The results? Good news and bad news. On the positive side, they were a gorgeous purple-brown color, and they weren't as overbearingly sharp-tasting as the ones I had sampled previously. However, as much as I love all pickles, and these were very good, I just think I prefer my eggs unpickled--devilled certainly, but not pickled--at least not to eat straight up. What I did find is that the pickled eggs were absolutely DELICIOUS when cut up and added to a dinner salad*. Our favorite way to enjoy them is with a chef's salad type of affair: turkey, ham, shredded cheese, pickled eggs, fried onions (instead of croutons), and Thousand Island dressing. Not low-cal by any means, but SO GOOD! The pickled eggs gives the salad a great zip and cuts through the richness of the other ingredients. In any case, here is my recipe if you'd like to try them for yourself:

Balsamic Pickled Eggs

18 hard-cooked large eggs, peeled
1/2 onion, sliced
4 cloves garlic, peeled and cracked
1 3/4 cups cider vinegar
1/2 cup balsamic vinegar
1 1/2 cups water
2 tablespoons canning salt
2 tablespoons sugar
1 tablespoon jalapeno (nacho) slices, chopped
1 teaspoon mustard seeds
a dozen or so whole peppercorns


Layer the eggs with the onion slices and garlic cloves in a large (half-gallon sized) jar. Combine the remaining ingredients and bring to a boil, then pour the brine over the eggs, close the jar, and refrigerate. Give the eggs two weeks to pickle to maximize their flavor before eating. Store in the refrigerator!

*Follow-up: I found another excellent use for the pickled eggs. I cut them up and put them into potato salad, and instead of regular pickle relish, I used my special zucchini relish. Mmm, mmm! The best potato salad I've ever made!

Wednesday, January 09, 2008

"He ain't dead..."

"...he's gonna wake up in thirty minutes, hungry enough to eat up everything in your house!" (Ok, you know the game by now. Name the reference if you can! We'll return to the quote later once you ponder it for a little bit.)

So...I was thinking to myself, it's a new year. I should turn over a new leaf and be more prompt about household drudgeries. You know, stuff like changing the sheets more often and cleaning out the fridge. (I knew the latter was getting to be a problem because we had run out of Tupperware-type containers...that's always the tip-off.) I set about my task with great purpose, and I actually enjoyed doing it. I think I'm just generally in a good mood because the days are getting longer (I was out cleaning the chicken coop until 4:30 the other day before losing the light...whoo-hoo!) and global warming has brought us from 12 below around New Year's to 50-some-odd degrees less than a week later! Yesterday, my neighbor and I cruised up to the butcher in Hemmingford, QC and along the way, we actually saw a woman in shorts washing her front windows! Spring cleaning in Canada on January 8th! SO BIZARRE!

Anyhoo, as I cleaned out the fridge, I came across my beloved sourdough crock, and I'm ashamed to tell you that it had been pushed to the back and forgotten for I don't even know how many months. I took it out and inspected it. It had as much "hooch" on top as batter below (if you could call the solid lump of dried-out starter a "batter"), and it smelled VERY, VERY, VERY SOUR. I bought this starter from King Arthur some 7-8 years ago, and though they recommend that you feed it at least every two weeks, I often push it to monthly feedings without a problem. But this had been a few-to-several months by now, and it looked and smelled funnnnn-ky. Still, my experience is that sourdough is darn near impossible to kill, unless you overheat it, so I thought I'd try to perform a resuscitatation before performing the last rites.

First, I poured off the powerful hooch, and sort of washed the chunk-o-batter with running water. Once I had diluted it to a consistency between heavy cream and a thick pancake batter, I scooped out a cup, poured it into a ceramic bowl, added another cup of flour and some water, and a pinch of sugar to give a quick meal to my languishing yeasties. It still smelled horribly strong, but I stuck it in my homemade proof box and went about my business. After about 12 hours, it still didn't look like much, maybe a freckling of teeny bubbles only, but I soldiered on in good faith. I reserved a cup, tossed the rest, added more flour and water to make a batter along with a pinch of ascorbic acid (Vitamin C) to make my well water more acidic and therefore hospitable to sourdough, then put it back in the proofer. The next day, it looked perhaps a wee bit frothier, so I fed it again. And lo and behold, LOOK what happened after that! IT...IS....ALIVE!! (Or to paraphrase my new favorite comedian, Katt Williams: He's not dead. He's just asleep right now but he's going to wake up hungry.)

So I kept feeding it for another day or two, then decided to take it for a test drive and bake bread. I found a recipe for oatmeal loaves that some helpful wag had converted to make with sourdough starter. It sounded delicious, so I went ahead and mixed the dough. The recipe said that the initial rise time would probably be about four hours (sourdough takes much longer to ferment than commercial yeast, as I'm sure you know), but at four hours, mine looked pretty much the same as when I started. I almost threw the dough away at that point, but then I decided that no harm would come from waiting it out, and I also remembered that sourdough can take 12 hours or more to rise. So I chucked it back in the proofer and waited. And waited. And waited some more. And I'll be danged if, at EIGHT hours, that dough didn't look (and smell) gorgeous! The dough was billowy and filled my whole big bread bowl to the top. Success! I punched it down (gently), formed two loaves, and stuck the pans back in the proofer. I wasn't sure if the starter would have enough "oomph" left in it for the final rise, but FOUR hours later, the loaves were beautifully doubled, so in the oven they went. 40 minutes later, I had some of the most delicious bread that I have ever made! (That long, slow rise really develops flavor.) The texture was nice and soft, largely thanks to the oatmeal, and it wasn't too sour-tasting as I had feared it might be from the neglected starter. Moreover, it made the most remarkable toast! :-)

Since the bread took that long to rise, I figured that the starter still needed to be strengthened. So I fed it for another couple of days before returning it to the fridge where I vow (as so many abusers do) not to treat it so terribly again! However, as insurance, it's always a good idea to have a couple of emergency back-up starters in case you really do manage to kill off your main one. You can separate them in different containers and keep them all in the fridge if you bake often, but for longer, safer storage, here's what you should do. Instead of chucking out that cup of starter when you feed it, pour it out in a very thin layer on waxed paper spread out on a large baking sheet. Then set the pan aside for a couple/few days until the starter is completely dry and brittle. (If it gets moldy, throw it out and try again--you didn't spread it thinly enough.) Then take it off the wax paper, crumble it up into little plastic storage bags, and then stick the baggies of starter in the freezer for safe keeping. If you need some, take one baggie out, grind the starter until powdery in the food processor, and then rehydrate it. You may need to feed it for a few days until it comes back to full strength, but it will absolutely come back. Also, dried starter is convenient to share with friends and family who live far from you; it's lightweight and easily sent through the mails. Isn't that a handy tip? I thought so.

Therefore, if your New Year's resolution involves attempting to bake with sourdough, I suggest this as an excellent beginning recipe. And if you need some starter to get started, I have another great idea for you. There was a man in my home state of Oregon named Carl Griffith who had been baking sourdough since he was a child (on the Oregon Trail, in a Dutch oven no less!) from a 150-year-old starter that had been in his pioneering family for generations. He was so passionate about sourdough baking and had such a generous spirit, that he used to mail out dried starter for free to anyone who requested it. Carl passed away in 2000, but the Friends of Carl (not to be confused with an AA group) still carry on his legacy to this day. If you send them a self-addressed, stamped ($.90) envelope, they will send you some of Carl's historic 1847 Oregon Trail sourdough for free! You heard me--FREE--well, except for the cost of postage. Or if you prefer, you can send them a dollar, and they will mail the starter to you. Is that great or what? His website is also where I got the oatmeal sourdough recipe that follows. Do try it. You will be so pleased that you did. Oh, and if any of my local readers want some sourdough starter, just ask. I would be more than happy to share. That's what Carl would want me to do! :-)

Oatmeal Sourdough Bread
(Source: Carl's Friends)
Makes two loaves

1 cup quick oats
1/2 cup whole wheat flour (I used graham flour)
1/2 cup brown sugar (I might try swapping this out for Grade B maple syrup next time)
1 tablespoon salt (sounds like a lot, but it isn't)
2 tablespoons butter
2 1/2 cups boiling water
1 cup sourdough starter
5 cups white bread flour (I used AP this time)

Combine in a large bowl the oats, whole wheat flour, brown sugar, salt, and butter. Pour boiling water over mixture. Stir to combine. When batter is cooled to lukewarm, add the starter and stir in the flour. When the dough is stiff enough to handle, turn onto floured board and knead for 5 to 10 minutes (I did this for five minutes in my stand mixer). Place in a greased bowl, cover and let rise until doubled (4-8 hours). Punch down and separate into 2 equal balls. Shape into loaves and place in greased 9 X 5 X 3 inch pans. Let rise until doubled again (2-4 hours). Bake for 30 to 40 minutes at 350 F. Cool on rack, brushing loaves with butter for a soft crust.

Notes: This recipe makes beautiful soft dough that bakes into great pan bread or it can be made into very tasty dinner rolls. Take the words "punch down" with a grain of salt. Be gentle with this dough. The more air you work out of the dough when forming the loaves, the longer it will take to recover volume in the second rise.

Be sure to allow enough time for the batter to cool to lukewarm before adding the sourdough starter. It took two hours or more when tested. Taste testers disagreed on the amount of salt, some preferred a little less; others liked the taste with the full tablespoon.

Ovens vary. Baking can take up to 50 minutes. You may also want to remove the bread from the pans for the last ten minutes of baking to brown the bottom half of the loaves. (I didn't, and they browned just fine.)

Treat yourself to real butter in the dough. This bread is worth it. Also butter the pans, you will be rewarded with an amazing butterscotch smell when the butter toasts the brown sugar sweetened dough while baking.

Thursday, January 03, 2008

Very belated birthday treat....

My limoncello post became so unwieldy that I didn't get a chance to discuss our special New Year's dessert. You see, I made Cyd a gorgeous birthday cake last month--she requested our very favorite Chocolate Velvet Cake with Butter Pecan Icing--but it turned out wrong. I accidentally added baking powder instead of baking soda and ended up with something more akin to a dense flourless torte than a lighter-than-air cloud cake. It was still good, but it just wasn't what I was trying to make. So I apologized for the mistake and promised Cyd that I would make another dessert of her choosing when I had time. It took me about a month to make good on that promise, but THIS is what she wanted, and tell me that it wasn't worth waiting for:

Doesn't it make you just want to crawl through the screen? I thought so. These are the most wonderful chocolate frosted éclairs in the whole world, and I've been making them since I first ran across the recipe in a magazine more than five years ago. (I could have sworn it was Gourmet, but an exhaustive and ridiculously time-consuming search of my old magazines revealed that it was, in fact, Food and Wine). I suppose there are comparable or better pâte à choux recipes out there, and the "frosting" is just chocolate and butter. But what makes this éclair truly spectacular is the pastry cream. It is PERFECT. It is absolutely delicious--rich, not too sweet, redolent of vanilla beans, and they make it look pretty, too! Plus, the recipe makes just the right amount to be generous when filling a dozen small eclairs--and who wants a skimpy éclair? No one!

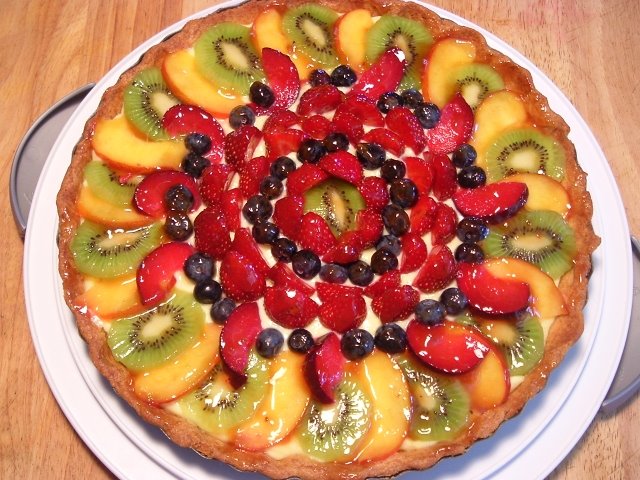
Seriously, if you take nothing else from this post, bookmark the pastry cream and use it wherever warranted (my other favorite use for it is in a fresh fruit tart with a cookie crust). But I really think you should try making the éclairs. They look very complicated, like an advanced pastry skill, but they truly aren't. I cajoled Cyd into helping me, and we had a batch thrown together in no time, and Cyd declared that they were easy enough that she could make them herself (not that she would ever be so inclined, mind you)! You can even make the pâte à choux shells and the pastry cream a day ahead, and then frost and assemble the éclairs the next day. Actually, I would suggest this in any case--make the elements but don't put them together until right before serving. YUM!


Chocolate-Frosted Éclairs
(Source:
Food and Wine, June 2002)
Makes one dozen éclairs

Choux Pastry:
1 cup water
1 stick (4 ounces) unsalted butter
2 tablespoons sugar
1/4 teaspoon salt
1 cup plus 2 tablespoons all-purpose flour
4 large eggs

Pastry Cream:
2 cups whole milk
1/4 vanilla bean, seeds scraped (I use a whole one!)
1/2 cup plus 2 tablespoons sugar
5 tablespoons cake flour
pinch of salt
1 large egg
2 large egg yolks
1/4 cup plus 2 tablespoons heavy cream

Chocolate Glaze:
4 ounces bittersweet chocolate
4 tablespoons unsalted butter, softened
directions

Make the choux pastry:
Preheat the oven to 400°. In a medium saucepan, bring the water, butter, sugar and salt to a boil over moderate heat. Remove the pan from the heat. Add the flour and stir vigorously with a wooden spoon for about 2 minutes, until the dough comes together and a film forms on the bottom of the pan. Transfer the dough to a large bowl and beat at medium speed until slightly cooled, about 1 minute. Add the eggs, 1 at a time, beating well after each addition.

Transfer the dough to a pastry bag fitted with a 1-inch round tip. Pipe twelve 5-inch-long logs onto a baking sheet and bake for 10 minutes. Turn the oven down to 325° and bake the shells for 30 minutes longer, or until golden brown. Transfer to a rack and let cool.

Make the pastry cream:
In a medium saucepan, bring the milk, vanilla bean and seeds just to a boil. Meanwhile, in a large bowl, whisk the sugar with the cake flour and salt. Whisk in the egg and egg yolks. Slowly add the hot milk, whisking constantly. Pour the mixture back into the saucepan and bring to a boil over moderate heat, whisking constantly. Continue to boil the pastry cream, whisking constantly, until thick, about 30 seconds longer. Immediately strain the pastry cream through a fine sieve into a medium bowl. Cover with plastic wrap and refrigerate for at least 30 minutes, or until cool. (It's much faster if you use an ice bath...FYI.)

In a medium bowl, whip the heavy cream until soft peaks form. Whisk the pastry cream, then fold in the whipped cream until blended.

Make the chocolate glaze:
In a medium bowl, melt the chocolate in a microwave oven. Whisk in the butter until smooth.

With a serrated knife, split the éclair shells lengthwise. Spoon a generous amount of the pastry cream into the bottom half of each shell. Dip the top half of each shell into the chocolate glaze, close the éclairs and serve.

Make ahead:

The components can be made early in the day, but assemble the éclairs shortly before serving.


Tuesday, January 01, 2008

HAPPY 2008!

HAPPY NEW YEAR , everyone! (Well, except to those in the Pacific time zone...you still have another 45 minutes or so to wait it out.) I suppose many of you are out whooping it up at big parties tonight? We had given some thought to hitting First Night Burlington across the lake in Vermont, but new snow on the ground today caused us to think better of it. Oh, who am I kidding? We're old and tired now and just as happy to stay home! At least we didn't fall asleep before the ball dropped the way my mom used to do. And we even had hats and horns! Red ones!

Other than the party attire, the rest of our New Year's celebration was pretty mellow. It was steak night for dinner, and we watched another great movie, Eastern Promises. (Though I warn you not to eat and watch it at the same time...it's engaging but grisly.) However, the real star of the evening was our fabulous pre-dinner cocktail. Now everyone who knows me knows that I am not a drinker. I will have a semi-annual margarita at each of two Faculty Association events a year, but that's about it. However, I have discovered another cocktail that I just love: the Lemon Drop Martini. It's called a Lemon Drop after the famous sour candy, and the resulting beverage tastes rather like grown-up lemonade but with a powerful punch! I had my first one at a restaurant called The Blackfish Cafe in Lincoln City on the central Oregon coast a couple of years ago while visiting my dear friend, John. But it doesn't seem to be as popular in the East for some reason, or maybe it's just a bit too foofy of a drink up here in the rural North Country? In any case, I decided to make my own, and my (lemony) twist on it is to make the drink with limoncello...HOMEMADE limoncello at that! You see, the problem with some Lemon Drops is that they involve sugar, and even superfine sugar (shaken not stirred!) is difficult to get to dissolve all the way, so you can end up with a grainy cocktail. And who wants that?

So, inspired by a lengthy thread on eGullet, I made my first attempt at a homemade liqueur, limoncello. It was surprisingly easy to make, requiring no real skill, only patience. To begin, you will need a large glass jar with a well-fitting lid for infusing the liquor with lemony goodness. You then zest a dozen bright-skinned lemons and one lime; the lime helps mimic the tarter Sorrento lemons of the Almalfi Coast of Italy, where this drink originated. (If you buy non-organic lemons, make sure to scrub them with a vegetable brush under hot running water to remove the wax and any residue from pesticides.) Ideally, you'll use a Microplane to get the finest shreds which makes more surface area for a better infusion. But I got bored after the first lemon and decided to use a regular vegetable peeler (taking care to press lightly and only remove the yellow skin and no bitter, white pith), and then I ground up the peels in my food processor. Worked like a charm! You add the zest to the glass jar and pour in one 750ml bottle of either Everclear or 100-proof vodka. The stronger spirits extract the lemon flavor more quickly and thoroughly, but may impart a harsh taste and burn to your final product. 100-proof vodka does just as well, though it may take some extra time for the infusion, but your finished liqueur should taste smoother. I went for option B, as I'm on vacay and have nothing but time on my hands. Store the jar in a cool dark place for at least ten days, preferably two weeks, and a month would be even better. Give it a shake every other day or so, and you'll know it's done with the lemon bits are whitish and brittle, and the vodka is a bright yellow.

When you feel like the vodka is no longer taking on additional color or aroma, strain out the zest (I used a mesh strainer lined with a paper coffee filter--that took roughly forever, but it made for a very clear result), and dilute with simple syrup. To make the simple syrup, mix three cups of water with three cups of sugar and bring to a boil. Remove from the heat and cool completely (adding warm simple syrup to your infusion will make it cloudy). Start with three cups of the simple syrup, and reserve one more in case you decide you need it later after tasting your concoction. Lastly, to the lemon-infused vodka and simple syrup, you will add one more 750ml bottle of regular 80-proof vodka. TA-DAH: homemade limoncello! You can drink this immediately (though freezing it first until lusciously viscous is both traditional and highly desirable), but I recommend letting the stuff stay in the jar for a few more days to a week to mellow a bit before sampling and bottling decoratively.

When you are satisfied with how your limoncello tastes, you may drink it straight like a cordial, or top off your iced tea with it, or make a fabulous martini like we did. I did a quick internet search for lemon cocktails made with limoncello, and I found the perfect recipe from, of all people, Sandra Lee. (The woman makes a lot of fake food, but always with a smart cocktail in her hand!) She called it the Lemon Cream Martini, and it was just what I had in mind, so I went off of that. In a shaker, you mix two ounces of vanilla vodka (we used Smirnoff), one ounce of limoncello, and crushed ice. Now Cyd and I debated about the vodka proportions. It was delicious as it was, but we liked it even better when we flipped it to two ounces of limoncello and one ounce of the vanilla vodka. Your call there. In any case, pour the icy mixture into martini glasses rimmed with sugar (preferably, vanilla sugar!), and top off with 7-Up/Sprite/Sierra Mist. I love the fizz of the soda (which is also how The Blackfish Cafe made theirs), and if you're a wimp like me, you can always use a larger proportion of soda than just a splash. If it were summer, I would do as Sandra Lee does and garnish with a few fresh blueberries. But I chose to use a couple of lemon peels this time. DELISH! But I warn you, be careful! It is almost too easy to drink and packs a real wallop! As I said, I rarely drink, and I had just ONE martini that was really more Sierra Mist than anything, and within a few minutes, I felt my cheeks burning, I started giggling uncontrollably, and Cyd said I "looked like a damn drunk!" Of course, I hadn't eaten all day, except for another Peppermint Mocha Frappucino at Starbucks. ;-) But remember, limoncello is the stuff that made Danny DeVito all loopy before he went on "The View" about a year ago. Imbiber, beware! But as long as you're in your own home on your own couch watching Seacrest and Dick Clark, what harm? It will certainly make for a very HAPPY Happy New Year! (Tee hee.)

P.S. Cyd said that I should send this shot into Absolut to use in their advertising. (Loving my new camera!) However, though the glass says Absolut, I used a new Polish vodka in the limoncello that I would HIGHLY recommend. It's called Sobieski, and it won both a gold medal and a best buy award at the prestigious International Review of Spirits Competition. It also earned a rating of 95 out of 100 (exceptional) and has been declared "an incredible value in a world of high-priced vodkas." I'm not sure if they declared that themselves, but I must concur. As super-premium vodkas have become astronomically priced, I was thrilled to find the Sobieski on sale for about nine bucks at my local Liquor and Wine Warehouse! Not bad for a vodka that is imminently sippable on its own, with "clear, spicy aromas of star anise, cream, minerals and powdered sugar follow[ing] through to a round, silky entry and a smooth off-dry medium-to-full body with a long, lingering whipped cream, spice, rye dough, and sweet citrus fade with virtually no heat. Great subtle, pure, and spicy rye flavors with a lively texture and superb smoothness." (The Beverage Tasting Institute) Check it out.

Sunday, December 30, 2007

Present...but stalling.

Hmm, that title aptly sums up the spirit of my vacation sloth. I'm technically alive but don't have much to show for it! Mostly, I've been reading and watching lots of movies. On that topic briefly, I would like to recommend the wonderful shoestring-budget Irish indie film, Once. It is the story of a street musician and his musical (and personal) collaboration with a young Polish woman, and it stars two little-known professional musicians-turned-actors Glen Hansard (of the Irish band, The Frames) and Markéta Irglová, who apparently are now a real-life couple. (Aww!) The film is so charming and inspirational, and the soundtrack is just fantastic. In fact, the song "Falling Slowly" should receive attention from Oscar or there is no justice in the cinematic world!

Secondly, have you seen Reign Over Me with Don Cheadle, Adam Sandler, Liv Tyler and Jada Pinkett-Smith? I found the film itself to be somewhat uneven and overwrought, but I was really impressed with the performances of the two leads. There is something so appealing, so humane, about Don Cheadler. I just love him. And why on earth has that not been more fuss made over Sandler's amazing performance in this film? Outstanding! I know people love him for his silly roles (even his horrible, unfunny, and I daresay, offensive ones like I Now Pronounce You Chuck and Larry--BLECH!), but he should get major props for nailing this role on all its many levels. He still gets to be funny, goofy Adam Sandler--if someone were to push Sandler over the edge and watch him descend into madness from grief and despair. The Golden Globe nominations were announced recently, and I am quite surprised that he was overlooked. (Stay turned for more incisive armchair film criticism throughout my vacation...ha ha.)

Ok, back to food blogging. I have been working on some food projects, but they've either been only semi-successful to date, or they aren't even done yet. (I saved some two-week-or-more experiments for winter break...and of course, I will report on them in due course.) However, I am extremely pleased to report, now that my back is on the mend and I can do a moderate amount of bending and twisting, that I FINALLY got all of my Christmas packages boxed up and ready for mailing. Tee hee. I know, I know. Don't even say it. But seriously, it has taken HOURS and HOURS to make it happen. I wanted to send a few of my friends and family a selection of my best preserves from the past season, and some of the boxes included up to a dozen jars! Glass jars going long distances are a particularly tricky proposition and involve a LOT of laborious drudgery. I had to dig through all my stacks of canning jar boxes to find just the right ones, pull out everything I needed, making a big pile in the front room, sort them, make, print and affix decorative labels, find adequate boxes and packing materials, haul the jars load by load to the gift wrapping station (=the dining room table), and then begin the odious and onerous task of packing, securing, and labelling each box. It literally took me all day to get five boxes ready to go, and I haven't even made it to the post office yet! Whew! No wonder people prefer point-and-click shopping. But Amazon doesn't have the delicious homemade goodies that I'm sending. The lucky folks on my list will receive selections from the following list of my favorites from this year's preserves:

Annie's Salsa
Apple Pie Jam
Apricot Pepper Jelly
Black Raspberry-Peach Jam
Hudson Valley Sour Cherry Jam
Maple Vanilla Pear Butter
Paradise Jelly
Peach Preserves for Cold Mornings
Plum-Orange Jam
Red Currant Jelly
Spiced Brown Sugar Apple Butter
Summer Pudding
Vanilla Bean Quince Preserves
Wild Grape Jelly
Zucchini Relish

Alright, gang. I promise, there will be proper posts with photos and recipes again very soon. In the meantime, let me end with some seasonal product endorsements. First, have you tried the (Limited Edition) Ghiradelli Peppermint Bark Squares? They come in milk chocolate and dark chocolate, and reportedly, even in a baking bar, though I haven't seen the latter in my local stores. Boo hiss. Anyway, the candy is yummy. And then I would be doing you all a huge disservice by not sending you directly to your neighborhood Starbucks to get yourselves the Peppermint Mocha Frappucino! Boy howdy, is that some kind of good! And it even comes with sparkly and festive red sprinkles on top! I don't know how long either of these tasty treats will be around, so you better get 'em while the gettin's good!

Tuesday, December 25, 2007

MERRY CHRISTMAS!

I hope everyone is having a magical holiday with lots of presents and great food, and most importantly, the love of family and friends! Yesterday was the big day for us. We watched "The Grinch That Stole Christmas," of course, while we made a huge, fabulous, ultra-garlicky roast beast, along with oven-roasted potatoes and asparagus. And I made yet another attempt at creating my own version of Baker's Square/Village Inn's Caramel Pecan Silk Supreme pie for dessert (I'm inching toward perfection on that project, but I'm not quite there yet--recipe follows). After our marvelous dinner, we headed into town for a lovely "midnight mass" service at the Episcopalian church. Then when we got home, since it was technically Christmas, we were naughty and opened all of our presents. I got the best stuff, including a nifty raclette grill from my dear friend, Kurt...won't that be fun to try?

But I was absolutely overwhelmed and overjoyed to receive the best gift EVER: a brand-new Canon Powershot S5 IS! WHOOOO-HOOOOOO! (A million thanks to Cyd, who was amazingly generous, though I feel very unworthy of it.) As Christmas is a time of giving, I will share my blessing with all of you. Between the light box that my friends gave me for my birthday (see below) and my new camera, the photography on this little blog will surely see a vast improvement, and that, dear readers, is my gift to you! (Cyd says that she got it just so I would shut up about my "crappy little point-and-shoot." Done.)

Merry, Merry Christmas, Everyone! :-)

Caramel Pecan Silk Supreme Pie (Version #2)

Start by pre-baking your favorite pie crust (15-20 minutes at 400 F?). While that bakes, get on with the caramel-pecan layer.

Caramel-Pecan Layer:
1/2 cup brown sugar
1/4 cup butter
1 cup cream
1 cup chopped pecans
pinch of salt
splash of vanilla

In a small saucepan, stir together the brown sugar, butter, and cream. Cook over medium heat, stirring frequently, until caramelized. This will take about 20 minutes, give or take. About halfway through the cooking, add the nuts and salt. When the caramel is finished, remove from the heat and add the vanilla. Cool, and then spoon into baked pie crust. Chill at least 30 minutes.

Cream Cheese Layer:
1 (8 ounce) package cream cheese, softened
1/2 cup powdered sugar
1 cup heavy cream (whipped to stiff peaks), divided

Once the caramel-pecan layer has firmed up, you can make the cream cheese layer. With a mixer, beat the softened cream cheese with the powdered sugar and about 1/2 cup of whipped cream (reserve the rest for the topping). Spread on top of the caramel-pecan layer and return to the fridge while you make the French Silk layer.

French Silk Layer:
1 1/2 oz. unsweetened chocolate, cut into pieces
1/2 cup (1 stick) butter, softened (do not use margarine!)
1/2 cup sugar
1/2 teaspoon vanilla
2 eggs (pasteurized if you're nervous) or 1/2 cup egg substitute

Melt the chocolate in the microwave or in a double boiler, then cool. Beat butter on medium speed until fluffy. Gradually beat in sugar until light and fluffy. Beat in cooled chocolate and vanilla until well blended.

Add eggs one at a time, beating on high speed 3 minutes after each addition; beat until mixture is smooth and fluffy. Spread on top of the cream cheese layer. Into the remaining whipped cream, gently fold in a tablespoon or two of powdered sugar (to taste), and spread the topping on the pie. Return to the fridge for at least two hours--preferably four--or overnight. Garnish with chocolate shavings if you want to gild the lily.

Serves 8 to 12 (It's VERY rich!)

<---Check me out! I'm a food stylist now! (Tee hee.) But in all seriousness, compare the picture of the pie above to the one I took of my last attempt using my old camera. Amazing difference, eh? YIPPEE! Thanks again, Santa Cyd!

Sunday, December 23, 2007

A little winter break canning...

I know, I know. I vowed that I was done with canning and preserving for the season. (Never believe a canner when they say this.) But I still had seven quinces sitting on a shelf in the front room from October(!) that needed my attention. This is an amazing thing about quinces--they are SUCH long keepers, especially when your house is as cold as ours is! And as a bonus, while they hang about, they freshen the room with a heady, floral perfume. Nevertheless, one of the quinces had started to go bad, and I assumed that one bad one would spoil the whole bunch, as with their cousin, the apple, so it was (past) time to make some preserves. As luck would have it, I had exactly the amount called for in the trusty old Ball Blue Book recipe for quince preserves. I followed the recipe pretty closely (as is always advised in jam-making), other than adding two split vanilla beans to the simple syrup that you cook the fruit in initially to soften those rock-hard little suckers. (Indeed, even using a good knife, I was blistered after peeling, coring, and chopping the quinces.) I had a hunch that vanilla and pineapple quince would be a match made in heaven, and right I was! The resulting preserve was delicious, and would be ideal served with a sharp cheese (Spanish manchego is the traditional pairing) and some crackers. Moreover, the magic of quinces is how they start off white-fleshed with (greenish-) yellow skin, but become tawny as they cook, then pinkish, then red, to nearly a deep crimson. I tried to take a decent picture that would show off the gorgeous color, and I wanted to use a white backdrop, so I stuck a jar out in the snow that had accumulated on top of the barbecue grill. Tee hee. Pretty, huh? And quite festive during this holiday season!


Vanilla Bean Quince Preserves
(Source: adapted from Ball Blue Book)

Yield: 4 half-pints

7 cups quartered, peeled, cored quinces, about 3 pounds (I don't know whey they say to quarter them--I want preserves, not canned quinces, so I cut mine into about one-inch pieces*)
3 cups sugar
2 quarts water
2 vanilla beans, split

When preparing quinces, discard all gritty parts (also, be sure to keep the cut quinces in acidulated water as you prepare them for cooking--I used the juice of one lemon in a big bowl of cool water). Combine sugar and water in a large saucepot (I also added two split vanilla beans and the juiced halves of the aforementioned lemon). Boil 5 minutes. Fish out the vanilla pods and the lemon rinds, then add quinces; cook until fruit is transparent and syrup is almost to gelling point (be prepared for the long haul, as this takes from one to two hours!). As mixture thickens, stir frequently to prevent sticking. Remove from heat. Skim foam if necessary. Ladle hot preserves into hot jars, leaving 1/4 inch headspace. Adjust 2-piece caps. Process 15 minutes in a boiling water canner.

* At the end of the cooking time, when it had reached the jelling point, the quinces still weren't broken down enough to suit me, so I took my handy potato masher to them until they were more to my liking. It's a good tip.

Do you think that this is the end of my winter canning story? Think again! The other night, I was perusing the Garden Web Harvest Forum, as is my way, and I came across a nice little post about a novice canner who had shared some of her wares with the chef of a local restaurant, and how flattered she was when he praised her work. In the post, she mentioned that she had made something called "Peach Preserves for Cold Mornings." Isn't that the loveliest, most romantic name? It's credited to someone called Doris on the Harvest Forum, but a Google search seems to suggest that it was invented by a pepperhead's wife named Sharon Johnson. In any case, I had to make some right away. And it's just wonderful stuff--a beautiful orange color with just a little heat--like sunshine in a jar! As the name says, it's perfect for a cold winter's morning. Although I tried it first on crostini spread with homemade ricotta and a little dollop of the preserves on top--outstanding! Like the quince preserves, this is also made without commercial pectin, so it has a long cooking time to reach the set point. So these are good choices of things to make when you have some free time on your hands. I knew there was a reason that I hadn't sent my Christmas care packages out yet! I know one fabulous friend in Chicago, a heat-lover by nature, who is going to go over the moon for these beautiful, spicy preserves. (Holla, Phillip!) Here's the recipe:

Peach Preserves for Cold Mornings
(Source: Garden Web's Harvest Forum)

3 pounds ripe peaches, peeled and quartered (fresh are best, of course, but I used sliced, frozen)
1/2 medium-size orange, quartered and seeded (oops--I used one entire small orange, sliced, and I wouldn't change that mistake!)
2 red savina habaneros, seeds and all (Um, is this person suicidal? I like hot things, but I only used one seeded orange habanero and then one seeded jalapeno--it made a few green bits floating around in there, but it was the perfect level of heat for me)
4 cups sugar
1/4 teaspoon almond extract
3/4 cup honey, the lightest, mildest you can find

Combine peaches, sugar, and honey in a large, heavy-bottomed pot; stir well. Cover and let stand 45 minutes. Position knife blade in food processor bowl; add orange quarters and chiles. Process until finely chopped, stopping once to scrape down sides. Place orange, chiles, and an equal amount of water in a medium saucepan. Bring to a boil; cover, reduce heat, and simmer 10 minutes or until orange rind is tender.

Bring peach mixture to a boil over medium heat, stirring until sugar dissolves. Increase heat to medium-high, and cook, uncovered, 15 minutes, stirring often. Add orange mixture. Bring to a boil; cook, uncovered, 20 to 25 minutes or until candy thermometer registers 221 degrees, stirring often (this took 30 minutes for me, and I used my potato masher again to break up the fruit like I like it). Remove from heat; stir in almond extract. Skim off foam with a metal spoon. Quickly pour hot mixture into hot jars, leaving 1/4-inch headspace; wipe jar rims. Cover at once with metal lids, and screw on bands. Process jars in boiling-water bath 10 minutes.

Side note: I took this picture on my kitchen counter where the jars were cooling. I couldn't have taken another picture outside in the snow if I wanted to. What a difference a day makes! It's 40 degrees today (on Christmas Eve Eve), and now there's no snow on the BBQ grill or the patio, for that matter. It's raining, and the wind is blowing like gangbusters. This is typical weather for us...in April! BIZARRE!

Follow-up idea (12/24): I was trying to figure out what to do for dinner last night when I ran across this Rachael Ray recipe via Joe's blog. I thought that it might be delicious using the spicy peach preserves instead of the apricot that the original recipe calls for, and indeed, it was! I only made two other changes: I omitted the honey (it was plenty sweet enough without) and I added a teaspoon or two of Worcestershire sauce. An excellent meal, and surprisingly, really did take only 30 minutes to make! Another good idea for this busy holiday time--and a great recipe to use some of the Peach Preserves for Cold Mornings, too!

Friday, December 21, 2007

Had a hard day...such a hard day.

Now that I'm finally on vacay (WHOO-HOO!), it's Cyd's turn to have it rough at work. The stress has something to do with an end-of-the-year audit and/or covering for an absent co-worker there at Dunder-Mifflin...who knows? I get a daily recounting at dinnertime, but like Chandler Bing, no one really understands what she does! In any case, this has been an interminable week for my poor roommate, so when she had special requests for dinner last night, how could I refuse her? Actually, I don't mind making dinner--I do it almost every night--but the worst part is deciding what to have, don't you find that to be true? All I know is, we can't subsist on Christmas cookies alone! So the deal was that she tells me specifically what she wants, and I'll make it. Sounds dangerous, eh? Actually, it turned out so well that I decided I had to blog about it! But as usual when I go off on my own in the kitchen, I don't have a precise recipe to share afterwards, but I'll try to get close (because I also want to remember what I did for next time so that I can do it again!). Cyd's request? Pork chops stuffed with blue cheese with a side of twice-baked potatoes. And they were both delicious, if I do say so myself! Here's what I did:

For the stuffed pork chops, I started by toasting and chopping about a half cup of pecans.Then I sauteed half of an onion (chopped) and two cloves of garlic (minced) in a little olive oil. In a small bowl, I combined the nuts and onion and garlic with goodly amount of crumbled blue cheese (use as much as you like--I probably used a little less than the nuts, so maybe 1/3 cup?) and about a tablespoon of Worcestershire sauce. Then I cut a pocket in each of four pork chops (my loin-end chops were not ideal for this--you should try to use center-cut and the thicker the better) and stuffed the filling inside. At this point, you can secure them with toothpicks if you feel strongly about it. Then I seasoned the chops liberally on both sides with salt, pepper and granulated garlic (remember, never too much garlic is my motto, but you can adjust the garlic level to your taste), and I browned them on both sides in a large skillet with a couple of tablespoons of olive oil. When the chops were all but cooked through, I stashed them in a warm oven while I got on with making a simple pan sauce. I deglazed the skillet with a scant half cup of red wine and reduced that for a few minutes. Then I whisked in 3-4 tablespoons of flour and enough chicken stock to reach the desired consistency for the sauce, probably between 2-3 cups all told (beef would have probably been more appropriate, but I had homemade chicken stock on hand). Finally, I seasoned the sauce with salt and pepper (to taste), and a good glug of Worcestershire sauce (at least a tablespoon), and then spooned the sauce generously over the stuffed pork chops. Truly, to die for good!

Now if it were left up to me, I would simply serve these chops with plain, steamed rice to soak up all their saucy goodness. But Cyd hates rice and had requested twice-baked potatoes. So I nuked some medium-sized Yukon Golds for ten minutes. Then I sliced them in half and, using a melon baller, I carefully scooped out the potato innards into a small bowl (leaving just enough around the edges of the peel to keep the halves sturdy). Then I added about a tablespoon of mayo, another of chives, a handful of shredded cheese, and some salt and pepper, and then gave the potatoes a quick mash. I filled each potato half with this mixture, placed them on a lined baking sheet, topped each with another sprinkling of cheese, and popped them in a hot (400 F) oven for about 15 minutes until heated through and the topping was lightly browned. Easy and yummy! All you need to complete this dinner is a simple green salad or the steamed veg of your choice.

So if you're having a tough day, or the Christmas preparations are getting to you, consider making this scrumptious meal for yourself. It's sure to make it all better...that is, until you have to decide what to make again tomorrow night! Tee hee.

Thursday, December 20, 2007

Christmas Cookies!

Oh, my friends, will you ever be able to forgive me? I have been in absentia for an obscene amount of time from this fine blog, though I promise, you were never far from my thoughts. The rumors of my untimely death were exaggerated, but not greatly. That end-of-the-semester push, nay, SHOVE, of finals and all the subsequent grading was quite rough and rude. But survive it I did, only to go comatose and narcoleptic for a few days, as I always do at the end of term. Also, in an evil coincidence, I managed to throw my back out as I do once every few years, and I am just starting to be able to stand and move without screaming. Still, the Christmas prep waits for no one, not even the semi-paralyzed. I've almost finished my shopping. I know, I know...I should have been done long ago. I was planning on sending care packages of homemade goodies to quite a few people, but I had to postpone that vision until I can stand for longer periods of time to bake and pack (sorry in advance, everyone--and you know who you are--but you'll be getting New Year's packages this year). So it was Amazon to the rescue in large part, and I even braved the mall today briefly (shudder), God help me.

I don't know what possessed me to do it. I suppose it was because I was in a good mood, having increased motility from taking mega-doses of ibuprofen, and possibly still on a sugar high from one of my favorite Christmas traditions, the Annual Padula Cookie Swap. It was a more intimate gathering this year, mainly because the head hostess, Dominica, now has a real job as a city attorney, and apparently could not convince her employers to give her time off for the high cookie swap holy day! BOO HISS! But her presence was felt, or rather tasted, as she made many cookies for us to munch on and trade. And then mama Janice made two ginormous, lovely quiches (ham and cheese and broccoli and cheese), a green salad, rolls, and we had Dominica's super-fabulous walnut tart for dessert. Yum!

The cookie offerings this year included June's famous ginger people, a peppermint swirl cookie from Martie (so pretty!), and whopper cookies that Dominica made from a recipe on Anna's blog. I, too, turned to the Mad Cookie Queen for inspiration. I needed something that wasn't too intricate, and I spied her recent post about chocolate almond shortbread that seemed perfect. The ingredient list wasn't daunting, it mixed up quickly with no fussy procedures (you don't even need to chill the dough), and the resulting cookies were so yummy--even better the next day! Continuing the motifs of almonds and powdered sugar (the latter is perfect for Christmas as the cookies look all snowy), I also made some Vanille Kipferl, an Austrian cookie better known as Vanilla Crescents. These were a little more involved, as they required hand-shaping--not to mention MATH to convert from European/metric measurements--but I didn't mind, as I could do both sitting down. ;-) These also taste better a day or two after making them...if they last that long! So what are you waiting for? Fire up your oven and hop to! Tick tock, tick tock!

Chocolate Almond Shortbread
(Source:
Almonds Are In--via Cookie Madness)

1 cup butter, softened
1/2 cup sugar (I tasted the dough and added an extra tablespoon or two)
1 teaspoon vanilla
1/4 teaspoon almond extract (I halved this--personal taste)
2 squares (1 oz. each) semi-sweet chocolate, melted and cooled (I used chips and weighed them)
1 square (1 oz.) unsweetened chocolate, melted and cooled
2 cups flour
1 cup toasted chopped almonds (I used blanched/sliced/toasted from TJ's)
*I also added a good pinch of salt

powdered sugar (and lots of it...I mixed a little Hershey's Special Dark cocoa in there for good measure)

Cream butter with sugar, vanilla and almond extract. Blend in melted unsweetened and semi-sweet chocolate. Stir in flour and almonds. Roll into 1-inch balls. Place on ungreased cookie sheet and flatten slightly (I missed this step on my first batch as you can see in the picture above, but the more rounded cookies were still delish). Bake at 350 degrees, 10 minutes (more like 12). Cool on wire rack. Sift powdered sugar over cookies (I tossed mine in it after they had cooled a bit).


Vanille Kipferl/Vanilla Cresents
(Source: What's for Lunch, Honey?)

1 vanilla bean (I used two--'tisn't the season to be Scroogey!)
1 3/4 cups all-purpose flour
13 tablespoons butter, softened
1/2 cup powdered sugar
pinch of salt
3/4 cup blanched almonds, finely ground

2 egg yolks

vanilla sugar*
powdered sugar

Cut open the vanilla bean and scrape out the seeds. Combine together the almonds with the flour, sugar, salt, vanilla seeds, and butter. Using your fingers (I used my mixer on low), work flour–nut mixture until dough resembles coarse meal or breadcrumbs.

Mix in the egg yolks and knead to form a smooth dough. Roll dough into two logs, wrap them in some plastic wrap and chill for approximately 30 minutes. This is an essential step--without the resting period, the dough will break when being formed into cookies.

Pre-heat oven to 350 degrees F. After resting the dough, cut each log into 24-25 equal pieces (total=48-50 cookies), then form each part into a 3-inch long piece with pointy tapering ends; bend these into crescents shapes. Place on a baking sheet and bake in the center of the oven until light golden around the bottom, 12 -14 minutes, rotating the sheets halfway through for even baking.

After baking, dip the still hot cookies into vanilla sugar. Handle the cookies with care, as they break quite easily, especially after baking (but you need a few "tasters" anyway for quality control!). When completely cooled, sprinkle liberally with powdered sugar (I mixed in some powdered vanilla to take the vanilla flavor over the top).


The cookies will keep for at least two weeks in an airtight container or a sealed cookie tin.

*Making vanilla sugar: Keep granulated sugar and a vanilla bean(s) in an airtight jar; after a few weeks the sugar will taste of vanilla.

Sunday, December 09, 2007

Christmas Party!

Tonight I attended a Christmas party at my dear friend and office mate Lee Ann's house. A lovely time was had by all, and there was a TON of great food there! Lee Ann's husband Steve did this amazing pork loin stuffed with feta, spinach and cranberries (can't you just picture the festive holiday colors?), homemade mac-and-cheese, and even a gorgeous loaf of stollen. (I wish I had taken some pics.) Lee Ann's sweet little mom from Ohio was also there, and she baked many wonderful goodies for the party, including some scrumptious little pecan tassies. Guests were encouraged to bring appetizers and/or desserts, and boy, did they come through! My vote for the most wonderful thing on the buffet was this completely addictive hot artichoke dip, and as is my way, I managed to track down the chef and browbeat the recipe out of her. She said it was the sort of thing that she has a basic outline for in her head but that she's not too precise about (my kind of gal). She also said that she takes the dip to parties wherever she's invited and always takes a clean dish home! I don't doubt it. It was DEE-lish!

Basically, you chop up marinated artichoke hearts until fine--she does it in the food processor--about a cup (many recipes say two cans, but I have the warehouse-size jar from Sam's). Then you mix them with a brick of softened cream cheese, a cup of mayonnaise, a teaspoon or two of dill weed, a teaspoon or so of granulated garlic, and shredded parmesan (she said a 5 oz. bag?--I would probably throw in about a cup myself). You bake it at 350 until bubbly and brown around the edges (I'm going to guess around a half hour), and serve with bread or crackers. An easy and delicious holiday go-to appetizer! In fact, I might have to make some for Cyd's birthday dinner tomorrow night (her actually birthday was today--HAPPY BIRTHDAY, CYD!).

So what did I bring to the party, you ask? Well, always the culinary over-achiever, I brought an hors d'oeuvre AND a dessert. For the sweet, I brought the ever-popular Trashy Toffee, and for the savory, I made the most fabulous antipasto platter, featuring my homemade mozzarella, salami, and many of the pickled veggies that I put up this summer (baby carrots, dilly beans, dill pickles, and cherry tomatoes). The only things on this tray that I did not make were the salami--no, I haven't got my charcuterie on yet--and the banana peppers (the tray needed another color, and I had a huge jar of them in the fridge, because I love them on everything). Doesn't it look fancy? Cyd assembled it, and I think it came out looking quite professional! Maybe we should cater some of these holiday parties? ;-)

Friday, December 07, 2007

A quick but satisfying entree salad for these harried holiday times....

So I'm in the eye of the hurricane at school. I survived it this week by some measure of grace, but next week might just finish me off. You see, next week is our finals week, and the "no sleep" rule will be firmly in effect until December 15! With all the paper grading, not to mention all the holiday preparations to be attended to in one's "free time," some nights I just can't face making an elaborate meal for dinner. And that's when I often turn to the composed entree salad that requires no real (or not much) cooking, just assembly.

I have been known to do a kind of south-of-the-border version with chicken, black beans, corn and a zesty chili or avocado-based dressing, or a garlicky chicken caesar with black olives and giant croutons, or perhaps even a Cobb-style salad. But this time around, my inspiration was one of those fried chicken salads that every chain restaurant seems to sell. But this was easy, tastier, and a whole lot cheaper to make yourself at home. There isn't really a recipe, just general guidance on composition (something I do a LOT as a teacher...tee hee). Moreover, this salad makes use of some "cheater" ingredients to simplify the process further. And LOOK what you will end up with! Don't you just want to grab a fork and dive right in? Trust me, you do. I ate this meal myself no fewer than three times last week!


So you start with your favorite kind of lettuce or mixed greens. At my house, it's usually a combo of red and green leaf lettuces, but we just had your basic green on hand this time. I de-spine it and then tear it into manageable pieces, but that's just me. Then you'll want to toss on some chopped, cooked bacon. You can use pre-cooked, but it's so expensive that it's well worth your time to fry up a little extra for a big weekend breakfast and use the leftovers during the week. You'll also want to slice up a hard-cooked egg or two. Yeah, it's a pain. I've even seen pre-peeled ones in the grocery store, for heaven's sake. But again, I recommend boiling up a dozen and peeling them on the weekend so that you have a quick breakfast with toast in the mornings, or egg salad for lunch, and egg on your salad at dinnertime. (As you may infer, we do not fear the egg-based cholesterol at my house! Then again, our chickens live a good life and their eggs are more flavorful and kinder to our health in return.) For veggies, I suggest some chopped scallions and some tomato in a small dice. You'll also want a good sprinkle of shredded cheese (I always have a Mexi-cheese blend in a bag in my deli drawer to make my life easier). I also found some fried onion salad toppers (on the shelf with the croutons at the store) that I threw on this particular salad, which added a nice flavor and crunch. And last but not least, you need some fried chicken. Feel free to fry your own, but as I said, I'm in the throes of finals, so I stopped by the deli counter at the grocery store and acquired a few chicken strips that I subsequently nuked and sliced for the salad.

For the finishing touch, I did make my own honey mustard vinaigrette that was so easy and informally thrown together, that I don't have a precise recipe for that either, I'm afraid. I started with a couple of tablespoons of mustard (one tablespoon spicy Creole for flavor, one tablespoon of regular yellow for that unmistakable color). Then I added at least as much honey (a couple/few tablespoons), along with maybe a third of a cup each of vinegar (cider or white) and olive oil. The olive oil I used was heavily-infused with garlic, or else I would have thrown at least one clove of minced garlic in there, along with salt and pepper to taste. I gave everything a quick, emulsifying spin in the blender, tasted it, and ended up adding a little more oil (so maybe half a cup total?) and maybe another tablespoon of honey until it was sweet enough to suit me. Basically, throw stuff in your blender until it looks right and tastes good, then drizzle a generous amount on your salad and you're done! Dinner will be taken care of lickety-split, and then you can get back to wrapping those presents and trimming that tree. Consider this quickie dinner idea another holiday gift from yours truly.

Stay alive, everyone. Christmastime is NOT for the faint of heart!

Tuesday, December 04, 2007

Santa Came Early This Year...'Cuz I'm Real Good!

'Tis the Season for holiday baking, and I'm getting all jazzed up and geared up for it. (Happy Hanukkah, by the way, to all my Jewish readers!) In anticipation of all the cookies and cakes and goodies soon to come, I put in a special request to Santa (or perhaps it was the Hanukkah Armadillo?) to stop by my house early, as I had a desperate need. Behold Exhibit A:

Is that TRAGIC or what? Yes, those were my very first Silpats that I bought, oh, about a decade ago, I think. They were burned and frayed, with small to huge holes in them. And recently, my dear roommate tried to clean one of them with some sort of solvent, and the chemical smell never did come out, which imparted a weird taste to anything baked on it. So I decided it was time to lay those old workhorses to rest and acquire some new ones. And LOOKIE!

Is there any greater joy to a cook than new Silpats? Well, perhaps All-Clad, but Santa works his magic on a budget at my house! Speaking of price, back in the day, Silpats (and Exopats and the like) cost about $25 apiece for the half-sheet size. Of course, they lasted forever (a decade for me anyway). But still, fifty bucks for two of them is pretty steep, though I really didn't want cheapo knock-offs. To my delight, I found that they are now going for about ten dollars apiece on amazon or from ebay sellers. With the money I saved, now I can buy new half-sheet pans, as mine have seen better days, too. Tee hee.

For the Silpats' maiden voyage, I made some excellent peanut butter cookies to take to trivia tonight. They are from a recipe that I found on my buddy Anna's Cookie Madness site, and they are delicious. And I only amended the recipe slightly. First, instead of using commercial peanut butter, I ground my own in the food processor to give the cookies a fresh peanutty taste. This is a tip I learned from my friend Lee Ann's husband, Steve, who is a fine cook and an all-around Renaissance man! Secondly, I used lightly salted and roasted peanuts from Trader Joe's (instead of dry roasted because it's what I had around), and instead of chocolate or peanut butter chips, I used teeny little peanut butter cups, also from Trader Joe's. Oh, and I added a teaspoon of vanilla because it seemed wrong not to!

These cookies are really good--tender on the inside and crispy on the outside. Just make sure not to overbake them. The recipe says fourteen minutes, but I'd check them at twelve. Once they are golden around the edges--even if they seem a wee bit underdone in the middle--take them out and let them set up on the tray as they cool for five minutes before transferring to a rack to cool completely. Finally, the next time I make these (and oh yes, there will be a next time!), I might reduce the sugar from two cups to a total of one and a half. These were a bit on the sweet side for my tastes, but you make them and decide for yourself. The recipe yields between three and four dozen good-sized cookies, so feel free to halve or quarter it. However, I simply refrigerated the dough and baked a dozen off at a time over a few days. That way, we always had warm, fresh cookies, and I think the texture was a bit better after chilling, too.


Triple Play Peanut Butter Cookies
(Source: www.cookiemadness.net)

1 cup butter, very soft
1 cup dark brown sugar (I used light because I ran out of dark, and I might reduce this to 3/4 C)
1 cup sugar (again, I would reduce this to 3/4 C)
1 1/4 cups peanut butter (I made mine fresh from peanuts ground in the food processor)
1/2 teaspoon baking powder
1/2 teaspoon baking soda
1/2 teaspoon salt
1 teaspoon vanilla (optional)
2 eggs
2 2/3 cups flour
1 1/4 cups chopped dry roasted salted peanuts (I used lightly salted/regular roasted)
1 1/3 cups peanut butter chips or chocolate chips (I used TJ's mini peanut butter cups)

Preheat oven to 350°. Line baking sheets with parchment (or SILPATS!).

Cream butter, sugars, peanut butter, baking powder, baking soda, and salt. Add eggs one at a time. Stir in the flour, nuts, and chips.

Drop by tablespoon (I used my trusty cookie scoop) onto prepared sheets. Bake for (12-)14 minutes, until set and golden brown around the edges. Remove from oven and cool on pan 5 minutes before transferring to wire racks to cool.

Sunday, December 02, 2007

Blessed are the Cheesemakers!

Last year about this time, I was baking loaf after loaf of the infamous no-knead bread, though I was one of the last food bloggers to jump on that crusty bandwagon. And then I caught the Dorie Greenspan fever long after every other baker in the known universe was ankle-deep in World Peace Cookies. This year, I find myself again the fervent convert to a new religion (well, not really...I've been a believer all along), and once again, I find myself running behind the pack. Oh well, better late than never, non?

I could go on and on about Barbara Kingsolver's amazing memoir, Animal Vegetable Miracle: A Year of Food Life, but I'll try to keep it as brief as I can (which is hard for me, as you well know). Kingsolver, mainly known for her fine fiction, chronicles her family's decision to move from the arrid Southwest to a family homestead in Kentucky where they vow to live as "locavores" for a year. That is, they will eat locally, consuming only the food they grow or make themselves, or food that has been sourced within the radius of an hour or two. They do this for many reasons, such as maintaining their health, improving the taste and nutritional value of the food, preserving rare heritage varieties, ensuring humane treatment of animals, saving money, reconnecting with each other and with the land, etc., but mostly to reduce their carbon footprint by living on food that has not used a ton of fossil fuels to be transported to them from California or countries south of the border.

In short (too late), it's a MUST-READ. It is fascinating, informative, engaging, and compelling, and all delivered in Kingsolver's charming style that manages to be both eloquent and down-home approachable at the same time. It is, in fact, the book that I wanted to write, that I should have written, but she beat me to it--and of course, did it way better than I ever could, damn her! This book is my bible (fundamentalists, please note the purposeful small "b" used), and I was raising holy hands and shouting "Amen!" all through it. Not only is the book very issues-driven and highly contemporary, it is also about organic gardening, and poultry-keeping, and cooking, baking and canning, specifically advocating the importance of slow food and seasonal eating--basically, everything that I hold dear, and indeed, what this blog is all about.

Barbara's daughter, Camille, is a co-author of the book, and she offers weekly seasonal meal planning and sample menus, along with wonderful-sounding recipes (these are also found on their website). I haven't had the chance to try more than one of the recipes, but there are several others that I have in my mental hopper and in the queue for preparation in the near future or, more to the point, when those things come into season. I thought I'd start with something I can make year-round, thanks to my lucky proximity to a dairy farm (right behind me), where I can get fresh milk whenever I want it--as long as I keep the farmer in homemade baked goods, which is an excellent and equitable arrangement as I see it. ;-) Yes, may the Kingsolvers help me, I made CHEESE!

It should be said that I went through a brief but fanatical cheesemaking phase a couple of years ago, and I got very good at simple, soft cheeses like Neufchatel, farmer's cheese, mascarpone and cottage cheese. But as I didn't have a cheese press (nor the funds to purchase such a pricey item nor the handyman skills to make one), I wasn't able to advance to the hard cheeses. I also wanted try my hand at making mozzarella, but every demonstration that I'd seen on t.v. with all the pulling and shaping of the cheese by hand, seemed beyond my skill set, so I never had the courage to attempt it. But the Kingsolvers have Pizza Night every Friday night, and they make theirs with Barbara's husband Steve's homemade pizza dough, seasonally-available toppings, and of course, homemade mozzarella that they swear can easily be made in 30 minutes right at home. So I said to myself, if the Kingsolvers can make mozzarella, so can I! And I'm here to tell you, so can you! My first shot at it took me 45 minutes, but it turned out perfectly, and perfectly delicious! It was tender and buttery, and as a bonus, I made ricotta from the leftover whey after making the mozzarella, and dear heavens, it was the must luscious spread we've ever had on crackers! I can only imagine what it would do for a white pizza or lasagna, especially in concert with the homemade mozzarella. YUM!!

I will share the recipe and techniques so that you can try it yourself. I'm sorry that I don't have pictures of the whole process, but I accidentally left my camera in the car, and it got so cold that the batteries went dead. By the time it warmed up enough to use, the cheese was done (more evidence of its speed and simplicity!). But the Kingsolvers use Ricki Carroll, the so-called Cheese Queen's recipe, and she has great pics of the process on her website if you need to reference them. Ok, here you go, and don't blame me if you never buy mozzarella from the store again--blame the Kingsolvers!

30-Minute Mozzarella
(Source: Barbara Kingsolver's Animal, Vegetable, Miracle and/or Ricki Carroll's Home Cheesemaking)

1 1/2 teaspoons citric acid (I got mine in bulk from the health food co-op in town) diluted in 1/2 cup cool, unchlorinated water
1 gallon whole milk, NOT "ultra-pasteurized" (my neighbor only brought me about 2/3 of a gallon from the barn, so I used 2% to make up the difference, and it turned out fine)
1/4 teaspoon liquid rennet* diluted in 1/4 cup cool, unchlorinated water
1 teaspoon salt (non-iodized, kosher flake salt--I used canning salt myself)

1. Pour the milk into a large, heavy-bottomed stainless steel pot and turn the burner on medium-low. While stirring, add the citric acid solution to the milk at 55 degrees and mix thoroughly.
2. Heat milk to 88 degrees, when the milk should start to curdle.
3. Gently stir in the diluted rennet with an up-and-down motion, while heating the milk to between 100 and 105 degrees. Turn off the heat. The curds should be pulling away from the sides of the pot; they are ready to scoop out (approximately 3 to 5 minutes). The curds will look like thick yogurt and have a bit of shine to them, and the whey will be clear. If the whey is still milky white, wait a few more minutes.
4. Scoop the curds with a slotted spoon and put into a 2-quart microwavable bowl. Press the curds gently with your hands, pouring off as much whey as possible.
5. Microwave the curds on HIGH for 1 minute. Drain off all the excess whey. Gently fold the cheese over and over (as in kneading bread) with your hand or a spoon. This distributes the heat evenly throughout the cheese, which will not stretch until it is almost too hot to touch (145-degree inside the curd). You may use rubber gloves to do this if you're a wimp, but I think it might impart a slight off-taste to the cheese...just my humble opinion.
6. Microwave two more times for 35 seconds each; add salt to taste after the second time (optional). After each heating, knead again to distribute the heat.
7. Knead the cheese until it is smooth and elastic. When the cheese stretches like taffy, it is done. If the curds break instead of stretch, they are too cool and need to be reheated another time or two.
8. When the cheese is smooth and shiny, roll it into small balls (I made two myself) and eat while warm. Or place them in a bowl of ice water for 1/2 hour to bring the inside temperature down rapidly; this will produce a consistent smooth texture throughout the cheese. Although best eaten fresh, if you must wait, cover and store in the refrigerator.

Yield: 3/4 to 1 pound.

Troubleshooting: If the curds turn into the consistency of ricotta cheese and will not come together, change the brand of milk; it may have been heat-treated at the factory to too high a temperature (=ultra-pasteurized).

*There are several different kinds of rennet. The most common kind derives from an enzyme in the stomach of a calf. Naturally, this might vex the vegetarians and animal-lovers, so there are also vegetarian rennets available made from plant sources or from fungi (microbial rennet). I have used the animal-based rennet in the past, but this time, I acquired vegetarian (microbial) rennet from the co-op for about $6. It worked equally as well. Some cheesemakers even use rennet (Junket) tablets easily found in in the grocery stores, but some consider it less powerful and harder to portion for use (1 tablet=1 teaspoon liquid rennet). However, even refrigerated, liquid rennet loses its potency quickly and must be replaced every six months or so, while Junket tablets last pretty much indefinitely on the shelf. So, it's your call. They all work.


After making the mozzarella, you can make ricotta cheese by reheating the leftover whey in the pot to almost boiling (you can do this right away without letting it sit overnight as the citric acid makes it acidic enough), letting it cool, then gently scooping out the curds and letting them drain through cheesecloth (I use a flour sack towel). Now I don't know from the Cheese Queen, but for the details of the ricotta how-to, let me direct you to my personal cheese god (again, to the pious, note the lower-case and that I do not blaspheme, but merely preach my own lactobacillic gospel), a chemistry professor in Cincinatti named, most improbably, Dr. David Fankhauser. He has an incredibly comprehensive virtual library of cheesemaking online (with step-by-step pictures of most of his recipes and methods), and I encourage you to check it out at your leisure, especially once you catch the cheesemaking fever. as you are sure to do after making 30-minute mozzarella!