"At that time, Antony Fortuny still suspected that part of the boy's mental deficiencies were due to his diet, which was far too influenced by his mother's French cooking. It was a well-known fact that the richness of buttery foods led to moral ruin and confusion of the intellect." --The Shadow of the Wind, Carlos Ruiz Zafon
Friday, September 29, 2006
Happy Birthday, Vicky!
The Martin Luther King, Jr. quote ("Our lives begin to end the day we become silent about things that matter") sums up her spirit and personality perfectly. I also had fun making her her own seal at this cool website which I highly recommend if you have some time to kill. Her last name is Sloan, her righteous indignation over injustices made the scales a fitting icon, and the Latin phrase translates to "Not a day without a line drawn." Originally, that was in reference to some particularly industrious artist, but I thought it fit Vicky in a different way, as she is often drawing the line over some important issue! ;-)
Then of course, I provided lunch for the folks. There's always one vegetarian in every crowd (ours is one of the other English teachers), so I decided to start with a cream of roasted tomato soup made with organic vegetable stock. The soup was one of Bobby Flay's dishes, and everyone was clamoring for the recipe (see below). I also made the blue cheese and walnut chicken salad and added some chopped apples and served it on cocktail croissants. And as two of Vicky's favorite dessert flavors are cherry (she's from Michigan originally) and chocolate, the grand finale was a gorgeous four-layer Black Forest Cake. I intended to make the whole thing from scratch, as is my way, but the oven is still on the fritz (sigh--yes, it's true, the repair guy came Thursday morning, but it apparently requires some part that needs to be ordered). Thus, I had to bake the cake layers at school, so I just used a dark chocolate fudge cake mix from a box. But LOOK at what you can do with a boxed mix if you set your mind to it!
I am pleased to report that I am returning home with empty dishes, other than one piece of cake that I saved to share with Cyd who was kind enough to help me make the chicken salad and the soup last night. Bless her heart! Anyhoo, here are the recipes for the soup and the cake, if anyone is interested in trying them out (the chicken salad can be found in an earlier post from 9/11/06 entitled, "Weekend in New England").
HAPPY BIRTHDAY, VICKY!
Cream of Roasted Tomato Soup
(Source: Food Network, Bobby Flay)
10 plum tomatoes, halved lengthwise, seeds removed (or you can "cheat" and use one 15-oz. can of plum tomatoes and one 15-oz. can of Muir Glen fire-roasted tomatoes for a similar effect)
1/4 cup olive oil, divided
6 cloves garlic, coarsely chopped
salt and freshly ground pepper, to taste
1 Spanish onion, diced (you can use any kind of onion here)
1 carrot, diced
3 cups vegetable stock (chicken stock would be fine, too, and beef stock might be even better)
1 tablespoon finely chopped fresh thyme (I used lime thyme from my garden--yum!)
1 1/2 cups heavy cream
Preheat oven to 325 degrees F. Place tomatoes in a large baking dish and drizzle with 2 tablespoons of the olive oil and sprinkle with the garlic, season with salt and pepper. Roast for 25 to 30 minutes, or until the tomatoes are soft.
Heat the remaining olive oil in a medium stock pot over medium heat. Add the onions and carrots and cook until the onions are soft, about 5 minutes. Add the roasted tomatoes, garlic, and the juices that have accumulated in the roasting pan. Add the stock and fresh thyme and cook for 20 minutes. Place the cream in a small saucepan over medium high heat and cook until reduced by half. Transfer the mixture to a blender and blend until smooth (I used my stick blender right in the pot), strain into a clean saucepan over low heat (I prefer not to strain--the bits add texture that I enjoy), stir in the reduced cream, and cook for 5 minutes.
Black Forest Cake
(Source: www.allrecipes.com)
Prep Time: 30 Minutes Cook Time: 40 Minutes
Ready In: 2 Hours 10 Minutes Yields: 12 servings (I got 16--you don't need big slices, it's so rich)
Cake:
(*you can substitute a boxed cake mix here in a pinch)
1 2/3 cups all-purpose flour
2/3 cup unsweetened cocoa powder
1 1/2 teaspoons baking soda
1 teaspoon salt
1/2 cup shortening
1 1/2 cups white sugar
2 eggs
1 teaspoon vanilla extract
1 1/2 cups buttermilk
Filling:
1/2 cup kirschwasser (cherry brandy)--I cut this by half with cherry juice for a less "boozy" effect
1/2 cup butter
3 1/2 cups confectioner's sugar
1 pinch salt
1 teaspoon strong brewed coffee (I used coffee liqueur instead and added a teaspoon of vanilla, too)
2 -14-oz. cans pitted Bing cherries, drained (I used Morello cherries from Trader Joe's)
Frosting:
2 cups heavy whipping cream
1/2 teaspoon vanilla extract
1 tablespoon kirschwasser (I used the kirsch/cherry juice mix that was leftover)
1 (1 oz.) square semisweet chocolate (I used probably 4 oz. of bittersweet chocolate)
1. Preheat oven to 350 degrees F (175 degrees C). Line the bottoms of two 8-inch round pans with parchment paper circles. Sift together flour, cocoa, baking soda and 1 teaspoon salt. Set aside.
2. Cream shortening and sugar until light and fluffy. Beat in eggs and vanilla. Beat in flour mixture, alternating with buttermilk, until combined. Pour into 2 round 8 inch pans.
3. Bake at 350 degrees F (175 degrees C) for 35 to 40 minutes, or until a toothpick inserted into the cake comes out clean. Cool completely. Remove paper from the cakes. Cut each layer in half, horizontally, making 4 layers total. Sprinkle layers with the 1/2 cup kirshwasser (I used a pastry brush, and I didn't use anywhere near a half cup!).
4. In a medium bowl, cream the butter until light and fluffy. Add confectioners' sugar, a pinch of salt, and the coffee (or coffee liqueur and vanilla extract); beat until smooth. If the consistency is too thick, add a couple teaspoons of cherry juice or milk (I used some of the leftover kirsch/cherry juice mix which made the filling a lovely shade of pink!). Spread first layer of cake with 1/3 of the filling. Top with 1/3 of the cherries. Repeat with the remaining layers.
5. In a separate bowl, whip the cream to stiff peaks. Beat in 1/2 teaspoon vanilla and 1 tablespoon kirshwasser (I also added about three tablespoons of powdered sugar and two tablespoons of nonfat dry milk to stabilize the cream so that it would last through the party). Frost top and sides of cake. Sprinkle with chocolate curls made by using a potato peeler on semisweet baking chocolate (I melted my chocolate over a double boiler, spread it thinly over the back of a baking sheet, let it cool, and made thick curls with a bench scraper instead). I would also chill this before serving to set the layers and make it easier to cut.
Sunday, September 24, 2006
The oven saga continues...
Ok, now that I've had my little psychotic break/meltdown/temper tantrum, let me turn to more pleasant, autumnal tidings. Friends, we are in the full glory of apple season! As you know, I have already used some Ginger Golds and Paula Reds in some baked dishes this season, but on Friday afternoon, we went in search of the most prized apple in all of Christendom, the Honey Crisp. Dear readers, believe me when I say that there is nothing more wonderful than biting into a Honey Crisp apple (preferably, cold from the fridge). It is, as you might guess from the name, incredibly sweet, toothsome and crisp, and as you take each bite, there's a burst of fresh apple juice in your mouth. Just amazing! I don't even have a recipe to go with these apples, because it would be a crime to do anything other than savor the beauties in their perfect, fresh form. However, I did score an unexpected apple bonus at our local Everett Orchards on Friday. As we were paying for our Honey Crisps, I noticed a sign advertising an apple called "Wealthy" by special request only. I inquired about this variety, as I'd never heard of it. The lovely woman told me that it was an old-fashioned baking apple, and that they only had two trees' worth. In fact, she said that her mother usually claims all of the Wealthy apples for her own pies, but that they had a few leftover to sell this year. Hard-to-find, scarce supply, heirloom baking apples? She was singing my song! So I snapped up a half peck in short order, naturally! I will report back on the pies that result, once I get the oven situation under control, that is. :-(
But I would be remiss if I blogged without posting a single recipe. And I do have one to offer. The other wonderful surprise at Everett Orchards was discovering their terrific homemade cookies. We sampled a peanut butter-filled chocolate one and a decadent double-chocolate one that seemed to have a hint of coffee involved. But my favorite was a delicious maple-walnut cookie that I am now obsessed with replicating at home. Other than scorching the first batch in the hateful new oven, my initial effort yielded some tasty results. Here is the recipe:
Maple Walnut Cookies
1 cup brown sugar, firmly packed
1/4 cup maple sugar
3/4 cup butter-flavored Crisco (or swap out part of the shortening, which makes them soft, for butter, which will give them better flavor)
2 tablespoons maple syrup (of course, real!)
1 teaspoon vanilla
1 egg
1 3/4 cups all-purpose flour
1 teaspoon salt
3/4 teaspoon baking soda
1/2 teaspoon cinnamon
2 cups walnuts, toasted (do NOT skip this step or you'll be sorry!) and coarsely chopped
1. Heat oven to 375 degrees F. (that's 200 to me...ha ha)
2. Place brown sugar, maple sugar, shortening, maple syrup, and vanilla in the bowl of a stand mixer. Beat at medium speed until well blended. Add egg and beat well.
3. Combine flour, salt, baking soda, and cinnamon in another bowl. Add to shortening mixture; beat at low speed just until blended. Stir in chopped walnuts.
4. Drop dough by rounded tablespoons 3 inches apart onto ungreased baking sheets. (I used my standard cookie scoop here onto Silpat-lined pans.)
5. Bake one baking sheet at a time at 375 degrees F for 8 to 10 minutes for chewy cookies, or 11 to 13 minutes for crisp cookies. DO NOT OVERBAKE. Cool 2 minutes on baking sheet. Remove cookies to a rack to cool completely.
Makes about 2 dozen cookies (using the cookie scoop).
Tuesday, September 19, 2006
Happy Birthday, Steve!
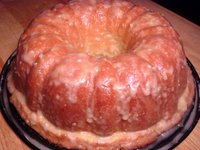
Meanwhile, back to Steve's birthday cake. Steve, it should be known, is a great lover of all things lemony. So he requested a lemon pound cake (or perhaps Lee Ann told him that I fancy myself the Queen of Pound Cake and he just specified the flavor...who can say?), but he was quite adamant that it be a very LEMONY lemon pound cake! And no other flavor should adulterate the lemons! So I set about to make as lemony a pound cake as I could muster up. I bought an entire bag of lemons to use, and came right home to begin zesting up a storm. The problem was, my longsuffering next-door neighbor didn't leave the spare key out for me, so I had to wait until he got home from work at 11:30pm (!) to accost him in his driveway and beg for oven time. So the cake wasn't finished until almost 2:00am (ugh!), but nevertheless, I think I may be onto something. It smelled heavenly, and the little bits that stuck to the middle of the bundt pan were quite tasty. But it's really all about the glaze! Wow! My mouth is puckering just thinking about that glaze! And after using the zest of four lemons and a quarter cup of juice in the cake, and the zest of two lemons and a half cup of juice in the glaze, it BETTER be lemony enough for the Birthday Boy! If not, as Lee Ann and I joked this afternoon, we'll just tie him down and start reaming lemons right into his pie hole and skip the cake altogether! Tee hee. Actually, I will make this again--for myself!--and I might do two things to up the lemon effect even more. One, I would like to track down some lemon oil and try adding it to the batter along with the zest and juice. And next time, I will poke holes in the bottom of the cake and soak it with glaze before I even turn it out of the pan, and then coat the top and sides as I did with this one. In any case, this is still one lemony pound cake, and I sure hope it's well-received at the party tonight. If not, next year, I'll buy TWO BAGS of lemons! ;-) HAPPY BIRTHDAY, Steve!
Follow-up: Lee Ann reported today that that the cake was "perfect," according to the Birthday Boy. (That's a gushing review coming from a rather taciturn fellow!) Plus, they have a one-year-old who had her first taste of a lemon dessert, and her reaction was to chuckle not once, but twice, and then do a little dance with her feet--high praise indeed! (Daddy must have passed on that lemon-loving gene.) Lee Ann was also kind enough to bring me a couple of sampler pieces to try, and I actually think it's one of the best things I've ever made! However, I have changed my opinion about adding lemon oil. This cake is PLENTY lemony as it is! Whoo! Pucker Power!
Steve's XTREME Lemon Pound Cake
2 sticks butter, softened
1/3 cup shortening
5 large whole eggs
3 cups sugar
1 tsp baking powder
1/4 tsp salt
3 cups all-purpose white flour (measure on the 3rd and last sift)
zest of 4 lemons, very finely grated (preferably, with a Microplane/wood rasp)
1 cup whole milk (If you want to live dangerously—and I always do—half and half makes it melt in your mouth!)
1/4 cup freshly-squeezed lemon juice
1 tsp vanilla
Preheat oven to 325. Spray or grease bundt pan and lightly flour entire surface. (Or the Pam with flour for baking makes it even easier!) Cream butter and shortening together at slow mixer speed. Add sugar and eggs, one at a time, alternating with the sugar. Begin and end with sugar. Scrape bowl often. When all added, set mixer on high speed for exactly four minutes. Sift flour three times, adding baking powder and salt on last sift, then measure three cups. Whisk the lemon zest into the flour mixture and set aside. Add the lemon juice and vanilla to the milk and stir. Add the milk and the flour mixtures to the bowl, alternating ingredients, beginning and ending with flour. Spoon batter gently into the prepared pan and smooth the top with a spatula.
The cake will take about 1 hour and 15 minutes to cook depending on your altitude, humidity and oven calibration. Test by inserting a knife or tester. It's done when it comes out a little oily but no batter. Cool on rack precisely 10 minutes and turn immediately out on a plate. Let it cool a bit, and then glaze with the recipe to follow.
XTREME Lemon Glaze
3 cups powdered sugar
1/2 cup freshly-squeezed lemon juice
zest of 2 lemons, very finely grated
1 tablespoon butter
splash of vanilla, optional
Whisk the powdered sugar and lemon together until smooth. Add the lemon zest and butter and microwave on high for 30 seconds to one minute (until butter is melted). Add a splash of vanilla, and whisk again until smooth. Coat pound cake with every last bit of the glaze (using a pastry brush is very helpful here), then let cool until set before serving.
Sunday, September 17, 2006
The Second (Tomato Tidal) Wave!
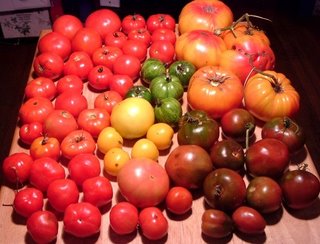
As heirloom tomatoes are not always as heavy-bearing as modern hybrids, I tend to overcompensate by overplanting. But I really scaled back this time--from my personal best (worst?) of about 80 plants to just 48 this year! (Tee hee.) I also like to save my own seeds from year to year. And if you think this is difficult to do or takes specialized equipment, think again! And it's a great way to grow different kinds of tomatoes that you happen to taste and enjoy and want to have again in the future. For example, when I was at the Burlington (VT) farmers' market a few weeks ago, I spied a Red Zebra (as you might guess, it looks just like the Green Zebra above, except that it's red with gold stripes--gorgeous!). So we bought the last two they had, and then came right home and saved the seeds so that I can grow it next season.
All you do is gently squeeze out the jellied insides of the tomatoes into a small plastic container (old yogurt cups works great). Rinse them a few times to wash away the majority of all the stuff that is not just the seeds, then fill the cup with water and set aside for a few days. Yes, they will start to smell a little funky and there may be some mold that floats on the top of the water. But fermenting the seeds is a very important step, because it removes the natural growth-retardant substance that coats the outside of the seeds. After about five days, carefully pour off the old water, and rinse the seeds a few more times. I then take a styrofoam plate and write the name of the variety on the rim with a Sharpie marker, and then spread the drained seeds out onto the plate, trying to make an even layer. Then just set the plate aside--somewhere it can't be disturbed--and allow the seeds to dry completely (a few days to maybe even a week). Finally, I put the saved seeds in a little paper coin envelope that I've labelled, store them in a dark, dry, cool place, and they will be ready to plant next March! This technique also works with peppers and squash, but I should mention that you only want to use non-hybrid varieties of vegetables for seed-saving. Some hybrids will produce infertile seeds that will not even germinate, and those that do germinate will not look exactly like the parent plant, so you don't know what you'll get. Then again, sometimes it's fun to be surprised, as I found out with my summer squashes that were natural cross-breeds from last season. They look odd, but they taste great. Finally, once you get into seed-saving and end up with more seeds than you would ever want to plant, you might want to join a seed-saving organization and trade seeds with others. I like to use the Garden Web Seed Exchange Forum where you can post a profile that lists the seeds that you're looking for and those that you have to share. Then you can arrange a swap with another member. It's great! You get all kinds of interesting seeds for the price of a stamp!
Enjoy the end of the harvest, my friends. And save a little something for next season's garden that can never come too soon.
Saturday, September 16, 2006
The House "Macaroni" Salad
While mom was manning the grill, it was my job to make what we simply referred to as "macaroni" salad. But it wasn't the elbows with mayo/Miracle Whip, mustard and relish affair that most people are familiar with. This was an unusual combination of ingredients, including tuna, eggs and black olives, that my mom always credited to my dad, who was Hawaiian. Since then, I have been to Hawaii and sampled many teriyaki lunches that always come with white rice and macaroni salad on the side (back in the day, I guess they needed double carbs to pick those pineapples or herd that cattle!). The traditional version seems to involve only pasta and mayonnaise, with perhaps a grating of carrot, but that's it. So I'm not sure what to make of our house recipe, but this is how we always made it, and it is still one of my very favorite dishes. It also intrigues and eventually delights people at picnics and potlucks and such. Give it try while there is still some grilling weather left, why don't you?
Mom's Hawaiian "Macaroni" Salad
4 eggs , hard-cooked, peeled and chopped
1 lb. shell pasta (I prefer medium-sized)
1 cup mayonnaise
1 teaspoon granulated garlic
1 teaspoon celery salt
1/2 teaspoon black pepper
1 can tuna, drained
1 small can chopped black olives, drained
1 large carrot, grated
2-4 scallions, thinly sliced
Place the eggs in a large pot and fill with water. Bring to a boil, and add the pasta shells, cooking until tender. Rinse the pasta until quite cool and drain. Peel and chop the eggs. In a large bowl, stir together the mayonnaise, seasonings, tuna, olives, carrot, and scallions. Add the cooled, drained pasta and the chopped eggs, and stir gently to combine. Refrigerate for several hours or overnight. (You will probably need to add salt the next day according to your taste.) Goes great with teriyaki meats!
Friday, September 15, 2006
The Itinerant Pie-Maker's Road Show
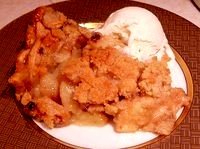
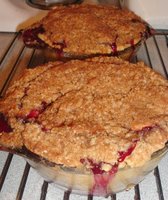
It's called Vanilla Bean Apple Cherry Pie. Wait..say it again...slowly. VANILLA BEAN APPLE CHERRY PIE. Are you weeping with joyful anticipation at just the utterance of those five glorious words? I thought so! Apples, cherries, and vanilla beans are truly a magical combination of flavors, especially topped with a lightly-spiced blond streusel. Divine! But don't take my word for it--better make one for yourself! Here's the recipe:
Vanilla Bean Apple Cherry Pie
(Source: Apple Pie Perfect, Ken Haedrich)
1 9-inch, unbaked pie crust, your favorite recipe
Filling:
1/2 cup sugar
1 vanilla bean (I used 2 teaspoons of vanilla bean paste instead)
8 cups apples, peeled, cored and sliced (I used Paula Reds this time)
1 tablespoon fresh lemon juice
1/3 cup cherry preserves (homemade, if you got 'em!)
2 tablespoons all-purpose flour
Crumb Topping:
1 cup all-purpose flour
2/3 cup sugar
1/4 teaspoon salt
1/8 teaspoon freshly-ground nutmeg (grating whole nutmeg makes all the difference!)
1/4 teaspoon ground cinnamon--optional (I know that the apples, cherries, and vanilla are supposed to be the featured players in this pie, but to me, crumbly topping just doesn't taste right without at least a dash or two of cinnamon!)
1/2 cup (one stick) cold, unsalted butter, cut into 1/4-inch pieces)
Prepare the pastry, chill it for at least an hour, and then roll it out. Place it in a (preferably, glass) pie pan and form an upstanding ridge (I fluted my edges, too, just to be sassy!). Freeze for at least 30 minutes.
Measure the sugar into a large mixing bowl. Halve the vanilla bean lengthwise and scrape the seeds into the sugar, then rub together with your fingertips. (Or you can just mix in vanilla bean paste instead, as I did.) Add the apples, lemon juice, and cherry preserves, and mix well. Set aside for ten minutes. Preheat the oven to 400 degrees. Shake the flour over the apples and mix well. If you're using a whole vanilla bean, take the whole pod and bury it under the center of the pie, just under the top layer of apples. Smooth the top of the filling with your hands, then place the pie on the center rack of your oven. Cover the pie loosely with aluminum foil to keep the vanilla bean from drying out. (Or skip this step if you're using vanilla bean paste.) Bake for 30 minutes.
While the pie is baking, make the topping. Combine the flour, sugar, salt and nutmeg in a food processor and pulse to mix. Scatter the butter pieces over the dry ingredients, and pulse until the mixture resembles fine crumbs. Transfer the topping to a mixing bowl and rub it between your fingers to make larger crumbs.
After 30 minutes, remove the pie from the oven and place it on a large, dark baking sheet covered with foil. Reduce the oven to 375 degrees. Carefully dump the crumbs in the center of the pie, spreading them evenly over the surface with your hands. Press down to compact them. Put the pie on the baking sheet and return it to the oven to bake for another 35 minutes or so, until the juices bubble thickly around the edge. (Cover the pie loosely with foil during the last 15 minutes if necessary to prevent the streusel from getting too brown.)
Transfer the pie to a cooling rack and let cool for at least an hour before serving--preferably, with a scoop of vanilla bean ice cream!
Tuesday, September 12, 2006
Chocolate-Chocolate Cream Pie
(Source: largely based on the classic Betty Crocker recipe)
9-in. pre-baked pie shell
1 1/4 cups sugar
1/3 cup cornstarch
6 tablespoons cocoa (I use five Dutch-process plus one black to make a darker chocolate filling)
1/2 teaspoon salt
3 cups milk (I don't usually have whole milk, so I use 2 cups half-n-half + 1 cup 2% milk or 2 1/2 cups milk plus 1/2 cup heavy cream)
4 egg yolks, slightly beaten
4 tablespoons butter (cut into pieces)
2 teaspoons vanilla
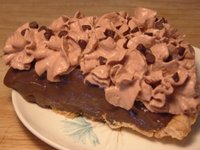
Mix sugar, corn starch, cocoa and salt in a large saucepan. Gradually stir in the milk. Cook over medium heat, stirring constantly, until mixture thickens and boils. Boil and stir for one minute. Stir some of the hot mixture gradually into the egg yolks, then add this mixture back into the saucepan. Boil and stir for another minute. Remove from heat. Stir in the butter and vanilla. (You may wish to strain the custard at this point to make sure it's ultra-smooth.) Pour into the cooled pie shell. Press a piece of plastic wrap down onto the filling. Refrigerate about two hours or until set. Serve with Chocolate Reddi-Whip and a sprinkle of mini chocolate chips (or regular-sized ones chopped up a bit or shavings or what you will).
Monday, September 11, 2006
Weekend in New England (Fanilows, HOLLA!)
Blue Cheese and Walnut Chicken Salad
one whole roasted deli chicken, skinned, boned and cut into bite-sized pieces
1 cup walnut pieces, toasted (do NOT be tempted to skip this step...you'll be sorry)
4 ounces blue cheese, crumbled
1/4-1/2 onion, finely chopped (to taste)
3/4-1 cup mayonnaise
1 teaspoon Dijon mustard (I prefer whole-grained)
2 tablespoons white balsamic vinegar (you can use regular balsamic, but you will turn everything a somewhat unappetizing greyish-purple)
1 tablespoon honey
1 teaspoon celery salt (omit in favor of chopped fresh celery if you have that)
salt and pepper to taste
Other possible additions: one chopped apple OR some halved red grapes, and any fresh herb(s) that floats your boat
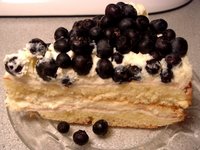
After the poultry swap, we travelled on to tiny Marshfield, VT, to check out a bakery that some friends at work raved about called Rainbow Sweets. When we arrived, we realized that we had already been there some years ago, when we were travelling along route 2 on our way to either New Hampshire or perhaps Maine. And though a bit (ok, more than a bit!) overpriced, the pastries are excellent and the baker-owner is a real character who is worth the price of admission by himself! We were lucky enough to be there on a Sunday when he makes cherry-cheese Danish, so we bought two of those, along with a slice of a gorgeous fresh blueberry torte layered with pastry cream and whipped cream, and also two of the most amazing St. Honore pastries. His version had a puff pastry round on the bottom and a couple of caramel-covered cream puffs on top (like you would use to form a croquembouche--G.J., feeling you here!), with everything glued together with sweetened whipped heavy cream. INCREDIBLE! We had our eye on some of his decadent chocolate desserts, too, but as our bill for five pastries was already almost $21, we stopped there. But if you ever find yourself in Marshfield, VT, it's definitely worth stopping in.
Our final stop before we had to get the chickens back home to New York was lovely Cabot, VT, just another four miles or so beyond Marshfield, and home to the world-famous Cabot Creamery. We got a gander at their massive cheesemaking plant and sampled all of their products before purchasing some of their Private Stock sharp cheddar (very sharp, complex flavor), some Mild Reserve cheddar (great nutty finish!), a flavorful garlic and fine herbes cheddar, a habanero cheddar (yowie!), and their newest creation--Harpoon Cheddar, flavored with Harpoon IPA (India Pale Ale). That ought to keep us in cheese for another week or so...tee hee.
So that was another fabulous fall weekend in New England. And now, the apples are coming in, so stay tuned for the next tale of autumnal splendor coming soon!
Saturday, September 09, 2006
A Great Sadness: The End of the Corn Season
Corn and Potato Chowder
2 tablespoons olive oil
4 tablespoons butter
8 ounces bacon, chopped
2 very large onions, chopped
1 teaspoon celery salt (I would have preferred to use a couple of stalks' worth of chopped celery to be sauteed with the onions, if I would have had any on hand)
1 teaspoon ground coriander
1/4-1/2 teaspoon cayenne pepper
2 teapoons salt (I used about a tablespoon of vegetable salt this time)
1 teaspoon black pepper
1 teaspoon tumeric
1/2 cup all-purpose flour
12 cups chicken broth
3 pounds potatoes, peeled or unpeeled, cut into bite-sized chunks
10 large ears of corn, cut from the cob
2 cups cream (half-n-half, whipping, or heavy--your call)
Garnishes: fresh chives and shredded extra-sharp cheddar (our favorite is McCadam Adirondack Cheddar if you can get it where you live)
Melt the butter with the olive oil in an eight-quart stock pot. Add the bacon pieces and saute until browned. Add the chopped onions and cook for about ten minutes until the onion is translucent. Add all of the seasonings and the flour, stirring well to combine. Cook the floured mixture for about three minutes, then slowly add the broth, stirring constantly. Bring to a boil and add the potatoes. Continue to boil the soup gently for 10-15 minutes or until the potatoes are tender.
Blanch the corn for three minutes (or I just nuke mine on the cob, husks and all, for about eight minutes until it's cooked halfway). You can skip this step if you're using frozen corn. Add the corn to the soup and cook for at least another five minutes. Turn the heat down to very low and add the cream, stirring gently to combine. Taste to correct the seasoning, then serve steaming hot in big bowls, garnished with a few snips of fresh chives and some grated sharp cheddar.
Friday, September 08, 2006
The September Tomato: The First Big Haul!
Sheesh! Now the deluge...and the race to get the rest of them to ripen before the first frost, which could be any second now in this part of the world! :-( Good thing you don't need an oven to make bruschetta--LOTS and LOTS of bruschetta! Oh, which reminds me. I found the yummiest pita chips at Sam's Club. They are called Regenie's Multi Grain Plus Thin Cut Crunchy Pita Chips. It says they contain fiber-rich grains like flaxseed and linseed and are low in saturated fat, but I am not fooled for a moment into believing that they are actually good for you. Nevertheless, they are mighty tasty and just perfect for scooping up some zesty bruschetta made with sweet, sun-ripened garden tomatoes. Just thought I'd pass along that serving suggestion for those of you who are overrun with tomatoes at this time of year! Savor it, friends. It is over all too soon. And the winter is long...much too long. :-(
Tuesday, September 05, 2006
Ovenless but not downtrodden...
I was reading my pal, Randi's blog the other day, and she made a lovely tabouleh salad for a community event. And that reminded me that I also made a tasty sort of Italian-style tabouleh recently from the couscous that I procured from my beloved Trader Joe's. Yes, yes, Italian and tabouleh (which is a traditional middle eastern salad) may be mixing cultures inappropriately, but I assure you that the end result was scrumptious and well worth trying. Plus, it's really quick and easy, and fairly healthful to boot (which is not usually my way)! Here's the recipe:
Italian-Style Tabouleh Salad
1/2 cup boiling water
1 1/4 cup dry couscous
6 tablespoons olive oil
1/3 cup lemon juice
1 tomato, small dice
1/2 onion, finely chopped
1 or 2 roasted red peppers, chopped (you could swap out chopped green peppers here)
½-1 cup black olives, sliced
1/2 cup freshly-shredded parmesan
2 (or more!) tablespoons persillade (or use a couple of tablespoons of chopped fresh parsley and a couple/few cloves of minced garlic instead--I just had persillade on hand so I used it)
salt and pepper to taste
Other possible additions: diced cucumbers and/or garbanzo beans
Stir the boiling water, olive oil and lemon juice into the couscous, cover and let sit five minutes, then fluff with a fork. Add the tomatoes, onions, peppers, olives, persillade (or parsley and garlic), and salt and pepper. Blend ingredients thoroughly, then serve at room temperature, or refrigerate to chill if you prefer (which I do prefer…also to give the flavors a chance to marry).
Just because the oven is on the fritz doesn't mean that we can't have dessert! Here is one of my favorite no-bake treats, riffing on Rice Krispie treats, but this one is made with Golden Grahams cereal and mini-chocolate chips, producing something akin to that campfire favorite, S'mores. This recipe also falls into the "quick and easy" category, and everyone will just gobble them up--which is a good thing, because the cereal loses its crunch after a day or two.
S’more Treats
4 tablespoons butter
4 tablespoons margarine (I am generally anti-margarine, but using all butter makes for great flavor but can make the resulting bars too hard)
1 bag marshmallows (10 oz.?)
1 teaspoon vanilla
8 cups Golden Grahams-type cereal
½- 1 cup mini-chocolate chips
In a very large saucepan or small stockpot over low heat, melt the butter and margarine together. Then add the marshmallows, and cook until completely melted, stirring frequently. Remove from heat and stir in the vanilla, then quickly add the cereal. Stir gently but thoroughly to coat all of the cereal with the marshmallow mixture. Spray an oblong baking dish and your hands with pan spray. Press the cereal into the dish evenly. Sprinkle the top with ¼ - ½ cup of mini-chocolate chips and lightly press the chips down into the bars. Flip the whole thing over and repeat the remaining chips. Let cool to room temperature before slicing and serving.
Monday, September 04, 2006
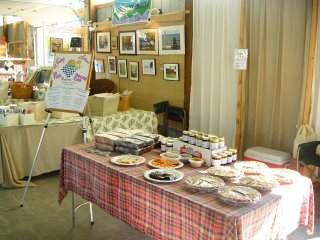
Last batch of market pies...
Apple-Blueberry Pie
2 unbaked pie crusts (recipe of your choice)
2 cups of blueberries
6 Ginger Gold apples, peeled, cored and sliced
1 cup sugar
2 tablespoons corn starch
2 tablespoons quick-cooking tapioca
1 tablespoon lemon juice
1/2 teaspoon cinnamon
1 tablespoon butter
Combine filling ingredients, except for the butter, in a large bowl gently with a wooden spoon. Pour the filling into a nine-inch pie pan lined with one unbaked crust. Top the filling with small pieces of the butter. Cut the other crust into strips and form a lattice top. Crimp edges to seal. Glaze with some egg wash and sprinkling of a coarse sugar if desired. Bake at 425 degrees for about 25 minutes. Reduce oven temperature to 375 degrees, and bake for another 40-45 minutes or until the juices bubble thickly. Cool at room temperature for at least one hour before slicing and serving.
I also made a couple of my very favorite kind of pie for the market, that is to say, PECAN! It's a little early, I suppose, but I never turn down pecan pie no matter what time of year, so I figured there must be some people like me out there. This is my go-to, tried-and-true recipe that came from my dear friend Kurt by way of Betty Crocker, I believe. And the only way that it can be improved upon (according to my blogger pal, Anna) is to toast the pecans beforehand and brown the butter. I agree.
Browned Butter Pecan Pie
one unbaked pie crust
2/3 cup brown sugar (preferably, dark)
1 cup corn syrup (I like half light and half dark, or try the new brown sugar flavor)
1/3 cup butter, melted and browned to at least golden, if not caramel brown in color
1 teaspoon vanilla
3 eggs
2 tablespoons flour
pinch salt
1 1/2 cups pecans, whole, lightly toasted (I've been known to go as high as 2 1/2 cups!)
Mix thoroughly all ingredients except the nuts, then fold in the pecans gently so as not to break them up. Pour filling into a pie pan lined with the unbaked crust. Bake at 350 degrees for about 50 minutes, or until the filling has set (is no longer wobbly). Cool thoroughly before serving, preferably with a scoop of vanilla ice cream!
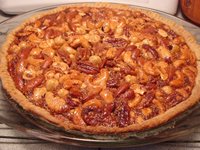
Unfortunately for me, both pecan pies sold at the market, so I didn't get to take one home for my dessert! ;-) I considered whipping up another one, but I remembered a similar recipe that I had been wanting to try for a long time called Fruits of the Forest Pie, sort of like pecan pie but made with mixed nuts. Once again, this is an amalgamation of Ken Haedrich's recipe from his book, Pie, and the pie that won first place in the nut category in the 2003 National Pie Championships from a woman named Emily Lewis. It turned out very good, but I used a raw nut mix from Trader Joe's, and I toasted the nuts myself. When I make it again, I might buy pre-roasted nuts (no salt or lightly salted), and I definitely want macadamias involved next time, too! Still, this was a yummy pie, the ultimate nut-lover's experience!
Fruits of the Forest Pie
one unbaked pie crust
4 eggs, lightly beaten
2/3 cup packed brown sugar
1 teaspoon vanilla
I cup light corn syrup (I used the brown sugar flavor instead)
1/2 teaspoon salt
5 tablespoons melted butter, melted and browned (between golden and caramel-brown)
2 1/2 cups lightly toasted mixed nuts
Whisk together all ingredients except the nuts until thoroughly combined. Gently fold in the nuts so as not to break them up. Pour into a pie shell lined with the unbaked crust. Bake at 350 degrees for 45-50 degrees or until filling is set (no longer wobbly). Cool completely before slicing and serving.
Friday, September 01, 2006
Fugly Contest Cake
There has been a cataclysmic event in my life--that is, the loss of my oven. The gas man came yesterday to fix the problem, but after replacing both the tank and the regulator, it still isn't working. So it's probably the oven valve, which is very bad news. The part alone is $250, plus a couple hours of labor, so you might as well buy a new oven! And I'm not sure how my landlady is going to feel about that. UGH! Seriously, I am a food blogger, for cripes' sake! How long will I survive without an oven?? Plus, I am supposed to sell at the farmers' market again soon! AARRRGGGH!!
Anyway, back to the bundt contest. The deadline was today, so last night, I borrowed my next-door neighbor's oven to bake my cake. And as it turns out, his oven is almost as bad as mine! After baking for 45 minutes, it still looked like raw batter, so I cranked up the heat by 25 degrees. 15 minutes later, still not much was happening, so I crankled it up another 25 degrees. 15 minutes later, it seemed done, but now the top was burned! I didn't have the time--or the ingredients--to start over again, but I figured I could slice off the top, and it would be inverted anyway. Or would it? Though I had liberally greased and floured the pan, it stuck, and some of the cake's surface ripped off as I released it from the pan. Plus, it was still a bit underbaked near the center. Then the glaze I made, though tasty, came out pretty thick when cooled. The good part is, it tastes like maple candy. The bad part is, it kind of hides the detail in the cake, which goes against the whole point of the Nordicware baking contest! Of course, for this particular cake, more coverage may be a good thing, as it's just FUGLY. Below is the evidence thereof, and yes, tragically, the photo had to be submitted along with the recipe. [sigh] Oh well, you win some, you lose some. I'm losing this one. Too bad, as I really wanted the holiday tree pan and the sand castle pan :-(
Still, the cake was tasty, so if anyone out there would like to make it, here's the recipe:
Wild Blueberry-Maple Streusel Pound Cake
Maple Sugar and Walnut Streusel:
½ cup flour
¼ cup brown sugar
¼ cup maple sugar
½ teaspoon cinnamon
¼ teaspoon salt
6 tablespoons butter, cold, cubed
½ chopped walnuts, toasted, chopped
Blueberry Pound Cake:
2 sticks butter, softened
1/3 cup shortening, plus extra for lubing the pan
5 large whole eggs
3 cups sugar
1 teaspoon baking powder
1/4 teaspoon salt
3 cups all-purpose flour (measure on the 3rd and last sift)
1 cup whole milk or half-n-half
1 teaspoon vanilla
3 cups blueberries (preferably, wild)
Maple Glaze:
2 tablespoons butter
¼ cup maple syrup
1 teaspoon vanilla
1 cup powdered sugar
Preheat oven to 325. In a food processor, pulse together the dry ingredients for the streusel (the flour, sugars, cinnamon and salt). Add the pieces of cold butter and pulse 10-12 times or until the pieces are the size of tiny peas or it looks like coarse meal. Add the chopped walnuts and mix in gently with your fingers. Place the streusel in the refrigerator until the cake batter is prepared.
Grease bundt pan liberally with shortening and lightly flour entire surface. (Or the pan spray with flour for baking makes this even easier!) Cream butter and shortening together at slow mixer speed. Add sugar and eggs, one at a time, alternating with the sugar. Begin and end with sugar. Scrape bowl often. When all added, set mixer on high speed for exactly four minutes. Sift flour three times, adding baking powder and salt on last sift, then measure 3 cups. Add vanilla to milk and stir. Add milk and flour to mixer bowl, alternating ingredients, beginning and ending with flour, but reserve the last 1/2 cup of flour to toss with the blueberries before gently folding them into the batter by hand. Carefully spoon about one third of the batter into the prepared bundt pan and even out the top with a spatula, then top with about half of the prepared streusel mixture. Top that layer with another third of the batter and the remaining half of the streusel. Add the last third of the batter on top, and smooth again with a spatula.
Bake at 325 degrees for an hour to an hour and 15 minutes depending on your altitude, humidity and oven calibration. Test by inserting a knife or other cake tester. It's done when it comes out a little oily but no batter. Cool on rack precisely 10 minutes and turn immediately out on a plate.
To make the glaze, melt two tablespoons of butter in a small saucepan with the maple syrup. Remove from heat, add the vanilla, and whisk in a cup of powdered sugar until smooth. Spoon onto the top of the bundt cake and let cool until set. Cake may be served warm or cold.