Friday, March 31, 2006

Chewy, nutty, multigrain goodness!


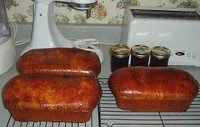
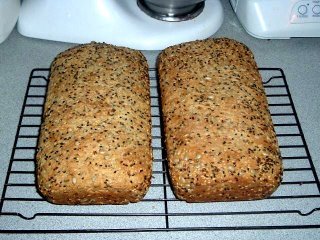
Dear readers, I hope you have been noting my faithful compliance with my New Year's resolution to bake more bread. And not that I have joined the Lo-Carb Cult or anything, but I have really been craving a good whole grain bread. Now I have been known to buy Milton's original, multi-grain bread out of Del Mar, CA (but available at your local Sam's Club), touted as the best-tasting bread in the world or some such. And it is pretty good, but a wee bit pricey (can you tell that I live on a teacher's salary and that how to save a buck is an ongoing theme here at Lindsey's Luscious?). So as usual, I wanted to be able to make my own multi-grain loaf at home and have it be, well, edible. Lo and behold, the good people at Cook's Illustrated must have heard my prayer, because they recently published a fine recipe for just such a bread. The picture shows the result of my first attempt, and I was pleased with the loaves that I produced.

The one important thing I would do differently is NOT assume that there would be more oven spring upon baking. Indeed, there was seemingly none at all! I had only let them rise to the top of the pan for their final proof (as it was getting late and I wanted to bake them and then get to bed!). Next time, I would let them rise to at least an inch or more OVER the top of the pan before baking. As a result, my loaves were a little shorter (and denser) than I would have preferred, but they sure were TASTY, especially toasted and buttered! Yum!

A couple of additional notes on the recipe:

I used a whole-grained porridge mix from King Arthur Flour, and after the requisite hour of soaking in hot water, it looked like...well, it looked the same as it did when I first poured the hot water over it! So I ended up cooking it on the stovetop for maybe 45 minutes until it was good and porridgy before continuing with the bread. Also, though the recipe calls for an oatmeal topping, I had another King Arthur item hanging around my freezer (can you tell I'm in spring cleaning mode?), a bag of seeds labelled "artisan bread topping," if memory serves. So I used that instead. But I would recommend an egg wash for the top of the loaves instead of just cooking spray. It would help even the oatmeal stick better, plus make your loaves pretty and shiny! And with these caveats in mind, I give you...

Multigrain Bread
By: Erika Bruce-CI

6 1/4 ounces 7-grain hot cereal mix -- 1 1/4 cups
20 ounces boiling water -- 2 1/2 cups
15 ounces unbleached all-purpose flour -- 3 cups
7 1/2 ounces whole wheat flour -- 1 1/2 cups
4 tablespoons honey
4 tablespoons unsalted butter -- melted and cooled
2 1/2 teaspoons instant yeast
1 tablespoon table salt
3/4 cup unsalted sunflower seeds
1/2 cup old-fashioned rolled oats

Place cereal mix in bowl of standing mixer and pour boiling water over it: let stand, stirring occasionally, until mixture cools to 100ºF and resembles thick porridge, about 1 hour. Whisk flours together in a medium bowl.Once grain mixture has cooled, add honey, melted butter, and yeast. Stir to combine. Attach bowl to stand mixing fitted with dough hook. With mixer running on low speed, add flours, 1/2 cup at a time, and knead until dough forms a ball, 1 1/2 to 2 minutes: cover bowl with plastic wrap and let dough rest for 20 mintues. Add salt and knead on medium-low speed until dough clears the side of the bowl, 3 to 4 minutes (if it does not clear the side of the bowl, add 2 to 3 tablespoons additional all-purpose flour and continue mixing); continue to knead dough for 5 more minutes. Add seeds and knead for another 15 seconds. Transfer dough to a lightly floured surface and knead by hand until the seeds are dispersed evenly and the dough forms a smooth, taut ball. Place dough into a large greased container and cover with plastic wrap. Allow to rise until doubled, 45 to 60 minutes.Adjust the oven rack to middle position and heat oven to 375ºF. Spray two 9 by 5-inch loaf pans with cooking spray. Transfer dough to lightly floured surface and pat into 12 bu 9-inch rectangle; cut dough in half crosswise with a knife of bench scraper. Shape loaves and coat with oats; cover lightly with plastic wrap and let rise until double in size, 30 to 40 minutes. (Dough should barely spring back when poked with knuckle). Bake until internal temperature registers 200ºF on instant read thermometer, 35 to 40 minutes. Remove loaves from pans and cool on wire rack before slicing.

Wednesday, March 29, 2006

Lust and Avarice: A Tale of Cherry Pie


In my last post, I referenced both my friend, June, and an amazing cherry pie. And I promised to tell the tale and follow through with the recipe, so I mean to make good on my promise (redemption seems a worthy aim during the Lenten season). First, let me tell you about June. Now, by all outward appearances, June is the most reasonable of persons. Indeed, she is a psychology professor and an expert on the brain itself. But when it comes to cherry pie, she loses all rationality, and her many virtues quickly yield to such vices as lust, greed, avarice and dare I add, gluttony? (I know, 'tis unsavory to mention that particular sin on a food blog! Tsk, tsk!) Do you doubt me? Listen to this anecdote and then judge...

Around the holidays, say at Thanksgiving or Christmas, June becomes quite prolific in the kitchen. In fact, she wowed her family a couple of years ago with a sublime Rachael Ray creation that I have since added to my own harvest-time repertoire, Pumpkin Soup with Chili Cran-Apple Relish (ok, fine, I'll post the recipe for that, too!). Moreover, in a show of great devotion and attentiveness to her family's desires, she offers to bake each person his or her own favorite pie, whatever it might be. Doesn't that sound extraordinarily kind and generous? But NO, it is a thinly-veiled deception! You see, she makes everyone else a pie, so that she may make herself her beloved cherry pie and be able to consume it all--without sharing! How's that for holiday spirit? Lust, greed, avarice, gluttony, I've said, and I'll say them again! Of course, all villians get their come-uppance at the end of a good story, and June's is no exception. As is always the way, her family never shows as much interest in their requested pies as they do in her coveted cherry pie, and her devious plan is always thwarted! So she has taken to baking two cherry pies at each major holiday, but they are devoured just as quickly, or perhaps doubly so. Poor June!

Because her tale is so tragic, I have taken to baking her her own special cherry pie when the occasion warrants. I have used the recipe on the back of the Oregon pie cherry label with great success, but one day, I saw a show on the Food Network about a bakery in Michigan that Mario Batali raves about, and I quote him, "I don’t think I've ever had as good a pie as Grand Traverse Pie Company's Cherry Crumb Pie... It's a religious experience." I think it's only right to tell you that you can buy their pies online, but for a pretty penny (about twenty bucks without shipping)! So when I saw that pie I thought, I could make something like that! So here is the recipe that I adapted and prepared for June's last birthday (that ended in a big -0!). She declared it the best she'd ever had, and that is high praise, considering the source. I think you'll really like it, too.

Cherry Pie with Almond Crumb Topping

1-9 inch single pie crust

Filling
2 cans pitted tart red cherries – water pack (or 4 cups)
1 ½ cups sugar, divided
1/3 cup cornstarch
pinch of salt
1 tablespoon butter
3-4 drops almond extract
½ t vanilla

Topping
¼ cup almonds (ground)
½ cup all-purpose flour
½ cup packed brown sugar
pinch of salt
4 tablespoons butter, cold, cubed
½ cup sliced almonds

Prepare pastry and line a 9-inch pie plate. Flute the edges. Chill in the fridge while you make the filling.

Drain the cherries and reserve one cup of the liquid (no more!). In a saucepan, combine ¾ cup sugar, the cornstarch, and a dash of salt. Stir in reserved cherry juice. Cook and stir over medium heat until thickened and bubbly. Cook and stir one minute more. Remove from heat and stir in the remaining ¾ cup sugar, butter and extracts, then the cherries. Fill pastry with the cherry mixture.

In a food processor, grind ¼ cup of almonds. Add the flour, brown sugar and salt, and pulse until blended. Add the butter and pulse until the mixture resembles coarse crumbs. Then stir in the ½ cup of sliced almonds (don’t process after that!). Sprinkle the crumb topping over the cherry filling. Cover edge of pie with foil. Place pie on a lined baking sheet as it WILL bubble all over! Bake at 375 degrees for 30 minutes. Remove foil and bake for about 30 minutes more. Cool on wire rack (at least two hours!) before serving.

Oregon Cherry Pie

1 1/2 cup sugar (more or less to taste)
3 tablespoons corn starch
2 cans Oregon Red Tart Pie Cherries, drained, reserve juice from one can
1/4 teaspoon red food coloring (optional)
1/4 teaspoon almond extract (I add at least a half teaspoon of vanilla, too!)
1 tablespoon butter


Pastry for two-crust 9-inch pie

Preheat oven to 400 degrees F. Drain the cherries and reserve the juice from only one can. In a saucepan, stir the cherry juice into the combined mixture of the cornstarch and sugar. Cook over medium heat, stirring constantly until thickened. Gently stir in cherries and optional ingredients. Remove from heat. Pour filling into pastry lined pie pan. Dot with butter. Adjust crust, seal and vent. Bake 45 minutes or until crust browns and filling begins to bubble. If necessary, cover edges with aluminum foil during the last 15 minutes to prevent over-browning. Cool pie several hours to allow filling to thicken before slicing. Makes 8 servings.


Pumpkin Soup with Chili Cran-Apple Relish

Difficulty: Easy, Prep Time: 20 minutes, Cook Time: 25 minutes, Yield: 8 first course or 4 entree servings

1 tablespoon extra-virgin olive oil
2 tablespoons butter
1 fresh bay leaf
2 ribs celery with greens, finely chopped
1 medium yellow onion, finely chopped
salt and pepper
3 tablespoons all-purpose flour
2 teaspoons poultry seasoning or 2 teaspoons ground thyme
2 teaspoons hot sauce, or to taste
6 cups chicken stock
1 (28-ounce) can cooked pumpkin puree
2 cups heavy cream
1/2 teaspoon freshly grated nutmeg

Relish:
1 crisp apple, such as McIntosh or Granny Smith, finely chopped
1/4 red onion, finely chopped
2 tablespoons lemon juice
1/2 cup dried sweetened cranberries, chopped
1 teaspoon chili powder
2 teaspoons honey
1/2 teaspoon ground cinnamon

Heat a medium soup pot over medium to medium high heat. Add the oil and melt the butter. Add bay, celery, and onion. Season the veggies with salt and pepper. Cook 6 or 7 minutes, until tender. Add flour, poultry seasoning and hot sauce, to taste, then cook flour a minute. Whisk in chicken stock and bring liquid to a bubble. Whisk in pumpkin in large spoonfuls to incorporate it into the broth. Simmer soup 10 minutes to thicken a bit then add in cream and nutmeg. Reduce heat to low and keep warm until ready to serve.

While soup cooks, assemble the relish: combine apple, onion, lemon juice, cranberries, chili powder, honey and cinnamon. Adjust seasonings in soup and relish and serve soup in shallow bowls with a few spoonfuls of relish.

Tuesday, March 28, 2006

Paying my debts in baked goods...


It seems every time I try to leave town, something catastrophic happens--usually of an automotive nature--and last week was no exception. I was scheduled to attend a conference in Albany, and I was hurrying down the Northway (as I-87 is known in these parts) to meet my carpool of colleagues. Mind you, I knew I was tempting fate. The evil money-grubbers at the dealership where I took my car the week before last charged me 65 bucks to say, "You need new tires." And they had warned me that the right rear tire was ready to blow any second. Even my roommate had repeatedly advised me to keep to the small, state route and off the freeway ("Stay on the path--beware the moors!"). But did I listen? NOOOO! Sure enough, that tire blew out on the Northway, and even though I was passing someone when it happened, fortunately, there wasn't an accident. Actually, I barely felt it--I wasn't even sure what happened at first until I heard a strange whirring sound, then slowed down until it started thumping! Also, I was lucky in that this happened right at an exit, so I pulled off, and coasted to a stop right in front of a handful of houses. Now I have no cell phone at the present time, so I began knocking on doors. No one was home at the first one, but on my second attempt, a very nice man let me in to use his phone to call my colleagues to come pick me up and to get my longsuffering next-door neighbor (who also had begged me to get new tires before this happened!) and my roommate to come deal with the car and get it home. Long story short (too late!), I made it my conference, and between the nice man whose house my car was beached in front of, my neighbor and my roommate, they managed to get the donut spare on the car and get her back home until I could have four, brand-spanking new tires put on at Sam's Club. (They are really the best place to go for tires, by the way. Not only are they the cheapest, but you get free road hazard and also rotating and balancing for life! Just FYI...)

So clearly, I had some debts to repay, not only to the people mentioned above, but also to a nice lady at school who works in the business office who gave me a ride home after my conference. And as is my way, I pay my debts in baked goods! First, for Ken and Cyd (my neighbor and roommate, respectively), they have been bugging me to make a berry pie for them forever. And though I usually use frozen berries when they're not in season, I happened to have two cans of Oregon Blackberries on hand. (This was a none-so-subtle hint from my neighbor awhile back when I asked him to pick up some canned cherries for me, and he slipped some blackberries in there as well!) Do you folks know about Oregon (brand) canned fruit? This is NOT fruit pie filling, mind you--this is just the berries. I discovered them when I was trying to find pie cherries to make a pie for my dear friend, June, who is disturbingly obsessed with cherry pie. But I can never find (sour) pie cherries in the supermarkets or even at farmer's markets around here, and I consider it a perpetual mystery that you can't buy them frozen either. So you can either get canned cherry pie filling (BLECH! The cherries get very mushy as they are cooked twice, plus the ratio of goo-to-fruit is unacceptable!), or buy canned pie cherries and make your own filling. This is infinitely preferable, in my opinion, unless you can find them fresh. Anyway, the pie recipes are on the back of the labels on the cans, and they are just excellent. Below is the recipe for the blackberry pie, and it was the best one I've ever made! The filling was just perfect--not too tight or too runny. (One day, I will also post my famous Cherry Crumb Pie recipe made with the Oregon pie cherries, but I already have too many recipes to share today , and the post is reaching encyclopedic proportions as it is!) I would like to add that I hold no stock in the Oregon Fruit Company, but as I grew up in Oregon and consider it home, it makes me happy to give them a shout out. (HOLLA!)

Because I myself do not enjoy fruit pie, I decided that I deserved a special dessert, too. After all, I had to endure Sam's Club on a Saturday morning, did I not? ;-) So I decided to try the sumptuous Lemon Almond Torta from Melissa over at the wonderful Traveler's Lunchbox site. As she has already posted a gorgeous picture and the recipe, I will just provide the link to it. I would add two recommendations to the recipe. One, make sure to use blanched almonds for the almond-flour mixture in the cake. I used unblanched, and the texture wasn't as refined as I would have liked. Secondly, I don't know what was the vision was for spreading eight tablespoons of lemon curd over the cake and then three more in the middle? It ended up having a big pool of lemon in the center (making it difficult to determine whether the cake was done, so I may have overbaked it by five minutes), and I simply would have preferred an even layer of lemony goodness all over the cake. So that's my $.02 on the recipe. But do try it! It is delicious! I gave half of the blackberry pie and a couple of pieces of the lemon-almond cake to Ken (refer to the picture above), and also a piece of cake to the lady in the business office who gave me a lift home on Friday, as she happens to be very keen on lemon desserts as I am! And of course, the roomie got the other half of the pie and some of the cake as well. ;-)

For the man who let me use his phone and loaned us tools to help remove the flat tire, I made some cookies from a recent issue of Martha Stewart's Everyday Food. It was a recipe sent in by a reader for Chocolate Pecan Pie Bars. Decadent! I actually cut the chocolate in about half (I know, I know...the chocoholics are screaming blasphemy, but I like the nuts to dominate rather than the chocolate--just my preference), and instead of just pecans, I used a combination of pecans, walnuts, almonds, and macadamias. Delish! The recipe is also below. And finally, what is pie or cake without ice cream? Since I was out of the beloved Edy's Double Vanilla, I decided to make my own damn Double Vanilla, adapting a recipe from our old friends across the lake, Ben and Jerry. To their sweet cream base, I added a whole tablespoon of Watkins double-strength vanilla (I adore Watkins, especially for ground cinnamon, vanilla and other extracts), and also a tablespoon of Nielsen-Massey's vanilla bean paste so that the ice cream has the highly-desirable specks in it! I have a small, Cuisinart brand electric ice cream maker that produces soft-serve in 20-30 minutes, but I like to "ripen" the ice cream for another two hours in the freezer. And I take a tip from Martha by lining a large loaf pan with a double-length of plastic wrap, filling it with the soft ice cream, covering it with the remainder of the length of plastic, and then freezing it until firm. This makes it easy to scoop in one long motion down the loaf pan. Works great! Recipe also follows. We'll just call this post, DESSERT OVERLOAD! Tee hee!

Oregon Blackberry Pie

2 cans Oregon Blackberries*
6 tablespoons sugar (more or less according to your preference)
3 tablespoons cornstarch
2 tablespoons lemon juice
1 tablespoon butter
Pastry for a two-crust pie

Drain the berries and reserve the syrup from one can. Stir the blackberry syrup into the combined mixture of the cornstarch and half of the sugar. Cook over medium heat, stirring constantly until thickened and clear. Cook 1 minute longer. Gently stir in remaining sugar, blackberries and lemon juice. Let stand while preparing pastry. Line a 9 inch pie pan with pastry and fill with fruit filling. Dot with butter. Adjust top crust on pie, cutting slits for steam to escape (or I cut out little hearts with a tiny cookie cutter myself!), and seal. Bake at 400 degrees for about 30 minutes or until filling is bubbly and crust is golden brown. Makes one 9-inch pie.

*Oregon Boysenberries, Blueberries, Loganberries, Marionberries or Red Raspberries may be substituted.

Chocolate Pecan Pie Bars


1/2 cup unsalted butter, room temperature
2 tablespoons unsalted butter, melted
1/4 cup light brown sugar, packed
1 1/4 cups all-purpose flour
1/2 teaspoon salt
3 large eggs
3/4 cup light corn syrup
1/2 cup granulated sugar
2 cups semi-sweet chocolate chips
2 cups pecans, coarsely chopped

32 servings, 1 hour 25 minutes 25 mins prep

Preheat oven to 350. Line bottom and sides of a 9x13 inch baking pan with aluminun foil. In the bowl of an electric mixer, beat 1 stick room-temp butter, brown sugar, flour,and salt until coarse crumbs form.
Pour mixture into prepared pan; press firmly into bottom. Bake until lightly browned, 25-30 minutes. Let cool, 10 minutes.

Meanwhile, in same large bowl, mix eggs, corn syrup, granulated sugar, and 2 TBS melted butter until well combined. Add chocolate chips and pecans; spread over crust. Bake until set, 25-30 minutes. Cool completely in pan before lifting out (use foil to lift). Cut into 32 bars.


Ben & Jerry's Sweet Cream Base #1 (This is Ben and Jerry's most popular base, as it has a creamy texture, medium body, and a subtle, understated taste. It's especially good as a background for fruit, cookies, and candy.)

2 large eggs (Note: This does call for uncooked eggs to those that should not eat them such as children, pregnant women or people with compromised immune systems. Also, I sometimes use just one egg for a lighter-textured ice cream.)
¾ C sugar (I sometimes pull back to a generous 1/2 cup of sugar as cream is sweet by itself.)
2 C heavy or whipping cream
1 C milk


Whisk the eggs in a mixing bowl until light and fluffy, about 2 minutes. Whisk in the sugar, a little at a time, then continue to whisk until completely blended, about 1 minute more. Pour in the cream and milk and whisk to blend. (Note: I often make this is a blender.) Makes 1 quart.

Sunday, March 19, 2006

Ciabatta!


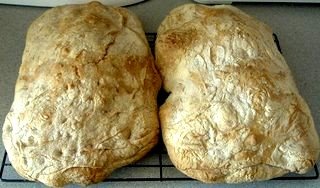
Dear readers, fear not! I have not forgotten my New Year’s resolution to bake more bread. And since I am on spring break and have the luxury of free time at my disposal, I thought I’d try something challenging. No, no, not the laminated doughs yet! I will get there…one day! But I was reading through the wonderful Cook’s Illustrated message boards, and there was a brave fellow named Tim who decided to cook his way through the entire volume of The Bread Baker’s Apprentice (in a similar vein as the Julie/Julia Project). It makes for fascinating reading if you like to bake, and you’ll also learn a lot vicariously through his experiences with the recipes. One that he was less than impressed by, though, was their ciabatta. So on the recommendation of another wise and helpful baker named Amy, he decided to try Craig Ponsford’s ciabatta from Maggie Glezer’s Artisan Baking Across America. Both Tim and Amy highly praised their resulting loaves, so I thought I’d give it a shot myself! Well, as you can see from the pictures, I don’t think I did too bad of a job for my first attempt! It’s really an interesting process. It starts with a biga, a type of starter that uses mostly wild yeasts to develop very slowly (it took two days in my cold house!). Then you mix the biga with more flour, yeast, salt, and so much water that the resulting dough is really more aptly described as a batter. And as it proofs, you stop it every twenty minutes, pour it out onto the bench, carefully stretch it out to approximately double its size, and do a very gentle turn in lots of flour before scooping it back into the bowl and letting it rise for another twenty minutes. You repeat this four times before leaving it to proof the rest of the way. It’s very cool…you feel like you’re working a cloud of dough! And it is surprising how it comes together after all four turns. In fact, you work the dough gently but so much and so often, it’s amazing to me that it doesn’t come out as hard as a rock. But instead, the resulting ciabatte should be full of the most tantalizing holes—the swiss cheese of breads!

CRAIG PONSFORD'S CIABATTA

Biga:
1/2 teaspoon instant yeast
1 cup warm water (110-115 degrees)
1 1/3 cups bread flour
2/3 cups all-purpose flour
2 tablespoons whole wheat flour
2 tablespoons rye flour
3/4 cups water

Sprinkle the yeast over the warm water, stir, and let it stand for 5-10 minutes. Mix the flours in the bowl of a stand mixer. Measure 1/2 teaspoon of the yeasted water into the flour mixture (throw the rest away—this is only to be able to measure 1/384 teaspoon of yeast). Then add the 3/4 cup water, chilled in the summer, warm in the winter. This dough will be very firm and resistant to kneading, but persevere! Add an extra tablespoon or two of water only if absolutely necessary. Place into an oiled container, cover and ferment overnight (18–24 hours) at room temperature. (Don’t be alarmed if it does nothing for at least ten hours. This is as it should be. It will eventually triple in volume and then flatten out, appearing to have the texture of lumpy oatmeal.)

Dough:
2 cups plus 3 tablespoons all-purpose flour
1 teaspoon instant yeast
2 3/4 teaspoons salt
1 1/2 cups lukewarm water
fermented biga

Place all ingredients into a mixing bowl fitted with a paddle or dough hook. Mix on low speed until a rough dough is formed. Increase speed to medium and continue to work the dough until it is fairly smooth, about 5 minutes. (This is a very soft dough—add extra water if it is too firm.)

Place the dough into an oiled container large enough for the dough to double in bulk. Cover and ferment for 20 minutes. Scrape the dough out onto a well-floured bench, carefully stretch or press the dough out to double its size, and do a gentle turn by the folding method. Rest for another 20 minutes and repeat. You will do a turn at 20, 40, 60 and 80 minutes, and then let the dough finish proofing for another 70-100 minutes (a total proofing time, with turns, of 2 1/2 to 3 hours). You will be surprised at how much the dough firms up during this process!

Heavily flour a couche or tea towels (I used one flour sack towel for both loaves). Flour the top of the dough and the work surface and turn the dough out. With a metal scraper, cut the dough approximately in half. Gently shape and stretch into rectangles, then loosely fold into thirds like a letter. Place ciabatte seam-side down on the couche or towels, sprinkle the tops with more flour and loosely cover. Let them proof until they are very soft and well-expanded, and barely spring back when gently pressed, about 45 minutes.

After shaping the dough, arrange a rack on the second-to-top shelf in the oven and place a baking stone on it (unglazed ceramic tiles work great, too!). Preheat the oven to 450 degrees. When ciabatte are ready to bake, place a piece of parchment paper on a peel. Carefully flip the loaves onto the peel, seam side up, and stretch them very gently to make them rectangular. Dimple the dough all over with your fingertips, pressing all the way down to the paper (don’t worry—the bread will recover in the oven!). Slide the loaves on the paper onto the baking stone. Bake them until very dark brown, 35-40 minutes, rotating halfway through the bake time. Let cool on a rack.

*For step-by-step pictures of the whole process, check out Lisa's blog.

Now that you have produced two gorgeous ciabatte, what will you do with them? Well, I have two suggestions. First of all, you might consider making my favorite sandwich in the world, what we refer to around my house as simply “The Italian Sandwich.” However, I visited New Orleans for the first time about four years ago, and discovered that my special sandwich was very similar to a muffaletta. Who knew? Whatever you call it, here is the methodology. Before you construct the sandwich (hours or even the day before is preferred), combine sliced mushrooms, olives, and roasted red peppers in a container. Add a clove or two of minced garlic, and cover with half oil and half vinegar, enough to cover the veggies. Refrigerate the mixture and give it time to marinate. Later, slice your ciabatta loaf in half and pile on hot cappicola, mortadella, Genoa salami, and provolone and/or mozzarella cheese. Spoon on a thick layer of the marinated veggie relish, and top with the other half of the bread. Press the sandwich together a bit, and either heat it in the oven for a few minutes or just nuke it for 30 seconds until everything is warmed through and delightfully juicy! Heaven!

You still have another loaf of ciabatta to contend with…what now? Ok, here’s another idea, similar feeling, different form. How about a wonderful panzanella, a Tuscan bread salad? I had to take something to a potluck tonight, and this is what I came up with. I cut the ciabatta into cubes, and fried them in olive oil (and a little of the bacon drippings leftover from breakfast) until they were golden brown and crispy, then set them aside. In another large bowl, I combined:

chopped tomatoes (2-4, depending on size—or you could use something like Muir Glen’s organic diced tomatoes in the winter)
1 red onion, very thinly sliced
1 can of olives, sliced
1 can of cannellini beans, drained
2 roasted red peppers (from a jar), sliced
2 cubes or about 4 tablespoons of pesto (because I didn’t have any fresh basil)
1/4-1/2 cup vinaigrette, plus a few tablespoons of balsamic vinegar
2 cloves of minced garlic
salt and pepper to taste

Chopped cucumber is also traditional, but I didn’t have one on hand. I did add some salami (8 slices) and pepperoni (16 slices), very thinly sliced—though cubed would be preferable. I let this mixture marinate for a couple of hours in the refrigerator. Right before the party, I added the ciabatta croutons and about 2 cups of cubed mozzarella, and stirred everything together. It was delicious, if I do say so myself! And even though many traditional recipes call for soaking stale bread with water before tearing it into chunks for the salad, I liked how my version stayed crunchy and was not soggy. But see what you think. Obviously, you can riff on this dish, adding things you like, and leaving out the things you don’t.

Whatever you choose to do with it, try your hand at making the ciabatta. It's fun!

Thursday, March 16, 2006

This one goes out to the dogs I love....


An acquaintance of mine in the PBGV community (WHAT??? That's a Petit Basset Griffon Vendéen, a small, shaggy rabbit hound of French origin, and I have two of them--you can see young Grady there to the left) is putting together a canine cookbook, and she invited me to share my favorite recipes for publication. Well, I obliged, of course, but it made me realize that I hadn't even shared these recipes on my own blog yet! Forgive me, dear readers and the dog lovers among you. I shall right that wrong immediately! These love shots go out to my own beloved brood of four: Percy the cocker mix (just turned 15 yesterday!), Rosie the basset hound (almost 10), Prunelle the PBGV (almost 5), and Grady the PBGV (2).

Dog Cookies (from The Inn at 410, Flagstaff, AZ)

2 cups quick-cooking oats
1/2 cup margarine, cut into pieces
4 beef or chicken bouillon cubes
2 cups boiling water
2 cups whole-wheat flour
1-1/2 cups yellow cornmeal
2 tablespoons sugar
1 cup skim milk
2 large eggs
2 cups grated cheese (optional)
2 to 4 cups all-purpose flour

Preheat oven to 350 degrees. Spray cookie sheets with nonstick cooking spray.

Measure oats into a medium bowl, top with pieces of margarine and the bouillon cubes. Pour in boiling water and let sit 10 minutes to dissolve the margarine and bouillon cubes. Mix well, then add whole-wheat flour, cornmeal, sugar, milk, eggs and optional cheese. Add enough of the all purpose flour to make a stiff dough. Mix well, using hands if necessary.

Roll out dough. The thinner the dough, the crisper the baked treats will be. Use bone- or cat-shaped cookie cutter to cut out cookies. Bake on prepared cookie sheets until hard, 5 to 15 minutes depending on how thin the dough is rolled. Remove from cookie sheets and cool completely.

Peanut Butter Dog Biscuits (adapted from Crazy Canine Critters Club)

1/2 cup water
1/2 cup oil
2 eggs
3 tablespoons peanut butter
2 teaspoons vanilla
2 cups flour
1/2 cup cornmeal
1/2 cup oats

Blend wet ingredients together. Whisk dry ingredients together and mix into wet mixture to form a ball of dough. Roll out and shape. Put onto a non-stick cookie tray or lightly greased one.

Cook 20 minutes at 400 degrees F. Turn off oven and allow the biscuits to cool in oven until crisp and hard. Store in airtight container.

Liver Treats (I have repressed the source of these!)

Preheat oven to 350 degrees. Spray a 9 x 13 baking dish with nonstick cooking spray.

Purée in blender or food processor:
1 – 1 ½ pounds of liver
2-3 eggs
1 can of vegetables (carrots, sweet potatoes, pumpkin, green beans, peas, etc. and include the juice)
handful or so of shredded cheese (optional)

Mix separately:
1-3 tablespoons of bouillon granules
4 tablespoons wheat germ
2-4 tablespoons bacon bits (optional)
1 teaspoon garlic powder or granules (NOT salt!)
1 – 1 ½ cups whole wheat flour (or all-purpose)
1 – 1 ½ cups corn meal

After combining separately, mix wet and dry ingredients together in a very large bowl until it’s the consistency of meat loaf—clabbery and reluctant to drop off a utensil or hand! Transfer to prepared baking dish and bake for 20-30 minutes at 350 degrees (depending on your oven and the desired consistency—for example, if you want to use the treats to hide pills in, bake it for the lesser amount of time).

Turn out of the pan after baking and cool for 10-15 minutes and then cut into the size pieces that you prefer. (For a crunchier treat, you can even bake them a second time after cutting them into pieces until they are browned all over and hard.) The treats will keep for about a week in the refrigerator or for months in the freezer.

Sunday, March 12, 2006

Decadent Lasagna!

Whew! It's finally spring break, and even though I'm not travelling anywhere this year (BOO HISS!), it's nice to have time to myself just to relax, and sleep, and read, and take hot baths, and watch movies, and catch up on Martha and Oprah, and play with my dogs, and of course, COOK and then blog about it! And today, I had a hankering for lasagna--not just that regular workaday creation made with, say, prefab spaghetti sauce and a carton of cottage cheese, NOOOO! I decided to make my favorite lasagna from the best, but perhaps the most complicated recipe known to man and woman! It involves making not one, but two sauces from scratch, but as AB would say, your patience (and hard work!) will be rewarded.

I am chagrined to reveal that this recipe originally came from the back of a box of low-end lasagna noodles, and I have recently learned that it is even incorrectly entitled "Lasagna Napoli." Apparently, Julie over at A Finger in Every Pie was on the same wavelength as I--on the same day even!--and was also crafting a lasagna in honor of the season six premiere of The Sopranos (refer to her post from March 12th). And I have learned from reading her informative prose that it is Lasagna Bolognese that alternates between a meat ragu and a bescamella, and that American-style lasagna derives from Lasagna Napoli. But as I have fiddled with this recipe over the years and sometimes add, for example, mozzarella (verboten in the Bolognese version which uses only parmesan!), I guess this is really a hybrid of the two regional influences. Furthermore, the recipe originally called for the use of ground beef, but I prefer using spicy sausage and also some pepperoni for a little kick. Also, though the original recipe called for ricotta cheese, I once found myself without any on hand, so I substituted 4 oz. of cream cheese (marscapone would be heavenly, too, I'll bet!) and a half cup of parmesan, and since then, I have never gone back to the ricotta. And once, when I made this for my good friend, Lee Ann, as she was recuperating from delivering her first child, I even sliced and sautéed some yellow squash and layered it into the lasagna, because I thought it might be yummy (and because it was summer, and I was overrun with squash in my garden!). So as always, feel free to add or swap out ingredients to make this recipe your own. And make sure to invite the whole gang to dinner, as it makes quite a substantial casserole!

LASAGNA "NAPOLI"

1 package lasagna noodles, cooked according to package directions
2 cups shredded mozzarella cheese
½ cup grated/shredded parmesan cheese

Red Meat Sauce:

¼ cup olive oil
2/3 cup carrot, shredded
2/3 cup zucchini, shredded
1 large onion, diced
4 cloves garlic, chopped
4 sausage links, casing removed (I prefer hot, but sweet is fine, too—or you could use ground beef)
½ cup red wine
15 oz. can diced tomatoes
2 tablespoons tomato paste (I prefer the double- or even triple-concentrated kind from a tube)
24 slices pepperoni, chopped

1 teaspoon dried oregano
1 teaspoon dried basil (a tablepoon of fresh would be even better if you have it!)
1 tablespoon sugar
salt and pepper, to taste

In a large skillet over medium heat, add olive oil and the carrots, zucchini, onion and garlic. Sauté for five minutes. Add the sausage and brown. Add the red wine, tomatoes, and tomato paste, mixing well. Cook for three more minutes. Add the chopped pepperoni, oregano, basil, sugar, salt and pepper. Stir well again and set aside.

White Mushroom Sauce:
½ cup butter
½ cup flour
2 cups milk, warmed
½ teaspoon dry mustard
½ teaspoon cayenne

salt and pepper, to taste
1 cup ricotta cheese (or 4 oz. cream cheese and ½ cup grated/shredded parmesan)
2 eggs, beaten
1 tablespoon chives
1 cup (or more!) sliced mushrooms, sautéed in 1-2 tablespoons butter

Melt butter in a saucepan. Whisk in flour and cook for two minutes, stirring constantly. Slowly add the warm milk and cook until mixture is smooth. Stirring constantly, add dry mustard, cayenne, salt and pepper. When thickened, remove from heat and add cheese(s). Stir until melted, then add beaten eggs, and mix well. Add in sautéed mushrooms and chives. Mix again, and set aside.

Assembly:
Place four lasagna noodles on the bottom of a large baking dish that has been sprayed with pan spray. Spread one half of the red sauce evenly over the pasta layer and top with about a cup of shredded mozzarella. Place a second layer of noodles on top of that. Spread half of the white sauce evenly over the pasta. Repeat for two more layers in the same order with pasta, the remaining red sauce and another cup of mozzarella, more pasta, and ending with the remaining half of the white sauce. Top with some grated or shredded parmesan cheese, and bake uncovered at 350 degrees for 30 minutes. Let the lasagna sit for 10 minutes before cutting and serving.

Sunday, March 05, 2006

A lullaby to lemons...

Dear readers, I am sorry that I have been neglectful of you of late, but it’s getting to be midterm time at school, and I’m a bit swamped! I have SO many papers to grade and projects to complete, all before spring break which is nearly upon us! Yikes! And what makes it all more depressing is, for the first time in six years, I am not going away for spring break. BOO HISS! I will be visiting California at the end of next month for about five days, but still…that’s a long way off! So I’m stuck here in the North Country for spring break, and though the calendar says March, the weather says it’s still January! BRRRR! But today, the sun has come out a little, and it’s a bit above subhuman temperatures, so I am feeling hopeful that spring will surely come…probably by the end of May!

So what’s a gal to do when she can’t shake off the winter blues? What culinary delight could melt the frozen corpuscles of my being? Why, CITRUS, of course! And what could be sunnier on a cold, late winter’s day than dishes made with that most magical of citrus fruits, the Meyer Lemon?! For those of you unfamiliar with this tropical gem (a Martha favorite), it’s a hybrid between a lemon and either an orange or a mandarin, and though it is still incredibly lemony, it is rounder, thinner-skinned, darker-fleshed and sweeter. I was very excited to find my first Meyer lemons just a few weeks ago. I was on my way out of the Big City en route to Albany, NY for a concert, and though we were in a bit of hurry, we had to make a stop in Yonkers at the wonderful dairy-cum-grocery-store, Stew Leonard's. What a FUN place! Even on the eve of an imminent blizzard (or perhaps, because of it), the place was teeming with people, and there was a great energy there. It’s really a hoot! The atmosphere was like a country fair, complete with animatronic figures singing and dancing in the produce section…tee hee! And the food! Wow! Of course, they make all of their own dairy products (we got some delicious smoked boccacini mozzarella balls), but they also make their own bread, sausages, soups, sushi, chocolates, roasted nuts, coffee, even tortillas…pretty much anything you can think of! And the employees are so nice and helpful—best customer service I’ve had in a long time. It’s not surprising that Stew Leonard’s is listed by Fortune Magazine as one of the top 100 companies in the country to work for! I understand that it began as a dairy (there was a line outside for their homemade ice cream even in the dead of winter during a snow storm!), but quickly expanded into farm stand produce as well. And they still have an amazing selection of fruits and vegetables. The kitchen Mage asked what may have been a rhetorical question about where one could get mangoes at this time of year for the mango-jicama relish recipe that I posted. Well, I have the answer—Stew Leonard’s! And in addition to the Meyer lemons, we also acquired the world’s tastiest, most enormous shallots, and the sweetest, crunchiest sugar snap peas which, upon arriving home, I quickly dressed with sesame oil, rice vinegar, garlic, and black sesame seeds (nod to Ina Garten for the inspiration on that one!). It's now my favorite grocery experience...well, neck-in-neck with the beloved Trader Joe's. ;-)

But now I’m really digressing from my Meyer lemon theme. To sum up, I was thrilled to find these citrusy treasures, and I brought them home, and made them into the most wonderful curd (recipe follows), which I enjoyed on some of my beloved pound cake...toasted, of course! And then something even more unexpected and miraculous happened: a few days ago, I found Meyer lemons in my own little town, at the Super Wal-Mart, of all places (where produce is normally an abomination)! So now, I am going to begin swapping them out in all of my favorite lemon recipes. And they are listed below, some savory, some sweet, for your enjoyment. Though these dishes are wonderful with regular lemons, do try and seek out the magical Meyer lemon...you won’t be sorry!

Lemon Linguine (From Nigella Lawson—where is she these days?? This recipe is so easy, but SO delicious! It’s one of my favorite side dishes.)

2 pounds of linguine
2 egg yolks
2/3 cup of heavy cream
1/2 cup of freshly grated parmesan
Zest of 1 lemon and juice of 1/2, plus more juice if needed
Pinch of salt
Freshly milled black pepper
4 tablespoons (1/2 stick) of unsalted butter
2-3 tablespoons of chopped parsley

Fill just about the biggest pot you have with water and bring to a boil. When friends are coming for lunch, get the water heated to boiling point before they arrive, otherwise you end up nervously hanging around waiting for a watched pot to boil, while your supposedly quick lunch gets later and later. Bring the water to a boil, cover and turn off the burner. I tend to leave the addition of salt until the water's come to a boil a second time. But whichever way you do it, add quite a bit of salt. When the bubbling's encouragingly fierce, put in the pasta. I often put the lid on for a moment or so just to let the pasta get back to a boil. But don't turn your back on it--give it a good stir with a pasta fork to avoid even the suspicion of stickiness once you've removed the lid. Then get on with the sauce, making sure you've set your timer for about a minute or so less than the time specified on the package of pasta.

In a bowl, put the yolks, cream, parmesan, zest of the whole lemon and juice of a hair of it, the salt and a good grind of pepper and beat with a fork. You don't want it fluffy, just combined. Taste. If you want it more lemony, then, of course, add more juice.

When the timer goes off, taste to judge how near the pasta is to being ready. I recommend that you hover by the stove, so you don't miss that point. Don't be too hasty, though. Everyone is so keen to cook their pasta properly al dente that sometimes the pasta is actually not cooked enough. You want absolutely no chalkiness here. And linguine tends not to become soggy and overcooked quite as quickly as other long pastas (or at least I find it so). This makes sense, of course, as the strands of "little tongues" are denser than the flat ribbon shapes. Anyway, as soon as the pasta looks ready, remove a cup of the cooking liquid and drain the pasta. And then, off the heat, toss it back in the pot or put it in an efficiently preheated bowl. Throw in the butter and stir and swirl about to make sure the butter's melted and the pasta is covered all over. Each strand will be only mutely gleaming, as there's not much butter and quite a bit of pasta. If you want to add more, then do.

When you're satisfied that the pasta's covered with its soft slip of butter, stir in the egg mixture and turn the pasta well in it, adding some of the cooking liquid if it looks a bit dry. (Only 2 tablespoons or so--you don't want a wet mess--and only after you think the sauce is incorporated.) Sprinkle over the parsley and serve.

Rao’s Lemon Chicken (If you like tangy, this is the chicken dish for you!)

Lemon Sauce:
2 cups fresh-squeezed lemon juice

1 cup fine quality extra virgin olive oil
1 tablespoon red wine vinegar
1 1/2 teaspoons minced garlic
1/2 teaspoon dried oregano
salt and pepper to taste

Chicken:
two 2 ½ to 3 pound broiling chickens, halved (or cut in pieces)

1/4 cup Italian (flat leaf) parsley, chopped

Directions:
For sauce, whisk together all ingredients, cover and refrigerate until ready to use. Whisk or shake vigorously before use.

For chicken, preheat broiler at least 15 minutes before using. Broil chicken halves, turning once, for about 30 minutes, or until skin is golden-brown and juices run clear when bird is pierced with a fork. Remove chicken from broiler (leaving broiler on). Cut each half of bird into 6 pieces (leg, thigh, wing and 3 breast sections). Place chicken into deeper broiling pan (with sides), pour half of the lemon sauce over each bird and toss to coat well. Return to broiler, cook for 3 minutes, turn each piece and broil for 1 additional minute. Remove from broiler, divide into 6 portions on serving plates. Pour lemon sauce into heavy saucepan, add parsley and place over high heat for 1 minute. Pour sauce evenly onto each portion and serve with lots of crusty bread to absorb the sauce.

Lemon Tart with Nicole (From Martha Stewart Living, this is a scrumptious dessert, but try halving the recipe to make a wonderful lemon curd by itself.)

one recipe short crust dough


3/4 c creme fraiche (sour cream will work, too)
6 large eggs
3 large egg yolks
1 tablespoon lemon zest
2 cup lemon juice, freshly-squeezed (about 12 lemons)
1 vanilla bean, scraped (or one teaspoon vanilla extract)
2 cups sugar, plus more for sprinkling
¼ oz unflavored gelatin powder; or 4 sheets, softened
1 ½ sticks unsalted butter, at room temperature

Heat oven to 350 degrees. Remove short crust dough from refrigerator. Remove parchment paper covering top, and invert onto a baking sheet. Press an 11-inch flan ring in center of short crust dough to cut out a circle. Keeping flan ring on baking sheet, trim excess dough from outside of ring, and reserve for another use. Prick circle of dough several times with a fork. Chill until firm, about 20 minutes.Remove dough-lined flan ring from refrigerator. Bake until a light golden brown, 15 to 18 minutes. Cool completely on a wire rack before filling.

Combine creme fraiche, eggs, egg yolks, lemon zest, lemon juice, vanilla bean, and sugar in a medium-size heat-proof bowl. Place over a pot of simmering water. Cook, stirring occasionally until mixture thickens, about 20 minutes. Remove from heat, and stir in softened gelatin sheets. Strain mixture through a fine mesh sieve set over a medium-size bowl. Cover surface of mixture with plastic wrap to prevent skin from forming. Set mixture in an ice bath to cool to 100 degrees. Add butter, and using a handheld immersion blender, mix for 5 minutes. Pour into pre-baked tart shell. Chill until mixture is firm, 2 to 3 hours. Just before serving, sprinkle individual slices with a light, even layer of sugar. Caramelize the sugar to a golden brown, using a blow torch or by placing under a broiler.

Aunt Ida’s Sour Cream Lemon Pie (Unlike most people, I am not a fan of lemon meringue pie. But I ADORE this homey little pie from my dear friend, Kurt--well, from his Aunt Ida. As you may have sensed, I like lemon best when it is cut a bit with some sort of cream. YUM!)
4 eggs
¾ cup sugar
¼ cup lemon juice
2 tablespoons lemon zest
1 cup sour cream

Beat the eggs with the sugar until thickened. Add the lemon juice and zest and mix well. Cook this mixture in a double boiler over low heat until the custard is thick (until you can see the marks of the whisk in the bottom of the pan or bowl). Stir in the sour cream. Pour into a baked pie shell. Chill the pie. Optional: Garnish with one tablepoon of sour cream on top and slivered toasted almonds. (This pie can also be frozen.)

Lemon Freeze (This is a really great summer dessert! So yummy!)

3 eggs, separated
1 ½ cups sugar, divided
3 fresh lemons
2 cups heavy cream
1 teaspoon vanilla
1 package graham crackers
few tablespoons butter, softened

Crush the graham crackers and mix with butter until they hold together. Press into the bottom of a 9x13-inch pan. Set aside.

Separate egg whites and yolks and place in two bowls. Gradually add ¼ cup sugar to egg whites and whip to stiff peaks. Squeeze the lemons and add the juice to the egg yolks, beating lightly, then mix in ½ cup sugar. In another large bowl, combine heavy cream with the remaining ¾ cup sugar and the vanilla. Add the lemon mixture and stir. Fold in egg whites. Pour on top of the graham crust, cover with plastic wrap, and freeze overnight.

Lemon Bars (What lemon list would be complete without a good lemon bar recipe? And this is a great one from my friend, June, by way of Southern Cooking.)


2 cups flour
1/2 cup confectioners' sugar
2 sticks butter
2 cups sugar
1 tablespoon flour
1 teaspoon baking powder
1/4 teaspoon salt
4 eggs, well beaten
1 heaping tablespoon grated lemon rind
1/4 cup lemon juice

Sift flour and powdered sugar together. Cut in butter until well blended. Press mixture over bottom of a 9 by 13 by 2-inch pan. Bake about 25 minutes at 300° until lightly browned.

Combine remaining ingredients and spread on top of the baked crust. Bake at 350° for 25 to 30 minutes. Sprinkle with powdered sugar.

Makes about 12 servings. (Note: June says she felt free to increase the amount of lemon zest and juice to make these super-lemony!)

Tuesday, February 28, 2006

HAPPY MARDI GRAS, or Damn you, Emeril!


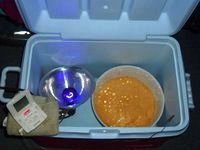
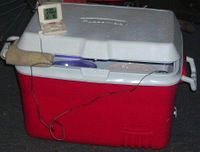
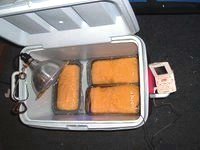
So I don’t get home until 7:00pm, after my stupid roommate insists that I make a trip to the store in subzero windchill factor weather for Hawaiian Punch of all things! Then she announces as I walk through the door--frozen, tired, hungry: “June called. She wants you to make some sort of cake for some holiday tomorrow.” My heart sank to my toes. Now, I have always wanted an excuse to try my hand at a king cake for Mardi Gras, but starting a yeasted, decorated bread at 7:00pm on a school night? Cyd declared the obvious as I got out the flour and sugar canisters: “You’re a better person than I.” (Duh.) Now, to whom does one turn in her hour of desperation on the eve of Mardi Gras? Why, Emeril, of course! I chose the recipe in his Every Day’s a Party: Louisiana Recipes for Celebrating with Family and Friends. I must confess, though, that I was suspicious when the directions said to melt a stick of butter and add it to the yeast and sugar. Hmm…pouring melted butter directly onto yeast? That can’t be right. And after I added all of the flour that the recipe called for, the dough was like a cement block! I couldn’t even get the Kitchen Aid to knead it. I had to take it out and try doing it myself…TRY being the operative word. Nor could I manage to shape it into a smooth ball! And after two hours in my homemade proof box (see previous post from Feb. 7), it was still the same size and unfortunate density. So into the trash the vile rock of dough went, and at 10:30pm, I started again (after my sobs subsided somewhat—dig that alliteration!). I did a quick search online, and found “The Official Mardi Gras Cake Recipe” submitted by Dena Conner to The Soulard Renaissance. I have no idea what (or where) Soulard is, and what makes Dena Conner the definitive authority on king cakes, but I liked that it was basically the exact same recipe as Emeril’s, but with an added half cup of warm water and (potentially) less flour. And most importantly, instead of melting the butter, the recipe had you form a soft dough, and then add softened butter, one tablespoon at a time, as in a proper brioche. I felt MUCH better about that method, and indeed, the dough came out beautifully. However, Emeril had a cream cheese filling for his king cake (as opposed to just a sprinkling of cinnamon), and I liked his icing better, too. So this is a hybrid of the two recipes that worked out very well. Oh, and don’t think that I wasn’t exceedingly pleased with myself for making my own purple, green and gold sugars! ;-) Laissez les bon temps rouler!

KING CAKE (Gateau de Roi)

½ cup warm water (110 to 115 degrees)
2 packages active dry yeast
½ cup plus 1 teaspoon sugar
3 ½ - 4 ½ cups unsifted flour
1 teaspoon nutmeg (freshly grated, please)
2 teaspoons salt
1 teaspoon lemon zest
½ cup warm milk
5 egg yolks
1 stick butter, cut in slices and softened

1 teaspoon vegetable oil

1 pound cream cheese, softened
1 cup powdered sugar

1 tiny plastic doll (not more than 1")

5 tablespoons of milk, room temp, divided
3 tablespoons fresh lemon juice
3 cups powdered sugar

purple, green and gold sugar sprinkles

Pour the warm water into a small shallow bowl and sprinkle yeast and 2 teaspoons sugar into it. Allow the yeast and sugar to rest for three minutes, then mix thoroughly. Set bowl in a warm place for 10 minutes until yeast bubbles up.

Combine 3 ½ cups of flour, remaining sugar, nutmeg and salt and sift into a large mixing bowl. Stir in lemon zest. Separate center of mixture to form a hole and pour in yeast mixture and milk. Add egg yolks and using a wooden spoon (I used the trusty Kitchen Aid with the dough hook!), combine dry ingredients into the yeast/milk mixture. When mixture is smooth, beat in 8 tablespoons butter, one tablespoon at a time, and continue to beat two minutes or until dough can be formed into a medium soft ball. Place ball of dough on floured surface and knead, gradually adding up to 1 cup more of flour. When dough is no longer sticky, knead 10 minutes more until shiny and elastic (again, I did this in the stand mixer). Form the dough into a smooth ball. Lightly oil a bowl with the vegetable oil. Place the dough inside of the bowl and turn several times to coat thoroughly. Cover with plastic wrap, set in a warm, draft-free place, and let rise until doubled, 1 ½- 2 hours.

Meanwhile, make the filling. In a large bowl, combine the cream cheese and one cup of powdered sugar. Blend by hand or with a mixer on low speed. Set aside. Line a baking sheet with parchment paper (or use a Silpat).

Turn the dough out onto a lightly floured work surface. Pat or roll dough into a rectangle 30 inches long and 6 inches wide. Spread the filling lengthwise over the bottom half of the dough, then flip the top half of the dough over the filling. Seal the edges, pinching the dough together. Shape the dough into a cylinder and place it on the prepared baking sheet seam side down. Shape the dough into a ring, and pinch the ends together so there isn’t a seam. Insert the king cake baby or pecan half into the ring from the bottom so that it is completely hidden by the dough. Cover the ring with plastic wrap or a clean kitchen towel and place in a warm, draft-free place. Let the dough rise until doubled in size, about 45 minutes.

Meanwhile, preheat the oven to 350 degrees. Brush the top of the risen cake with two tablespoons of the milk. Bake until golden brown, 25 to 30 minutes. Remove from the oven and let cool completely on a wire rack.

Make the icing. Combine the remaining three tablespoons of milk, the lemon juice, and three cups of powdered sugar in a medium mixing bowl. Stir to blend well. With a rubber spatula, spread the icing evenly over the top of the cake. Sprinkle with the sugars, alternating colors around the cake.

The cake is traditionally cut into 2-inch-thick slices with all the guests in attendance. And whoever gets the piece with the baby (or pecan or bean) in it, is king or queen for the evening!


Tuesday, February 21, 2006

Brown the hamburger, an onion, and add a can of cream o' soup...

Dear readers, I have been struggling with a moral dilemma lately. I wanted to do it...it was soooo tempting, but I worried: What would they think of me if I did? But then I visited anapestic's web site and saw that HE did it, so I figured, why shouldn't I? If the most urbane and droll anapestic can do it, then it must be ok! (Refer to his Feb. 19th post and recipe for Chile con Queso.)

Though I can make brioche with the best of them, and I am undaunted by puff pastries and phyllo doughs and the like, sometimes, especially in the cold, dark, dead of winter, I long for menu items that are quick (it's too COLD in my kitchen to tarry there for long), hearty, and above all, comforting. And that's when I turn to the genre of church potluck cuisine, to be politically correct about it. When I am being less sensitive, I refer to these as my "trashy" recipes! In fact, one memorable New Year's Eve, my best friends and I hosted an entire trashy buffet that included things like green bean casserole with Durkee french fried onions, tuna casserole with potato chip topping, tater tot casserole, and of course, the ubiquitous bucket of KFC! (My dearest friend, Kurt, brought this, in honor of his tackiest extended family members who always bring the KFC to their potlucks and reunions!) I must tell you that we had a ball that night eating the declassé food, listening to a "horrible hits" mix cd that I made (think "The Pina Colada Song"--it's wrong, but you know you love it!), and after dinner, learning some country line dances. Brilliant!

So I have decided to share my personal canon of trashy cuisine with you today. You know the ones...they always seems to start with "brown a pound of hamburger with a chopped onion and add some cream o' soup..." Like anapestic, I will warn you not to tell anyone where you got these recipes. If you do tell, I'll only deny it! But I know, secretly, in the privacy of your own kitchens, when no one is watching, you will unearth the cream o' soup from your pantries and do what you know you want to do!

CHICKEN AND NOODLES

1 large whole chicken (3-4 lbs.)
5 or 6 tablespoons chicken soup base (or bouillon)
1 teaspoon of pepper (or to taste)
2 or 3-12 oz. packages of frozen egg noodles (like Ream’s brand)
2 or 3 cans cream of chicken soup

Remove giblets from the thawed chicken. Add chicken to a large, heavy-bottomed stockpot and cover with water. Bring to a boil, then simmer the chicken for at least an hour (maybe two-or “until you get home from church!”). Remove the chicken from the broth, and when it’s cool enough to handle, remove the skin and bones and break the chicken into bite-sized pieces. Set aside. To the broth, add enough chicken soup base/bouillon until it tastes like chicken soup. ;-) Also, add enough black pepper to suit you, and whisk in the cans of cream of chicken soup until well blended. Bring the broth back to boil, and add one package of frozen noodles*. Bring to the boil again, and then add the other package (you could even add a third package if you have more folks to feed). Reduce heat to medium and cook until the noodles are tender. Add chicken pieces back to the pot, mix well, and serve. (Midwesterners will insist upon serving this over real mashed potatoes=CARB OVERLOAD!)

*Try as I might, I cannot find frozen egg noodles here in the northeast, and believe you me, I have asked my local groceries stores to order them for me to no avail. But I have found a decent substitute. At the Super Wal-Mart (yegads!), they sell a one pound package of homestyle egg noodles called Country Pasta. They’re not as good, I won’t lie, but they do quite well. Don’t try this recipe with just any old pasta that you have on hand, though--it won’t be the same (you'll end up with something more like chicken noodle soup).

This next recipe comes from Kurt, or more precisely, from his mother, Muriel. To quote my roommate, Cyd, “This really sounds like sh*t if you read it before you taste it.” And that might be true. But every time I make it for a group function, people rave about it. One of my former colleagues used to refer to it as “The Glop,” but she asked for the recipe and began making it regularly at her house! In fact, people always ask for the recipe for this one, and it’s always embarrassing to give, but here it is:

CAMPFIRE STEW (aka Muriel’s Winter Stew)

1 lb ground beef, browned with a minced onion

Add:
1 can of cream of chicken soup
1 can of cream of mushroom soup
1 can of creamed corn (or 2!)

Then add a 2 lb. bag of thawed tater tots, 2 tablespoons of flour, and (up to) one quart of milk. Cook over medium heat until the tater tots break up, and the whole thing heats through and thickens somewhat.

"TRASHY" CHICKEN POT PIE


For an easy chicken pot pie, cut four chicken breasts into chunks and brown them, perhaps with a chopped onion. When the pieces are mostly cooked through, mix them with any number of canned things. You’ll need some sort of cream o' soup(s)--cream of chicken and cream of celery is my favorite combo. Then any canned vegetables of your choice. I like creamed corn and regular corn, carrots, green beans, and those little whole potatoes, halved. I also throw some frozen peas in there if I have them on hand (I hate canned peas-so mushy!). Add salt, pepper, maybe a little garlic powder, and then spoon the goo into a pie plate lined with one refrigerator crust (oh, the blasphemy!). Top with the other crust and pinch/crimp the top and bottom together to seal. You can even egg wash the pie if you feel strongly about it. Bake at 350 for about an hour or until GB&D (golden brown and delicious). Let it sit for a while (15-20 min?) to cool, or all the molten lava will run out when you try to cut a piece.

That reminds me of another guilty pleasure that I sometimes throw together, the MANWICH PIE! For that sophisticated gem, brown a pound of hamburger and maybe a chopped onion as well, add a can of Manwich sauce, and a can of corn (drained). Fill one prefab pie crust with this mix and top with at least a cup of shredded cheddar cheese. (I suppose you could turn this into a two-crust affair if you prefer, but I rather like the open-faced pie topped with cheese.) Bake in a 350 degree oven until the crust is done, about a half an hour.


ROB'S "TRASHY" ENCHILADAS

4 boneless/skinless chicken breasts--cut into chunks and then browned

Add and cook until heated through:
one can cream of mushroom soup
one can cream of chicken soup
one can green chiles*
one can jalapenos (or less than a full can for a milder effect!)*

shredded cheese

8 flour tortillas (though you could try it with corn, too)

Add 2-3 spoonfuls of the mixture to each of the eight tortillas along with some shredded cheese. Roll and place side-by-side in a 9x13 baking dish, and cover with the remaining sauce and more cheese on top. Bake at 375 for 30 min (I cover it with foil until the last 5-10 minutes, so that the cheese doesn't get too brown.)

*Note: One tme when I made this, I didn't have regular green chilies or jalapenos on hand, so I used one chipotle in adobo sauce (minced) from a previously-opened can. It was spicy and DELISH! Feel free to improvise on this one--the next one, too.)

This last one is not quite as "trashy" as the others, as it has no cream o' soups involved. (I always mistakenly think it does like the previous, similar recipe.) But while we're on the enchilada theme, I am reminded of this, another one of my favorite recipes. We LOVE this one at my house!

BLOND ENCHILADAS

one pound of ground beef
1/2 cup chopped onion (1 large)
1 t. salt
1 cup (8 oz.) prepared taco sauce
1 cup shredded cheese (or more…LOTS more!)
8-six-inch flour tortillas
4 tablespoons butter
4 tablespoons flour
2 teaspooons instant chicken bouillon
1 1/3 cups water
2/3 cups sour cream

Brown the beef and onion together and stir in salt. Divide the meat into the tortillas and top each with some taco sauce and cheese*. Roll and place seam side down in a 9x13 baking dish. In a saucepan, melt the butter--blend in flour and bouillon. Stir in the water. Cook and stir until thickened. Gradually add the sour cream. Pour the sauce over the tortillas. Bake uncovered at 350 for about 15 minutes. Sprinkle with remaining cheese and return to oven until melted.

*Note: I find it easier to just combine the meat with the taco sauce and cheese and then spoon this combined mixture into the tortillas. I have also been known to throw some beans--black beans or kidney beans--into the meat mixture. Again, use your imagination!

Saturday, February 18, 2006

Sports drool, but the Olympics rule!

Here’s the weird thing. I hate sports, but I love the Olympics. In fact, during the ladies’ gymnastic finals in 2004, my friend and I were camping on Cape Cod. I actually had to seek out a sports bar in Sandwich so that we could watch—imagine that—me, at a SPORTS BAR! Boggles the mind! Tee hee. This time around, as I am nocturnal, I find myself watching the repeat of primetime broadcasting from Turin/Torino/Tarantino/whatever until the wee hours of the morning. And I can hardly wait until ladies' figure skating, my favorite!

In honor of the Olympics, I would like to share a wonderful recipe from my brilliant colleague and friend, Dr. Becky Kasper. She was kind enough to invite me to her Christmas party this year. It was held at her parents’ gorgeous house on Lake Champlain (you could see right across the water to the lights of Burlington, Vermont). There had been a light snowfall, a fire was lit in the big stone fireplace, there was wonderful company—not the least of which was her precious mom, Lillian—and the food, mercy, the FOOD! Becky and her mom really put out a remarkable spread, and I actually spent part of the evening engaged in culinary espionage, rummaging through their cookbooks to unearth the recipes for the wonderful things that they served. Among my favorites were the blue cheese popovers (from Martha’s hors d’oeuvres book), risotto cakes served with pesto (from Italian Classics by Cook’s Illustrated—a wonderful book!), and assorted cheeses including Maytag blue and a lovely aged gouda. The desserts included a chocolate-topped cheesecake, the best sugar cookies I’ve ever had, and a gorgeous buche de noel crafted from some sort of pumpkin gingerbread. Oh, and the most divine homemade eggnog, too, from an old military wives’ cookbook. It was a truly magical evening!

But one of the best recipes that I managed to pilfer from my hosts was the one that Becky was most proud of, as she developed it herself for the last summer Olympics, in honor of the return to their birthplace of Athens, Greece. She aptly named it Chicken Olympic, and though it is rich, it is just scrumptious, and if you only partake of it every two years, you should live to see the next Olympics roll around! ;-) Below is my version of her recipe with only minor adjustments (as her notes were a bit sketchy!). I hope you try it and enjoy some while you are rooting the U.S. team onto the gold!

Chicken Olympic

3 boneless chicken breasts, cubed
½ cup lemon juice
2 tablespoons olive oil

1 large onion, finely chopped
2 packages frozen spinach, thawed and squeezed of excess water
2 tablespoons olive oil
1 cup mozzarella, shredded
1/2 cup feta, crumbled
2 tablespoons parmesan, grated
1 egg, lightly beaten

1 cup mayonnaise
2 tablespoons lemon juice (or to taste)
½ teaspoon salt (or to taste)
2 tablespoons dried oregano
¼ cup (4 or 5) green onions, chopped

20 sheets phyllo dough, thawed (one sleeve of 9”x14” sheets from a “twin pack” box)
butter, melted (less than one stick)

Marinate chicken pieces in lemon juice for at least two hours, then cook in olive oil until about halfway done (still somewhat pink inside). Set aside. Saute onion in olive oil until softened. Add spinach, and cook until heated through. Cool mixture to room temperature before adding cheeses, and mixing in the beaten egg. In a separate bowl, combine the mayo, lemon juice, salt, oregano, and green onions. Set aside.

Take one sheet of phyllo dough and brush lightly with butter. Top with another sheet and butter that one. Continue until you have completed five sheets. In a row on the long side of the phyllo (at least an inch from the edge and each end), place half of the spinach and cheese filling. Top with half of the chicken cubes, and then top with half of the sauce. Cover with another five sheets of phyllo, one at a time, tucking each sheet down and around the filling, then brushing lightly with butter before adding the next sheet. Fold in the ends, and roll like a jellyroll to the end. Place the finished roll on a lined baking sheet, and butter the top. Repeat this entire process to make a second roll. Bake them at 350 degrees for about 20 minutes, or until golden brown and crispy. Cut into thick slices and serve.


Tuesday, February 14, 2006

HAPPY VALENTINE'S DAY!

HAPPY VALENTINE’S DAY, dear readers! Romantic times call for romantic cuisine, and I have an enchanting menu for your consideration.

First of all, can you beat a steak dinner for the ultimate date night fare? I think not. And my personal passion is the rib eye. My sweet friend and mother figure, Dr. Ruth McDowell Cook, was the first one to introduce me to the joys of the succulent rib eye steak. At the university where we both taught years ago, they used to give us a turkey for Christmas as a gesture of holiday spirit. And they would always present us with the ten-pound bird at our semi-formal Christmas Tea. As you can imagine, none of us really enjoyed hauling a frozen carcass around in our finery! So eventually, they switched to giving us gift certificates to a local butcher instead. As Ruth and her husband Cecil were empty nesters, they didn’t really have much use for a big turkey. So it was their custom to use the gift certificate for two juicy rib eyes instead. I thought them silly until they made me one. WOW! Up until that point, I thought the best steaks were New York strips or T-bones. Boy, was I mistaken! And after tinkering with my special marinade for the past decade or so, I think I have achieved carnivorous perfection.

This is more a technique than a precise recipe, but here’s what you do. Drizzle each thick rib eye steak with olive oil (about a tablespoon?). Then pour on a little balsamic vinegar, also about a tablespoon. Next pour on maybe a teaspoon of Worcestershire sauce, and about a teaspoon of Dijon mustard (preferably whole-grained), and about a teaspoon of freshly minced garlic. Massage these items into the meat like a wet rub. Sprinkle with salt and lots of pepper and a little of your favorite herb blend (Italian, or Herbes de Provence, or dried thyme leaves), and then flip the steaks and repeat all of this on the other side. Do NOT be tempted to mix the ingredients up like a vinaigrette beforehand and just pour it over. I don’t know why, but it just tastes better if you apply one ingredient at a time and then massage everything in (we are all better after a tender, loving massage, right?). Marinate for about 30 minutes at room temperature, or for several hours in the fridge. Then the steaks can be grilled or pan-seared. Incredible!

The perfect accompaniment to the special rib eyes is a baked Yukon Gold potato with butter and sour cream and chives (I also enjoy a little lemon pepper on mine, thank you). And then you’ll want a nice salad. One of my very favorites comes from my wonderful friend, Rob (who is also a dear friend of the infamous Salsa Derek!). I think Rob got the recipe from one of his favorite restaurants in his hometown of Dayton, Ohio, but I am a bit fuzzy on the details. In any case, again I will share more of a methodology than a specific recipe. You should sauté some sliced mushrooms in butter with some freshly minced garlic. When the garlic is soft and the mushrooms take on some color, deglaze the pan with a good splash (or two!) of sweet vermouth, though white wine would do in a pinch. Then you put all of this atop a bed of baby spinach, along with some crumbled cheese (Rob prefers feta, but I like buttermilk blue myself). Drizzle the salad with a little balsamic vinegar, and garnish with some cashews. Delish!

Finally, there is the matter of dessert. Of course, a chocolate recipe is absolutely de rigueur, as Martha would say. And as I pride myself on my pound cakes, I have chosen double-dark mocha pound cake in mini-bundt molds to be served with a generous dollop of homemade raspberry curd. Now for these things, I WILL give actual recipes! ;-) The first is one of my most cherished recipes. It is from one of my “dog friends” who has PBGV’s as I do, and it is an heirloom recipe from her “Mamaw.” I have added cocoa powder and espresso powder to make a mocha version, but omit these things, and you will have the most incredible golden vanilla pound cake that you have ever wrapped your lips around! And of course, there are endless variations on the theme. Lemon pound cake with a lemon glaze, cranberry pound cake with an orange (or blood orange!) glaze, or an eggnog version served with a sugared plum sauce for the holidays. Use your imagination! But I think dark chocolate is best for Valentine’s Day, don't you?

Double-Dark Mocha Pound Cake

2 sticks butter, softened
1/3 cup shortening
5 large whole eggs
3 cups sugar
1 teaspoon baking powder
1/4 teaspoon salt
3 cups all-purpose flour (measure on the 3rd and last sift)
6 tablespoons cocoa powder (to make it doubly-dark, use 5 tablespoons of black cocoa instead)
1 teaspoon instant espresso powder (optional)
1 cup whole milk (If you want to live dangerously—and I always do—half and half makes it melt in your mouth! But for the chocolate cake, I often use buttermilk here instead of milk or half-n-half.)
1 teaspoon vanilla (or 2!)

Preheat oven to 325. Spray bundt pan and lightly flour entire surface. (Or the Pam with flour for baking makes it even easier!) Cream butter and shortening together at slow mixer speed. Add sugar and eggs, one at a time, alternating with the sugar. Begin and end with sugar. Scrape bowl often. When all added, set mixer on high speed for exactly four minutes. Sift flour three times, adding baking powder and salt on last sift, then measure 3 cups. Add vanilla to milk and stir. Add milk and flour to mixer bowl, alternating ingredients, beginning and ending with flour. Spoon batter gently into the prepared pan and smooth the top with a spatula.

Depending on the size of your bundt pan, you may want to put a foil covered cookie sheet under the cake rack in the oven. Sometimes it runs over through the center tube of the bundt pan about 1/2 cup. The cake will take from 1 hour 15 minutes to 90 minutes to cook depending on your altitude, humidity and oven calibration. Test by inserting a knife. It's done when it comes out a little oily but no batter. You may also use mini-bundt pans, baking for about 30 minutes. Cool on rack precisely 10 minutes and turn immediately out on a plate.

Raspberry Curd (adapted from Chez Panisse Desserts)

(makes 2 cups, enough to fill one 9" tart shell).

3 half-pint baskets raspberries
about 1/2 c. sugar
4 tablespoons unsalted butter
1 1/2 teaspoons lemon juice, or to taste
2 eggs + 2 egg yolks.

Puree the raspberries and put them through a fine strainer to remove the seeds. Measure 1 1/2 c. puree, heat it in a non-corrosive saucepan, and stir in the sugar and butter. Taste and add the lemon juice to taste. Whisk the eggs and egg yolks just enough to mix them, then stir in some of the hot puree to warm them. Return to the pan and cook over low heat, stirring constantly, until the mixture is thick--it shouldreach a temperature of 170 degrees. Remove from heat, then I personally add two more tablespoons of butter to enrich the curd and make it truly supple! Chill. Serve with vanilla or chocolate pound cake, or you might use it to fill a tart.

I hope you all get a chance to share this romantic menu with a special person of your choosing (or the one you chose long ago). XOXOXO--Gina

Friday, February 10, 2006

Another spicy (Indian) dish for a cold night...

About five years ago, my roommate Cyd and I were visiting the Boston area, and it had taken us too long to get there (traffic!), and we had gotten very lost trying to find the hotel (I'm afraid that names were called and tears were shed), and then we had to try and find a place to park in Cambridge (good luck!). So by the time we got into our room, we were exhausted and NOT looking forward to venturing out again for dinner. All we wanted to do was take a hot shower and veg in front of a pay-per-view movie in the room. So while Cyd showered, I went down to the lobby to forage for take-out menus. And to my shock and delight, there was an Indian restaurant called India Pavillion right nearby that delivered. Now you must understand, we live out in the middle of nowhere, in a tiny town where no one will even deliver a pizza to you--let alone Indian food! Of course, we weren't very familiar with the cuisine at the time (Cyd made me order because she was frightened of the foreign menu items), but we were so enchanted with the idea of someone delivering such an exotic cuisine to our doorstep, that we decided to give it a try. Well, after sampling a feast of veggie samosas, paneer pakora, aloo naan, tandoori chicken, beef vindaloo, chicken tikka and butter chicken, as well as the most delicious chutneys and other interesting condiments, we were hooked! The problem is, we have no Indian food in our town, and the one place across Lake Champlain in Burlington, VT is "just okay" IMHO. Now, there are some great Indian places in Montreal (Bombay Palace is our favorite, and it's conveniently located right next door to my favorite movie theatre). Still, one hates to drive an hour for one's butter chicken and the like, so I have made it business to start learning to make my own Indian dishes. And in fact, I became proficient enough to prepare an entire Indian meal as a cultural diversity event at the college where I teach. We watched Bend It Like Beckham, and then discussed it over dinner afterward (yes, of course, I made the aloo gobi!). My only gaffe, pointed out very tactfully and kindly to me by my colleague, Mohan Chandhoke, was that I did not toast the pappadums! (OOPS! Who knew?) Still, the food was very well-received, and some folks that attended still use the recipes that I circulated that evening. In any case, I myself got a hankering for Indian food last night, so we made the much-beloved butter chicken from a recipe that I have been tinkering with for a few years. For example, the original (British) recipe called for heavy cream, but I have found that yogurt works just as well and adds a nice tang (and less fat, if you care about that kind of thing). But this spicy dish, served over fluffy, nutty, jasmine-scented basmati rice, is just the ticket on a cold winter's night; it will fill you up and warm you up! Plus, you won't have to call for take-out either! :-)

Butter Chicken (Murg Makhani)

3 tablespoons vegetable oil
1 medium onion, peeled and chopped
1/2 finger fresh ginger (about one tablespoon), peeled and chopped
3 large cloves garlic (about one tablespoon), peeled and chopped
1 medium jalapeno pepper (whole, fresh), seeded and chopped
2 teaspoons garam masala
1 small can tomato paste
2 cups chicken broth
1 6-ounce carton plain yogurt
4 skinless, boneless chicken breasts, cut into 1" chunks
2 teaspoons kosher salt
1 teaspoon black pepper, freshly ground
4 tablespoons butter (divided), cut into pieces
¼-½ cup fresh cilantro leaves, chopped (to taste)

1. Heat vegetable oil in a large (preferably, nonstick) skillet over medium-high heat. Add the onions, garlic, ginger, and jalapeno, and cook for about three minutes, stirring often, until the vegetables are softened and slightly browned. Add in garam masala and cook for another minute.
2. Transfer the vegetable mixture to the jar of a blender. Add tomato paste, chicken broth, and yogurt, and puree until smooth. Set aside.
3. Season chicken pieces with salt and pepper. Wipe out skillet with a paper towel, removing any remaining vegetable bits or spices. Melt two tablespoons of the butter over high heat in the same skillet, then add the chicken. Cook for about three minutes, or until chicken is no longer pink, stirring often.
4. Pour in the blended vegetable mixture, reduce heat to medium, and cook for another five minutes. Turn heat to low, then stir in the remaining two tablespoons of the butter until melted and the cilantro. Serve immediately with steamed (preferably, jasmine-scented basmati) rice.

Tuesday, February 07, 2006

Happy Birthday, Lee Ann (but no cake)!

I posted yesterday WITHOUT a recipe, which simply won’t do. So I have one for you today. It was my officemate and dear friend Lee Ann’s birthday today. Interestingly, she’s not a cake person. In fact, instead of cake, she and her husband had an ice cream sundae bar for their wedding. People after my own Breyer’s-saturated heart—although have you folks tried Edy’s DOUBLE VANILLA? Incredible! Anyway, I decided not to make a cake to celebrate her. (Too bad for her, as I was going to make Chocolate Velvet Cake with Cream Cheese-Butter Pecan Frosting! YUM! I'll get around to posting that one eventually...) Well, it wasn't all that bad for her, because I decided to make a cheesecake instead. And as she loves lemon, I thought I might adapt a regular cheesecake recipe into a Ginger-Lemon version. If I do say so myself, it turned out FABULOUS! It looked lovely, too, and I did try to take a picture to share, but the vultures at my workplace had already hacked into the poor beastie, rendering it quite…un-photogenic! But it was delicious, and despite popular misconceptions about cheesecake, not hard to make. Let me know what you think…

Ginger-Lemon Cheesecake with Honeyed Sour Cream Topping

The Crust:
10 ½ oz. (2 packages or about 60) Swedish ginger thin wafers, crushed
2 tablespoons sugar
1 stick of (unsalted) butter, melted
pinch of salt

Combine all ingredients for the crust and press into the bottom and halfway up the sides of a 9- or 10-inch springform pan. (Tip: Use a metal measuring cup to help you press and shape the crust in the pan.) Bake at 350 degrees for 8-10 minutes until slightly brown. Cool the crust while you prepare the filling.

The Filling:
2 lbs. (4 eight-ounce packages) of cream cheese, softened
1 cup sugar
2 tablespoons (unsalted) butter, melted
4 eggs
zest of two lemons
1 tablespoon lemon extract
pinch of salt

Place cream cheese in the bowl of a stand mixer. Beat on medium-low speed for a minute or two until completely creamy. Add sugar and butter, and mix again until smooth. Add eggs, one at a time, just until blended. Add zest, extracts, and salt, and mix just once more, briefly. (You don’t want to overmix and incorporate too much air into the batter.) Pour filling into the cooled crust, and return to the oven for 40-50 minutes or just until it’s no longer wobbly in the center. Remove cheesecake from the oven and let it cool a little bit and settle back down into the pan while you make the topping.

The Topping:
1 ½ cups sour cream
2 teaspoons vanilla
3 tablespoons honey

Mix topping ingredients by hand, then carefully pour over the cheesecake, covering the entire top. Return to the oven for 5-10 minutes. Let cheesecake rest until fairly cool, then cover and refrigerate for several hours, or preferably, overnight. (The flavors get better the next day! This can easily be made a couple of days ahead of time, too.) Run a knife around the edge of the springform pan before removing the ring. Garnish with candied ginger before serving.

I see the cold bread rising...


Good grief! I became so involved all my Super Bowl musings that I forgot to share some pics that I took over the weekend. As usual, I begin with an anecdote. You see, the house I live in out in the country is a drafty old farmhouse built in the 30’s. No one has electric heat out in these parts, as it is exorbitantly expensive. In this house, we have a combination of a fuel oil furnace in the back (love it—so toasty!), and a propane monitor in the front (hate the thing—a glorified space heater that may as well run on gold bullion!). We try to sit out in the living room running the propane heater, and an electric space heater, while trying to snuggle under sleeping bags for additional warmth. But when it becomes bitterly cold, or those jackals at the propane company won’t bring us any more until we pay $250 up front (OUCH!), we retreat to what we affectionately call “the winter room.” For a few months, the back/guest bedroom plays host to two people, four dogs, and whichever heat-seeking cats happen to wander in. This is how we stay alive until spring finally comes (sometimes not until May around here!). All this to say, for a gal that vowed to bake more bread this year, living in a veritable refrigerator makes that promise to oneself very difficult to keep. For example, when I made the brioche and sticky buns recently, it took THREE DAYS to complete the project! Granted, those long, slow, cold rises made for excellent flavor development, but who has the time for all that? So I was surfing around the net, hoping to find some kind of electric proofing box for home use, but all I could find was a huge commercial unit for about $1000! (This is a great idea, though. Someone could make millions with a countertop proofer, say, about the size of a humidifier? Someone hustle off to the patent office, pronto!) But in my web surfing, I found quite a lot of good advice about how to make a proofing box at home, using materials that you probably already have on hand, or perhaps with a few inexpensive additions. To start with, many bakers recommend using a Styrofoam chest as a proofer, but I worried about heating Styrofoam (the fumes and potential melting were concerns). So I used a regular plastic cooler. The heat source that most folks use is one of those electrical cords with a socket on the end, adding a light bulb, and dangling it over the edge and down into the cooler. But I used a metal clamp-on lamp that I happen to have and a purple reptile heat bulb (don't ask). Next, you’ll need a thermometer to monitor the heat, as the main danger of this Easy Bake Oven-type proofer is overheating your dough and killing the yeast. What you ideally want is a temperature of about 85 degrees. If you have one of those digital thermometers with an external probe, that works great to dangle down into the cooler, leaving the rest of the device outside so you can monitor the temperature without opening and closing the lid. Or, better yet, turn on the temperature alert, set it to 90 degrees, and it will let you know if it gets too hot. To regulate the temperature when it starts to get too warm, just use a tea towel to vent the lid (adjust the number of folds as need be). I can tell you, this worked like a charm! My sweet potato brioche doubled in two hours instead of two days! Whoo-hoo! So I just thought I’d share this idea with anyone else who may be struggling to get your breads to rise during the winter months. Hope it helps…