Friday, February 29, 2008

Comfort Foods for a Busy Work Week


WOW! Check it! I placed my book order to Amazon on Monday when I got back from the weekend in NYC, and these arrived yesterday...all the way up to the boonies where I live in only four days! Very impressive, Amazon, very impressive! I haven't even had a chance to look through the books yet--or even take the wrapper off of the Ferber volume--but I am excited about crawling into a hot tub with them over the weekend.

Until I have recipes to share from my new cookbooks, allow me to offer some ideas from recent dinners that I've made. After being gone all weekend, and not being able to do any big cooking or baking projects like I do, I was itchin' to get back in the kitchen. Plus, when you're road-tripping, you tend to eat too much crappy food, and I wanted something good and homemade. So I was quite proud of myself this week for taking more initiative in proper meal planning. I work long, late hours, and sometimes, I admit, I succumb to the siren's song of the pizzeria or make do with just a sandwich eaten off of the kitchen island. :-( But this time, I actually shopped like the Frenchies do, choosing things that looked good in the market that day and selecting recipes accordingly. Please celebrate this week's menus with me:

Sherried Cream of Tomato Soup with Buttery Thyme Bread
Cubed Pork Steaks with Golden Mushroom Gravy over Egg Noodles
Spicy Szechuan Noodles with Carrot-Cucumber Relish
Carne Picada Burritos (Steak Ranchero)
Macaroni and Cheese with Smoked Sausages

I know, right? I am greatly to be praised as a fully self-actualized weekday cook! And the secret is that most of these dishes use a few pre-fab, shortcut ingredients (i.e. a can of golden mushroom soup to enrich a pan gravy or some Emeril-brand "Kicked-Up" smoked sausages to go alongside homemade mac and cheese), but there is still a sufficent homemade quotient, enough to satisfy your need for "real food" during the busy work week. For instance, we got home very late Monday night after my choir rehearsal, but I still managed to pull off a freshly-made pot of soup and some indecently scrumptious bread to go with it. These are dishes from the delightful Pioneer Woman, and though they may come off like "cheater" recipes made with canned goods and French bread from the grocery store, they are quite delicious and very satisfying, especially on these still-frigid days. Besides, as Nigella says, there's something very satisfying about cooking with cans. ;-)

I made a few adaptations to this soup recipe, so here's my take on it:

Sherried Cream of Tomato Soup
(Source: adapted from
The Pioneer Woman Cooks!)

6 tablespoons melted butter
1 medium onion, diced (I would use one very large onion or two smaller ones myself)
*I would also throw in 4-6 cloves of minced garlic, as is my way
1 46-ounce bottle or can tomato juice (Instead of tomato juice, I swapped out a can of tomato paste and 4-6 cups of chicken stock, depending on how thick or thin you want your soup)
2 14 ounce cans diced tomatoes (I used one 28-oz. can of crushed tomatoes)
2 tablespoons chicken soup base
3 to 6 tablespoons sugar (I used 4--but taste to see how much you need to counteract the acidity of the tomatoes)
pinch of salt
black pepper to taste
1 cup cooking sherry (ACK! Never use cooking sherry--'tis an abomination. I used a drinkable dry sherry but only 1/2 cup of it, personal preference)
1 1/2 cups heavy cream
chopped fresh parsley**
chopped fresh basil**
**fresh herbs would better, of course, but I substituted one tablespoon dried parsley, one teaspoon dried basil, plus one teaspoon dried oregano and a good pinch of red pepper flakes
Saute diced onions in butter until transluscent. (Add minced garlic and the herbs if using dried, and saute another minute or two.) Add canned tomatoes. Add tomato juice, sugar, pinch of salt, and lots of black pepper and stir. Bring to a near boil, then turn off heat. Add in sherry and cream and stir. Add in herbs (if using fresh), adjust other seasonings, and serve with crusty bread, or ideally, the buttery thyme bread linked to above. (Though, as with most of the Pioneer Woman's recipes, you may want to clear it with your cardiologist first!)

This soup is also delicious with cheese. For dinner, I sprinkled some pecorino romano over each bowl, though parmesan or asiago would do just as well. And then the next day for lunch, I dropped a handful of cheese curds into my hot bowl o' soup, and it was amazing! The little blobs of cheese didn't fully melt, but became soft and squooshy and dee-licious floating around in there!


Before I wrap this up, I want to highlight one other recipe above, the Spicy Szechuan Noodles with Carrot-Cucumber Relish. I spied this one on another blog that I read faithfully, Culinary in the Country, though the original source is Cooking Light (May 2007). GOOD HEAVENS! I LOVED this stuff! Most of the time, when I make Asian cuisine at home, it's never as good as going out for it. But this is truly fabulous! The only fussy thing about the recipe is making the relish, as you have to salt-cure your cucumber first and let it drain for an hour, then add the carrots and other ingredients and let it chill for yet another hour. So I decided to shred and salt the cucumber in the morning, let it drain in the fridge while I was at work, then finish the relish when I got home, letting it chill while I got on with the rest of the dish. I originally thought, why not just throw those veggies in with the rest of the stir-fry and save yourself some hassle? But I came to realize that the dish is pretty much all tan in hue, and the relish adds nice colors on top, not to mention a freshness and crispness since it's not cooked. And the sugar and rice vinegar add a wonderful tangy compliment to the gentle heat of the noodles. I won't reprint the recipe (the link is above), but I used whole-grain spaghetti instead of udon noodles (the store I went to didn't carry them), and the only other change I made to the dish was adding some chopped peanuts to garnish, as I thought that it could use something crunchy. SO YUMMY! You have to try it!

Tuesday, February 26, 2008

Junior's Cheesecake: A Return to Gotham

AGAIN?? You went to the City AGAIN? TWICE in as many weeks?? How shamefully decadent!! Who do you think you are...the Queen? Did you inherit untold wealth and are, thus, made of money? And right after an unexpected and enormous car repair following the last sojourn downstate? What gives??

Yes, yes, it's true. I am freshly back from trip #2 to NYC over the weekend. Honestly, I didn't mean to go...it just kind of...happened. You see, before the fan fell out of my car and everything, I was considering attending a dog show, and an acquaintance of mine (who bred Fairchild, the number one PBGV and number two hound in the country last year!) was trying to put together a major, which are very hard to come by in my region. (Sidebar: In order to complete an AKC championship, a dog has to earn a total of 15 points including two "majors"--a win of three, four or five points--basically, by beating several dogs all at once. So with a rarer breed like PBGVs, you often have to work together to organize the entries at a show to have enough dogs to make a major. Got it? Good.) So my friend and I had hatched a scheme to make a major at the shows in Rockland County, though I had only ever been to those shows years ago when my first PBGV was still a young'un, and I was still foolishly trying to show her. The shows were at a different location then, in Walkill, which is closer to me, kind of between Poughkeepsie and Newburgh. I do remember the venue being hideous--a completely tiny and horribly overcrowded little gymnasium somewhere. Poor Prunelle almost got trampled to death, so I had to carry her everywhere just to keep her alive! They have since moved the shows to Suffern at Rockland Community College's Field House, which was very nice, but quite a bit further south. In fact, after I'd already entered the shows and started surfing the 'net to book a hotel room, I realized that it was just a half an hour from the Big Apple. Well, you know me. I wasn't going to be that close and not make a quick trip in to see a show!

What I really wanted to do was see Spring Awakening again, but I figured that would be inappropriate and a inexcusable squandering of funds. So I went on a tip from a colleague who teaches American Musical Theatre here at my school and got a cheapo preview ticket to In the Heights (only 30 bucks even after all the screw-you fees!). The show had enjoyed a terrific off-Broadway run, and is now moving up to the big time (like George and Weezy). Well, friends, maybe it was just me, as the crowd seemed to adore the show, but it just didn't do much for me. The sets were amazing, the lighting design was cool, the performances were solid, the dancing was hot, and the show was admirably fresh and energetic. It was also great to see a show on Broadway with salsa infused with hip-hop, things you don't usually see on The Great White Way. However, I'm sorry to say that I found the story to be trite and the songs forgettable, which leaves you kind of nowhere for a musical. And maybe I've just become cynical in my old age, but I guess I like my musicals with a dark, gritty underbelly. I want my characters afflicted with homelessness and AIDS (Rent), I want incest, abortion, sexual abuse and masochism (Spring Awakening), or I want to see the fabulous but saccharine Wizard of Oz story turned on its head and made into a treatise on the nature of good and evil and the oppression of minorities that are "different," with a dollop of sex and violence on top (Wicked). That is to say, I am not interested in white-washed stories of displacement due to urban gentrification, especially if they don't make me feel compelled to run right out of the theatre and immediately buy the cast recording. Surprisingly, the NYT agreed with me, saying that it was like a Disneyfication of the barrio, like "Sesame Street without the puppets." It's very funny that they should have written that, because when I was watching the show, the whole thing just struck me like a big-budget version of Villa Allegre. (Remember that one, Gen X-ers? It was that PBS show that taught kids Spanish, and it came on right after one of my favorite shows, The Electric Company. SING IT: "La, la, la, la, la, la, la, la, la, la, la, la, la...Villa Allegre!) Then again, maybe I was grumpy because I didn't have enough leg room, and I really just wanted to be seeing Spring Awakening again!

So I didn't dig the musical, and my boy, Grady, only got reserve at the dog shows (that's like second prize in a beauty contest, without the ten bucks of Monopoly money). But I did have one excellent thing that came of the weekend, and it is food-related. (Took you long enough, food blogga!) While wandering around waiting for In the Heights to start, I found myself in front of Junior's Most Fabulous Cheesecakes and Desserts. Though I have been to New York many times over the years, I had never been there. However, I tried their chocolate mousse cheesecake once when a friend ordered one over the internet to celebrate an office birthday. It was truly heavenly, but at about 40 bucks a pop (without shipping!), I decided--as is my way--to make my own version at home. This led to the development of the recipe below, which is perhaps among the best desserts that I make. It honors the Junior's cheesecake that was its inspiration, but it also reminds me a bit of Olive Garden's Black Tie Mousse Cake. So I call this creation, Black Tie Cheesecake. It takes awhile to make, so plan accordingly. But most of it is passive cooling/chilling time, and it's darn well worth it!

Black Tie Cheesecake

First, crush about half a package of Oreos (about 25) in a food processor until fine. Mix in 4-5 tablespoons of melted butter and press into the bottom of a 10-inch spring form pan.

Cheesecake Layer:
2- 8 oz. packages of cream cheese, at room temperature
scant cup of sugar
2 tablespoons corn starch
1 ½ teaspoons vanilla
1 large egg
3/8 cup heavy cream

Place one package of cream cheese, a scant 1/2 cup of sugar, and the corn starch in the bowl of a stand mixer. Beat on low until creamy, about three minutes, scraping the bowl as necessary. Beat in the remaining package of cream cheese. Increase the mixer to high and add the remaining scant ½ cup of sugar. Blend in the egg, beating well after adding it, then mix in the heavy cream. At this point, mix the filling only until completely blended—be careful not to over mix. Gently spoon the cheese filling on top of the Oreo layer. Bake the cheesecake at 350 degrees until the center barely jiggles when you shake the pan, about 40-50 minutes. Cool the cake on a wire rack for one hour.

Chocolate Mousse Layer
9 oz. (about 1 1/3 to 1 1/2 cups) bittersweet or semi-sweet chocolate
4 egg yolks
1/3 cup sugar
1 1/4 cups whipping cream, divided

Melt finely-chopped dark chocolate over hot water. Beat the egg yolks with the sugar until pale. Heat 1/4 cup of the whipping cream just to the boiling point, then remove from heat and whisk in the egg yolks. Fold in the melted chocolate. The mixture will immediately thicken. Cool to approximately 100 degrees. Whisk the remaining cup of whipping cream until stiff. Fold with the egg and chocolate mixture--one tablespoon at a time--until the filling becomes soft, then fold in the remainder of the whipped cream. Spoon the mousse on top of the completely cooled cheesecake, level it with a spatula, and place in the refrigerator for several hours or, preferably, overnight.

When the mousse is completely cold and much firmer, it’s ready for the ganache topping. Melt about a half cup of bittersweet or semi-sweet chocolate with a half cup of cream (whipping cream will make it softer, heavy cream will set up firmer—your choice). Cool to lukewarm—not so hot as to melt the mousse, but still loose enough to pour and spread on top of the mousse layer of the cheesecake.

Return the whole thing back to the fridge for a few more hours or overnight or until you can’t stand to wait anymore!


To finish my Junior's anecdote, I bought a GINORMOUS piece of the chocolate mousse cheesecake that I remembered so fondly, though I eyeballed the carrot cake cheesecake longingly (isn't the very idea of it inspired?). But as one piece costs almost seven bucks and would feed a small village, I just got the one slice and lovingly hand-carried it on planes, trains and automobiles all the way home to Plattsburgh (well, maybe not planes) to share with Cyd. Wasn't that nice of me? ;-) But before I left Junior's, I had spotted a display of cookbooks in the restaurant window. When I got home, I looked it up on Amazon, and the index indicates that both the chocolate mousse cheesecake AND the carrot cake cheesecake recipes, along with 48 tasty others, are included in the volume. YAY! And as I was browsing other books to try to bump up to $25 and get the free shipping, I discovered another wonderful surprise. Christine Ferber's Mes Confitures is finally back in print, and can be yours for the reasonable price of $19.77! YIPPEE!

So now I am going to try...TRY...to stay away from NYC for a few months until my coffers can be replenished (saving up for The Little Mermaid or Xanadu, maybe? tee hee). In the meantime, I will console myself and ease the separation anxiety by making many authentic Junior's cheesecakes!

Friday, February 22, 2008

The honeybells are here! The honeybells are here!

Actually, my first honeybell shipment came a couple of weeks ago, but it was a very disappointing batch. Several had bad/soft spots, about a third were unripe/green, and most were horribly scarred (too ugly to make a pretty preserve). I was initially very sad, but I contacted Cushman's, and they were extremely pleasant about it, offering to replace my entire order, no questions asked. Thus, batch #2 arrived two days ago, and it was MUCH improved! So I promptly set about my marmalading tasks. I learned several important lessons when making the blood orange marmalade recently, the most important of which is that making marmalade takes pretty much FOREVER! So I cleverly hatched a plan to spread out the work. I washed and prepared the fruit the first evening, did the initial cooking the next morning, and then the final cooking off and canning the second evening. This was a MUCH better, more humane schedule.

To prepare the fruit, I decided to try and avoid all pith and go for a less bitter preserve more suited to my wimpy American palate this time around. I used a vegetable peeler to just take off the outer skin of 12-14 washed honeybells, and then julienned the peels very finely. Then I removed the outer pith from the rest of the fruit (it came off in big pieces, just like when you peel an orange). Next, I TRIED to supreme the honeybells, but the fleshy innards clinged to the membranes so much that it proved impossible! So I took off as much of the tougher parts of the membrane as I could, then just roughly chopped the fruit segments. After all, I thought, many orange marmalade recipes have you used the whole orange, either thinly-sliced or finely chopped. Of course, this was a RIDICULOUSLY messy job, as honeybells are RIDICULOUSLY juicy! (In fact, Cushman's sends a package of plastic bibs with every order--pictured above! Tee hee.) But after the requisite three hours of work, I had a pot-full of honeybell pulp, shreds of peel, and plenty of juice, including that of two lemons. Having learned my lesson about trying to use a flour sack towel as a jelly bag, I added all of the pith and membranes and seeds and lemon rinds to four layers of cheesecloth tied up with string ("these are a few of my...." oh, never mind). I added water to cover the fruit mixture, submerged the bag of pectin-y bits, brought the pot to a boil, and simmered everything for five minutes before covering and letting it sit overnight.

The next morning, the pot was brought back to the boil and cooked (uncovered) for 25-30 minutes to soften everything. Then I put the lid back on and left it to sit until I got home that night. I must confess, I had become a bit agitated that, instead of dissolving as I had hoped they would, the chopped membranes (good grief--that sounds very Hannibal Lecter or maybe one of those Saw movies, doesn't it?) seemed to have swelled up and become far too prominent in my preserve. So I decided to press the softened fruit through a strainer. Happily, the shards of peel held their shape, but I pressed the membrane bits right through the collander, yielding more of a mush, and that seemed a fine solution. However, next time, I think I may just take off the outer peels and juice the rest of the fruit by hand. That way, I'd get the juice and most of the flesh, but leave the membranes with the rinds. Note to self: don't try to supreme honeybells next time! After dealing with the membranes, I kneaded every drop of pectin that I could get out of my cheesecloth satchel, which worked great, by the way--not one tear or rip! And when I measured everything, I had about 11 cups of pulp, juice, peel, and pectin. This time, I decided to follow June Taylor's guideline of 50-60% sugar for marmalade, which was between six and a half and seven cups on the higher end. You may recall that, for the blood orange marmalade that had the pith included, I upped it to 75% sugar to counteract some of the bitterness. But as sweet as the honeybells are, and as I had removed most of the pith, I found nearly seven cups of sugar to be plenty!

After adding the sugar, I brought the whole mess to a rolling boil and set the timer for 30 minutes. On average, the final cooking down process takes anywhere from 30-45 minutes--longer than 45 minutes and you risk carmelizing the sugar, thus ruining the color and fresh fruit flavor of your marmalade. So imagine my panic when, after an hour of cooking had elapsed, it STILL wasn't to a sufficient jelling stage! I cooked it another ten minutes until my nerves couldn't take it anymore, and I pulled it off of the heat. Mind you, it was still only at about 215-218 degrees on my candy thermometer (you want 220-221), and the color and flavor were still bright, but I didn't want to chance it. (Plus, it was getting to be past my bedtime!) So I went ahead and filled ten half-pint jars and processed them in a boiling water bath for ten minutes. This morning I checked them, and although the marmalade was a little looser than I might like, they certainly weren't syrupy or runny. So I'll check them again in a week or two (sometimes if you give them some time, they'll continue to set up for you), and if they are still too loose, I may open up the jars and boil them down a little longer. But I have a hunch that they'll be fine. I enjoy a more tender marmalade (as opposed to one that is the consistency of Jello), and besides, they'll set up more when you open a jar and then store the leftovers in the fridge.

What I can report, though, and this is the most important thing, the marmalade tastes AMAZING! It is sweet and sunny and slightly tangy, and it's just GORGEOUS to boot! It is the most vibrant yellow-orange color, and though it may have been a mistake, those softened, smooshed-up membranes added a wonderful body to the preserve, whereas many marmalades are more like clear jelly with slivers of peel floating around in it. This has more character and texture, which I like, though not as much as the kind of marmalade made with whole slices of citrus. I think it's a very happy medium, plus, it's so delicious, I might just have to make another batch!

Sunday, February 17, 2008

My Tardy Valentine...

I was going to post about this little Valentine's Day treat for my co-workers, not to mention, a fabulous Valentine's dinner menu, but Thursday became a total nightmare. No, no, it was not the embittered cynicism of an aging single woman that marred the day, but an automotive catastrophe which was far more upsetting. When we were in the Big City last weekend, I scraped a curb in the front as I was parking at the Meadowlands. It must have broken something at that point, and then I drove over some icy snow in the road on Wednesday, and that was the final straw. As I was driving home that night, I heard something begin to drag and scrape, and it got louder as I neared home. But it was too dark to see what was wrong that night. The next morning, we were horrified to see the whole fan had been ripped out of the car! What's worse, as we were heading out to take it to my kindly repairman down the road, we got stuck in the (unplowed) driveway, and my longsuffering neighbor had to come push us out. Thank God for him, because he loaned us his car for two days to get to work while mine was being repaired. (YES, he is the best neighbor in the whole world!) So the bottom line is, the car needed a new fan, and of course, no used ones could be found. Wanna guess how much one of those stupid plastic things cost from the dealer? $330! And that was before the labor charges. Again, I am thankful to have an awesome guy down the road that charges next to nothing for labor, or it surely would have been twice the cost of the part. Still, after being in NYC and overspending as one always does, this car repair came at a terrible time, and it was especially aggravating because it was my dumb mistake that caused the damage. UGH! Happy Valentine's Day to me!

However, the Valentine's treats (pictured above) that I made for my division the night before the great auto debacle turned out very cute and VERY delicious! I used a recipe for German Chocolate Mini-Cakes from King Arthur Flour, and I made them in those little Reynolds Fun Shapes Baking Cups, in heart shapes, of course. I don't even like German Chocolate Cake (I don't care for coconut), but this cake was awesome! The cake itself was luscious--Cyd and I licked the batter bowl clean! I swapped a little Hershey's Special Dark Cocoa to make the flavor and color even deeper. Then it's frosted with a simple but heavenly ganache, and topped with a wonderful toasted coconut, pecan and caramel mixture that is good enough to eat by itself as candy! I will definitely be making this recipe again, perhaps next time as a layer cake.

German Chocolate Mini-Cakes
(Source: King Arthur Flour)

Cake:
3/4 cup (1 1/2 sticks, 6 ounces) unsalted butter*
1 3/4 cups (12 1/4 ounces) granulated sugar
1/2 teaspoon salt
2 teaspoons espresso powder
2 teaspoons baking powder
2 teaspoons vanilla extract
2 cups (8 1/2 ounces) all-purpose flour
3/4 cup (2 1/4 ounces) Dutch-process cocoa (I swapped out 1/4 cup Hershey's Special Dark Cocoa)
4 large eggs
1 1/2 cups (12 ounces) cool water
*If you use salted butter, reduce the salt in the recipe to 1/4 teaspoon.

Icing:
1 cup (6 ounces) semi-sweet chocolate chips (I used bittersweet)
1/2 cup (4 ounces) heavy cream

Topping:
6 tablespoons (3 ounces) unsalted butter
1/4 teaspoon salt
1/4 cup (2 ounces) half and half or milk
1 cup (7 1/2 ounces) light brown sugar
1 teaspoon vanilla extract
1/8 teaspoon pecan flavor or pralines & cream flavor, optional (I used princess cake flavoring)
1 cup (2 1/2 ounces) shredded or flaked coconut, sweetened or unsweetened, toasted*
1 cup (3 3/4 ounces) chopped pecans, toasted**

Toast the pecans and coconuts until golden brown in a 350°F oven. This is most easily done if you place each in a 9" round cake pan, and put them in the oven as soon as you pull out the finished cake. Bake for about 10 minutes, watching carefully towards the end, as the coconut will brown quickly. Remove from the oven, and stir the coconut to distribute the less-browned and more-browned pieces together evenly.

Preheat the oven to 350°F. Lightly grease a 9" x 13" pan.

To make the cake: In a large mixing bowl, cream together the butter, sugar, salt, espresso powder, baking powder, and vanilla till very smooth and creamy, beating for 5 minutes. Add the eggs to the butter mixture one at a time, beating well after each addition and stopping to scrape the bottom and sides of the bowl after you’ve added the first 2 eggs. Add one-third of the flour to the creamed mixture, then add half the water, another third of the flour, the remaining water, and the remaining flour. Scrape the sides and bottom of the bowl occasionally throughout this process. Pour the batter into the prepared pan. (I divided the batter into 21 baking cups instead.)

Bake the cake in a preheated 350°F oven for 35 to 40 minutes (my cupckaes took only 30 minutes), until a cake tester inserted into the center comes out clean, and the cake begins to pull away from the sides of the pan. Remove the cake from the oven. Cool the cake for 10 minutes, then run a table knife all around the sides of the pan to loosen the edges. Use a spatula to gently lift the cake free of the pan all around the edges; you’re going to turn it out of the pan, hopefully without sticking. Place a piece of parchment or waxed paper on a cookie sheet, put the sheet, parchment-side down, atop the cake pan, pick up the cake pan/cookie sheet, and turn the whole thing over. The cake should settle down atop the cookie sheet. Lift off the pan, and allow the cake to cool for 5 minutes. Use a 2 ¾" to 3" round biscuit or cookie cutter to cut 12 circles out of the cake. Or use whatever shape cutter you want: hearts or scalloped flower shapes are nice, too. Whatever you use, it should be around 3" in diameter. Carefully transfer the cakes to a cooling rack, right side up, and allow them to cool. As for the leftover scraps, snack on them (baker’s privilege!), or stir into instant pudding for an easy dessert. You’ll have about 4 to 5 cups of coarse cake chunks, just in case you have a recipe calling for that amount.

To make the icing: Heat the chocolate chips and cream till the cream is very hot; this is easily done in the microwave. Remove from the heat, and stir till the chocolate melts and the mixture becomes smooth. Don’t panic; it’ll look very sloppy at first, but keep stirring and it’ll become a smooth, rich glaze.Working with one cake at a time, grasp it in the center with thumb and forefinger, and roll it through the chocolate like a wheel, to coat the sides. Place the coated cake onto a piece of parchment paper, to catch any drips. Repeat with the remaining cakes.To make the topping: Combine the butter, salt, half and half, and sugar in a medium-sized saucepan. Bring to a simmer, and cook gently, stirring occasionally, for 5 minutes. Remove from the heat, and stir in the flavors, coconut, and pecans. Spoon the topping evenly atop the cakes; you’ll use about 2 1/2 tablespoons for each. A tablespoon cookie scoop is perfect for this task.

Yield: 12 servings (I got 21 cupcakes!)

Because Thursday was such a nightmare, we just ate some leftovers for dinner and called it a night. But this weekend, I finally prepared the Valentine's menu that I had originally planned. As an appetizer, I made these utterly appalling, ridiculously fattening, but incredibly tasty little abominations that I am ashamed to either describe or picture here. But I will link you to the highly amusing Pioneer Woman's website (remember, she's the one who almost killed us with her heart-clogging but scrumptious mashed potatoes at Christmas!) where you can see pictures of the whole process--but skip the "parmesan" in the green can, I beg you, and grate your own! For the main course, I made roasted Cornish game hens stuffed with herbed rice. And for dessert, Valentine's Day demanded the ultimate chocolate pie! This recipe comes from the American Pie Council, and it was last year's winner in the chocolate cream division at the 2007 National Pie Championships. (Why don't they show that on the Food Network anymore? I lived for it!) Anyway, this is way more than a chocolate cream pie--more in the French Silk category, I'd say. It has an Oreo crust, then a thick layer of ganache, and finally, a light, Nutella-based filling. OH MAN, OH MAN! It a chocolate lover's ultimate fantasy! Of course, you should top it with whipped cream and perhaps some chocolate shavings, and I did that, but I am picturing it "naked" so you can get a better view of the different layers. DELISH! It will put the most amazing sweet finish to your next Valentine's Day or any other special occasion, and it will surely do much to soothe and comfort you if the fan happens to fall out of your car!

Evette Rahman's Oh My Ganache! Chocolate Cream Pie
(Source: American Pie Council)
Serves 8

Crust:
1 1/2 cups Oreo cookie crumbs
1/4 cup unsalted butter, melted

Preheat oven to 350 degrees. Mix crust ingredients and press into a deep-dish pie plate. Bake for eight minutes, then cool completely.

Filling:
1/2 cup heavy whipping cream
3/4 cup semi-sweet chocolate morsels
1/2 cup unsalted butter, softened
1/4 teaspoon kosher salt
1/4 cup powdered sugar
2 extra large eggs
3/4 cup chocolate hazelnut spread (Nutella)
1/2 cup whipping cream, whipped to firm peaks
additional sweetened whipped cream

Heat cream in a small saucepan until hot. Place morsels in a small bowl. Pour hot cream over morsels and let stand for five minutes. Stir gently to combine. Let cool. Chill until very thick but still spreadable. Spread evenly over bottom and sides of prepared pie shell. Chill.

In a large mixing bowl, cream together the butter, salt, and sugar until fluffy. Add eggs, one at a time, beating two minutes after each addition*. Add Nutella and beat again for about five minutes, scraping down the sides as necessary. Fold in the whipped cream, then chill the mixture for an hour. Fill the prepared pie shell with the Nutella mixture, and chill again for at least four hours. Serve with additional whipped cream, and any chocolate garnishes as desired.

*When I beat in the eggs, the butter separated into little chunks floating around in eggy goo, and I thought it would never come back together. Also, my Nutella was rock-hard because my house is always so cold. So I softened it a little in the microwave before mixing it in (it was only tepid to lukewarm at most, not hot), and I think that helped bring it all together. It became very smooth and glossy, so don't worry if yours starts off looking lumpy.

Warning: As with other traditional French Silk Pies, this recipe contains raw eggs. So children, the elderly, and those with compromised immune systems should be careful. Everyone else should be okay, as long as you trust the source of your eggs. (My producers are out back in their coop!) But you could always use eggs pasteurized in the shell if you're nervous about it.

Tuesday, February 12, 2008

Blessings of Bread and the Big City

I once told the story of my sweet friend June who showed up on my doorstep (an hour round-trip from town, I should note!) one evening with warm, fresh-baked bread to give me. I thought that this magnanimous gesture could never be topped, but my boys out in Oregon may have done it. When we got home from work last Thursday night, there was a package by the back door. We didn't even get the box opened before the enticing scent of its contents assailed our senses.

Though I am extremely jealous of John and Keith (Keith is pictured below, all smug and pleased with himself!) and harbor much ill will against them because of their new, monolithic wood-fired brick oven, I am compelled to set aside my envious and vindictive feelings because they sent me this most wondrous care package! Inside was a long sunflower-encrusted baguette of some sort, a country levain boule, a good-sized ciabatta, and even a sticky bun, lovingly prepared from natural/sourdough starters and pulled from the fiery mouth of their own backyard oven before being hustled off to the post office. Oh, and as a bonus, they tucked in some wonderfully moist, tender and flavorful sun-dried tomatoes. Could there possibly be better friends on this planet? I think not!

Unfortunately, we were going out of town the next day, so I had to park the sunflower loaf in the freezer, but we managed to quickly consume half of the levain before dinner that very night. I sliced it thinly, buttered the slices and broiled them until crisp. Then I rubbed the slices with cut garlic and topped them with mozzarella, popped them back in the oven to melt the cheese, and then served the cheesy toasts with a big spoonful of my homemade roasted red pepper spread. MERCY, MERCY, and again I say it, MERCY!

Cyd took the sticky bun to work the next day for her breakfast or coffee break or whatever, and she reports that it was wonderful! (Naturally, I didn't have any of it because it involved raisins....shudder!) And as for the ciabatta, I decided to make a pressed, Italian, muffaletta-type sandwich out of it to take on our weekend road trip into the Big City. I sliced it in half and spread one side with mayo, then layered on sliced mozzarella and every cold cut I could find in the fridge, including pastrami, turkey, ham and salami, then topped that with a finely-chopped veggie mix of mushrooms, black olives and red peppers marinated in olive oil, vinegar, and minced fresh garlic (trust me, this MAKES the sandwich...any sandwich!). Of course, I had to add a layer of banana pepper rings, like I do, then I squirted some vinaigrette on the other half of the ciabatta and closed her up. I double-wrapped the big bitch, and let it rest overnight in the fridge, weighted down by random heavy things like a big tub of sour cream (what did you call me?) and a Tupperwared vat of mysterious leftovers. Somehow smooshing the sandwich layers together and letting those flavors all mingle makes for a magical outcome. YUM!

As for the City, it was a quick but satisfying trip that included specialty dog shows Saturday and Sunday at the Meadowlands in Secaucus, NJ, dinner Saturday at the Carnegie Deli where the world's most ridiculously large sandwiches and creamiest cheesecake are served (I had the "Woody Allen"--that's corned beef and pastrami), an amazing Broadway musical* where we encountered SNL's Amy Poehler who had come to see the show, a requisite trip to the Sullivan Street Bakery, and our last, most glorious meal Sunday at AmyRuth's in Harlem. I had "The Rev. Al Sharpton"--that's chicken and waffles to the uninitiated, though I gave serious consideration to "The Ludacris" (wings and waffles). Cyd had fried chicken with sides of potatoes and gravy, string beans, and we shared a simply divine mac and cheese and a heavenly slice of sweet potato pie for dessert. Truthfully, everything is amazing there--the best soul food north of the Mason-Dixon Line! We squeezed a lot of fun and good eats into two days in Gotham, but we're older now, and we're really dragging this week at work. Thank goodness we still have homemade bread baked by loved ones to sustain us. :-) THANKS, Keith and John!

*On a semi-related tangent, I beg of you, if it is in your power, get yourself to NYC and go see the Tony award-winning musical, Spring Awakening. It is just the most incredible show with absolutely gorgeous music! It is based on a German play that is over 100 years old, but has banned from being performed for most of that time for its surprisingly fresh and obviously timeless issues surrounding teenage sexual exploration and maturation. Its themes are dark, but it is, at the same time, remarkably uplifting. Indeed, I haven't been so moved by a show since Rent, and that is saying something for me, as Rent is my all-time favorite. And if you can't make it to New York, at the very least, get the cast recording. You will never regret it. The haunting songs (by Duncan Sheik--remember the song "Barely Breathing?") will seep inside you and infuse the fibers of your being.

Thursday, February 07, 2008

Super Bowl Spread

YIKES! Where does the time go? I have been meaning to post about our Super Bowl feast all week, and here it is Thursday afternoon, and this is the first free moment I've had! In any case, I hope everyone enjoyed the big game on Sunday. I loathe sports, but even I thought that last touchdown was awfully exciting! And I think it's neat that the Manning brothers won in back-to-back years, both MVP's. That's very very cool. Usually I hide in the kitchen making snacks, only watching the commercials and the halftime show, but was it just me, or were they less than spectacular this year? None of the commercials were particularly fabulous, and though I like Tom Petty, he ain't no Prince or Paul McCartney or Michael Jackson...or Janet Jackson, for that matter! And I shudder to think about Mr. Petty having any kind of "wardrobe malfunction." Ewww. So I actually tried to watch the game this year, but I didn't even make it through the first quarter before I passed out on the couch! ;-) It was a good thing that I had much of our Super Bowl eats prepared in advance, and Cyd even made dessert--imagine that!

Though Super Bowl Sunday demands manly, heart-clogging, trashy foods, our pre-function nibbles were strangely genteel. We had jumbo shrimp with a spicy dipping sauce, as is our way, and another cute little tidbit that was a quick and easy version of Paula Deen's brie en croute, or brie in puff pastry. Unfortunately, we gobbled them all up before I thought to take a picture, but I will explain my method nevertheless. First, I toasted a half cup of chopped walnuts in two tablespoons of butter (4-5 minutes until the butter and the nuts begin to brown). Then I mixed in two tablespoons of brown sugar (up to 1/4 cup if you want it sweeter) and a sprinkle--oh, a mere whisper--of cinnamon and a pinch of salt. Next I took those little pre-fab frozen phyllo cups (15 in a package) and filled each with a spoonful of the nut mixture and topped with half of a Babybel cheese. Then I baked them for about ten minutes in a 350-degree oven to crisp up the shells and melt the cheese. Easy, delicious, and rather sophisticated!

For a main dish with more testosterone, I tried a recipe that has been languishing in my "to-try" pile since last year when the Bears played the Colts. It was an Italian Beef sandwich from Tim, a prominent presence over at the Cooks Illustrated message boards. Though I swapped out flat-iron steaks for chuck roast and cooked it all in the crock pot instead of the oven, the sandwiches turned out great! And then, of course, we had to have our annual seven-layer dip. My version involves refried beans mixed with homemade salsa to make them softer for dipping into and imminently more flavorful. I top that with a double layer of guacamole (that's the secret!), a thin layer of sour cream, a ton of shredded cheese, chopped black olives, and green onions on top. It's the best! But I always end up making too much, so I brought the leftovers into work this week, and within a few hours, the dip had disappeared! TOUCHDOWN! Ok, so sports metaphors don't work for me. Fine. Here's the Italian Beef recipe:

Chicago Bears Style Italian Beef
(Source: Tim of the
Cooks Illustrated Message Boards)

5 pound bone-in chuck roast (I used about five pounds of flat-iron steak instead)
salt and pepper to taste

1 teaspoon paprika (I used smoked)
1 tablespoon Greek oregano
1 tablespoon garlic powder or one head of garlic crushed (I opted for the latter)
1/4 teaspoon red pepper flakes
1/4 teaspoon ground black pepper
2 or more minced pepperoncini

1/4 cup pepperoncini juice
2 tablespoons lemon juice (from two lemons)

1 chopped onion (optional, but why wouldn't you want it?)
2 cups excellent beef stock
5 bay leaves (I used ground for this)

Combine all spices into a paste with some pepperoncini and lemon juice. Rub on roast.

In a Dutch oven, add all liquids and the seasoned roast. Cover and roast at 350 degrees for 2-3 hours until meat is falling from the bones. (I cooked it in the crock pot for 10-12 hours on low.)

Remove roast, let cool and shread into bite size pieces. Place back into pot to reheat. Serve with toasted hoagie rolls, horseradish mayo and more pepperoncini. Some people also add mozzarella cheese, but I went with Swiss. Chicagoans may balk at the faux pas, but it was darn good eats!

Finally, for dessert, Cyd made an excellent pineapple upside-down cake. We found some lovely golden specimens at Sam's Club for three dollars apiece, and she wanted to do something that would really showcase the fruit. Of course, she usually makes grand plans to make a special dish, but ends up just eating the fresh pineapple quickly before it goes bad and has to be thrown away. But to my shock and awe, she took herself into the kitchen this weekend, tackled the onerous job of deconstructing the pineapple, and then actually made a cake from scratch! And in making a few substitutions to the original recipe, she may have made the cake better than anyone thought possible! Instead of a yellow cake base, this was more of a light spice cake laced with dark rum whose tropical flavors perfectly complimented the caramelized pineapple on top. Bravo, Cyd! (We'll make a proper cook of her yet! Tee hee.) Here's that recipe:

Pineapple Upside-Down Cake
(Source: Gourmet via Food Network)

For topping:
1/2 medium pineapple, peeled, quartered lengthwise, and cored
3/4 stick unsalted butter
3/4 cup packed light brown sugar

For batter:
1 1/2 cups all-purpose flour
2 to 3 teaspoons ground cardamom (we were out of cardamom, so we substituted 1 1/2 teaspoons cinnamon, a pinch of cloves and a quarter of a nutmeg, grated)
2 teaspoons baking powder
1/4 teaspoon salt
3/4 stick unsalted butter, softened
1 cup granulated sugar
2 large eggs
1 teaspoon vanilla
1 tablespoon dark rum (don't omit this, even if you think you don't like rum--it's not enough to make the cake "boozy," but it adds a wonderful depth of flavor)
1/2 cup unsweetened pineapple juice (we used orange juice, which was yummy with the other tropical flavors)
2 tablespoons dark rum, for sprinkling over cake (optional--we omitted this)

Special equipment: a well-seasoned 10-inch cast-iron skillet (we used a Dutch oven)

Preheat oven to 350 degrees F.

Topping:
Cut pineapple crosswise into 3/8-inch-thick pieces. Melt butter in skillet. Add brown sugar and simmer over moderate heat, stirring, 4 minutes. Remove from heat. Arrange pineapple on top of sugar mixture in concentric circles, overlapping pieces slightly.


Batter:
Sift together flour, cardamom (or other spices), baking powder, and salt. Beat butter in a large bowl with an electric mixer until light and fluffy, then gradually beat in granulated sugar. Add eggs, one at a time, beating well after each addition. Beat in vanilla and rum. Add 1/2 of the flour mixture and beat on low speed just until blended. Beat in pineapple (or orange) juice, then add remaining flour mixture, beating just until blended. (Batter may appear slightly curdled.)

Spoon batter over pineapple topping and spread evenly. Bake cake in middle of oven until golden and a tester comes out clean, 45-50 minutes. Let cake stand in skillet five minutes. Invert a plate over skillet and invert cake onto plate (keeping plate and skillet firmly pressed together). Replace any pineapple stuck to bottom of skillet. Sprinkle rum over cake and cool on plate on a rack. (I slid the cake from the plate onto the rack to cool. Otherwise you will steam the bottom of the cake to mush!)

Serve cake just warm or at room temperature.

Cooks' Notes:
• Some of the food editors found 3 teaspoons of cardamom to be too much, but others loved the intense flavor. • Cake may be made 1 day ahead and chilled, covered. Bring to room temperature before serving.

Gina's Note: You may want to use a propane torch or run the cake under the broiler for a minute or two to caramelize the topping a bit more after turning it out of the pan. Just an idea...


Sunday, January 27, 2008

In a Citrus Frenzy: An Homage to June Taylor

Yep, you guessed it. This is another crazy midwinter canning post! I was reading the GardenWeb's Harvest Forum recently, and I came across a mention of Honeybell Marmalade. What's a honeybell, I wondered? Apparently, it's a super-sweet, super-juicy tangelo (tangerine x grapefruit cross) with a very short season, basically only during the month of January. So intrigued was I that I quickly ordered up two dozen honeybells to be sent from Cushman's in Florida...pronto! I was feeling quite smug and pleased with myself on my acquisition of this citrus marvel, until I was bragging to my friend June about my order, and she asked, "Oh, are they like mineolas?" I told her yes, that according to my extensive internet reading to figure out what in the world I had just ordered, they are close cousins, crossed with the same tangerine (Darcy) but different varieties of grapefruit (Duncan for the honeybell, Bowen for the mineola). And she replied, "Oh, I love those! You can get them at Hannaford!" Hannaford is one of our regional grocery chains, and I should have known to check there first, as they were the ones that had my nearly-impossible-to-find quinces in the fall. Drat! Oh well. No harm done. I still look forward to the arrival of my Cushman honeybells.

In the meantime, I stopped by Hannaford to see if they had any other interesting fruit for me, and sure enough, they had a beautiful crop of Moro blood oranges, also known as raspberry oranges for their deep, dark flesh and hint of berry taste. They were so beautiful and fragrant with rinds that looked like a sunset, and since I need to practice my marmalading skills before the honeybells arrive, I bought a dozen, naively trusting that I would be able find a good recipe for blood orange marmalade when I got home. Easier said than done! I have done an exhaustive search of the internet, the cookbooks on my shelves, and even a few on Amazon, and came up with very few marmalade recipes that deal specifically with blood oranges. Traditionally, marmalade is made with Seville oranges, which are quite sour. So following a traditional orange marmalade recipe would, I theorized, yield a product that would be too sweet. What to do, what to do?

When looking for jam-making inspiration, I idolize two women in particular: Christine Ferber of France and June Taylor in the Bay Area. Unfortunately, I could not consult Ms. Ferber, as I do not have her book, Mes Confitures: The Jams and Jellies of Christine Ferber. Mind you, I have given it twice as a gift, but procrastinated too long to order one for myself, and now it's out of print! BOO! Used copies on Ebay and Amazon and the like are going for between $80 and $160 (three to six times its regular price)! So until the good people of Michigan State University Press get around to printing some more, I'm out of luck there. :-( Now June Taylor doesn't have a cookbook (more's the pity!), but she does have a video interview on Chowhound where she's shown making and talking about...blood orange marmalade! I thought I had hit pay dirt until I realized that Ms. Taylor had not offered up a specific recipe for the marmalade, just the technique. It was a start, anyway. And I did find three of her marmalade recipes online (grapefruit and Meyer lemon, thick-cut orange, and tangerine and grapefruit), along with a lengthy New York Times Magazine article which yielded further clues. I then consulted my trusty Ball Blue Book and also considered the approaches of every other blood orange marmalade recipe that could be found, and I think I have managed to develop a method in the style of June Taylor that worked perfectly for the blood orange marmalade and will, I believe, also compliment the Cushman honeybells when they are delivered. Here we go...and be advised, no one said marmalade was going to be easy, or quick. Indeed, most methods advocate a two, if not three-day process!

The first day, I prepared the fruit, breaking down the dozen blood oranges. If you can find organic blood oranges where you live, knock yourself out. But in my tiny 'burgh, it's Sunkist from California or nothing. So first, I scrubbed the fruit under very warm water to remove the stickers, the wax, and any pesticide residue. Then, following the technique of Ms. Taylor, I spent every bit of three hours cutting up all of those oranges. First, you cut off the top and bottom of each piece until you can see the flesh. Then you supreme the fruit (cutting out the segments between the tough membranes--this is what takes forever), leaving the peel on, then slicing each segment into thin little squares, reserving the discarded bits to be cooked in a jelly bag later. I added the little orange pieces to a large, heavy-bottomed pot along with the juice of two lemons (reserving the seeds and rinds for the jelly bag), and added water to cover, then submerged the jelly bag (I tied everything up into one of my flour sack towels). I brought the mixture to a boil and simmered it for five minutes, then covered the pot and let it sit overnight. If your house isn't as cold as mine, you might want to refrigerate it to be safe. June Taylor does not do this step, but nearly every other marmalade recipe that I consulted recommends soaking the fruit overnight--with or without a brief initial cooking. I have no idea what this is for. My guess is that it helps to soften the citrus peels in stages rather than cooking it in one long session and risk scorching it. Maybe the water also helps leech out some of the bitterness? Who knows? But since it was very late when I came to the end of the eternal fruit-cutting part of the program, I decided to employ the common let-it-soak method. Some recipes just say overnight (which I take to mean eight hours), another said 12-18 hours, and many said 24 hours.

The next day, I brought the pot back to a boil (uncovered) for the next stage of cooking, to soften the peel fully, evaporate some of the water, and render the natural pectin out of the fruit and reserved bits in the jelly bag. This takes 20-30 minutes. After that, many recipes recommend letting the mixture cool, and refrigerating it for up to another 24 hours! But since it's Sunday, and I had to get my marmalade on today before returning to work tomorrow, I opted to just keep going. I removed the jelly bag, and after it was cool enough to touch, I kneaded and squeezed between a third and a half a cup of pectin out of the bag (as demonstrated in the June Taylor video). Unfortunately, in doing so, I destroyed my flour sack towel which simply could not withstand the abuse. So next time, I will seek out muslin bags or perhaps try 4-6 layers of cheesecloth instead. In any case, I mixed the pectin that I rendered from the jelly bag back into the pot of fruit and then measured the whole business. I had just over two quarts (eight cups) of fruit and thickened juice. Now, here was my biggest dilemma. Almost every marmalade recipe on the face of the earth calls for a one-to-one ratio of fruit to sugar. But Ms. Taylor is famous for making conserves with as little as 20% sugar, and still just 50-60% sugar for marmalades (so sayeth the New York Times article). So for eight cups of fruit, that would mean only five cups of sugar at most, as opposed to the more typical eight cups. I was worried that, without enough sugar, perhaps it would be hard to get the preserve to set properly. Plus, I suspect that Ms. Taylor, being a Brit, enjoys a more bitter marmalade than I would with my wussy American palate. So I started with five cups, but when I tasted it, it was indeed too bitter to my taste. So I decided to up the sugar to six cups for a 75% ratio of sugar to fruit. I gave some to Cyd to try, as she tends to like things less sweet, and she thought it was perfect. I'm still undecided. If I was making it just for myself, I still might opt for the classic one-to-one proportion. However, with all of that rendered pectin from the jelly bag, I needn't have worried about the set, even when reducing the sugar.

Once you get it as sweet as you want it, it's time for the final "cooking off" stage. You will want to bring the pot rapidly to a roiling boil, and let it go like gangbusters for 25-40 minutes until it reaches the set point. How will you know? Well, there are a few ways to check. The surest way is with a candy thermometer (it should reach 221 or 222 when it's ready). You can also put a dollop on a chilled plate and see if it mounds up a bit ("like a fresh egg" says June Taylor) and if it forms a skin after a minute or two (it will crinkle when you drag your finger through it). You're going to hate me for saying it, but mostly, it's just instinct. It's the way it looks and feels that tells you it's done, and you get to know what you're looking for once you've made a lot of jam. For the novice, I would suggest erring on the side of it being too loose than overcooked. After all, the marmalade will still taste great even if it's a little runny on your toast, and it'll firm up in the fridge anyway. Ms. Taylor says that marmalade has a very short window--just five minutes between set and overdone. And if you misjudge it and end up caramelizing the sugar, both the color and flavor of the fruit will go off irreparably, and then all that work will be for nothing. So be careful, and keep a close eye on the marmalade toward the end of the cooking.

When your marmalade has reached the set point, you should remove it from the heat, skim any excess foam, and pour immediately into hot, sterilized jars (I got nine half-pints). Ms. Taylor would call herself done at this point, letting the jars seal themselves in the venerable open-kettle method that your grandma used. Though grandmas rarely kill anyone with their jams and jellies made this way, I'm a safety girl (name the movie), so I went ahead and processed the preserves in a boiling water bath for ten minutes. Finally, 85 years later, I had nine lovely jars of blood orange marmalade, bringing a little sunshine (more like a lovely sunset!) into these dark, wintry months. I believe June Taylor would be very proud.

Saturday, January 26, 2008

Back to the deep freeze...

So much for that teaser 40-50 degree weather. We're back to hardcore winter in these parts. In fact, I was foolish enough to try and start a load of laundry a couple of days ago, but the drain pipe froze, and I couldn't finish it until today when it got back into the balmy 20's. (And not a moment too soon, as I was down to that last desperate pair of clean underpants--you know the ones--threadbare, ripped, hanging on by one overworked strand of elastic.) Also, as of Thursday, school is back in full swing, and I have hit the ground running as I do every semester. So these frigid and busy times mandate meals that are not too fussy to make and that stick to your ribs. Nothing fancy, just hearty fare to warm your cockels. Do girls even have cockels? Well, even if we don't, we can still be comforted by a pot of fabulous chili and a homemade cinnamon loaf for dessert.

When I make chili, I usually just throw a bunch of stuff into the pot until it looks and tastes right. But this time, I consulted the International Chili Society's website and perused many of the World Champion Chili Cook-Off recipes, gleaning excellent tips that I used to fashion what I feel is the best pot of chili that I have ever made. The only thing that would have taken it over the top would be if I had used tri-tip beef roast instead of regular ground beef. I'll definitely try that next time. But it was still marvelous as it was--rich, flavorful, and both sweet and hot, just like I like it! To make it easy and to give it that slow-cooked flavor, I simmered it in the crock pot all day, only adding canned beans to the mix about an hour before eating. Here is the recipe for you to try, but also to remind myself what I did this time so I can replicate it in the future.

World-Class(y) Sassy Chili

1 pound ground beef
1 large onion, diced
6 cloves garlic, minced
1 teaspoon dried oregano
1 tablespoon cumin
1/2 teaspoon cayenne
1/2 black pepper
1/2 cup (up to 10 tablespoons) dark chili powder
salt to taste
1 small can chopped green chilis (don't drain them)
1 large can crushed tomatoes
3 tablespoons brown sugar
1 teaspoon Tabasco (or to taste)
1 cup chicken broth
1 cup beef broth
juice of one lime (1-2 tablespoons)
2 cans dark red kidney beans (or light red kidneys or chili beans or what have you), drained

Brown the hamburger with the onion and garlic. When just browned, drain off the excess fat, then mix in all of the dried herbs and spices. Add the meat mixture to a crock pot, then the chilis in their juice, the tomatoes, brown sugar, Tabasco, and the broths. Stir together and taste to correct the heat and seasoning. Cook on low all day (6-8 hours or however long you're at work/away from the house). A half hour to an hour before serving, add the lime juice and the beans. Garnish with a handful of shredded cheddar cheese and a smattering of chopped onions. To make a more substantial meal, serve it over spaghetti (Cincinatti-style).

For dessert, I suggest something simple but satisfying. I found a recipe for a fine cinnamon swirl loaf in one of my holiday baking magazines that just fit the bill. It really is a quick bread--doesn't take any more time than a boxed cake mix, but it's infinitely homier. And who doesn't love streusel? No one, that's who! Even if you're not a seasoned baker, you should try making this. It's easy and darn tasty. And I think it looks fairly impressive; even though I over-swirled my marble, it still came out pretty. Try toasting a thick slice of it the following day--divine!


Cinnamon-Swirl Bread
(Source: Christmas Baking, BHG 2007)

1/3 cup sugar
1/2 cup finely chopped pecans or walnuts, toasted
2 teaspoons ground cinnamon
1 cup sugar
2 cups all-purpose flour
1 teaspoon baking powder
1/2 teaspoon salt
1 egg
1 cup milk
1/3 cup cooking oil

Preheat oven to 350 degrees. Grease and flour the bottom and sides of a 9x5x3 loaf pan. Combine 1/3 cup of sugar, nuts, and cinnamon. Set aside.

Combine 1 cup of sugar, flour, baking powder, and salt. In a separate bowl, beat egg. Then, stir in milk and oil. Make a well in the flour mixture and add the egg mixture. Stir just until mixed. Do not overmix.

Pour half of the batter into loaf pan. Sprinkle with half of the cinnamon mixture. Repeat. With a wide rubber scraper or spatula, swirl mixtures together with a down and up circular motion.

Bake for 45 to 50 minutes or until done (mine took an hour!). Cool in pan for about 10 minutes. Then, cool completely on a wire rack.

Thursday, January 17, 2008

Another Two-Week Project: Pickling Eggs

Back in October, I was invited to a friend's cabin out in the woods for some autumnal hiking and the last of the leaf-peeping before she closed the place down for the season. Everyone who came brought something to share, either a stand-alone potluck dish, or an ingredient for a cauldron of "stone soup." I think I brought several kinds of beans for the soup and a loaf of Aunt Elva's Banana Bread, if memory serves...and it doesn't always anymore! Regardless, the food was all yummy, especially eaten in front of the wood stove on a chilly but beautiful fall day. One of the foods on the buffet made by the hostess herself was a platter of strikingly-colored pickled eggs. Having only ever seen them in a big jar on bar counters or convenience stores (the hygiene issue and lack of refrigeration were always psychological barriers to my sampling them), I was intrigued. And they were gloriously magenta-hued from being pickled with beet juice. I had to try one! However, to me, the vinegar taste was much too strong (which is saying something, as I love vinegary things and everything pickled). But I liked the idea of the pickled egg, so I tucked that thought in the back of my mind for future research.

Flash forward to winter break. Now I have time to work on pickling some eggs. To begin, I found an interesting website where a scientist named Stan Woods compiled the results of his many egg-pickling experiments. I chose one recipe that he deemed his favorite to date to riff on. One of the main tips that I gleaned from his ground-breaking ovarian work was that the eggs can be pickled just as well in vinegar that has been diluted by half with water as those made in straight vinegar (which results in rubbery eggs with a too-acidic flavor). And the other big change I wanted to make was to not use beet juice. It makes the most beautifully-colored eggs, but I just don't care for the taste of beets beyond the bowl of authentic borscht in Montreal or the wonderful chlodnick that my precious Johnny makes (from the New York Times Cookbook by Craig Claiborne). So I wanted fabulous color, but using something other than beets. Thus, I was drawn to Stan Wood's recipe calling for balsamic vinegar. He reported that his eggs took on great color from the balsamic, and I love its flavor, too. So that was my starting point.

Pickling eggs is a surprisingly easy enterprise; it just takes patience--patience to peel 18 eggs and patience to wait two weeks for them to cure before you eat them up! First, I took a clean, half-gallon-sized wide mouth jar (I had several knocking around up in the attic, but I have seen them for purchase at Michael's, too) and layered in a dozen and a half hard-cooked eggs along with garlic cloves and onion slices. Then I made the brine, brought it to a boil, and poured it all over the contents of the jar. I closed it up and "parked it in the chill chest" (name that cook for a bonus point!) for two weeks. The results? Good news and bad news. On the positive side, they were a gorgeous purple-brown color, and they weren't as overbearingly sharp-tasting as the ones I had sampled previously. However, as much as I love all pickles, and these were very good, I just think I prefer my eggs unpickled--devilled certainly, but not pickled--at least not to eat straight up. What I did find is that the pickled eggs were absolutely DELICIOUS when cut up and added to a dinner salad*. Our favorite way to enjoy them is with a chef's salad type of affair: turkey, ham, shredded cheese, pickled eggs, fried onions (instead of croutons), and Thousand Island dressing. Not low-cal by any means, but SO GOOD! The pickled eggs gives the salad a great zip and cuts through the richness of the other ingredients. In any case, here is my recipe if you'd like to try them for yourself:

Balsamic Pickled Eggs

18 hard-cooked large eggs, peeled
1/2 onion, sliced
4 cloves garlic, peeled and cracked
1 3/4 cups cider vinegar
1/2 cup balsamic vinegar
1 1/2 cups water
2 tablespoons canning salt
2 tablespoons sugar
1 tablespoon jalapeno (nacho) slices, chopped
1 teaspoon mustard seeds
a dozen or so whole peppercorns


Layer the eggs with the onion slices and garlic cloves in a large (half-gallon sized) jar. Combine the remaining ingredients and bring to a boil, then pour the brine over the eggs, close the jar, and refrigerate. Give the eggs two weeks to pickle to maximize their flavor before eating. Store in the refrigerator!

*Follow-up: I found another excellent use for the pickled eggs. I cut them up and put them into potato salad, and instead of regular pickle relish, I used my special zucchini relish. Mmm, mmm! The best potato salad I've ever made!

Wednesday, January 09, 2008

"He ain't dead..."

"...he's gonna wake up in thirty minutes, hungry enough to eat up everything in your house!" (Ok, you know the game by now. Name the reference if you can! We'll return to the quote later once you ponder it for a little bit.)

So...I was thinking to myself, it's a new year. I should turn over a new leaf and be more prompt about household drudgeries. You know, stuff like changing the sheets more often and cleaning out the fridge. (I knew the latter was getting to be a problem because we had run out of Tupperware-type containers...that's always the tip-off.) I set about my task with great purpose, and I actually enjoyed doing it. I think I'm just generally in a good mood because the days are getting longer (I was out cleaning the chicken coop until 4:30 the other day before losing the light...whoo-hoo!) and global warming has brought us from 12 below around New Year's to 50-some-odd degrees less than a week later! Yesterday, my neighbor and I cruised up to the butcher in Hemmingford, QC and along the way, we actually saw a woman in shorts washing her front windows! Spring cleaning in Canada on January 8th! SO BIZARRE!

Anyhoo, as I cleaned out the fridge, I came across my beloved sourdough crock, and I'm ashamed to tell you that it had been pushed to the back and forgotten for I don't even know how many months. I took it out and inspected it. It had as much "hooch" on top as batter below (if you could call the solid lump of dried-out starter a "batter"), and it smelled VERY, VERY, VERY SOUR. I bought this starter from King Arthur some 7-8 years ago, and though they recommend that you feed it at least every two weeks, I often push it to monthly feedings without a problem. But this had been a few-to-several months by now, and it looked and smelled funnnnn-ky. Still, my experience is that sourdough is darn near impossible to kill, unless you overheat it, so I thought I'd try to perform a resuscitatation before performing the last rites.

First, I poured off the powerful hooch, and sort of washed the chunk-o-batter with running water. Once I had diluted it to a consistency between heavy cream and a thick pancake batter, I scooped out a cup, poured it into a ceramic bowl, added another cup of flour and some water, and a pinch of sugar to give a quick meal to my languishing yeasties. It still smelled horribly strong, but I stuck it in my homemade proof box and went about my business. After about 12 hours, it still didn't look like much, maybe a freckling of teeny bubbles only, but I soldiered on in good faith. I reserved a cup, tossed the rest, added more flour and water to make a batter along with a pinch of ascorbic acid (Vitamin C) to make my well water more acidic and therefore hospitable to sourdough, then put it back in the proofer. The next day, it looked perhaps a wee bit frothier, so I fed it again. And lo and behold, LOOK what happened after that! IT...IS....ALIVE!! (Or to paraphrase my new favorite comedian, Katt Williams: He's not dead. He's just asleep right now but he's going to wake up hungry.)

So I kept feeding it for another day or two, then decided to take it for a test drive and bake bread. I found a recipe for oatmeal loaves that some helpful wag had converted to make with sourdough starter. It sounded delicious, so I went ahead and mixed the dough. The recipe said that the initial rise time would probably be about four hours (sourdough takes much longer to ferment than commercial yeast, as I'm sure you know), but at four hours, mine looked pretty much the same as when I started. I almost threw the dough away at that point, but then I decided that no harm would come from waiting it out, and I also remembered that sourdough can take 12 hours or more to rise. So I chucked it back in the proofer and waited. And waited. And waited some more. And I'll be danged if, at EIGHT hours, that dough didn't look (and smell) gorgeous! The dough was billowy and filled my whole big bread bowl to the top. Success! I punched it down (gently), formed two loaves, and stuck the pans back in the proofer. I wasn't sure if the starter would have enough "oomph" left in it for the final rise, but FOUR hours later, the loaves were beautifully doubled, so in the oven they went. 40 minutes later, I had some of the most delicious bread that I have ever made! (That long, slow rise really develops flavor.) The texture was nice and soft, largely thanks to the oatmeal, and it wasn't too sour-tasting as I had feared it might be from the neglected starter. Moreover, it made the most remarkable toast! :-)

Since the bread took that long to rise, I figured that the starter still needed to be strengthened. So I fed it for another couple of days before returning it to the fridge where I vow (as so many abusers do) not to treat it so terribly again! However, as insurance, it's always a good idea to have a couple of emergency back-up starters in case you really do manage to kill off your main one. You can separate them in different containers and keep them all in the fridge if you bake often, but for longer, safer storage, here's what you should do. Instead of chucking out that cup of starter when you feed it, pour it out in a very thin layer on waxed paper spread out on a large baking sheet. Then set the pan aside for a couple/few days until the starter is completely dry and brittle. (If it gets moldy, throw it out and try again--you didn't spread it thinly enough.) Then take it off the wax paper, crumble it up into little plastic storage bags, and then stick the baggies of starter in the freezer for safe keeping. If you need some, take one baggie out, grind the starter until powdery in the food processor, and then rehydrate it. You may need to feed it for a few days until it comes back to full strength, but it will absolutely come back. Also, dried starter is convenient to share with friends and family who live far from you; it's lightweight and easily sent through the mails. Isn't that a handy tip? I thought so.

Therefore, if your New Year's resolution involves attempting to bake with sourdough, I suggest this as an excellent beginning recipe. And if you need some starter to get started, I have another great idea for you. There was a man in my home state of Oregon named Carl Griffith who had been baking sourdough since he was a child (on the Oregon Trail, in a Dutch oven no less!) from a 150-year-old starter that had been in his pioneering family for generations. He was so passionate about sourdough baking and had such a generous spirit, that he used to mail out dried starter for free to anyone who requested it. Carl passed away in 2000, but the Friends of Carl (not to be confused with an AA group) still carry on his legacy to this day. If you send them a self-addressed, stamped ($.90) envelope, they will send you some of Carl's historic 1847 Oregon Trail sourdough for free! You heard me--FREE--well, except for the cost of postage. Or if you prefer, you can send them a dollar, and they will mail the starter to you. Is that great or what? His website is also where I got the oatmeal sourdough recipe that follows. Do try it. You will be so pleased that you did. Oh, and if any of my local readers want some sourdough starter, just ask. I would be more than happy to share. That's what Carl would want me to do! :-)

Oatmeal Sourdough Bread
(Source: Carl's Friends)
Makes two loaves

1 cup quick oats
1/2 cup whole wheat flour (I used graham flour)
1/2 cup brown sugar (I might try swapping this out for Grade B maple syrup next time)
1 tablespoon salt (sounds like a lot, but it isn't)
2 tablespoons butter
2 1/2 cups boiling water
1 cup sourdough starter
5 cups white bread flour (I used AP this time)

Combine in a large bowl the oats, whole wheat flour, brown sugar, salt, and butter. Pour boiling water over mixture. Stir to combine. When batter is cooled to lukewarm, add the starter and stir in the flour. When the dough is stiff enough to handle, turn onto floured board and knead for 5 to 10 minutes (I did this for five minutes in my stand mixer). Place in a greased bowl, cover and let rise until doubled (4-8 hours). Punch down and separate into 2 equal balls. Shape into loaves and place in greased 9 X 5 X 3 inch pans. Let rise until doubled again (2-4 hours). Bake for 30 to 40 minutes at 350 F. Cool on rack, brushing loaves with butter for a soft crust.

Notes: This recipe makes beautiful soft dough that bakes into great pan bread or it can be made into very tasty dinner rolls. Take the words "punch down" with a grain of salt. Be gentle with this dough. The more air you work out of the dough when forming the loaves, the longer it will take to recover volume in the second rise.

Be sure to allow enough time for the batter to cool to lukewarm before adding the sourdough starter. It took two hours or more when tested. Taste testers disagreed on the amount of salt, some preferred a little less; others liked the taste with the full tablespoon.

Ovens vary. Baking can take up to 50 minutes. You may also want to remove the bread from the pans for the last ten minutes of baking to brown the bottom half of the loaves. (I didn't, and they browned just fine.)

Treat yourself to real butter in the dough. This bread is worth it. Also butter the pans, you will be rewarded with an amazing butterscotch smell when the butter toasts the brown sugar sweetened dough while baking.

Thursday, January 03, 2008

Very belated birthday treat....

My limoncello post became so unwieldy that I didn't get a chance to discuss our special New Year's dessert. You see, I made Cyd a gorgeous birthday cake last month--she requested our very favorite Chocolate Velvet Cake with Butter Pecan Icing--but it turned out wrong. I accidentally added baking powder instead of baking soda and ended up with something more akin to a dense flourless torte than a lighter-than-air cloud cake. It was still good, but it just wasn't what I was trying to make. So I apologized for the mistake and promised Cyd that I would make another dessert of her choosing when I had time. It took me about a month to make good on that promise, but THIS is what she wanted, and tell me that it wasn't worth waiting for:

Doesn't it make you just want to crawl through the screen? I thought so. These are the most wonderful chocolate frosted éclairs in the whole world, and I've been making them since I first ran across the recipe in a magazine more than five years ago. (I could have sworn it was Gourmet, but an exhaustive and ridiculously time-consuming search of my old magazines revealed that it was, in fact, Food and Wine). I suppose there are comparable or better pâte à choux recipes out there, and the "frosting" is just chocolate and butter. But what makes this éclair truly spectacular is the pastry cream. It is PERFECT. It is absolutely delicious--rich, not too sweet, redolent of vanilla beans, and they make it look pretty, too! Plus, the recipe makes just the right amount to be generous when filling a dozen small eclairs--and who wants a skimpy éclair? No one!

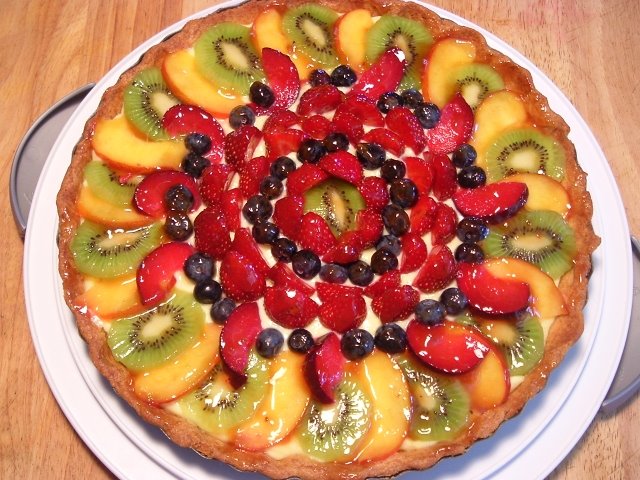
Seriously, if you take nothing else from this post, bookmark the pastry cream and use it wherever warranted (my other favorite use for it is in a fresh fruit tart with a cookie crust). But I really think you should try making the éclairs. They look very complicated, like an advanced pastry skill, but they truly aren't. I cajoled Cyd into helping me, and we had a batch thrown together in no time, and Cyd declared that they were easy enough that she could make them herself (not that she would ever be so inclined, mind you)! You can even make the pâte à choux shells and the pastry cream a day ahead, and then frost and assemble the éclairs the next day. Actually, I would suggest this in any case--make the elements but don't put them together until right before serving. YUM!


Chocolate-Frosted Éclairs
(Source:
Food and Wine, June 2002)
Makes one dozen éclairs

Choux Pastry:
1 cup water
1 stick (4 ounces) unsalted butter
2 tablespoons sugar
1/4 teaspoon salt
1 cup plus 2 tablespoons all-purpose flour
4 large eggs

Pastry Cream:
2 cups whole milk
1/4 vanilla bean, seeds scraped (I use a whole one!)
1/2 cup plus 2 tablespoons sugar
5 tablespoons cake flour
pinch of salt
1 large egg
2 large egg yolks
1/4 cup plus 2 tablespoons heavy cream

Chocolate Glaze:
4 ounces bittersweet chocolate
4 tablespoons unsalted butter, softened
directions

Make the choux pastry:
Preheat the oven to 400°. In a medium saucepan, bring the water, butter, sugar and salt to a boil over moderate heat. Remove the pan from the heat. Add the flour and stir vigorously with a wooden spoon for about 2 minutes, until the dough comes together and a film forms on the bottom of the pan. Transfer the dough to a large bowl and beat at medium speed until slightly cooled, about 1 minute. Add the eggs, 1 at a time, beating well after each addition.

Transfer the dough to a pastry bag fitted with a 1-inch round tip. Pipe twelve 5-inch-long logs onto a baking sheet and bake for 10 minutes. Turn the oven down to 325° and bake the shells for 30 minutes longer, or until golden brown. Transfer to a rack and let cool.

Make the pastry cream:
In a medium saucepan, bring the milk, vanilla bean and seeds just to a boil. Meanwhile, in a large bowl, whisk the sugar with the cake flour and salt. Whisk in the egg and egg yolks. Slowly add the hot milk, whisking constantly. Pour the mixture back into the saucepan and bring to a boil over moderate heat, whisking constantly. Continue to boil the pastry cream, whisking constantly, until thick, about 30 seconds longer. Immediately strain the pastry cream through a fine sieve into a medium bowl. Cover with plastic wrap and refrigerate for at least 30 minutes, or until cool. (It's much faster if you use an ice bath...FYI.)

In a medium bowl, whip the heavy cream until soft peaks form. Whisk the pastry cream, then fold in the whipped cream until blended.

Make the chocolate glaze:
In a medium bowl, melt the chocolate in a microwave oven. Whisk in the butter until smooth.

With a serrated knife, split the éclair shells lengthwise. Spoon a generous amount of the pastry cream into the bottom half of each shell. Dip the top half of each shell into the chocolate glaze, close the éclairs and serve.

Make ahead:

The components can be made early in the day, but assemble the éclairs shortly before serving.