Sunday, April 22, 2012

Blessed is she who receives the gift of chutney...

Back in the fall (I think), my dear friend, Jay, sent me a lovely jar of his homemade rhubarb chutney. I guess I take after my mom who always saved her gifts "for special," because when Jay recently asked me if I enjoyed the chutney, I was chagrined to realized that I hadn't even tried it yet!  So I busted it out tonight and used it to top off a quick meal of one of those pre-marinated garlic and peppercorn pork tenderloin roasts.  It was SO delicious--and I don't even *like* rhubarb! My roommate's review was: "Amazing! I want to put it on EVERYTHING!" When our local rhubarb is ready, you can be sure I'll be making of batch of this wondrous stuff!

Orange Rhubarb Chutney

10 whole black peppercorns
1 tablespoon mustard seeds
1 tablespoon pickling spice
4 tablespoon grated orange zest
2/3 cup fresh orange juice
6 cups chopped rhubarb
5 cups lightly packed brown sugar
3-1/2 cups cider vinegar
3 cups chopped onion
1-1/2 cups raisins
2 tablespoon finely chopped garlic
2 tablespoon finely chopped ginger root
1 tablespoon curry powder
1 teaspoon ground allspice

1.) TIE peppercorns, mustard seeds and pickling spice in a square of cheesecloth, creating a spice bag. Set aside.
2.) COMBINE orange zest and juice, rhubarb, brown sugar, vinegar, onions, raisins, garlic, and ginger in a large stainless steel saucepan. Bring to a boil over medium-high heat, stirring constantly. Reduce heat and boil gently, stirring occassionally, for 45 minutes.
3.) ADD curry powder, allspice, and reserved spice bag; stir well. Boil gently, stirring frequently, until thick enough to mound on spoon, about 30 minutes.
4.) PREPARE boiling water canner in the meantime. Heat jars and lids in simmering water until ready for use. Do not boil. Set bands aside.
5.) LADLE hot chutney into hot jars leaving 1/2 inch headspace. Remove air bubbles. Wipe rim. Center hot lid on jar. Apply band and adjust until fit is fingertip tight.
6.) PROCESS in a boiling water canner for 10 minutes, adjusting for altitude. Remove jars and cool. Check lids for seal after 24 hours. Lid should not flex up and down when center is pressed.

Sunday, April 15, 2012

HAPPY (ORTHODOX) EASTER!

Today is perhaps my favorite holiday of the year--Second Easter, as I like to call it. My dear friend, Janice Padula, always invites folks over for the most AMAZING Mediterranean spread for orthodox Easter. Observe:


As for my contribution, I couldn't help myself but to try and duplicate something cheesy but adorable that I had seen floating around Facebook (via Pinterest) around traditional Eastertime. This platter of peepers took a little longer to make that regular devilled eggs--which take too long as it is--but they were fun, and everyone was greatly amused at the orthodox Easter gathering.


Just prepare your favorite devilled egg recipe, but instead of cutting the hard-cooked eggs in half lengthwise, cut the top third or so off, width-wise. (If the yolk doesn't pop out easily, try coaxing it out with the small end of a mellon baller.) Pipe the filling into the bigger/bottom part from a sandwich baggie with the corner snipped off, really heaping it up, then top with the other piece of white. Finally, fashion eyes with small bits of black olive and beaks with a teeny triangle of carrot. SO CUTE!

Friday, April 13, 2012

Throw away those takeout menus!

WHO NEEDS TAKEOUT when you can make fabulous fried rice at home? This works great with whatever kind of meat you have left over, but in this case, I used some ham from a previous night's dinner. Even my roommate raved about this, and she claims to hate rice!


Pork Fried Rice

2 cups basmati rice, rinsed
3 cups water
1/4 cup vegetable oil
1 medium onion, diced
1 large carrot, thinly julienned
4 cloves garlic, minced
1 tablespoon peeled and grated ginger
1/2 cup frozen peas
1/4 cup roasted peppers, chopped
1/2 cup ham, chopped (or any cooked meat you prefer)
1/4 teaspoon pepper
2 tablespoons soy sauce
1 tablespoon oyster sauce
1 teaspoon toasted sesame oil
squirt of sriracha
2 eggs

First, prepare the rice. In a large sauce pan, add the rinsed rice and the water. Bring to boil, cover with a tight-fitting lid, reduce heat to simmer, and steam covered (no peeking!) for 20 minutes.

In a large skillet, heat the vegetable oil and saute the onion until tender and translucent. Add the carrot, garlic and ginger, and cook for another couple of minutes.  Then add the peas, chopped peppers, ham (or other meat), pepper, spy sauce, oyster sauce, sesame oil, and sriracha. Cook for another minute.

Using a spoon or spatula, push the cooked veggie and meat mixture away from the middle of the pan and then crack the eggs in the center. Scramble the eggs as they cook, and when they are very close to being fully set, pull the pan off the heat. Add the rice and mix everything to combine.

Garnish with green onions cut on the bias.

Thursday, April 12, 2012

Couscous and chickpeas and lemons...OH MY!

Warm weather is just around the corner, folks, and we're going to need some sunny side dishes, preferably ones that hold up for long stretches on the picnic or potluck table. So I've got one for you, and it's colorful, extremely flavorful, has interesting textures, and is downright DELICIOUS! If your grocery store doesn't carry Israeli couscous, try your local co-op/health food store, or substitute Acini de Pepe pasta instead.

Israeli Coucous and Chickpea Salad with Lemony Dressing

2 tablespoons olive oil, divided
1 cup Israeli couscous
1 1/4 cups chicken broth
1 can chickpeas, drained
1/2 can fire-roasted diced tomatoes (though a cup of halved cherry tomatoes would have been preferable if I had them on hand)
1 small onion, finely chopped
2 to 4 cloves garlic, peeled and minced
1/2 cup baby spinach, chopped
1/4 cup fresh cilantro leaves, chopped
zest of one lemon/juice of two lemons
2 teaspoons grainy mustard
1 teaspoon honey (or sugar)
1/2 teaspoon ground cumin
1/2 teaspoon ground celery
squirt of sriracha
salt and pepper to taste
1 avocado, large dice

Heat a tablespoon of olive oil in a sauce pan over medium heat. Fry the couscous until it starts to brown. Add the chicken broth, bring to a boil, cover, reduce heat, and simmer for six minutes. Turn off the heat, and let the couscous sit for another 3-5 minutes covered. Combine the cooked couscous and everything else except the avocado in a large bowl and mix (gently) until well combined. Taste to correct seasonings. Then tenderly mix in the avocado chunks just before serving. May serve room temperature or chilled.

Tuesday, April 10, 2012

Mean and GREEN Enchiladas!

I know I've made these chicken enchiladas in green sauce (and blogged about them) before, but I tried a different technique for the filling this time. Basically, I started with making a roux before adding sour cream and cheese, which ultimately yielded a luscious, creamy filling. You should give this a try. If you start with a roasted chicken from the deli, it's even easy enough for a work/school night!


Chicken Enchiladas Verde

2 tablespoons butter
2 tablespoons olive oil
1 large onion chopped
4 cloves garlic, minced
1/4 cup flour
1 1/2 cups chicken broth
1 teaspoon cumin
1/2 teaspoon black pepper
1/2 cup sour cream
1 deli chicken, skinned, deboned and coarsely chopped
1/4 cup chopped cilantro leaves
2 cups shredded colby-jack cheese, divided
1 jar Cookwell & Company Green Chile Stew (or about 4 cups of your favorite salsa verde)
10 6-inch flour tortillas

Heat the butter and olive oil in a large skillet over medium heat and saute the onions until tender and translucent. Add the minced garlic and cook for another minute. Whisk in the flour and cook for two minutes, then whisk in the chicken broth until thick and smooth. Stir in the cumin, pepper, sour cream, chicken, cilantro, and one cup of the shredded cheese. Remove from heat.

Add a cup of the salsa verde to the bottom of a 13x9 baking dish. Divide the chicken filling into ten portions in the skillet. Spoon each portion into a tortilla, roll up, and place into the baking dish. Continue until you've done all ten tortillas (8 in a row, 2 along the side). Pour the remaining salsa verde evenly over the enchiladas, and bake uncovered at 350 degrees for 30 minutes. Add the remaining cup of shredded cheese to the top and return to the oven to melt for another five minutes or so.http://lindseysluscious.blogspot.com/2012/04/mean-and-green-enchiladas.html

Sunday, April 08, 2012

HAPPY EASTER, 2012 Edition

We didn't have any special Easter plans this year, so my roomie and I decided to play a new game that we made up: Aldi Chopped. It's a pretty easy game. You just wander around Aldi, adding things that you might like to eat in the cart, and then you have to make an Easter menu with those random items.

Sound scary? Well, here was tonight's Easter feast: Artichoke and Feta Dip with Crackers, Bone-In Smoked Ham with Brown Sugar and Pineapple, Roasted Sweet Potatoes with Maple Syrup, Fresh Green Beans with Garlic and Lemon, Corn on the Cob (um, in April?), and Carrot Cake with Cream Cheese Frosting.  I declare myself the new Aldi Chopped Champion!

And then for a seaonal art project, we also made some tie-dyed eggs. They didn't exactly turn out as advertised on the box (they never do), but we had lots of messy fun coloring them! 


HAPPY EASTER (or Passover) everyone!

Saturday, March 31, 2012

Easter Dessert Inspiration

This is how my life often goes: I wandered into the bathroom, spied the new Bon Appétit, flipped through it, and an hour later, the kitchen was cleaned, the dishwasher was running, and I had a citrus-pistachio pound cake in the oven! YAY ME!

I didn't have any limes on hand, so I used the zest of the lemon. Also, instead of oranges, I used some extra-juicy minneolas. YUMMY! But please, learn from the error of my ways. Either scale the recipe back by a third, or use a larger pan than a standard loaf pan. Otherwise, you will have batter spilling over and burning in the bottom of your oven like I did. Oops! (My friend, Joan, tried this recipe after I posted about it on Facebook, and she used three smaller loaf pans which she reported worked out well.)

This would be a lovely springtime addition to your Easter dessert buffet!

Pistachio Pound Cake
Source: Bon Appétit, April 2012
Yield: Makes 8 to 10 servings

Nonstick vegetable oil spray
2 cups all-purpose flour plus more
1 1/2 teaspoons kosher salt
1 teaspoon baking powder
1 cup (2 sticks) unsalted butter, room temperature
2 cups sugar
5 large eggs
2 tablespoons fresh lemon juice
2 tablespoons fresh orange juice
2 teaspoons finely grated orange zest
1 teaspoon finely grated lime zest
1 cup shelled, unsalted pistachios, coarsely chopped, divided

Arrange a rack in middle of oven; preheat to 325°F. Coat a 9x5x3" loaf pan with nonstick spray. Dust pan with flour; tap out excess.

Whisk 2 cups flour, salt, and baking powder in a medium bowl. Using an electric mixer, beat butter on medium speed until light and fluffy, 2-3 minutes. Add sugar; beat until well incorporated, 1-2 minutes. Add eggs one at a time, beating to blend between additions. Add juices and zests; beat until well combined (mixture will look curdled), 2-3 minutes. Add dry ingredients; reduce speed to low and beat just until blended. Fold in 3/4 cup pistachios. Pour batter into prepared pan; smooth top. Sprinkle remaining 1/4 cup pistachios over.

Bake cake, rotating halfway through, until a tester inserted into center comes out clean, about 1 1/2 hours. Transfer to a wire rack and let cool completely in pan. Run a sharp knife around sides to loosen; unmold cake. DO AHEAD: Can be made 1 day ahead. Store airtight at room temperature.

Thursday, March 29, 2012

Upscale Beanie Weenies

We all tend to overindulge during the holidays, then we must pay our penance in the New Year. But if you manage to survive all of the light/lo-cal/nonfat/healthy dishes featured on cooking magazines and on the Food Network in January, your endurance will be rewarded with all-chocolate recipes in February, and--please God--we'll all be back to comfort food by March!

Bon Appétit did a feature this month where they remade some of our favorite homespun dishes. I really want to try the Hoisin-Glazed Meatloaf, a Bahn Mi(t)loaf, if you will. But another recipe jumped out at me. It was called Chorizo and Gigante Bean Cassoulet, which was basically an uptown version of franks and beans with a Spanish twist. Ultimately, it turned out to be a very good dish, but I have some tips for you (as is my way):

1) Be advised that this recipe will take almost four hours to complete even if you pre-soak the beans, so either save it for a Sunday afternoon or enlist the help of your trusty crock pot.
2) Do NOT go by the recipe on the amount of time to cook your beans, as I went with the low end, and my gigante beans nearly disinegrated! I ended up having to cook some cannellini beans on the side and add them to the sauce to fix the mess I'd made. Thus, check your beans as they are simmering, and pull them as soon as they are just tender, as there's still a lot of cooking time to go after that.
3) Do NOT be tempted to substitute regular paprika for smoked. In my opinion, it is the defining flavor in this dish!
4) I only used a pound of sausage, which I thought was plenty--but maybe that's because I had extra beans.
5) Lastly, for the bread crumb topping, I toasted up some panko in olive oil and butter in a skillet, added the parsley and lemon zest and called it a day!

Chorizo and Gigante Bean Cassoulet
Source: Bon Appétit, March 2012
Yield: Makes 8 servings

3 cups dried gigante, corona, or large lima beans
4 tablespoons extra-virgin olive oil, divided, plus more for drizzling
8 fresh Spanish chorizo or hot Italian sausage links (About 2 pounds)
1 leek (white and pale-green parts only), cut into 1/4"-thick rounds
1 small yellow onion, finely chopped
kosher salt and freshly ground black pepper
5 garlic cloves, thinly sliced
3 anchovy fillets packed in oil, drained, chopped (optional)
1 tablespoon tomato paste
1 1/2 teaspoons smoked paprika
3 cups low-salt chicken broth
1 28-ounce can whole tomatoes, drained, crushed with your hands
7 sprigs thyme
2 bay leaves
2 sprigs rosemary

Breadcrumb topping:
6 tablespoons extra-virgin olive oil, divided
2 cups fresh coarse breadcrumbs (from three 1/2"-thick slices white sandwich bread)
Kosher salt and freshly ground black pepper
1/2 cup chopped flat-leaf parsley
1 teaspoon finely grated lemon zest

Ingredient Info: Fresh Spanish chorizo, a link sausage that’s milder than Mexican chorizo, can be found at specialty foods stores, Spanish markets, and latienda.com (try hot or mild). Smoked paprika is available at most supermarkets.

For beans and chorizo:
Place beans in a large pot and cover with water by 3". Bring to a boil; boil for 2 minutes. Remove from heat, cover, and let stand for 1 hour.

Drain beans. Add fresh water to cover by 3". Bring to a boil; reduce heat to medium and simmer, uncovered, until beans are just tender but not mushy, 1 1/2-2 hours (time will vary depending on size and age of beans). Drain, reserving 1 cup bean broth.

Preheat oven to 450°F. Heat 2 tablespoons oil in a large heavy pot over medium heat. Add chorizo and cook, turning occasionally, until golden all over, 7-8 minutes. Transfer chorizo to a plate and set aside.
Place 2 tablespoons oil, leek, and onion in same pot. Season with salt and pepper; cook, stirring occasionally, until vegetables are softened and light golden, about 5 minutes. Add garlic and anchovies; stir 1 minute to break down anchovies. Add tomato paste and paprika; stir constantly until paste is caramelized, about 2 minutes. Add reserved 1 cup bean broth, beans, chicken broth, and next 4 ingredients; bring to a boil.

Cover and bake until beans are very tender, about 30 minutes. Add chorizo (and any accumulated juices) to pot, pressing to submerge. Bake until liquid is reduced and slightly thickened, 40-45 minutes longer.

For breadcrumb topping:
Meanwhile, heat 3 tablespoons oil in a large skillet. Add bread- crumbs and cook, stirring often, until golden and crisp, about 10 minutes. Season with salt and pepper.

Sprinkle breadcrumbs over beans and drizzle with remaining 3 tablespoons oil. Bake cassoulet until breadcrumbs are browned and liquid is bubbling, about 15 minutes. Let sit for 15 minutes. Sprinkle parsley and lemon zest over just before serving.

Sunday, March 25, 2012

A Little Dollop of Crème Fraîche

OOPS! In my rush to post my new Disney-fied recipes, I neglected to share some exciting spring break news. I brought a little something extra in my carry-on luggage back from Arizona. Ladies and gentlemen, say hello to Douglan's Crème Fraîche de Bellevoix, or Dollop for short. (All together now: AWWWWWWWW!)


My sweet old basset hound, Rosie, died in December of 2010, I finished both Canadian and American championships on my last PBGV over three years ago, and I have been waiting to acquire a puppy from a particular Australian breeding program for NINE years! So the time was finally right to add another dog to the household.

This is a very exciting litter, as the dam--a French import--was Winners Bitch and Best of Opposite Sex to the national specialty winner in 2009, and the sire is an Australian grand champion and a Best in Show winner who has already sired many champions Down Under.


CH Correze des Rocs du Plessis (Dam: "Cosi")


BIS Aus. GCH Rokeena Esprit Naturel (Sire: "Sam")

I have great hopes for this little one as a show dog, but right now, we're just working on learning to be a well-behaved house pet. Needless to say, we are in the "No!" and "Stop that!" phase, and the living room is veritably swimming in enzymatic cleaner. But this little Dollop of badness has already wormed her way into our hearts and brings us much joy as a cheerful, energetic (emphasis should be noted here), and adorable companion.

Friday, March 23, 2012

Scenes from an Italian Restaurant

A friend of mine from high school who is quite the foodie mentioned on Facebook the other day that she was preparing turkey and artichoke stuffed shells for a special family dinner, and I thought that sounded delicious. She told me it was a Giada recipe, and I had to try it. I must say, it was a LOT of work; also, it was a rather pricey dish to make. Thus, it’s probably best for a weekend meal or special event. But it was YUMMY! Here are my recipe notes:

1. I used Barilla shells, cooked for 9 min as the box directed--2 boxes to be safe (as recommended by recipe reviewers) but only needed one. I got 36 stuffed shells, 24 in a 9x13 pan, and an 8x8 with 12, frozen for another time.
2. I used the whole onion and doubled the garlic. And I used extra cheese in the filling and on top, because that's how I roll!
3. I used turkey sausage and added some dried herbs: 1/2 teaspoon each of thyme and rosemary, and a teaspoon of oregano.
4. I used a 15 oz. can of artichokes, drained and chopped finely.
5. I also increased the sauce. I cheated and used 2 24 oz. jars of Classico Spicy Red Pepper plus a pint of homemade sauce, yielding 7 cups. Since these sauces were already spicy, I pulled back the red pepper to a scant teaspoon.
6. The store I was at did not carry pancetta, so I used a 1/2 pound of low-sodium bacon instead. It added a little smokiness, not unlike fire-roasted tomatoes.

Turkey and Artichoke Stuffed Shells with Arrabbiata Sauce
Source: Food Network, Giada De Laurentiis
Serves: 6 to 8

1 (12-ounce) box jumbo pasta shells (recommended: Barilla)
3 tablespoons extra-virgin olive oil
1/2 large yellow onion, chopped (about 1 cup)
3 cloves garlic, chopped
1 pound ground turkey
1/2 teaspoon kosher salt, plus 1/2 teaspoon
1/4 teaspoon freshly ground black pepper, plus 1/4 teaspoon
1 (8 to 10-ounce) package frozen artichokes, thawed and coarsely chopped
1 (15-ounce) container ricotta cheese
3/4 cup grated Parmesan
2 eggs, lightly beaten
1/4 cup chopped fresh basil leaves
2 tablespoons chopped fresh flat-leaf parsley
5 cups Arrabbiata Sauce, recipe follows
1 1/2 cups grated mozzarella (about 5 ounces)

Bring a large pot of salted water to a boil over high heat. Add the pasta and partially cook until tender but still very firm to the bite, stirring occasionally, about 4 to 5 minutes. Drain pasta.

Meanwhile, in a large heavy skillet, heat the olive oil over medium-high heat. Add the onions and the garlic and cook until the onions are soft and starting to brown, about 3 minutes. Add the ground turkey, 1/2 teaspoon salt, and 1/4 teaspoon black pepper and continue to cook, stirring occasionally, until the meat is slightly golden and cooked through. Add the artichoke hearts and stir to combine. Remove from heat and let cool.

In a large bowl combine the cooled turkey mixture with the ricotta cheese, Parmesan cheese, eggs, basil, parsley, and the remaining salt and pepper. Stir to combine.

To stuff the shells, cover the bottom of a 9 by 13 by 2-inch baking dish with 1 cup of Arrabbiata sauce. Take a shell in the palm of your hand and stuff it with a large spoonful of turkey mixture, about 2 tablespoons. Place the stuffed shell in the baking dish. Continue filling the shells until the baking dish is full, about 24 shells. Drizzle the remaining Arrabbiata Sauce over the shells, top with the grated mozzarella. If freezing, cover tightly with plastic wrap and place in the freezer for 1 day and up to 1 month.

To bake, preheat the oven to 400 degrees F. Bake until the shells are warmed through and the cheese is beginning to brown, about 60 minutes (20 minutes if shells are unfrozen.)

Arrabbiata Sauce:
2 tablespoons extra-virgin olive oil
6 ounces sliced pancetta, coarsely chopped
2 teaspoons crushed red pepper flakes
2 garlic cloves, minced
5 cups jarred or fresh marinara sauce

Heat the olive oil in a large soup pot over medium heat. Add the pancetta and saute until golden brown, about 5 minutes. Add the garlic and saute until tender, about 1 minute. Add the marinara sauce and red pepper flakes and bring to a simmer. Remove from heat and let cool until ready to use.

Yield: approximately 6 cups

P.S. I shared the extra half pan of shells with my wonderful friends, the Padulas. (They do freeze beautifully, by the bye.) And Janice said after finishing dinner, "I feel like I ate at a fancy Italian restaurant!"

Sunday, March 18, 2012

Mickey Mousing Around in the Kitchen

Just back from spring break, and man, am I EXHAUSTED! As is often the case, I need a vacation to recuperate from my vacation! I actually left last week Wednesday for our PBGV National Specialty in Mesa, AZ, then on Sunday, I hopped on over to sunny southern California to visit The Mouse with my dear friend, Mike, something I haven't done since the Millenium! (I've been to Orlando since then, but not to my beloved Magic Kingdom in Anaheim.) In fact, the last time I was there, California Adventure wasn't even open yet! So it was fun to check them both out this time with our Park Hopper passes. But I was younger and more fit in 2000, and three days tromping around both parks nearly did me in! Now that I'm home again, I wanted a little taste of Disney that would involve less money and physical exertion.

Since I already tried clones of Dole Whip and Bengal Barbecue, I decided to make some treats as an homage to California Adventure upon returning home to New York state. The strange thing is--I never actually sampled these items. We were going to have lunch one day at the Pacific Wharf Café, but the line was WAY too long, and we had Fast Passes to use for Soarin' Over California (my FAVORITE "new" ride--new to me, anyway). So Mike and I enjoyed some delicious noodle bowls and chilled edamame at The Lucky Fortune Cookery. But I regretted not trying some of the savory dishes served in Boudin Bakery sourdough bread bowls at the Pacific Wharf Café. What was I to do but make a couple of them for myself at home?! Of course, I have no reference point of whether my versions were close to the real deals or not, so one of you will have to try them and give me some feedback. In the meantime, we'll call these recipes "inspired by" menu items at Disney's California Adventure.

The first is a spicy twist on a traditional corn chowder that the Pacific Wharf Café calls Santa Rosa Corn Chowder. It's the addition of peppers--hot peppers for kick and sweet roasted red for both flavor and color--that give it that California flair.


Santa Rosa Corn Chowder

1 lb. jowl bacon*, diced
2 medium onions, diced
1 large stalk celery, diced
1 large red (or orange) pepper, seeded and diced
1 Cubanelle pepper, seeded and diced
4 cloves garlic, peeled and minced
1/4 cup flour
3 cups chicken stock
2 cups heavy cream
1 can creamed corn
2 lbs. (about 8 smaller) potatoes, scrubbed and cut into chunks
1 lb. frozen corn
8 oz. roasted red peppers, chopped
2 tablespoons sugar
1 tablespoon chili powder
1 teaspoon black pepper
few dashes of hot sauce, to taste

Brown the bacon in a large Dutch oven*. Remove the pieces with a slotted spoon and set aside. Add the onions, fresh red pepper and the Cubanelle pepper to the pot and saute until tender, about ten minutes. Add the minced garlic and cook for another minute or two.

Stir in the flour and cook for two minutes, stirring and scraping the bottom of the pot the whole time. Add the chicken stock and stir until combined. Bring to a boil, reduce heat, and add the cream, creamed corn, potatoes, frozen corn, roasted red peppers, and the remaining seasonings. Simmer until the potatoes are tender, about 30 minutes. Stir in the reserved bacon pieces (or just sprinkle some on top of each bowl), garnish with chopped chives, and serve.

*To make this to serve for vegetarians, sweat the veggies in olive oil, and then do as the Pacific Wharf Café does and top each meat-eater's serving with some julienned ham instead of the jowl bacon that I used. And if all of your eaters are carnivorous but you don't have jowl bacon rattling around your freezer as I did, try frying up maybe a half pound of regular bacon, and sweat the veggies in the bacon fat after you remove and reserve the crispy bacon pieces.

Another item I had hoped to try at the Pacific Wharf Café was the Sonoma Chicken and Apple Salad, also served in a bread bowl. And Disney actually published the recipe for this item. But I made a "cheater" version that I tailored a bit for my tastes. I will post both versions, and you can decide which to make for yourself.

Sonoma Chicken and Apple Salad
Pacific Wharf Café, Disney's California Adventure Park

4 cups water
2 cubes chicken bouillon
1 pound boneless, skinless chicken breast
1/2 head iceberg lettuce
1/4 cup walnut halves
1/4 cup celery, diced small
1 Granny Smith apple, peeled and cut into wedges
2/3 cup honey mustard dressing (your favorite brand)
4 individual-sized bread bowls*
4 leaves Romaine or leaf lettuce
8 fresh chives sprigs, chopped
1/4 cup dried cranberries

1. In a medium pot, boil 4 cups of water. Add chicken bouillon, stirring until the bouillon is dissolved in the water. Lower heat, and bring to a simmer.
2. Add chicken breast; cover pot and cook for about 8 minutes, or until the internal temperature reaches 165°F. Put chicken in the refrigerator to cool down.
3. Thinly shred the lettuce; set aside.
4. Dice chicken into 1/4" pieces and put it in a medium-sized bowl. Add walnuts, celery, apple wedges, and honey mustard dressing and toss well.
5. Hollow out the bread bowls; fill with the shredded lettuce. Place one lettuce leaf on the edge and place the chicken salad at the center. Sprinkle the salad with chives and cranberries just before serving.

* Sweet, salty, and crunchy, this salad is a hit at the Pacific Wharf Café, served in bread bowls made in the adjacent Boudin bakery (where a secret family recipe for sourdough dates back to 1850).

Yield: 4 servings

Sonoma Chicken and Apple Salad (My Version)

1 deli chicken, skin removed and deboned, cut into chunks
1 cup walnuts, toasted and coarsely chopped
1/2 cup celery, diced small (optional--I hate it!)
1 shallot, peeled and minced
1 Granny Smith apple, cored and cut into chunks (I used a large Honeycrisp)
1/2 cup dried cranberries
2/3 cup honey mustard dressing (your favorite brand)
black pepper, to taste

Garnish: 8 fresh chives sprigs, chopped

Serve on top of a pile of shredded lettuce, and to be more authentic, inside a sourdough bread bowl.

Thursday, March 01, 2012

Two midweek quickies...

I wanted to take some treats to my department meeting tomorrow, but I was too tired to put much effort in. So here's what to do: Stir up a box of Dark Chocolate Ghirardelli Brownie Mix, then put a spoonful in the bottom of a each well of a nonstick muffin tin. Add an Oreo cookie frosted with a big blob of peanut butter in the middle, then fill almost to the top with the remaining batter. Bake for about 35 minutes at 325, and you have Oreo-Peanut Butter Brownie Cups! (You're welcome.)


And since you should probably have some lunch before you polish off one of those Oreo brownie things, consider the following sandwich combination: Toasted oatmeal bread, off-the-bone ham, prosciutto, and swiss, with spicy tavern mustard and cranberry salsa or "strumpet". MMM! SO GOOD!!

(I apologize for my brevity and lack of real culinary effort...thus begins MARCH MADNESS for me, and we ain't talkin' basketball!)

Sunday, February 26, 2012

HAPPY OSCAR DAY 2012!

The Oscar-themed feasting has begun! For lunch, we had Glazier dogs (unearthly red garlic franks ubiquitous at all sporting events around these parts) as a nod to both Moneyball and NYC street cart dogs (Extremely Loud and Incredibly Close). Later this evening, we will enjoy some little Hawaiian meatballs on bamboo skewers as an appetizer in honor of The Descendants:


Dinner will be a classic Hollywood steakhouse meal a la The Artist: Pan-Seared Porterhouse Steaks with Béarnaise (the sauce adds a French twist as homage to Hugo) and Twice-Baked Potatoes.


Also, I will be making "Audrey's Salad," the original creation of my dear friend Jaymie's partner: Romaine lettuce (though I used the red leaf on hand), prosciutto crisps, vanilla roasted pears (I used Asian pears), blue cheese crumbles, and rustic french dressing.


Last but not least, we will have a slice of Minny's chocolate pie from The Help...with no unsavory "special" ingredients (though it cracked and looked like sh*t!).

Minny's Chocolate Pie
(Source: Food and Wine)

1 packaged pie dough crust, such as Pillsbury
1 1/2 cups sugar
3 tablespoons unsweetened cocoa powder
4 tablespoons unsalted butter, melted
2 large eggs, beaten
3/4 cup evaporated milk
1 teaspoon pure vanilla extract
1/4 teaspoon salt
Whipped cream, for serving

1. Preheat the oven to 350°. Ease the pie crust into a 9-inch pie plate and crimp the edges decoratively. Prick the crust lightly with a fork. Line the crust with foil or parchment paper and fill with pie weights or dried beans. Bake for 15 minutes or until set. Remove the foil and weights and bake for about 5 minutes longer, just until the crust is dry but not browned.
2. Meanwhile, in a bowl, whisk the sugar with the cocoa powder, butter, eggs, evaporated milk, vanilla and salt until smooth.
3. Pour the filling into the pie shell and bake for about 45 minutes, until the filling is set around the edges but a little jiggly in the center. Cover the crust with strips of foil halfway through baking. Transfer the pie to a rack and let cool completely before cutting into wedges. Serve with whipped cream.

Make Ahead: The chocolate pie can be refrigerated overnight.

Sunday, February 19, 2012

50 Years Demands a Very Special Birthday Cake

Last weekend, after the dog shows at the Meadowlands, my lovely friends Jaymie and Audrey invited me to spend the night at their gorgeous Victorian mansion in Washington, New Jersey, about an hour west of NYC. And that evening, one of best friends, Tony, and his fiance', Larry, came for dinner, as did one of Jaymie and Audrey's neighbors, Jewels, who I was happy to meet in person, having only known her from an online book club on Facebook.

The dinner was nothing short of magical. We gathered at the table around 7pm for snacks and wine, and we didn't leave the table until midnight, having feasted and laughed and relished each other's company for hours. As a bonus, between Audrey and Jaymie and Tony and Larry's dogs, there was a tiny yapper to warm each guest's lap after the meal. (Tee hee.) The entree' was a terrific lactose-free beef stroganoff that was surprisingly good (Jaymie is off dairy these days). Audrey made it with cultured almond milk in place of sour cream, which added a delicious nuttiness that really complimented the earthy mushrooms and also gave it a hint of sweetness. And there was a green salad with a yummy citrus vinaigrette that Jewels made.

Over dinner, I learned that Jewels was a graduate of CIA in Hyde Park, NY and owns her own catering business called AngelFood. Even more exciting was the news that Jewels had also brought dessert, a cocoa nib, chocolate and berry dacquoise (from Chef Elizabeth Falkner of Citizen Cake and "The Next Iron Chef") that was among the best desserts I've ever had in my life! I had been stressing over what to make for my friend Lee Ann's 50th birthday, as it needed to be very special and something other than traditional cake and frosting, because she doesn't care for it. The light bulb went on, and I asked Jewels whether a mere mortal who did not attend culinary school might be able to replicate the dacquoise. She assured me it was possible, and guess what? It was!

In fact, this dessert really isn't all that hard. It just takes FOREVER! I think it took me about 10 hours from start to finish (actually, it was longer, as I made a stupid mistake on the meringue layers and had to remake them--UGH!). But much of that is passive time, such as letting the meringues dry in the oven overnight and letting the layers chill in stages. It would be a much more humane project if you did it over two or even three days in stages.  That will be my strategy the next time I make it. Ok, so let me break down the process for you...

The first step is to make the two meringue layers. Right out of the gate, it all went horribly wrong for me, as I accidentally added a tablespoon of baking soda to the whipped egg whites instead of corn starch (the boxes look the same)! Thus, the meringues didn't rise, and they ultimately tasted like, well, urine is a fairly accurate descriptor. So I shed some tears and put in an emergency call to Jewels who gently broke the news that I would have to start again. I was worried that I didn't have enough cocoa nibs to make a second batch, but she said that the 3/4 cup the recipe calls for was overkill, and she was right. I would use 1/2 cup at the most in the future.

By the bye, I found cocoa nibs at my local health food co-op, but of course, you could also acquire them from many sources on the internet. My last bit of advice on this part is to coat the pan and parchment paper liners with a generous amount of flour-added baking spray, and you'll have no problem releasing them later. And do NOT skimp on the overnight drying time, because if the meringues are moist at all, they may dissolve when layered next to the mascarpone cream. After all, they are mainly sugar and egg whites.

This is stage one of putting the cake together: the bottom layer is one of the meringues topped with some of the chocolate glaze. Then it goes in the fridge to set up for a half hour before continuing the assembly. I forgot to take a picture of the next step, but you spread on half of the mascarpone cream on top of the chilled ganache.

The next phase involves a chocolate chiffon cake layer topped with blood orange marmalade. However, I am not crazy about the chocolate-orange combo, and Jewels used blackberry jam on hers, which was scrumptious. So I topped mine with black raspberry jam instead. For those of you that don't think you like any kind of fruit with your chocolate, I encourage you to try a berry jam with this. It somehow gives the chocolate flavor more depth and richness and makes it...more chocolaty.

On top of the chocolate chiffon cake and jam, you add the other half of the mascarpone cream, and this is where it gets very scary! You must pray to the deity you serve, and somehow manage to get this very tender (and now heavy with toppings) layer on top of the bottom layers of meringue, chocolate, and cream. My cake broke on one side in the transfer, but I think once it all got squished together, no one was the wiser(she feebly tries to convince herself). I recommend placing the layer on waxed paper, and then using two wide but thin pancake turners to help you lift, move and place it. GOOD LUCK!

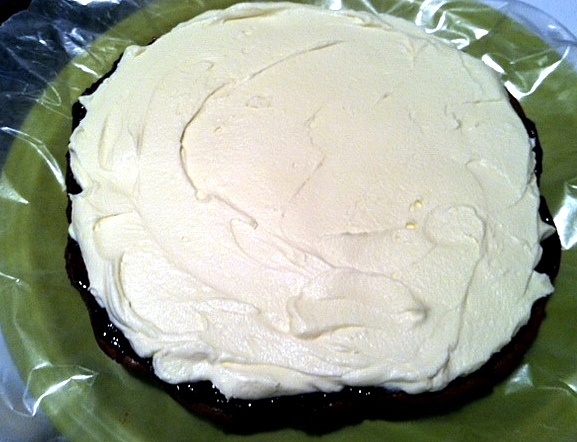
Once you have, by some miracle, transferred the chocolate cake layer (look closely, and you can see the big crack in mine), you put the other cacoa nib meringue on top of the whole shebang, and it should look something like this (with cream exploding out of the sides, naturally) before you commence with the frosting/glazing.

And this is what it looks like with a crumb coat of the chocolate glaze. Yes, yes, I realize that it looks like something a third grader might make, but bear in mind, it still needs a finishing coat of glaze once this has set up, and the last step (pouring smooth chocolate over the whole affair) will cover a multitude of sins.

And TA-DAH, here is the finished product! I guess I should have reheated the glaze a bit longer so that it poured over and smoothly coated the dacquoise, but I was afraid of getting it too hot and having to wait for it to cool down again (and I need to get myself to work!). So I basically just frosted the cake with one more coat of chocolate. Jewels suggested that I could have smoothed it all over with a hot spatula, but I didn't have time--I barely got to class on time as it was! Even so, I think it looked alright, and would have been that much prettier with a ring of fresh berries around the base. Oh well...next time.

You need to chill the cake very thoroughly for it to slice properly, and Jewels recommends freezing it to make it easier (though I didn't have that much room in my freezer). At the restaurant where we had the birthday party, I tried slicing it with a large serrated knife that I wiped between each slice, but the top layer of ganache was fairly thick, and I ended up crushing it as I cut down and mashing some of the cream out. UGH! However, the taste was DIVINE, and none of the guests complained.

Jewels recommended that you cut the cake in sixteen slices (as it is so rich), and twelve people opted for a slice at the party. So I brought the last quarter of the cake home, and tried to figure out a different way to slice it so that you could see the pretty layers better when serving. The secret, as it turned out, was a HOT knife, reheated and wiped clean between each cut. That worked like a charm! Of course, I am a perfectionist, and it annoys me that I did not get the bottom layer of mascarpone cream spread evenly, but oh well...that will give me something to shoot for next time. However, someone is going to have to have another VERY significant occasion before I have the strength to attempt this cake again. And yet, all the labor was certainly worth it in the end. It truly is CRAZY DELICIOUS!

Cocoa Nib, Chocolate and Berry Dacquoise
(Source: adapted from Elizabeth Falkner, Bon Appétit, February 2009

Meringues:
Nonstick vegetable oil spray
1 cup powdered sugar
1 tablespoon cornstarch
3/4 cup cocoa nibs* (about 2 1/2 to 3 ounces), finely ground in spice mill or small coffee grinder
1/2 teaspoon coarse kosher salt
3/4 cup egg whites (about 6 large)
1/4 teaspoon cream of tartar
1/4 cup sugar

Chocolate chiffon cake:
Nonstick vegetable oil spray
1/2 cup sugar, divided
1/4 cup all purpose flour
1/4 cup unsweetened cocoa powder
1/4 teaspoon baking powder
1/8 teaspoon baking soda
1/8 teaspoon coarse kosher salt
1/3 cup canola oil or other vegetable oil
2 large eggs, separated
2 tablespoons water

Mascarpone whipped cream:
1 1/4 cups chilled heavy whipping cream
1 8-ounce container mascarpone cheese**
1/4 cup powdered sugar
2 teaspoons vanilla extract

Glaze:
6 ounces bittersweet chocolate, chopped (use a high-quality chocolate, like Callebaut)
3/4 cup heavy whipping cream
3 tablespoons water
3 tablespoons unsweetened cocoa powder
2 tablespoons light corn syrup
3 tablespoons unsalted butter, room temperature

Blackberry or black raspberry jam
Fresh berries (for garnish)

For Meringues:
Preheat oven to 300°F. Line bottoms of two 9-inch-diameter cake pans with 1 1/2-inch-high sides with parchment paper; spray parchment with nonstick spray. Sift powdered sugar and cornstarch into medium bowl; whisk in ground cocoa nibs and 1/2 teaspoon coarse salt. Beat egg whites and cream of tartar in large bowl until thick and foamy. Adding 1 tablespoon sugar at a time, beat until stiff but not dry. Fold in cocoa nib mixture. Divide meringue between prepared pans, spreading evenly.

Bake meringues 1 hour. Turn off heat. Keeping oven door closed, leave meringues in oven overnight to dry (meringues will deflate slightly).

Chocolate chiffon cake:
Preheat oven to 32 degrees F. Line bottom of 9-inch-diameter cake pan with 2-inch-high sides with parchment paper; spray parchment with nonstick spray. Combine 1/4 cup sugar and next 5 ingredients in medium bowl; whisk to blend.

Whisk 1/3 cup oil, egg yolks, and 2 tablespoons water in large bowl to blend. Stir in dry ingredients. Beat egg whites in another medium bowl until soft peaks form. Gradually add remaining 1/4 cup sugar, beating until stiff but not dry. Fold whites into yolk mixture. Transfer batter to prepared pan.

Bake cake until tester inserted into center comes out clean, about 25 minutes. Cool in pan 15 minutes. Turn cake out onto rack; peel off parchment. Cool completely. DO AHEAD: Can be made 1 day ahead. Wrap in foil; store at room temperature.

For mascarpone whipped cream:
Combine all ingredients in large bowl. Beat just until mixture holds soft peaks (do not overbeat or mixture will curdle). Cover and chill at least 1 hour and up to 2 hours.

For glaze:
Place chocolate in large microwave-safe bowl. Combine heavy whipping cream, 3 tablespoons water, unsweetened cocoa powder, and light corn syrup in heavy medium saucepan. Whisk over medium heat until blended and just beginning to boil. Pour mixture over chopped chocolate; let stand 1 minute, then stir until smooth. Whisk in butter. Let glaze stand until thick enough to spread, 15 to 20 minutes.

Place 1 meringue on platter, flat side down; spread 1/2 cup glaze over. Refrigerate until chocolate is firmly set, about 30 minutes. Spread half of mascarpone cream (about 1 1/2 cups) over chilled chocolate. Refrigerate 10 minutes. Place cake layer on work surface; spread with 1/2 cup marmalade, then remaining mascarpone cream. Carefully place cake layer atop meringue on platter. Top assembled cake with second meringue, flat side up. Spread 1/3 of glaze over top and sides of cake in thin even layer. Refrigerate until coating sets, about 30 minutes.

Heat remaining glaze in microwave just until pourable but not hot, 5 to 10 seconds. Carefully pour glaze over cake, spreading to coat evenly. Chill cake until glaze sets, at least 1 hour. DO AHEAD: Cake can be made 3 days ahead. Cover with cake dome and keep refrigerated.

Cut cold cake into wedges. Serve with fresh berries.

* Bits of shell-roasted cocoa beans; available at many specialty foods stores and from chocosphere.com.
** An Italian cream cheese; sold at many supermarkets and at Italian markets.

Wednesday, February 15, 2012

Chili's Chicken Enchilada Soup...in the Crock Pot!

I went on a little road trip down to the Meadowlands in Secaucus, NJ last weekend to the PBGV specialties that take place every year on the Saturday before Westminster. And for lunch between the two shows (parent club in the morning, New Jersey club in the afternoon), a gang of us went to Chili's. As chains go, it's one of my favorites, and I'm sad that we don't have one in my town.  This time, I decided to try some different things on their menu. I ordered a chicken club quesadilla which was nothing to write home about, but I also got a cup of their chicken enchilada soup, which was FABULOUS!
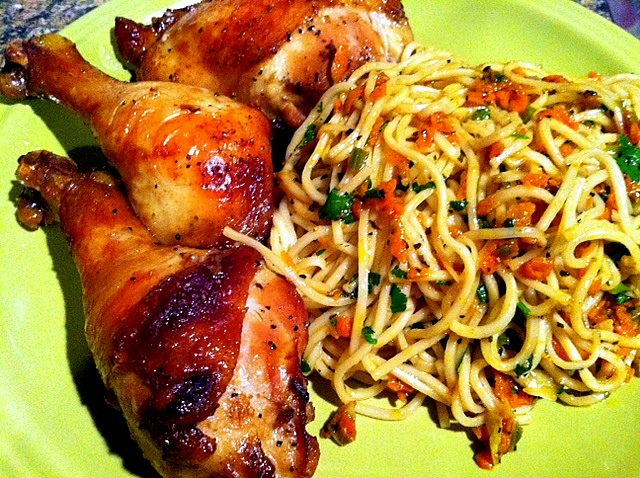
Since the closest Chili's is over in Burlington, I knew I needed to work up one of my copycat versions, and of course, convert it to be made in the crock pot. If I do say so myself, this soup turned out GREAT, and because it makes use of several "convenience" ingredients, it can be thrown together for a weeknight dinner. I also think this would make a terrific potluck dish that people would just love. In fact, as this recipe makes at least four quarts of soup, I will be taking my leftovers into share with my lucky co-workers! ;-)


Crock Pot Chicken Enchilada Soup

2 tablespoons vegetable oil
2 medium onions, diced
4 cloves garlic, minced
1 quart chicken stock
1 tablespoon chicken soup base
2 teaspoons ground cumin
2 teaspoons chili powder
1/2 teaspoon black pepper
1/4 to 1/2 teaspoon cayenne pepper, to taste
1 (8 oz). can tomato sauce
1 (19 oz.) can enchilada sauce (or two 10 oz. cans)
6 small corn tortillas*, minced
16 oz. Velveeta, cubed
1 cup co-jack cheese, shredded
1 22 oz. bag Tyson roasted and diced chicken, thawed
1 can whole kernel corn**, drained (optional)
Garnishes: pico de gallo, sour cream, shredded cheese, crunchy tortilla strips

In a skillet, heat the vegetable oil over medium heat, and saute' the onions until they are tender. Add the minced garlic and cook another minute or two, then scrape the onions and garlic into your crock pot. Add all the other ingredients, except the chicken and corn. Cook over high heat for two hours or low for four. Whisk until smooth (you may wish to use a stick blender). Add the chicken pieces and corn and heat through, maybe another 30 minutes to one hour. Check seasonings, and garnish as you like before serving.

*Most of the recipes that I found online called for one or two cups of masa harina to thicken the soup. The store I was shopping in didn't carry that, so I got the brilliant idea to just chop up some corn tortillas and let them dissolve in the soup. it worked perfectly, and gave the soup great flavor...just like chicken enchiladas!

**Chili's chicken enchilada soup doesn't have corn in it, but it's delicious in this, amplifying the corny flavor of the tortillas. You could even go crazy and also add a can or two of black beans. That would be yummy, too.

Tuesday, February 07, 2012

Celebrating my officemate...with PIE!

Today is my dear friend and officemate's birthday, and even though we're going to have a bigger celebration later on this month (because it's a very significant birthday, ending in ZERO!), I thought it only right that we have small workplace gathering at lunchtime.

I love to make treats to share with Lee Ann, but when it comes to her birthday, she always throws a wrench into the plans because she doesn't like cake. In fact, when she got married, she had an ice cream sundae bar instead of a wedding cake! Tee hee. But she loves pie, so that's what I thought I'd make for her.

Because I had to cook on a school night--after getting home from choir practice at 9pm--I had to take some shortcuts. I started with frozen pie crusts (ACK!) which I tried to partially blind-bake (as juicy berry pies can often make the bottom crust soft), but I accidentally baked them all the way! What to do, what to do? Then I had a flash of genius: maybe I could make the filling on the stovetop, then add the crumbly topping and bake just long enough to brown the top? Well, folks, I'm pleased to report that it worked like a charm, and I think this is how I will make berry pies from this point forward!

Stovetop Triple Berry Pie

1 pie shell, blind-baked until pale golden brown

Fruit Filling:
4 cups frozen berries (blackberries, blueberries, and raspberries)
1 cup sugar
1 tablespoon lemon juice
2 tablespoons corn starch
2 tablespoons quick tapioca
1 teaspoon vanilla

Crumb Topping:
3/4 cup all-purpose flour
3/4 cup sugar
1/2 cup sliced, toasted almonds or walnuts
6 tablespoons softened butter
pinch of cinnamon

In a heavy-bottomed saucepan over medium heat, cook the berries, sugar, and lemon juice with the corn starch and tapioca until it comes to a boil and the mixture fully thickens, stirring frequently so that it doesn't scorch. Remove from the heat and add the vanilla. Pour this mixture into the baked pie shell.

Mix the crumb topping ingredients with a pastry blender, breaking up the nuts as you go. Pile the crumbly topping evenly on top of the pie. Cover the edge with a pie shield or tin foil and bake about 40 minutes at 350 until the filling is bubbling up and the topping is GB-n-D. Let cool for at least two hours before cutting and serving.

Thursday, February 02, 2012

No Need for Take-Out

I made some teriyaki chicken the other day, as I often do. No real recipe--I just grabbed random things to fashion an Asian-style marinade: soy sauce, rice vinegar, vegetable oil, brown sugar, grated ginger, minced garlic, black pepper, and a squirt of sriracha. But then I needed something to go with, so I created some spicy noodles that echoed some of the ssame flavors as in the chicken marinade. The zippy dish that I'm calling Firecracker Lo Mein turned out REALLY delicious, both as a hot side dish, and cold leftovers for lunch the next day. These noodles are super-easy to prepare, and tastier and cheaper than calling out for delivery!


Firecracker Lo Mein

1 lb. lo mein noodles
4 cubes chicken bouillon in 2 quarts water
1/4 cup vegetable oil
1 jalapeno, seeded, minced and finely chopped
1/2 large carrot, shredded
6 scallions, sliced
4 cloves garlic, minced
1 teaspoon grated ginger
1/2 teaspoon black pepper
2 tablespoons teriyaki sauce
1 tablespoon lime juice
1 tablespoon Hoisin sauce
1 tablespoon rice wine vinegar
1 teaspoon Thai fish sauce, optional
squirt of sriracha hot sauce, optional
1/4 cup cilantro leaves, roughly chopped

Cook the noodles in boiling chicken broth for the time indicated on the package. Drain. Meanwhile, in a large skillet or wok, heat the oil and stir-fry the jalapeno, carrot and scallions for a few minutes, then add the ginger and garlic and fry for another minute. Pull from the heat and add everything else except the cilantro.

Mix in the drained noodles until everything is well combined. Garnish with the cilantro just before serving.

Wednesday, February 01, 2012

It's that time again...

Back to school time, that is. I've had a month off, and I managed to see most of the Oscar nominees, so I am ready for the new semester to begin. It just kills me that it always has to start with an opening day session at the CRACK OF DAWN after keeping some obscenely late hours over winter break. The one bright spot in the day was when lunch was provided for us, and they served this delicious, creamy chicken soup with tortellini in it. I complimented the Sodexho staff and asked them for the recipe, but I was told that they couldn't give it out. This is very humorous, as I don't think anyone has ever asked for a food service recipe in the course of human history, and then they are too high-falutin' to share? Whatevs. So I made my own version--in the crock pot, of course, as I am back to work and already harried. Naturally, mine turned out better, and unlike Sodexho, I am happy to share my recipe with you.


Crock Pot Creamy Chicken Tortellini Chowder

2 tablespoons olive oil
1 large onion, diced
2 stalks celery, diced
2 medium carrots, diced
4 cloves garlic, peeled and minced
1 teaspoon dried oregano*
1 teaspoon dried basil*
1 teaspoon dried parsley*
1/2 teaspoon dried thyme*
1/2 teaspoon dried rosemary*
(*Or use a generous tablespoon Italian seasoning instead)
1 large bay leaf
1/2 teaspoon black pepper
pinch of red pepper flakes
4 cups chicken stock
1 teaspoon chicken soup base (I like Better Than Bouillion)
4-5 boneless, skinless chicken breasts, cut into small chunks
2 cans cream of chicken soup (or one could be cream of celery)
1 lb. frozen cheese tortellini (spinach would be prettier!)
1 cup sour cream
1/4 cup corn starch, optional

In a large skillet over medium heat, add olive oil and saute the onions, celery, and carrots until the onions are translucent, about ten minutes. Add the minced garlic and seasonings and cook for another minute or two. Place this mixture in the bowl of a crock pot, pour in the chicken stock, stir in the chicken soup base, and the pieces of chicken. Cook for three hours on high (or perhaps six on low?).

Stir in the two cans of soup, and then add the frozen tortellini. Cook for another hour on high (two on low?) until the tortellini is cooked through and tender. Remove the bay leaf, and stir in the sour cream. You can serve it as soup at this point, or you may thicken it further for a chowder. Whisk together corn starch and a couple of cups of the soup broth ladled from the crock pot in a small sauce pan. Cook over medium heat, stirring frequently until bubbling and thick. Stir back into the crock pot until everything is blended together, then serve.

Sunday, January 22, 2012

Game Day Grub

As anyone who knows me or who has read this blog for awhile understands, I absolutely hate sports! But my roommate has become a passionate NFL fan, and we have come to an amicable truce which involves her getting to watch her game(s) on Sunday while I amuse myself with tasty experiments in the kitchen. Today, while she rooted for/fretted over the Patriots and then the Giants (aren't you impressed that I know that much? tee hee), I got it in my head to make Cincinnati-style, five-way chili. To make it easier on myself while I juggled three ongoing games of "Words with Friends," I started the chili on the stovetop, but then let it simmer away all day in the crock pot. Man, was it delicious! And even though the weather was in the 20's today, and I could finally turn off the kitchen tap that had been trickling for two days, the chili was very warm and comforting on a winter's day.  This one's a keeper, folks.


Cincinnati-Style Five-Way Chili
(Source: adapted from 
http://americanfood.about.com/od/classicchowdersandstews/r/cinnchili.htm)

1 lb. ground beef
1 large onion, diced
4 garlic cloves, minced
2 cups water
2 cups crushed tomatoes (I used one can of diced, spicy red pepper flavor)
1 tablespoon Worcestershire sauce
2 teaspoons unsweetened cocoa powder
2 tablespoons chili powder
1/2 teaspoon cayenne pepper, or to taste
1 teaspoon ground cumin
1 tablespoon cider vinegar
1 whole bay leaf
1/8 teaspoon ground cloves
1 teaspoon ground cinnamon
1 teaspoon ground celery
1 teaspoon salt

2 cans drained beans (I used chili beans and dark red kidneys), optional
cooked spaghetti, optional
shredded cheese, optional
chopped onions, optional

In a large skillet, brown the ground beef with the diced onions. Once the meat is nearly brown and the onions are tender, add the minced garlic and cook for another minute or two.

Add the meat mixture and everything else (excepts the optional toppings, of course) to the crock pot, and cook on low for eight hours or high for four. About 30 minutes before you serve, fish out the bay leaf and add the two cans of beans, if using.

To serve, pile some spaghetti on the plate, top with the chili, then shredded cheese and onions.

The Cincinnati "Skyline" Chili Ordering Code

1-way: just the chili
2-way: chili served over spaghetti
3-way: chili, spaghetti, and grated cheddar cheese
4-way: chili, spaghetti, cheese, and onions
5-way: chili, spaghetti, cheese, onions, and beans
All "ways" is served with oyster crackers.