Thursday, December 30, 2010

As Ke$ha might say, "Get your drunk on!" (Drunken BEANS, that is!)

This year, I decided to give many of my dear friends the gift of BEANS for Christmas! As I have blogged before, I am completely smitten with Rancho Gordo's heirloom beans, and I just wanted to share the love and get others hooked...like a culinary crack dealer. Tee hee. Plus, with New Year's right around the corner, I figured my friends might want to cook up some beans for good luck in 2011. (You're not limited to just black-eyed peas, ya know! The luck applies to anything you eat a great number of, symbolizing the amount of wealth--or pieces of gold--you'll acquire in the New Year, or some such nonsense.)

As I was placing my gift orders (that included Christmas limas and snowcaps, naturally!), I got to wondering if I had any Rancho Gordo beans left in my own supply. So I dug around in the pantry and unearthed one solitary package of Ojo de Cabra (goat's eye) beans.  But what to do with them? The description said that they were sort of like pintos, and a quick Google search took me to a recipe from Relish Magazine (provided by Rancho Gordo themselves) called "Drunken Beans." Yet another reason to make such a dish for New Year's when there is often much imbibing of spirits, and surely an open beer bottle to be found lying about! ;-)

So I got my beans properly drunk, served them over some rice, and garnished them with some of the corn relish that I just made. I must tell you, if you like things like red beans and rice, this will be TOTALLY up your alley! 

HAPPY NEW YEAR, everyone! (It's gotta be better than 2010...just sayin'.)


Rancho Gordo Drunken Beans
(Source: Relish Magazine)
"Not sweet or tomato-y like canned baked beans, these are great over rice or served with fresh corn tortillas. Use a dark, sweet beer such as Killian’s or Michelob Amber Bock."

1 tablespoon vegetable oil
1 cup chopped onion, divided
2 garlic cloves, minced, divided (I used at least four!)
2 cups dried beans Ojo de Cabra (Goat’s Eye) or pinto beans
3/4 cup dark, sweet beer (I used a lighter lager--the whole bottle)
1 thick slice bacon (um, or eight slices, as I did?!)
3 serrano peppers, seeded and minced
1/2 pound button mushrooms, sliced
1/2 teaspoon salt
Coarsely ground black pepper
Limes wedges
teaspoon salt
Coarsely ground black pepper
Limes wedges

1. Heat oil in a heavy saucepan; add 1/4 cup chopped onion and 1 minced garlic clove. Sauté about 5 minutes. Add beans and enough cold water to cover by 3 inches. Bring to a boil, reduce heat to medium-low and simmer, uncovered, 2 hours or until beans are tender, adding water as necessary to keep beans covered.
2. Add beer and simmer about 15 minutes.
3. Cook bacon large skillet until crisp. Remove bacon and all but 1 tablespoon of fat from pan, reserving bacon. Add peppers and remaining onion and garlic to pan; sauté until tender. Add mushrooms; cook until tender. Chop reserved bacon and add to pan.
4. Combine bacon mixture with bean mixture. Cook 10 to 15 minutes. Season with salt and black pepper. Serve with lime wedges. Serves 6.

Recipe courtesy of Rancho Gordo, Napa, Calif.
"Relish a New American Farmer," Feb. 2007

Thursday, December 23, 2010

Pie is the Best Present of All

I have a friend who is a nightmare to buy presents for, but he loves homemade baked goods. So in lieu of purchasing a Christmas present for him this year, I decided to make him something special. I conferred with his wife, and she informed me that he loves mincemeat pie, but she herself does not, so she never makes it for him. Done, and DONE, I say!

About two weeks before Christmas, I cooked up a batch of mincemeat using just dried fruits and no actual meat or suet. I had to admit, it looked and smelled divine, even before macerating in liquor for a good long while. Here is the recipe I (mostly) followed:

Homemade Mincemeat
Makes about 6 cups (enough for two pies)
(Source: adapted from Rick Rodgers' Christmas 101 via Joy of Baking)

2 large Golden Delicious apples, peeled and grated (I used MacIntosh)
1 12 ounce (1 1/2 cups) can frozen apple juice concentrate, thawed
1 cup dried apples, chopped
3/4 cup dark raisins
3/4 cup golden raisins
3/4 cup dried currants
3/4 cup dried cranberries
2/3 cup mixed candied peel
1/3 cup candied lemon peel
1/2 cup dark brown sugar
1/2 cup dark rum
1/2 cup brandy or cognac (I used maple whiskey)
4 tablespoons unsalted butter
1/2 teaspoon ground cinnamon (I used 1 full teaspoon)
1/2 teaspoon ground allspice
1/2 teaspoon freshly ground nutmeg
1/2 teaspoon ground cloves (I only used 1/4 teaspoon)
1/4 teaspoon salt
*I also added one cup of orange juice to the mix

Place all the ingredients in a large Dutch oven, and bring to a boil over medium heat, stirring often. Then, reduce the heat to medium-low and simmer the mincemeat, stirring often, for about 25-30 minutes, or until the liquid is almost evaporated. Transfer the mincemeat to a large bowl and let it cool completely. Cover with plastic wrap and place in the refrigerator, at least overnight, or up to a month. Note: If storing longer than a week, stir in a little rum or brandy (about 1/4 cup) every week.

Ok, so I had mincemeat, but how now to make it into a pie? Truthfully, I consulted lots and lots of recipes, but then just kind of used The Force and winged it. I started with my favorite recipe for a two-crust pie and chilled the dough thoroughly. Then I rolled out both crusts, filled the bottom one with three cups of the mincemeat to which I added a cup of roughly chopped walnuts, dotted the filling with two tablespoons of butter, covered the filling with the top crust, perforated it and added a traditional star design for flourish. Then I egg-washed the top with a whole egg mixed with a tablespoon of cream. I started baking the pie at 425 degrees for about fifteen minutes, then turned it down to 350 and baked it until golden, probably about an hour total (and I covered the edges of the pie when they threatened to get too brown).

When I presented the pie to the lucky recipient at a local pub where we exchanged gifts a few days before Christmas, my friend Tom took a fork out and dove right into the middle of it! He said it was good, but his affect displays are hard to read (=understatement). Still, I believe he was pleased. This was confirmed the next day when his wife sent me a picture of Tom enjoying his pie...for breakfast! Tee hee.

Sunday, December 19, 2010

Holiday Party Potluck Ideas

I don't know how you good people are managing your social dance cards this holiday season, but mine are a bit full. Of course, this is both a blessing--to have lots of friends--and a curse--to have to prepare many potluck dishes to bring to many events during this terribly busy time, right at the end of the semester.  So let me offer a few quick-and-easy people pleasers.

First on the docket was my office potluck which I had very little advance notice about and just one evening to prepare for (after teaching a night class, I might add). It was to take place on the last day of the term after two, three-hour finals and shortly before our winter graduation ceremony. When I was bouncing ideas off of my roommate the night before, I blurted out that I really needed something that I could throw in a crock pot when I got to school in the morning, and it would take care of itself all day and be ready to serve in the late afternoon. We considered soup, but I knew of two people that were already bringing some, so we started discussing hot dips. We briefly toyed with the idea of that Rotel cheese dip that everyone is crazy about, but I HATE processed cheese sauce, and I knew I would never live it down if I served something Velveeta-based to my colleagues.

When I contemplated my favorite hot dip that I'd ever sampled at a potluck gathering, my mind went immediately to an artichoke dip that I first had at a Christmas party a few years ago. It was baked, but I thought it might work in a slow cooker. I made a few adaptations--mainly, the inclusion of crabmeat--and I took home a clean crockpot from my office party!  MISSION ACCOMPLISHED!

Crockpot Crab and Artichoke Dip

2 cans artichoke hearts, drained
1 (8 oz.) brick cream cheese, softened
3/4 cup mayonnaise
1 (8 oz.) bag shredded Italian cheese blend (mozzarella, parmesan, provolone, asiago, fontina, romano)
1 can crabmeat, drained
2 teaspoons dill weed
2 to 4 cloves garlic (to taste), peeled and minced
1/4 teaspoon black pepper
several shakes of hot sauce, to taste
juice of half a lemon

Blitz the artichoke hearts in a food processor, then blend in the cream cheese and mayo. Scrape this out into your crock pot, and add the cheese, crab, and the rest of the seasonings. Stir everything together and turn the crock pot on high for an hour or so, until it's hot all the way through, then lower the heat to keep the dip warm throughout your party. Serve with sliced rounds of a crusty baguette that you have toasted in the oven just before serving.

Right on the heels of our gathering at work was my officemate's Christmas annual Christmas party. And I was so wiped out from the crashing halt of the semester that I wasn't feeling like coming up with anything too intricate. Luckily, my divine friend, Phillip, and his lovely hubby, Rob sent me an early and very tasty Christmas present this year: Medjool dates and date crystals from Shields Date Farm near Indio, CA. So for the party, I made a special hors d'oeuvre--those ginormous, sweet, almost creamy Medjool dates filled with tangy goat cheese and wrapped in bacon. I didn't follow any recipe--you don't really need to. But here's the jist of what I did:

I sliced each date on one side, filled the cavity with goat cheese, wrapped it in a half piece of extra-thick, very smoky bacon, and secured it with a toothpick. I placed them all on Silpay-lined trays and baked them at 400 degrees until the bacon was crispy (15-20 minutes?), turning them halfway through to promote even browning. They were very yummy, although I think I might try filling them with a blue cheese next time just for kicks!

I have one last idea if you're REALLY in a time crunch and can't even cook anything for an event. I have a couple of friends--who shall remain nameless--who often bring the following salad to potluck gatherings (because they can't be bothered to actually cook?!). It's an elegant, delicious, usually lighter offering to offset so many heavy dishes, and is something that the vegetarians can enjoy, too. And the best part of all, to prepare the salad, mostly what you need to do is open bags and assemble! I'm sure many of you already have a version of this salad in your repertoire, but just in case, consider this the master formula with infinite variations.

You start with mixed baby greens, any blend you prefer. Alternately, baby spinach on its own is lovely. Secondly, you add crumbled cheese, feta (plain or flavored) or a bleu. Third, you add nuts--pecans, walnuts, sliced almonds or even sunflower seeds. Some onion is optional, scallions or slivers of red onion. Lastly, you add fruit: strawberries in the summer, apples in the fall, or dried cranberries all year round (have you tried the pomegranate juice-infused Ocean Spray craisins?). Then you dress it all with--and this is KEY--Newman's Own Raspberry Walnut Light Vinaigrette (though your favorite balsamic dressing is yummy, too).  So easy, so sophisticated, so YUMMY, that you're guaranteed to take home an empty bowl from your party or potluck! Better yet, you should make a version of this salad weekly at your own house--it's just that good!

HAPPY HOLIDAYS, everyone! Enjoy them, and don't let them stress you out! :-)

Tuesday, December 14, 2010

What I Should NOT Be Doing During Finals Week

I'm not sure if having the first day of finals week off was serendipitous, or more likely, I'll be cursing my misfortune in a few days, as all of my exams are bunched up at the end of the week. But one thing I do know for sure is that I should have spent my day off grading papers. But instead, I spent it canning. I sometimes make little holiday gifts of jam or chutney at this time of year for friends and colleagues, but this time, I was canning for someone I didn't even know!

You see, upon learning of this humble little cooking blog, one of my students asked me if I had homemade canned goods and preserves for sale, as she wanted to put a gift basket together for her aunt who loves such things. Of course, I was happy to oblige, and so we discussed what sorts of items would her aunt would prefer. I had many things on hand that I believed would fill the bill...all except one. My student told me that her aunt's favorite thing in the world was corn relish, and of course, that was one thing I did not have. I tried to talk her into some zucchini relish, but it had to be corn. So how could I not try and make her some? After all, it was for Christmas!

The thing I was most worried about was the unseasonable lack of fresh corn on the cob, but some knowledgeable folks on my favorite canning resource, GardenWeb's Harvest Forum, assured me that corn relish, since it's pickled, can be successfully made with frozen cut kernel corn. And guess what? It can, and it's TERRIFIC! This is such an easy and delicious recipe (from our trusty old friend, the Ball Blue Book), and I am thrilled to now know that it can be made year-round!

Oh, for those of you who may be asking, what do you do with corn relish, you can use it wherever a pickle relish might be called for, like on hot dogs, hamburgers or sandwiches. It's also good mixed into a pasta salad, or you can blend it with sour cream, mayo or cream cheese to make a delicious dip. Some people eat it as a side dish on its own. As for me, I like it on nachos with some black beans. YUM!

Home-Style Corn Relish
(Source: BBB's Fresh Preserving)

2 cups white vinegar
2/3 cup sugar
1 tablespoon salt (that's plain canning salt)
4 cups cooked corn kernels, about 8 ears (I used frozen, thawed but not cooked)
2 cups diced mixed red and green bell peppers, about 2 large (I used one sweet red pepper, 4 long hot peppers and 2 jalapenos, as I like a little kick to my relishes!)
3/4 cup diced celery (about 2 stalks)
1/2 cup finely chopped onion (about 1 small)
1 tablespoon dry mustard (didn't realize I was out, so I swapped out 1 teaspoon yellow mustard seeds)
1 teaspoon celery seeds
1 teaspoon ground turmeric
*I added 1/2 teaspoon black pepper and 1 teaspoon of coriander

6 (8 oz) half pint glass preserving jars with lids and bands (I used pints and got exactly 3 jars)

1. PREPARE boiling water canner. Heat jars and lids in simmering water until ready for use. Do not boil. Set bands aside.
2. COMBINE vinegar, sugar and salt in a large saucepan. Bring to a boil, stirring to dissolve sugar. Add corn, red and green peppers, celery, onion, mustard, celery seeds and turmeric. Reduce heat and simmer 15 minutes, stirring frequently.
3. LADLE hot relish into hot jars leaving 1/2 inch headspace. Remove air bubbles. Wipe rim. Center hot lid on jar. Apply band and adjust until fit is fingertip tight.
4. PROCESS filled jars in a boiling water canner for 15 minutes, adjusting for altitude. Remove jars and cool. Check lids for seal after 24 hours. Lid should not flex up and down when center is pressed.

Wednesday, December 08, 2010

Birthday Presents Worth Food-Blogging About!

Way back in October--a time frought with personal misfortunes--my age advanced by another year, adding insult to injury (tee hee). My lovely colleagues at work took me out to the Japanese steakhouse in town for dinner and showered me with many excellent gifts, including a beautiful handmade Wizard of Oz lap quilt (you can see from the picture of my desk that it was a theme of the day--along with better luck!)

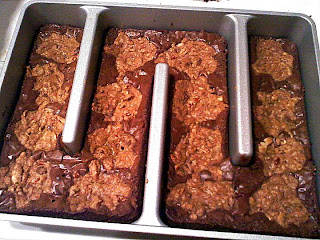
Another one of my favorite presents was from my very kind and generous roomie--a cooking implement that I had wanted for years, but was too cheap to pony up the 35 bucks for, the Baker's Edge brownie pan. And even after receiving the pan, it took me a long time to give it a test drive. WHY OH WHY did I wait that long? What a waste of time and awesome brownies that could have been enjoyed!

I am now convinced that this is the greatest creation in human history, especially for us edge lovers. You see, the pan has these metal dividers or channels that cause every brownie or bar to have at least two chewy edges, if not THREE! And before you inside brownie lovers start to protest (sickos that you all are), this pan bakes so beautifully and evenly, that the middles of the brownies are tender and ethereally light and just DEE-licious!

I can't wait to try other cookie bars and coffee cakes and pound cakes and cornbread and such in this magical pan! If you have been considering buying one, DO NOT hesitate. The pan is heavy and well-made, and if you take care of it and hand wash only, you will have it forever. And you will need it to make a weekly batch of brownies...which may be a problem. ;-) Oh, and before you even ask, pictured above is a mix that I highly recommend called Betty Crocker Supreme Cookie Brownie Bars. All I changed to the given instructions was to add an extra handful of mini chocolate chips to the cookie dough, along with a half cup of chopped pecans. SO GOOD!

The other commercial product/birthday present that I must recommend to you is the gift that I got for my roommate for her birthday, the Keurig Special Edition coffee maker. Now, I tried to get this for her last year, but she wasn't convinced that she would like it, coffee snob that she is. But now that she has one, she is OBSESSED with the thing! She loves how fast it makes coffee, how it makes one cup at a time so the rest of the pot is never wasted, and most of all, she loves that it make coffee dark enough for her tastes. I also got her the little adapter to make your own k-cups, so she can use any of her favorite dark roast blends, or you can buy k-cups labelled "extra bold," which means they have extra coffee grounds in them for a bolder brew.

My main concern about the device, cheapskate that I am, was the cost per cup. But if you buy the k-cups in bulk via Amazon (highly recommend Coffee People's offerings--Black Tiger is a favorite), you can often get them for less than $0.50 a cup, and even if you use two to fill a commuter mug, that's still a fraction of the price of a daily Starbucks' run! Also, make Sam's Club (or Costco) your friend. They have a Keurig bundle for $120 that includes the special edition machine, 60 k-cups, AND the little adapter to make your own k-cups. That's a heckuva deal! Also, they have a separate box of 80 k-cups of Paul Newman's Organic Extra Bold for $33 (about $0.41 a cup), another excellent bargain. You're welcome. ;-)

Thursday, December 02, 2010

In which my life threatens to become a bad country song...


"Yeah, I watched that sweet old life become a bag of bones..."
--Indigo Girls, "Ozilline"

Rest in peace, old girl. You were dearly loved and will be sorely missed.

ROSIE LINDSEY
(June 6, 1996 - December 2, 2010)

Sunday, November 28, 2010

A Post-Thanksgiving Post

Oh, I forgot something else on our Thanksgiving menu. Again, some credit goes to Bobby Flay for insisting that you should always start the meal with soup of some kind. Partial credit should also go to a hilarious young blogger (the niece of one of my PBGV friends) whose Thanksgiving dinner always includes her grandmother's mushroom soup. Here's my own take on it:


Cream of Mushroom Soup

4 tablespoons butter
2 tablespoons olive oil
24 oz. crimini mushrooms, washed and sliced
1 medium onion, diced
1 clove garlic, peeled and cracked (or 1/2 teaspoon granulated)
pinch of red pepper flakes
1/2 cup white wine, optional
1/2 cup flour
4 cups beef or pork stock
1 1/2 teaspoons Worcestershire sauce (a few shakes, to taste)
bunch of thyme (or 1 teaspoon dried)
1/2 teaspoon pepper
2 cups half-and-half
salt, to taste

Melt the butter and olive oil over medium heat in a large skillet. Saute the mushrooms, onion and garlic clove with a pinch of red pepper flakes until the onions are soft and the mushrooms start to brown. Deglaze with white wine, if you like, scraping up all the browned bits. Let the wine almost completely cook off. (If you choose not to use the wine, just move directly on to the flour.) Add the flour to the mushrooms and cook for a couple of minutes until it starts to take on a golden color, stirring frequently.

A little at a time, add the stock, stirring constantly. When all the stock has been added, and the soup is uniformly smooth, shake in some Worcestershire sauce, throw in a bundle of thyme (or dried), add the pepper, the half-and-half, and salt to taste. Reduce the heat to low, and simmer for 20-30 minutes to let the flavors meld. If the soup becomes too thick, add more half-and-half or stock as you see fit.

*You may also use a stick blender to whiz this all up, but I prefer sliced mushrooms in mine.

Before I wrap up this Thanksgiving follow-up post, I have one turkey leftover idea for you: TURKEY CAESAR SALAD!  Start with mixed greens, leftover turkey, sliced olives, shredded parmesan, Cardini's Caesar dressing (there is no substitute!), and instead of croutons, top the salad with leftover french fried onions from that green bean casserole you probably made. Not exactly low-cal, but crazy good!

Saturday, November 27, 2010

Very THANKFUL this year!

I have SO MUCH to be thankful for! Since this time last year, I have been blessed to move into my own home, my BFF and roomie, Cyd, returned from living in MN for over a year, and I have survived both cancer and a serious car accident. And I am so very grateful to God and to faithful friends who have sustained me through it all. HAPPY THANKSGIVING, EVERYONE!

Having said all that, I'm not really one for going all gourmet crazy at Thanksgiving; I'm very much a traditionalist. We went to my friend Lee Ann's, as we often do on the actual day, and they have all of the traditional fare. I was assigned an hors d'oeuvre and a chocolate dessert, so I took an easy appetizer called Swiss, Bacon and Tomato Bites (the recipe is from a friend at work, originally from Pampered Chef, that I amped up with a little minced garlic) and a classic French silk pie.

I also brought along some of my one experimental dish this year, inspired by Bobby Flay and one of my blogger friends, Kitchen Mage: cranberry-blackberry-jalapeno chutney. (Ooh...let that idea marinate in your thoughts for just a moment!) This was based on a blueberry habanero chutney that Cyd and I love, especially on grilled salmon and pork chops. But I thought I'd Thanksgiving it up with cranberries. The addition of blackberries was thanks to recent episode of Bobby Flay's "Throwdown." It turned out so well, I think it's the start of a new Thanksgiving tradition!

As for the home menu that we prepared for Black Friday, we brined and roasted a 22-pound beast of a turkey that Cyd bought from a co-worker who raises them, made a sausage, sage and veggie dressing, the Pioneer Woman's decadent mashed potatoes, homemade gravy (of course--there is NO substitute!), green beans with bacon, brussels sprouts for Cyd (ick), and we had some delicious leftover pumpkin cheesecake that we brought home from Lee Ann's. YUM! I hope you all enjoyed your holiday, too!
 
Cranberry-Blackberry-Jalapeno Chutney

2 onions, chopped
2-4 jalapenos, seeded and chopped
1 1/2 cups apple cider vinegar
1 cup orange juice
2 cups sugar
1 teaspoon salt
1/2 teaspoon black pepper
1 lb. fresh cranberries
1 lb. frozen blackberries

Combine the onion, at least two of the peppers (for a pretty mild sauce), vinegar, orange juice, sugar, salt and pepper. Simmer until the liquid is reduced to about 1/3 its original volume.

Add cranberries, blackberries, and more jalapeno to taste. Simmer gently until thickened and jammy-looking, stirring every minute or so to avoid scorching. Let cool before serving.

Tuesday, November 23, 2010

God Save the Beets!

My beloved friend Jay has a husband named Greg, and they have a darling little four-year-old boy named Clark. Jay is a writer and works from home, and Greg...well...Greg (like Chandler Bing) has a job that nobody really understands, but has something to do with computer systems training and causes him to travel a lot all over the world. Usually Jay and Clark hold down the fort at home in Chicago, but recently, they got to accompany Daddy Greg to London for two weeks. While there, Jay sampled a cake made with beets that had a poppyseed glaze that he really fancied. It sounded quite vile to me, as I loathe beets, but Jay said it really tasted very similar to carrot cake, but without the heavy cream cheese frosting, which he feels can overwhelm a cake. (Baker's Note: Jay is ridiculous in this opinion! The only reason to eat carrot cake is for the cream cheese frosting...SHEESH!)

Nevertheless, I took up the challenge to help Jay recreate a beetroot cake back home across the Pond. I found a recipe from Nigel Slater online, and I converted it to American ingredients and measurements from British. Other than needing a little more sugar (to suit our American tastebuds) and a tad more salt, my cakes turned out quite tasty, and as Jay promised, with very little beet-y flavor. I amended the recipe to reflect the necessary additions, and here's what I ended up with:


Beetroot Cake with Poppyseed Glaze
(Source: adapted from Nigel Slater on Tender Recipes)

1 3/4 cups all-purpose flour (I swapped out one cup of white whole wheat)
1/2 teaspoon baking soda
1 tablespoon baking powder
1 teaspoon ground cinnamon
1 teaspoon salt
3 eggs, separated
1 1/2 cups dark brown sugar, packed (I used light)
3/4 cup vegetable oil
1 1/8 cups raw beets, grated (I used red and golden beets, about one pound total)
juice of half a lemon
1 teaspoon vanilla
1/2 cup sultanas or raisins (ick! optional!)
1/2 cup mixed seeds (sunflower, pumpkin, linseed)

for the icing:
1/2 cup powdered sugar
lemon juice or orange blossom water
1 tablespoon poppy seeds

Set the oven at 350F. Lightly butter a rectangular loaf tin (20cm x9cm x 7cm deep, measured across the bottom) then line the bottom with baking parchment. (I just used flour-added spray on a glass pan, and it came out perfectly.)

Sift together the flour, baking soda, baking powder and cinnamon. Beat the oil and sugar in a food mixer until well creamed then introduce the beaten egg yolks one by one, reserving the whites for later. (I did this in a regular bowl and whisked by hand.)

Grate the beets coarsely and fold into the mixture then add the lemon juice, raisins or sultanas and the assorted seeds. Fold the flour and raising agents into the mixture whilst the machine is turning slowly. Beat the egg whites until light and almost stiff. Fold gently but thoroughly into the mixture using a large metal spoon (a wooden one will knock the air out).

Pour the mixture into the cake tin and bake for 50-55 minutes, covering the to with a piece of tin foil after 30 minutes. Test with a skewer for doneness. The cake should be moist inside but not sticky. Leave the cake to settle for a good 20 minutes before turning out of its tin on to a wire cooling rack.

Make the icing. Sieve the powdered sugar and stir in enough lemon juice or orange blossom water to achieve a consistency where the icing will run over the top of the cake and dribble slowly down the sides (about one tablespoon), stirring to remove any lumps. Drizzle over the cake and scatter with poppy seeds (I just mixed the poppyseeds into the glaze and poured it over). Leave to set before eating.

Monday, November 22, 2010

Cookies to Restore Sanity

My dear friend June's birthday is only two days after mine, so we sometimes celebrate together, usually on the last weekend in October. But this year, June and her family were travelling to Washington, D.C. to attend Jon Stewart's Rally to Restore Sanity (and Stephen Colbert's Rally to Keep Fear Alive) over that weekend. I desperately wanted to go, but I was in that awful insurance limbo period where I didn't have a car. (I was driving my saintly roommate's car to get to work every day, but I wouldn't trust it all the way to D.C. and back!)

So I stayed home and watched it on the big screen and made a batch of chocolate chip cookies to celebrate the event. (If any food was going to restore sanity, I feel it would be a good chocolate chip cookie, don't you?) As it turns out, I may have been in the preferred situation, because even though June and her family had fun partying in the unseasonably warm weather with other spirited and kind-hearted moderates bearing amusing t-shirts and posters, there were SO MANY people in attendance that they couldn't even see the stage. June kept calling me to find out what was going on via the television. LOL! As for the cookies, they turned out quite well. I tried a new recipe--one with vanilla pudding in the mix to add flavor and keep the cookies tender. I read many of the over 500 reviews and made some changes accordingly--they are noted below.

Mom's Chocolate Chip Cookies
(Source: adapted from Allrecipes)

1 cup butter, softened (I used 1/2 butter and 1/2 shortening)
3/4 cup packed brown sugar (I reduced this to 1/2 cup)
1/4 cup white sugar (I used 1/2 cup powdered sugar)
1 (3.5 ounce) package instant vanilla pudding mix
2 eggs
1 teaspoon vanilla extract (I increased this to 2 teaspoons)
2 1/4 cups all-purpose flour (I reduced this to 2 cups)
1 teaspoon baking soda (I added 1 teaspoon baking powder)
1/4 teaspoon salt (optional but helps cut the sweetness)
2 cups semisweet chocolate chips (I cut this back to 1 1/2 cups)
1 cup pecan pieces (optional but delicious!)
1. Preheat oven to 375 degrees F (I dropped this down to 350.)
2. In a mixing bowl, cream butter (and shortening, if using) and sugars. Add pudding mix, eggs and vanilla. Combine flour and baking soda (and baking powder and salt, if using); add to creamed mixture and mix well. Fold in chocolate chips and nuts, if using.
3. Drop by teaspoonfuls onto ungreased baking sheets. Bake for 10 to 12 minutes or until lightly browned. (Mine took 12-13 minutes at 350.)
Yield: 27 cookies using a regular cookie scoop

A couple of weeks after June's birthday, we FINALLY got around to celebrating her properly by going out to a nice dinner, and then going back to her house for coffee and dessert and board games.  Since I had to prepare the dessert on Thursday night after teaching an evening class, it couldn't be anything too elaborate. But I made some special cupcakes to honor my friend who hails from New Orleans and who loves the pairing of coffee and chocolate (as do I)! I started with the time-honored Hershey's Black Magic Cake recipe, then made a coffee cream cheese frosting, and topped the cupcakes with sliced almonds. They turned out pretty darn delicious, if I do say so myself. Happy (belated) birthday, June!


Louisiana Mud Pie Cupcakes

Black Magic Cupcakes:
(Source: Hershey's)

2 cups sugar
1 3/4 cups all-purpose flour
3/4 cup cocoa (1/4 cup black cocoa)
2 teaspoons baking soda
1 teaspoon baking powder
1 teaspoon salt
1 cup buttermilk or sour milk
2 eggs
1 cup boiling water
1/2 cup vegetable oil
1 teaspoon vanilla extract

1. Heat oven to 350°F. Line muffin cups (2-1/2 inches in diameter) with paper bake cups.
2. Combine dry ingredients in large bowl. Add buttermilk, eggs, water, oil and vanilla; beat on medium speed of mixer 2 minutes (batter will be thin). Fill cups 2/3 full with batter.
3. Bake 15 minutes or until wooden pick inserted in center comes out clean. Remove cupcakes from pan. Cool completely. Frost. Makes 30 cupcakes (I got 27)

Coffee Cream Cheese Frosting:

1/2 cup/1 stick butter, room temperature (no substitutions!)
1 (8 ounce) package cream cheese, room temperature
2 teaspoons vanilla
1 1/2 tablespoons instant espresso mixed with a little hot water
pinch of salt
4 cups confectioners' sugar, sifted (more if needed, must be sifted)

Whip together the butter and cream cheese until uniform and light in texture. Add the vanilla, espresso mixture, and salt and blend again. Mix in the powdered sugar at first on low speed, then until completely smooth on medium speed.

*Top each cupcake with a generous amount of frosting, then garnish with a big sprinkle of sliced and toasted almonds before serving.

Sunday, November 21, 2010

More tragedy....and a little comfort.

Suffice to say, this has not been my year. I've already shared about my recent health crisis, but along with losing my mother almost five years ago, this next tragic story rounds out the top three worst things that have ever happened to me. So my 2002 Ford Focus wagon finally gave up the ghost when the electrical system went haywire. It always had been a little funky, but it was past the point of no return when it got stuck in park, and I had to bypass the safety feature with a screwdriver every time I started the car. It was probably going to cost more to fix it than it was worth, so I decided it was time to suck it up, face the inevitability of a car payment, and go buy something new and fully functioning.

I was excited to discover that a car dealership in town had changed over to selling Kias, and I had my eye on a cute little Java-colored Kia Soul Exclaim with all the bells and whistles, including a moon roof, which I had always wanted! I fought a tough battle with the salesmen, and I finally took ownership of the car on Monday evening, October 20th. And coming home Thursday evening, October 22nd, I totalled it. Yep, that's right. And though I've never caused an accident before, it was my fault.

I was travelling on a rural highway that had just gone from four lanes to two when I saw two cars parked on the shoulder with all their lights on. At first, I thought a police officer had someone stopped, but I didn't see any flashing lights. So then I thought someone had broken down and the other car had stopped to help. In either case, it was dark, and I couldn't see where the people were standing, so I moved over to get out of the way in case they were standing outside of their cars, as I didn't want to hit anyone. I don't know if I wasn't used to driving a larger car or if I had forgotten that I only had one lane or what, but I swerved too far over and hit the guy in the oncoming lane. THANK GOD neither of us was seriously injured, but the cars were another story. Oh well, that's why we have insurance, right?  Things can be replaced; people can't.

When you're feeling low, sometimes you just need a comforting meal. It may not make everything all better, but it sure helps in the moment. So I decided to make a big pot of a hearty beef barley soup, and to go with it, I made a very simple but tasty brown bread from a James Beard recipe that my sweet friend, Phil, sent me. And for dessert, I cheated and made a cake from a mix--Betty Crocker's Decadent Supreme Cinnamon Swirl. But it was pretty darn good, I must say. In fact, I'd say it tasted very close to a Cinnabon in cake form! And it went a long way to soothing the physical and emotional bruises of the unfortunate car accident.


Beef, Barley, and Mushroom Soup

2 tablespoons olive oil
1 1/2 lbs. sirloin steak
2 tablespoons steak rub (or enough to coat the meat)
1 large onion, chopped
2 large stalks celery, chopped
4 carrots, diced (I used 3 carrots and one parsnip)
1 lb. crimini mushrooms, sliced
3 cloves garlic, peeled and minced
1 28 oz. can crushed tomatoes in puree
6 cups beef stock
2 tablespoons Worcestershire sauce
1 bundle thyme (or a teaspoon of dried thyme, if you prefer)
2 bay leaves
salt and pepper to taste
1 cup medium (not quick-cooking) barley

In a 5-qt. Dutch oven, heat the olive oil. Coat the steak(s) with your favorite spice rub, then brown the meat in the oil. Remove from the pot and add the chopped veggies (except the garlic). Cook for a few minutes until the mirepoix becomes tender and starts to brown. Add the garlic and cook for another minute or two.

Meanwhile, slice up the steak and add the pieces (and any juices) back into the pot. Pour in the crushed tomatoes and the beef stock, and add the seasonings. Bring to a boil, then reduce heat. Simmer for a couple of hours until the meat is almost as tender as you'd like. Add the barley, bring back to a boil, and simmer for another hour, give or take. Check seasoning and serve piping hot with a slice of hearty bread.

Myrtle Allen's Brown Bread
James Beard, Beard on Bread (1973)
Yield:1 loaf

3 3/4 cup whole-wheat flour, preferably stone ground
1 1/2 packages active dry yeast
2 cups warm water (100ºF to 115ºF, approximately), divided
2 tablespoons molasses
1 tablespoon salt

Put the whole-wheat flour in a large mixing bowl and place in a warm oven (a gas oven with the pilot light on or an electric oven set as low as possible). Both the flour and the bowl should be warm when you make the bread.

Dissolve the yeast in 1/2 cup of the warm water, and blend in the molasses. Let proof. Add another 1/2 cup water. Combine the flour, yeast mixture, and salt. Add enough warm water to make a wet, sticky dough (about 1 cup or more according to the flour). Put directly into a buttered 9 x 5 x 3-inch bread tin. Cover, set in a warm spot, allow to rise by one-third its original size. Preheat the oven and bake at 450ºF for 50 minutes, or until the crust is nicely browned and the loaf sounds hollow when tapped. Remove from the pan and leave on the rack in the turned-off oven for 20 minutes more to give a crustier finish.

Saturday, November 20, 2010

Amish Reflections

So this is a post about Columbus Day weekend, and I know that it's WAY LATE, but I feel like I've been treading water just to keep on top of everything this semester. Teaching seven classes and doing a round of chemo every three weeks has been a challenge, to say the very least, but I am finally DONE WITH TREATMENT (YEE-HAW!), so now I can play catch-up with some stuff that I've had to back-burner for awhile, like my poor little blog. Thanks for your continued patience...

Even though it was came right on the heels of chemo #4, I decided that I didn't want my treatments to keep me from enjoying a school holiday. Still, I didn't feel up to doing anything extremely taxing, so my roommate and I decided on a quickie driving tour of Philadelphia and the Amish Country in Lancaster County, PA. We had a very nice time, despite the fact that the fall color had yet to reach Pennsylvania. In fact, the day we visited Philadelphia, it was almost 80 degrees!

Of course, the first thing we did after checking into our motel was to go in search of the ultimate cheesesteak, but what we found was the sandwich that Philly SHOULD be famous for, the roast pork with broccoli rabe, specifically at Tony Luke's.

The next morning, we enjoyed a walk through the Reading Terminal Market and had breakfast at the Down Home Diner (featured on "$40 a Day" with Rachael Ray). 


In the afternoon, we saw the Liberty Bell and Independence Hall because, well, you have to.
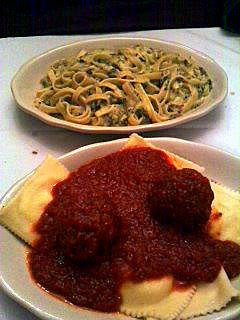


Then that night, the Food Network theme continued, as we decided to visit the Italian Market area, and we dined at this joint called Villa di Roma that had been around for decades and had been in an episode of "Throwdown" where their meatballs bested Bobby Flay's. We had spaghetti and the famous meatballs and a decadent quattrocini alfredo (pasta alfredo with spinach and bits of prosciutto). But the best thing was this appetizer that the waitress talked into--fried spears of asparagus with a lemony, buttery dipping sauce. YUM!!

The next day, we headed west to the land of the Amish. I had always dreamed of visiting what I imagined to be a very quaint and homespun region, but as it turns out, it was pretty kitschy. The only way to escape all the tourist traps (many of which we dutifully visited--my favorite was Kitchen Kettle Village, like a theme park based on canning!) was to get off the main highway, turn off the GPS and just drive! We took in glorious scenery that way, and encountered places like September Farm in Honey Brook where we bought some delicious cheeses, and the Bird in Hand Bake Shop (don't you just love the lyrical names of the towns?), where we loaded up on rye bread and whoopie pies and snickerdoodles and sticky buns and shoofly pie. Oh, and we bought some of the BEST local milk to wash (some of) it down with...so rich and flavorful from those Amish cows, no doubt! And clearly, we chose an excellent and authentic place for lunch (Yoder's in New Holland) because we were seated next to these lovely people of whom I snuck a verboten picture! ;-)

Before we headed home the next day, we stopped at Stoltzfus Meats in (wait for it...here it comes...) Intercourse, PA to pack our coolers with lots of delicious meats and cheeses. They were also selling their homemade sausage chowder which looked wonderful, but it was $8 a quart! I thought to myself, I can make a whole purple Dutch oven full of sausage chowder for eight bucks! So when I got home, I devised the following recipe that I thought turned out very well. It's a sausage, corn and KALE chowder, because I happened the have some kale hanging around that needed to be used.  Plus, I thought the soup needed something green and healthful.


Sausage, Corn and Kale Chowder

2 tablespoons olive oil
1 lb. sausage (I used sweet Italian)
1 large onion, chopped
2 stalks celery, chopped
1 sweet pepper, seeded and chopped
4 carrots, peeled and cut into large dice
4 large potatoes, washed and cut into chunks
1 16 oz. bag frozen corn
4 cups chicken or vegetable stock
1 teaspoon pepper
1 teaspoon granulated garlic
1 teaspoon celery salt
1 teaspoon ground sage
1 teaspoon dried thyme
2 teaspoons worcestershire sauce
2 cups fresh kale, stemmed and torn into small pieces
1 12 oz. can evaporated milk
1 cup half and half
salt, to taste

In a 5-quart Dutch oven over medium heat, brown the sausage in the olive oil along with the chopped onion, celery,and pepper. When the sausage is no longer pink, add the carrots, potatoes, corn, stock and seasonings and bring to a boil. Reduce to a simmer and cook until the potatoes are tender. Use a potato masher to mash about half of the potato chunks to thicken the chowder. Stir in the kale, and add the milk and cream. Add salt to taste. Simmer uncovered until the liquid has reduced a bit and the kale has wilted.

*I did not do it (yet), but I think a couple of cups of shredded cheese melted into the chowder would be delicious, too! I'm thinking a swiss like emmental or gruyere.

Tuesday, October 19, 2010

Things we know how to do...

Sometimes it's all about doing simple things well. And learning to do them well takes trial and error and lots and lots of practice. Years later, it may dawn on you that...hey, I've got this thing down!

One of the things that is bordering on perfection in my house is my roommate's method of making oven-roasted potatoes. I have made them myself many times, of course, but Cyd's always come out SO much better! So I finally pinned her down and made her describe her technique in as much detail as she could muster. Simple, but simply delectable! Here are her directions:
Cyd's Oven-Roasted Potatoes

Wash but do not peel your potatoes. Cut into big but still bite-sized chunks (for an average-sized potato, in half, then in sixths). Throw them into something like a glass oblong baking dish, and toss the potatoes with enough olive oil to coat. Then add some stock (preferably, vegetable but whatever you have on hand will do) about halfway up the potatoes. Season liberally with coarse salt and pepper (or your favorite seasoning blend) and lots of minced garlic. Also, feel free to throw in any herbs that you like--fresh thyme is a favorite here or rosemary. Just squish the whole herbs down into the broth.

Roast uncovered at 450 degrees for about an hour or until fork-tender inside and browned outside. (Keep adding a little stock as it cooks off, until the potatoes are almost completely tender, then let them finish roasting until they are as crispy as you want them to be.) Cyd says the "secrets" are the vegetable broth for extra flavor and the high roasting temperature to get them all lovely and browned.


The second thing that I've decided is ready to be shared with the world is my method of making a pork roast. We've all had a lot of dry, flavorless pork roasts in past, and I am making it my business to rid the world of the inedible lot of them! Now, parts of my "recipe" may sound a little weird--like ill-advised Asian-German fusion perhaps--but please trust me when I say that this combination of flavors is divine and perfectly enhances the succulent porkiness of the roast. Here's what you do:


Gina's Slow-Braised Fusion Pork Roast

You start with a couple of tablespoons of olive oil in a 5-qt. stock pot. (You could also do this in a large skillet and then transfer to a slow cooker.) Rub a 3-4 lb. pork SHOULDER roast (avoid the loin roast...it is usually dry no matter how long you braise it) all over with salt, pepper and granulated garlic, or your favorite seasoning blend plus extra garlic and pepper. Brown in the olive oil on all sides. Chop up a large onion, and once the roast is browned, toss the onion in and cook until translucent in the fond (the browned bits on the bottom).

At this point, you could transfer this to a crock pot and then continue with the following instructions. To the pot, add two cups of stock (vegetable or beef), and a pound of sauerkraut. (Even if you think you don't like sauerkraut like I used to believe, add it anyway! You won't be sorry!) Also shake on about a tablespoon each of worcestershire sauce and soy sauce--I usually use reduced sodium.

Cover the pot, and braise in a low oven (275 degrees) for about 2 1/2 hours. Halfway through, turn the roast, and I like to coat the top with some of the juicy sauerkraut to keep everything moist. After 2 1/2 hours, I flip the roast again, cover it, and put it back in the oven which I then turn off. I let the roast sit in the still-warm oven for about a half an hour while I get on with my sides. Homemade mashed potatoes are a must, topped with some of that savory sauerkraut, and then a green veggie to give you the illusion that you're eating healthy. ;-)


*Just the most delicious, most comforting meal EVER that will surely warm you up now that the weather has become brisk. Make one for yourself soon, and then leave a comment to thank me for my gastronomical genius. Tee hee.

Monday, October 18, 2010

Anne's Appetizing Autumnals

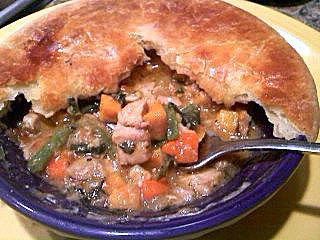
Food Network strikes again! There I was, minding my own business, watching an episode of "Secrets of a Restaurant Chef," when that Anne Burrell goes and makes the most FABULOUS autumnal menu that I had to try and recreate immediately! The entree was a chicken and butternut squash pot pie, but as I had sweet potatoes on hand and some kale (left over from the kale chips), I made chicken, sweet potato and kale pot pies. YUM!

And though it's extra work to make the crust yourself, Anne's recipe is made decadent and delectable with cream cheese, and almost comes out like a cross between pie crust and a biscuit--flaky and DEE-LICIOUS! Only one word of caution: I ended up with enough filling for four small pies, one double-sized one, and I had the remaining cup or so over rice for lunch at work one day. Sheesh! But no biggie. The pies freeze beautifully, so you might as well make several while you're in the making mode.

Autumn Chicken Pot Pie(s)
(Source:
Food Network, "Secrets of a Restaurant Chef" with Anne Burrell)

For the crust:
1 stick butter, cut into pea-size pieces
1 (8-ounce) package cream cheese, cut into pieces 1 1/2 cups all-purpose flour, plus extra for kneading
pinch kosher salt
1 egg yolk
1 to 2 tablespoons cold water

For the filling:
extra-virgin olive oil
1 large onion, cut into 1/2-inch dice
2 ribs celery, cut into 1/2-inch dice
1 large or 2 small carrots, peeled and cut into 1/2-inch dice
kosher salt
2 cloves garlic, smashed and finely chopped
3 pounds skinless chicken legs and thighs (I used boneless/skinless thighs)
4 cups rich chicken stock (preferably homemade)
2 cups butternut squash, peeled and cut into 1/2-inch dice (I used sweet potatoes)
1 1/2 cups 1/2-inch pieces haricots verts
*I also added a couple of cups of kale, stemmed and chopped
6 sage leaves, finely chopped
4 tablespoons butter
4 tablespoons all-purpose flour
1 egg beaten with 2 tablespoons of water, for egg wash

To make the crust: In the bowl of a food processor, combine the butter, cream cheese, flour and salt. Pulse to combine. Pulse, pulse, pulse until the ingredients start to come together and resembles Parmesan. Add the egg yolk and one tablespoon of water. Pulse a couple of more times until the ingredients start to form a ball. If the mixture is exceedingly wet, add some more flour. Or conversely, if the mix is dry, dry, dry, add in a few more drops of water.

When the mixture has come together into a ball, turn it out onto a floured work surface and knead it a couple of times to help it come together. Dust it with flour, form it into a disk and wrap it in plastic wrap. Refrigerate until ready to use. This can be done a day ahead.

Cook's Note: When ready to use the dough, remove it from the refrigerator about 20 minutes before rolling, to allow it to warm up and soften.

To make the filling:

Coat the bottom of a stock pot lightly with olive oil put over medium heat. Add the onions, celery and the carrots and sprinkle with salt, to taste. Saute the vegetables for 7 to 8 minutes. Add the garlic and sweat for another 2 to 3 minutes. Season with salt, then add the chicken and the chicken stock. If the stock doesn't cover the chicken, add water until it does. Bring the stock to a boil, over high heat, then reduce the heat and simmer for 30 minutes.

While the chicken is simmering, add the butternut squash to a large bowl, drizzle with some olive oil and add salt, to taste. Toss to coat the squash with the oil and transfer to a baking sheet. Roast until the squash is cooked but still has some texture, about 15 to 20 minutes. Remove from the oven and reserve.

Remove the chicken and vegetables from the stock and put into a large bowl. Reserve the stock. When the cool enough to handle, remove the bones from the chicken and stir into the vegetables. Add the roasted squash to the chicken and vegetables. Stir to combine and season with salt, if needed. Stir in the haricots verts and the chopped sage.

Melt the butter in a large saucepan over low heat. Add the flour and stir to combine with melted butter. Cook stirring frequently until the mixture is the consistency of wet sand and is starting to turn a little beige, about 6 to 7 minutes. Gradually whisk in the reserved chicken stock. Taste and adjust seasoning, if needed. When the stock is combined into the roux, bring to a boil, then reduce the heat and simmer until it has a gravy-like consistency, about 20 to 25 minutes. If the gravy reduces too much and becomes too thick, whisk in a little more chicken stock or water.

Preheat the oven to 375 degrees F.

Add the chicken mixture into a 2-quart casserole dish or 4 individual (2 cup) crocks. Ladle the "gravy" over the chicken mixture until the dish(s) are 3/4 filled. (I combined the chicken filling and the sauce, and then filled my dishes.)

Dust a clean work surface with flour and roll the dough into the shape of the casserole dish or large enough to cut circles to cover the individual casserole dishes. Whichever dishes are being used the dough needs to have generous overhang of dough on the edges of the dish. Brush the outside edges of the dish with a little of the egg wash to help "glue" the dough to sides of the dish. Fold the edges of the dough under and press it onto the edges of the dish. Brush the top of the dough with the remaining egg wash. Cut a couple of vents in the top of the dough to allow the steam to escape.

Bake in the preheated oven until the dough is golden brown and the inside is hot and bubbly, about 30 to 35 minutes. Remove from the oven and serve hot.


I also made a version of Anne's Butter Lettuce Salad with Crispy Prosciutto, Oyster Mushroom Chips, Cabrales and Pears from the same episode, but I swapped out so many of the main ingredients, it's hardly recognizable as the same dish. Mine was sort of a lower-rent version of her salad based on ingredients that I had on hand. But let me tell you, it was just incredibly flavorful, and one that I will be making again and again during apple season!

My salad was comprised of butter lettuce (my favorite!), sauteed baby portabellas instead of the oyster mushrooms, bacon swapped for the pancetta, domestic bleu cheese instead of the fancy Spanish, and Macintosh apples instead of pears. And I made a creamy blue cheese vinaigrette for the top because I wanted something to coat the apples (in the Waldorf fashion). I must say again, the resulting salad was EPIC! Don't you just love fall and all of these wonderful harvest-time ingredients? :-D

Sunday, October 17, 2010

APPLES, APPLES, APPLES!

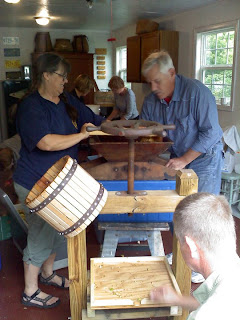
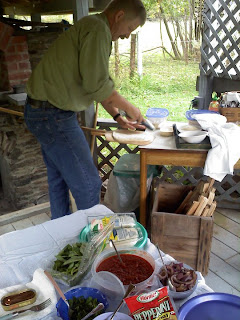
What a GORGEOUS fall we're having, and despite the moonsoon we had this past Friday (leaving miniature lakes in everyone's yards!), the weather has been crisp and lovely. In fact, a few weekends ago, a friend from work invited a gang of us over to their house (just down the road from the old house in Sciota) for a day of apple cider-pressing and baking with her multi-talented husband in the fantastic wood-fired brick oven that he built out back. There was a smattering of rain on the way to their house, but once that front had passed, it was a beautiful, sunny, autumnal day.

We worked hard all day sorting, washing, chopping, and pressing the apples. But we took breaks along the way to make delicious individual pizzas for lunch in the wood-fired oven, and also to bake loaves of homemade bread (my favorite was the molasses bread). And even though I got a wicked blister on my hand from cutting up apples, our labors were rewarded with about seven gallons of sweet, tangy, refreshing, fresh-pressed cider from 100-year-old heritage apples. YUM! Here are a few miscellaneous pictures from the day, which I certainly hope becomes an annual fall event:

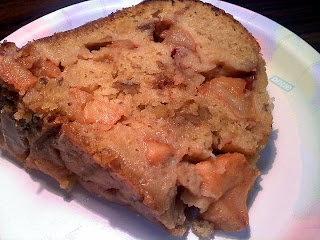
Since it is the High Holy (Apple) Season, I would also like to share a recipe for a terrific apple bundt cake from Smitten Kitchen that I made for my friend Vicky's birthday. I took more than a few liberties with the original recipe as is my way, the most significant of which was to convert the recipe for use in a bundt pan. But the very best amendment was the buttered rum glaze that added to the top! This very moist, flavorful cake is a must-make at this glorious time of year!

Apple Cake with Buttered Rum Glaze
(Source:
Smitten Kitchen)

6 apples, I used Macs and Spartans
1 tablespoon cinnamon
5 tablespoons sugar (I used 3 T white + 2 T brown)
2 3/4 cups flour, sifted (I used 1 1/2 C white whole wheat, the rest AP)
1 tablespoon baking powder
1 teaspoon salt
1 cup vegetable oil
2 cups sugar (I reduced this to 1 1/2 C and used 1 C white + 1/2 C brown)
1/4 cup orange juice (I used our fresh apple cider!)
2 1/2 teaspoons vanilla
4 eggs
1 cup walnuts, chopped (optional, but I used them)

Preheat oven to 350 degrees. Grease a tube pan (I used a bundt pan sprayed with flour-added spray). Peel, core and chop apples into chunks. Toss with cinnamon and sugar and set aside.

Stir together flour, baking powder and salt in a large mixing bowl. In a separate bowl, whisk together oil, orange juice (or cider), sugar and vanilla. Mix wet ingredients into the dry ones, then add eggs, one at a time. Scrape down the bowl to ensure all ingredients are incorporated. (I whisked the wet ingredients together--including the eggs but not the cider--for two minutes, then added half the dry ingredients, the cider, then the rest of the dry stuff in the traditional manner. Then I stirred in the chopped walnuts.)

Pour half of batter into prepared pan. Spread half of apples over it. Pour the remaining batter over the apples and arrange the remaining apples on top. Bake for about 1 1/2 hours, or until a tester comes out clean. (In the bundt pan, I alternated 1/3 of the batter, 1/2 apples--and juice--1/3 batter, the remaining apples, and the last of the batter.)

Bake for about 90 minutes or until a tester comes out clean. (You may need to tent the top with foil if it gets too brown before the end of baking.)

Buttered Rum Glaze:


4 tablespoons butter
1/2 cup sugar
2 tablespoons water
1/4 cup dark, spiced rum

In a small saucepan, combine the butter, sugar and water, and bring to a boil for five minutes. Remove from the heat, then add the rum. Bring back to a boil for a minute. When the cake comes out of the oven, poke it all over with holes using a long wooden skewer, and apply about half the glaze to the bottom with a pastry brush. Once the cake has cooled for about a half hour (until the pan is not hot to the touch, just warm), turn it out onto a rack and use the rest of the glaze all over the top and sides of the cake.

Tuesday, October 05, 2010

Meatless Mondays

I have a dear friend and colleague whose husband is struggling with his weight and diabetes that was off the charts. His doctor had a serious come-to-Jesus meeting with him back in July, and around the time of my own health crisis, he and his wife decided to take extreme measures and adapt a strict vegan diet, at least until his diabetes was under control. Six or seven weeks later, and he'd lost a lot of weight and inches (down more than 30 pounds and several pants sizes), and his diabetes went from a reading of 12 (the scale goes to 12) down to 7 (6 or below is considered normal)!

My roommate and I were both very impressed at the changes in our friend's appearance and health, and we vowed to start incorporating some meatless entrees into our own weekly menus. One of the dishes my friend suggested that her entire Italian family enjoys (even before the vegan conversion) is pasta and lentils. Strange combo, you say? I thought so, too, but the lentils are sort of meaty in and of themselves, so you don't feel unsatisfied eating a vegetarian meal. And this recipe makes a TON! Like other hearty dishes of this nature, they taste better the next day (and the day after that), so this makes great leftovers to take for lunch at work. I took enough to share with my officemate one day, and she concurred that you don't even miss the meat.

There isn't a proper "recipe" for this. My friend described the process for me as she was teaching an afternoon chem lab. LOL! And of course, I took a few liberties, like adding a can of fire-roasted tomatoes and a chopped up sweet pepper that I had on hand, plus a pinch of red pepper flakes for zip. It's healthy, hearty, and tasty--what more do you really need?

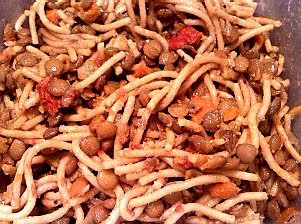
Pasta e Lenticchie

1/4 cup olive oil
1 onion, chopped
2 carrots, peeled and chopped
1 large stalk celery, chopped
1 sweet pepper, seeded and chopped
pinch of red pepper flakes
4 cloves garlic, peeled and minced
1 15 oz. can diced (preferably, fire-roasted) tomatoes
1 lb. lentils, rinsed
5 to 6 cups vegetable stock
salt and pepper, to taste
1 lb. (preferably, whole-grain) spaghetti, broken into fourths

Garnishes: vinegar (white wine vinegar or the brine from a jar of pickled peppers) and shredded Parmesan cheese

Heat the olive oil in a deep skillet (I used a 3.5 quart). Add the onion, carrots, celery, pepper, and red pepper flakes. Cook over medium heat until vegetables are soft and just starting to color. Add the garlic and saute for another minute or two. Add the tomatoes (with the juice), lentils and five cups of stock and bring to a boil. Reduce to a simmer and cook until the lentils are almost completely tender.

In a separate pot of boiling salted water, cook the pasta almost to al dente then drain (rinse with cold water to hold for awhile, if necessary). When the lentils are almost done cooking, add the pasta to the skillet and combine. Continue to simmer until lentils and pasta are completely tender. Add more stock if needed. Taste to adjust seasonings. Serve with a good splash of vinegar and an ample sprinkling of cheese (which, of course, would make it vegetarian, not vegan).


Oh, and I have another healthy, vegan, super-cinchy treat to share with you! I first heard about this crazy idea from my friend (and super-skilled cook), Mike. He had been raving about his new favorite snack on Facebook, and though I was skeptical, anything Mike swears by always turns out to be fabulous! Ladies and gentlemen, I give you....KALE CHIPS!


Kale chips, you say? Blech! Bitter greens as a snack food? TRUST ME, dear readers...have I ever led you astray? And I profess to not even like kale, except in soups and such. But by some miracle of the Maillard reaction, once you mix them with a little olive oil and bake them, they go from leafy to soggy and wilty to amazingly crisp in the span of about 15 or 20 minutes. And even more remarkably, they taste very like potato chips! I have no explanation for that, but I can vouch for how yummy they are--especially when we dipped them in a little homemade garlic blue cheese dressing. ;-)

To make your chips, start with a big bunch of kale. In the regular size bunch that you get from the grocery store, I used about half. Wash and spin your greens to get rid of any grit. Remove the stems and tear the leaves into potato chip-sized pieces. Toss the pieces of kale with a tablespoon of olive oil, a tablespoon of the vinegar if your choosing (I liked seasoned rice vinegar here), and a couple of good pinches of salt. Lay the pieces of kale in a single layer on two large baking sheets (I prefer to use Silpats underneath the chips), and bake for 15-20 minutes at 350. You want the chips to be crisp, but they taste bitter if allowed to brown. So keep a close eye on them!

Monday, October 04, 2010

As usual, I blame the Food Network....

It is a well-established fact that I watch far too much Food Network, and now The Cooking Channel as well. And this compels me to fall under evil influences like Paula Deen and friends, and I end up making things that I probably shouldn't! Recently, Miss Paula had a guest on her show named Cheryl Day who is the proprietor of Back in the Day Bakery in Savannah, and Paula talked the nice lady into making her famous "biscones" on her show. "Biscones" is Cheryl's nickname for these luscious, fat-filled creations that are halfway between a biscuit and a scone. Happily, they are easier to make than either one, as there is no rolling and cutting, just scooping the dough right onto a pan.

Now I made my biscones to fashion some egg sandwiches out of them for Sunday brunch, but they would also be wonderful to accompany a big pot of soup, chili, or beans. And you could add lots of different things to the dough to make endless tasty variations (mine were garlic, black pepper and parmesan).

Back in the Day "Biscones"
(Source:
Cheryl Day on "Paula's Best Dishes," Food Network)

3 cups all-purpose flour, plus 2 tablespoons to toss onto dough before baking
1/4 cup granulated sugar
2 tablespoons baking powder
3/4 teaspoon salt *optional for savory scones
1 teaspoon coarsely ground black pepper
1/2 cup cold butter, cut in cubes
1 1/2 cups cold buttermilk
1/2 cup grated sharp white Cheddar (I used parmesan)
*I added about a teaspoon of granulated garlic as well.

egg wash

Preheat the oven to 375 degrees F.

Add all the dry ingredients into a large bowl. Cut in the cold butter with a fork or pastry blender until the butter is the size of peas and some larger pieces. Gradually add in the cold buttermilk until it is just combined. Stir in the cheese. Do not overwork the dough.

In the same bowl, pat down dough and dust the top with the remaining two tablespoons of flour. Using an ice cream scooper, arrange scoops of the biscone mixture onto a baking sheet lined with parchment paper. Brush the tops with egg wash and bake, turning halfway through, until the tops are golden brown about 18 to 20 minutes.


It used to be just the Food Network that I was addicted to, but now we have their spin-off, The Cooking Channel, too. My favorite show on that sister network is called "Foodcrafters," where we learn about small, independent food businesses around the country. It was because of that show that I discovered things like Laloo's goat's milk ice cream out of Petaluma, CA--SO delicious, creamy but with half the fat and a delicious hint of tanginess, also more digestible for the lactose intolerant. If you can find it (check your local health food co-op), try the Rumplemint which is awesome!

And though I'd heard of them before, The Cooking Channel's segment on Rancho Gordo heirloom beans compelled my roommate to place a small order of three different kinds of beans: yellow-eye, Rio Zape, and Ojo de Cabra (goat's eye). The yellow eyes were cousins to the navy bean, so I decided to make a big pot of savory ham and bean soup with those. And when I was invited to a "True Blood" finale party that would also be attended by vegans, I made some zesty red beans and rice with the meaty Rio Zapes. I haven't tied the goat's eyes yet, but if they are anything like the first two varieties, they will be wonderful! Who knew beans could have so much more flavor and texture than those dry old dusty things we usually get in the supermarket?

For those of you that are hesitant to cook beans from their dried state, the basic cooking method is pretty simple. First, you rinse the beans well, and cover by about an inch with cool water. Soak them for at least a couple of hours and (preferably) up to six. Do NOT drain the beans. The prevailing wisdom these days is that many of the vitamins and nutrients leech out into the soaking liquid.

Toward the end of the beans' soaking time, cut and chop a basic mirepoix of onions, celery and carrots. You may also consider some sweet or hot peppers and a few cloves of garlic. Saute everything except the garlic in a little olive oil until the veggies are tender and just starting to color. Add the garlic and saute for another minute or two.

Add the beans, their soaking liquid, and the softened veggies--and perhaps a meaty ham bone or a couple of smoked turkey wings--to a large, heavy-bottomed pot. If the liquid doesn't cover the beans by at least an inch, add more water or, better yet, some flavorful stock. Bring to a vigorous boil for five minutes, then lower the heat, cover the pot, and let it simmer until the beans are tender, which will probably take a couple of hours. If the liquid starts to disappear along the way, add more water or stock as necessary.

At the end of the cooking time (say, the last twenty minutes or so), season the beans and add anything acidic like tomatoes, citrus juices or vinegars. If you add salt or acids at the beginning of the cooking process, it may toughen the beans. And that's it...a perfect--and perfectly delicious--way to cook beans! Serve your savory, rib-sticking beans with some homemade biscones, and you have a surefire recipe for surviving the chilly days ahead.