Wednesday, January 27, 2010

HAPPY BLOGDAY TO ME!


WOW! How time does fly! It has been four years since I started this little blog during a spate of cabin fever late in the winter of 2006. I remember, the propane monitor in the living room was on the fritz...or perhaps we couldn't afford to run it at a level that actually kept us warm. So myself, my roommate, three dogs, and four cats were all holed up in the back bedroom, the only room that was sufficiently warmed by a faithful old fuel oil furnace. Actually, during a couple of dreadful winters, we moved into that room by January and didn't fully emerge until March or April! And when we did, we still had to rely on a system of strategically-placed space heaters, layered clothing, and sleeping bags draped over us just to stay alive! That is just one of many reasons why I feel so blessed to own my own home now where there is a kerosene monitor (old, but still doing her job well) and a large wood stove that can really crank out the heat. Ok, ok...I must admit that I managed to freeze the kitchen pipes within the first three days of living here (oops), but for the first time in nine years, we are cozy and WARM! PTL!!

Right at the moment, we may have global warming to thank, as it is weirdly, unseasonably warm. Two days ago, we actually had a spring-like flood watch (though spring doesn't truly come to us until April)! Even my friend, June, who is from New Orleans and is always cold admits that "51 degrees is spooky in January" in the North Country. Indeed, it's quite odd to start spring semester and look out my classroom window to see Lake Champlain...unfrozen! But we all know that winter is not yet done with us, and there will be plenty more cold before it's all over. So to keep us toasty on the inside, I offer a couple of hearty soup recipes for your approval.

The first one was a collaborative effort between my roomie and myself. While she was living in frigid Minnesota for more than a year, Cyd claims to have mastered the art of ham and navy bean soup. So I told her she needed to make some for me, but of course, I couldn't help meddling, as is my way. But in this case, too many cooks did NOT spoil the broth, but made an even tastier version!


Cyd's (and Gina's) Bean and Bacon Soup

1 lb. dried navy beans
8 cups vegetable stock
2 ham hocks
1 lb. bacon (I used something I found called "jowl bacon"), cut up
2 medium onions, chopped
4 large stalks celery, diced
4 medium cloves garlic, minced
4 large carrots, sliced
1 15 oz. can diced tomatoes
1 teaspoon sugar, optional (to balance the acidity)
1 tablespoon dried parsley
1 teaspoon dried thyme
2 bay leaves
1/2 teaspoon black pepper
pinch of cayenne

Place the beans, vegetable broth, and ham hocks in a stock pot. Bring to the boil, reduce heat and simmer for about an hour. In the meantime, brown the bacon pieces, onion and celery in a skillet over medium heat. When the bacon is crisp and the onion and celery are soft and translucent, add the minced garlic and cook for another minute or two. Set aside.

When the beans have boiled for an hour, add the bacon, onion, celery and garlic mixture, the carrots, the canned tomatoes with their juice, the sugar (if using) and all of the herbs and spices. Continue to simmer until the beans are tender, probably about an hour. Remove ham hocks and bay leaves, then taste and correct seasoning before serving.


The second soup comes by way of my favorite Montreal bloggers at An Endless Banquet. I was drawn to this recipe because I'm not really fond of clams. This chowder calls for haddock or cod, and I used both, along with some bay scallops. (If I had had shrimp, I would have thrown half a pound of those in there, too!) Delicious stuff, and stick-to-your-ribs hearty! You might as well make a double batch, and then you'll have a homemade hot lunch all week long.

Seafood Chowder
(Source: adapted from
An Endless Banquet)
Serves 4

1 lb. haddock or cod fillets (or both!)
1/2 pound bay scallops
1 bay leaf
1/4 lb. bacon ends, or bacon, or salt pork
1 medium onion, finely chopped
1 small leek, white part only, thoroughly rinsed, cleaned, and finely chopped
2-3 medium potatoes, cut into chunks
1 tablespoon parsley, minced (I used 2 tablespoons dried)
2-3 sprigs thyme, leaves only, minced (I used about a teaspoon of dried)
1 1/2 cups milk (I used half-n-half)
salt and freshly ground black pepper
1/2 tablespoon Old Bay Seasoning, optional

Bring three cups of lightly salted water to a boil (I used a box of seafood stock for additional flavor). Add the fish and scallops and the bay leaf, lower the heat, and simmer gently for 7-8 minutes. Using a slotted spoon, remove the fish to a plate or cutting board, but keep the broth warm on a back burner.

Fry the bacon in a skillet it has rendered its fat and has begun to crisp. (I took my bacon all the way to crispy, then fished it out, cooled and crumbled it, and used it to garnish the chowder.) Add the onion and the leek and sauté until the onion begins to turn translucent and the leek has become tender. Add the onion/leek mixture and the chopped potatoes to the fish broth. Bring to a boil, lower the heat, and simmer for 12-15 minutes, until the potatoes are tender and the broth has thickened slightly.


Meanwhile, gently flake the fish fillets. When the potatoes are ready, turn the heat down to the lowest setting, add the fish, the parsley, the thyme, and the milk (or half-n-half) to the broth, and let the chowder steep for 5-10 minutes. Taste and adjust the seasoning. (Mine didn't have enough zip to suit me, so I added half a tablespoon of Old Bay Seasoning, and that did the trick!)

Serve each bowl of chowder topped with crackers that have been broken into chunks, or with oyster crackers.


And I would completely remiss if I forgot to give a shout-out to my little buddy who shares the same birthday as my blog. This happy, tousled fellow is my PBGV, Grady. He is a champion show dog (in two countries!), but more importantly, he's just a sweet lug of a lapdog, and SIX years old today!

Saturday, January 23, 2010

Best Christmas Present---Best Neighbor!

I recognize that it is nearly one month AFTER Christmas, but I have to tell you about a belated Christmas/housewarming surprise. I have shared many, many times about what a WONDERFUL next-door neighbor we had for nine years living in Sciota. In fact, it was the one thing that truly gave me pause about moving--what would I ever do without Ken? He is just a gem of a human being, however, he is next to impossible to buy presents for! He is a man of very simple means who also has no patience. So he doesn't need much, but if he wants something, he buys it for himself right away. It's very frustrating for me, as I want to be able to get him something that would give him some sense of how much I appreciate him! So mostly, I just bake him homemade treats and take him out to dinner and a movie once in awhile, which he seems to enjoy more than the lame presents I choose for him semi-annually.

A couple of weeks after Christmas and the big move, Cyd and I finally managed to get together with Ken to go see a movie ("It's Complicated"--LOVE Meryl and Alec!) and grab some dinner (Mangia's). When we were done eating, Ken said that he needed to pull around to load something into my car. What in the world, I thought? I asked if it was alive, and then told him that I had quite enough pets at present, thank you very much! He said, no, it wasn't alive, but it was HEAVY! When I got out to the parking lot and unlocked the back door, Ken began hauling a ginormous box out of his car and into mine. Friends, that saintly man had bought me this:


Is it not the most GORGEOUS thing you've ever seen? I have no idea what put it into his head to get me a new Kitchen Aid mixer, but I was over the moon! I bought my old one probably 15 years ago, a no-frills classic white refurb from a kitchen outlet outside of Boise. Don't get me wrong--that thing was a faithful workhorse, and besides having to replace a knob on it, gave me no trouble at all, even with heavy use. However, I always wanted to upgrade to a more powerful model--one where the bowl lifts up and down so that I could knead bread dough in it without having to hold the bowl in place and keep the speed low so that it wouldn't fly off the base! Plus, since the move into the new house, I haven't been able to locate the attachments to my old mixer, and I had been jonesin' to get back to some real baking! So it really was the PERFECT gift, but WAY too generous! I tried to protest, but Ken wouldn't hear of it. So I told him that he doesn't owe me a birthday or Christmas present for at least another three years after this! Ha!

I couldn't wait to get started using my new black beauty. The first thing I whipped up was a Toll House pie, always a crowd pleaser. I followed the recipe that everyone uses, except that I like to toast the nuts and add a teaspoon of vanilla.

Secondly, after seeing "It's Complicated" and the decadent double fudge cake that Meryl Streep's character made, Cyd, Ken and I were all craving some truly awesome chocolate cake. I did a Google search for double fudge cake, and found something on BakeSpace called a Double Chocolate Whammy Cake with Fudge Icing. That sounded like just the ticket, though I decided to make the recipe into 24 cupcakes so that I could easily transport Ken's share up to him in Sciota. (My timing was impeccable, too, as the poor fellow was having knee surgery and would be on crutches for awhile. So I took him a large pan of spicy chicken enchiladas and the cupcakes to keep him fed for a few days!)


Though the recipe begins with a boxed devil's food cake mix, it was very good. However, the frosting was a NIGHTMARE! The fact that it called for the use of a candy thermometer should have been my first clue. I was game to try, though. I am not afraid of candy making. But when I brought it up to the soft ball stage and then cooled it back down as directed, it became as hard as a rock! I had no choice but to melt it back down and smooth it out with some heavy cream (like a ganache). But then it didn't set up enough to suit me. So I decided to try and whip it in the mixer. It did fluff up, and made a surprisingly light and delicious topping for the cupcakes, but they had to be kept in the fridge to keep the frosting from melting. Next time, I would frost the cupcakes with something like Martha's recipe for "Mrs. Milman's Chocolate Frosting," which is basically just a thick ganache.

Double Chocolate Whammy Cake with Fudge Icing
(Source:
BakeSpace)

1 package of any good Devil's Food Cake Mix
1 cup dairy sour cream
1 cup water
1/3 cup vegetable oil
3 eggs
1 cup miniature semi-sweet chocolate chips

1 cup minus 1 tablespoon whole milk
2 ounces unsweetened chocolate, grated
2 cups granulated sugar
1/8 teaspoon salt
4 tablespoons butter
1 teaspoon vanilla
1 cup Sour Cream (or Whole Milk)

Preheat oven to 350°. Trace around bottom edge of two 9 inch cake pans on sheets of parchment paper. Cut out circles, and place one in bottom of each pan.

Beat the Devil's Food cake mix together with the water, sour cream, oil, and eggs with a mixer for at least 2 minutes. Add the miniature semi-sweet chocolate chips, and stir in by hand. Pour equal amounts of batter into the pans lined with parchment paper.

Bake 35 to 40 minutes at 350° (or adjust for specific cake mix directions if needed). Let cakes cool in the pans for 15 minutes, then loosen around edge of cakes, invert them onto buttered parchment paper and let them cool thoroughly.

Bring the milk to a boil. Remove from the heat and add the chocolate, sugar and salt. Bring again to a boil and cook covered 2 to 3 minutes at a full boil. Uncover, reduce the heat and cook without stirring to soft-ball stage or about 234°F (112°C) by a candy thermometer.

Cool the icing to 110°F (43°C). (Placing the hot pan in a larger pan of cold or ice water for awhile will speed this process). Add 4 tablespoons of Butter and 1 teaspoon vanilla and beat the icing until it begins to loose its sheen. Beat in up to 1 cup of sour cream until the fudge icing is spreadable.

Ice the top of the first cake layer and then put second cake layer on top. Ice the second layer's top and then the sides of the cake.

If you don't mind "death from chocolate", decorate the top with Semi Sweet Chocolate Curls. You might want to drink lots of milk or enjoy some ice cream to "cut through" the incredible richness of this Chocolate Double Whammy Cake.


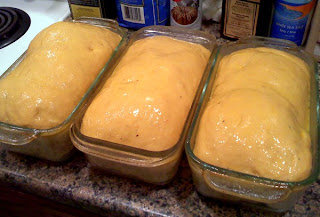
Last but not least, I had to test the new mixer's bread-making abilities. And I was overjoyed to find that it worked like a dream! I made three loaves of Sherry Yard's sweet potato bread (one to eat right away, one to stick in the freezer, and one to take over to introduce myself to my new neighbors across the road--sorry, Ken!). I have already posted that recipe, but I will show you some new pictures just for shiggles.

Beautiful, huh? And all thanks to my amazing (former) neighbor, Ken! I will miss living next door to such wonderful friend!


P.S. I have come to the realization that my beloved roommate, Cyd, will read this at some point and may be hurt that I didn't publicly acknowledge HER fabulous Christmas gifts. Since I just bought a new 50-inch plasma t.v. as a housewarming gift to myself, she made it PERFECT with the addition of a new Blu-Ray player and some wonderful 3-D movies like Up! and Coraline. So THANKS to Cyd as well! I have terrific friends! :-)

Monday, January 18, 2010

First Christmas in the new house...such as it was.

MERRRRRRRRRY CHRISTMAS, everybody! Yeah, yeah, I know. I am weeks behind in that salutation. But I am still trying to catch up from the month that fell into the black hole! I don't even have too much to share recipe-wise, as the new kitchen was not unpacked (having just completed the move on 12/23). But I thought you might get a kick out of seeing the fabulous Christmas Eve dinner that we somehow managed to pull off--the first real meal prepared in the new house! Of course, it was served on paper plates, but it was still delicious! TA-DAH!

I don't know what your feelings are about the hallowed holiday protein alternatives, but many years ago, Cyd and I decided that our choice would be the roast beast. It always seems like we're just finishing up the Thanksgiving turkey leftovers by the time Christmas rolls around, as I always end up buying a huge bird, and there's just the two of us to eat it (maybe three, if I shared with neighbor Ken). And then ham says Easter to me, so that's right out. Thus, roast beef seems the best option.

Moreover, I had a great student this past semester who did her informative speech on English food (she was born there), and some of her Power Point images gave me a real hankering for a proper Yorkshire pudding! This time, I tried a recipe from my boyfriend, Tyler Florence (who I am pleased to see has NOT crossed over to the dark side and become disturbingly emaciated like my husband, Alton Brown!). It turned out puffy and golden and delicious--like Tyler himself, and just like the giant popover that it is. Tradition dictates that you eat the Yorkshire pudding with gravy, but I didn't make any this time (couldn't begin to locate a whisk). Besides, I like to tear off hunks and just eat it like bread with my meal. Another way to do it is to make individual puddings, which I probably would have done had I been able to find a muffin tin!

Yorkshire Pudding
(Source: Tyler Florence, via
Food Network)

3/4 cup all-purpose flour
1/2 teaspoon salt
3 eggs
3/4 cup milk
1/2 cup pan drippings from roast prime rib of beef

Preheat the oven to 450 degrees F.

Sift together the flour and salt in a bowl. In another bowl, beat together the eggs and milk until light and foamy. Stir in the dry ingredients just until incorporated. Pour the drippings into a 9-inch pie pan, cast iron skillet, or square baking dish. Put the pan in oven and get the drippings smoking hot. Carefully take the pan out of the oven and pour in the batter. Put the pan back in oven and cook until puffed and dry, 15 to 20 minutes.


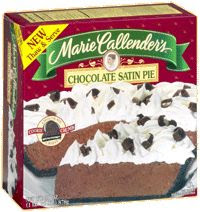
In addition to the roast and the Yorkshire pudding, we had an amazing number of side dishes for people with very limited kitchen resources. First, I cooked some fresh green beans with bacon--simple, but always satisfying. Also, I roasted some sweet potato chunks with brown sugar and maple syrup. And then, not pictured on my plate above (because I hate them), were mashed rutabagas (which Cyd loves). Lastly, for dessert, I am covered with shame to admit that I BOUGHT something from the freezer section of the grocery store. Please don't judge me, as I couldn't even find the attachments to my mixer at that time! However, I must confess that the pie I bought was EXCELLENT! Mad props to Marie Callender for the thaw-and-serve Chocolate Satin Pie! It had an Oreo-type crust, a filling that's a hybrid between French silk and chocolate cream, and a Cool Whip-like topping with a few big chocolate shavings on top. For a cheater pie, it was darn good, and so help me, I'd buy one again in a pinch!


So that was our first Christmas feast in the new house. As for Christmas Day proper, we took the ferry over to Vermont to visit with my sweet cousin, Mandi, and her new bride, Ashley, and Ashley's lovely parents. As you may recall, they had their commitment ceremony at Epcot last June, but they came to Vermont to make it legal with a civil union. Of course, they also came for some snowy winter fun, and I thought it was precious that the young lovebirds invited Ashley's parents to join them on the trip.

In any case, we met for brunch at the Inn at Essex Junction, and it was just beautiful--both the venue and the buffet! Normally, there is a separate restaurant and a tavern, but they had it set up so that cold dishes were on the restaurant side, and hot dishes were in the tavern. I believe that the food is prepared by chefs-in-training at the New England Culinary Institute, so everything was tasty and tasteful. Here is a picture I snapped of some of the cold offerings, including dressed baby greens, a marinated bean salad, smoked salmon with capers and chopped egg and cornichons, an assortment of cold cuts and cheeses, a terrifically flaky croissant, and even two kinds of housemade charcuterie. Yum!

After we stuffed ourselves at the inn and had a nice visit with the cute couple and my cousin's in-laws, we decided to follow the time-honored tradition of the Christmas Day matinee...and it wasn't even my idea! (Ashley and her folks are my kind of people--frequent moviegoers, and teachers and dog lovers to boot!) We saw "Up in the Air," which was very good, though not what I expected. The trailers made it seem like a typical mainstream rom-com, but it was darker and quirkier. I liked it a lot, and it was the perfect jumpstart to my annual Winter Break Golden Globes Fest!

Though I know I'm ridiculously late in my well wishes, I hope you, too, had a joyful holiday celebrated in whatever manner you like best, surrounded with loving family and friends.

Thursday, January 07, 2010

Moving messes with Christmas tradition...

Had I been in my right mind, I would have considered that my big move and the annual Padula Christmas Cookie Exchange would converge on December 21, and I would have baked and frozen this year's cookies ahead of time. But as you can imagine, I was more than a bit scatty during that period and failed to plan (and yes, planned to fail). As it happened, when the party was upon us, I had access to two kitchens, but neither were fully functioning. So initially, I concluded that I wouldn't attend the cookie exchange this year. But I really couldn't bear that thought, and my friend and hostess, Janice, wouldn't hear of it. She said I should come anyway, but my pride wouldn't allow me to attend...cookieless. Therefore, I confess that I cheated and decided to make some sort of no-bake cookie, hoping that my friends would forgive me under the circumstances. And when they tasted the simple, but simply DELECTABLE treats that I made, I feel confident that there would be no hard feelings.

Awhile back, I was perusing one of my favorite blogs, Smitten Kitchen, and busy new mom, Deb, made a quick and easy treat that put a new twist on an old favorite: Rice Krispie Treats with Browned Butter and Sea Salt. GENIUS! Why didn't someone think of this before? By simply browning the butter to a nutty, caramel color and swapping slightly tangy sea salt for regular salt...well, it makes ALL the difference in the world! Oh, they don't look any different, but the flavor is improved exponentially. And for those of us who love that sweet-salty combo, these treats are like CRACK! I made six batches in rapid succession, flash-chilling them in the open-air blast chiller that is my front porch, cut and individually wrapped them, then bagged them up in winter-themed Ziploc baggies. TA-DAH! Ready for the cookie party with limited cooking facilities! You have to try these...

Salted Brown Butter Crispy Treats
(Source:
Smitten Kitchen)
Makes 16 2-inch squares or 32 1- x 2-inch small bars

4 ounces (1/4 pound or 1 stick) unsalted butter, plus extra for the pan
1 10-ounce bag marshmallows
heaping 1/4 teaspoon coarse sea salt
6 cups Rice Krispies cereal (about half a 12-ounce box)

Butter (or coat with non-stick spray) an 8-inch square cake pan with 2-inch sides.

In a large pot, melt butter over medium-low heat. It will melt, then foam, then turn clear golden and finally start to turn brown and smell nutty. Stir frequently, scraping up any bits from the bottom as you do. Don’t take your eyes off the pot as while you may be impatient for it to start browning; the period between the time the butter begins to take on color and the point where it burns is often less than a minute.

As soon as the butter takes on a nutty color, turn the heat off and stir in the marshmallows. The residual heat from the melted butter should be enough to melt them, but if it is not, turn it back on low until the marshmallows are smooth.

Remove the pot from the stove and stir in the salt and cereal together. Quickly spread into prepared pan. I liked to use a piece of waxed or parchment paper that I’ve sprayed with oil to press it firmly and evenly into the edges and corners, though a silicon spatula works almost as well. (Gina's Note: Slightly dampen your hands,then just press with your fingertips.Works like a charm!)

Let cool then cut into squares.


Of course, I would be remiss if I did not pay homage to the delicious grub that we had at the luncheon. With hosts named Padula, you have to KNOW that we got some fantastic Italian fare! We started with a lovely green salad with dried fruits and nuts mixed in, then there were two kinds of stromboli--ham and pepperoni--and also chicken parmesan with angel hair pasta and marinara. SO YUMMY!

And naturally, Janice's daughter and co-hostess, Dominica, baked up a storm for the affair, and shared an entire platter of beautiful and DELICIOUS Christmas cookies with us for dessert, as befitting the occasion. They were all so good, but two of the cookies really stood out to me, both coming from the Better Homes and Gardens Ultimate Cookie Book. And both were types of shortbread, which should come as no surprise to those who know me or my blog, as shortbreads are my very favorite kind of cookie. The first was a maraschino cherry shortbread cookie that was very tasty (even without a dip in white chocolate as directed in the original recipe) and SO pretty with the flecks of red throughout...perfect for holiday gift-giving! The other cookie was my absolute FAVORITE edible item of the entire event, Chocolate-Pistachio Trees. In fact, they were SO good, I am thinking about making the same recipe in heart shapes for my friends and co-workers at Valentine's Day (note to self). Actually, come to think of it, the cherry shortbread--with its red and pink hues--would also be perfect for valentines if made into heart shapes (second note to self). And if any local friends and/or co-workers are reading this, please do try to act surprised come February. ;-)

White-Chocolate Cherry Shortbread
(Source and Photo Credit:
Better Homes and Gardens)

1/2 cup maraschino cherries, drained and finely chopped
2-1/2 cups all-purpose flour
1/2 cup sugar
1 cup cold butter
12 ounces white chocolate baking squares with cocoa butter, finely chopped
1/2 teaspoon almond extract
2 drops red food coloring (optional)
2 teaspoons shortening
White nonpareils and/or red edible glitter (optional)

1. Preheat oven to 325 degrees F. Spread cherries on paper towels to drain well.
2. In a large bowl, combine flour and sugar. Using a pastry blender, cut in the butter until mixture resembles fine crumbs. Stir in drained cherries and 4 ounces (2/3 cup) of the chopped chocolate. Stir in almond extract and, if desired, food coloring. Knead mixture until it forms a smooth ball.
3. Shape dough into 3/4-inch balls. Place balls 2 inches apart on an ungreased cookie sheet. Using the bottom of a drinking glass dipped in sugar, flatten balls to 1-1/2-inch rounds.
4. Bake in preheated oven for 10 to 12 minutes or until centers are set. Cool for 1 minute on cookie sheet. Transfer cookies to a wire rack and let cool.
5. In a small saucepan, combine remaining 8 ounces white chocolate and the shortening. Cook and stir over low heat until melted. Dip half of each cookie into chocolate, allowing excess to drip off. If desired, roll dipped edge in nonpareils and/or edible glitter. Place cookies on waxed paper until chocolate is set. Makes about 60.
6. To Store: Layer cookies between waxed paper in an airtight container; cover. Store at room temperature for up to 3 days or freeze for up to 3 months.


Chocolate-Pistachio Trees
(Source and Photo Credit:
Better Homes and Gardens)

1 cup butter
2/3 cup packed brown sugar
1 teaspoon vanilla
1 egg, beaten
2-1/4 cups all-purpose flour
1/4 cup unsweetened cocoa powder
3/4 cup finely chopped pistachio nuts
3/4 cup semisweet chocolate pieces
1 tablespoon shortening
1/2 cup ground pistachio nuts

1. In a medium saucepan, combine butter and brown sugar; heat and stir over low heat until butter is melted. Remove saucepan from heat; stir in vanilla. Cool mixture for 15 minutes. Stir in egg, flour, and cocoa powder until mixture is combined. Stir in the 3/4 cup pistachio nuts. Divide dough in half. Cover and chill about 30 minutes or until dough is easy to handle.
2. Preheat oven to 350 degrees F. On a lightly floured surface, roll dough, half at a time, to a 1/4-inch thickness. Using a tree-shape cookie cutter, cut out cookies. Place cookies 1 inch apart on an ungreased cookie sheet.
3. Bake in preheated oven about 9 minutes or until edges are firm. Transfer to a wire rack; cool.
4. In a heavy small saucepan, combine chocolate pieces and shortening; heat and stir over low heat until chocolate melts. Remove from heat. Dip one-third of each cookie into chocolate mixture; roll edges of cookie in ground pistachio nuts.

Makes about 48 cookies.

To Store: Layer cookies between waxed paper in an airtight container; cover. Store in refrigerator for up to 3 days.

Sunday, January 03, 2010

2010: A Return to Blogging

HAPPY NEW YEAR (albeit a bit belated)!

Friends, I realize that I have hit a new low. I have been absent from this blog for over a month, and that is just disgraceful. To put it simply, December 2009 was the month that wasn't. You see, the movers came to take away most of the stuff from the old rental and haul it to the new house on Dec. 14, so the big push to be ready for that momentous day was nightmarish, to say the very least. I remember watching Paula Deen's "Chefography" show ages ago, and in it, she and her sons talked about a time in their life when they were all working around the clock at some cafeteria that Paula was managing. And it was such a difficult time that they still don't talk about it to this day. That's kind of how I feel about this move; it was physically and emotionally traumatizing.

Of course I am excited to be moving into the first house that I own, but I was in that rental house for nine and a half years--longer than I have ever lived anywhere--so there was an unbelievable amount of stuff to pack and purge. And with me working two jobs (the movers actually came the first day of finals week at Clinton!), it was practically impossible to accomplish much on the homefront right at the end of the semester, in the thick of all the madness. All honor and glory and praise MUST go to my AMAZING roommate, Cyd. There really are not enough words to describe the amount of work she did to get us ready for the move or how incredibly thankful I am for her Herculean efforts. So I will just say, from the bottom of my heart, GOD BLESS HER! And the other person that we could not have done it without is my (now former....sniff!) next-door neighbor, Ken, who spent the better part of December running up and down the stairs, hauling crap down from the overstuffed attic. BLESS HIM, TOO!

Though the movers transferred about 80% of our possessions on 12/14, it was somehow worse to finish the last of it, especially as we had to move the rest ourselves. (Appropriate shout-outs here to my sweet friends and co-workers who helped to subsidize the cost of the professional movers, and also to my faithful friends, Vicky and Tom, for the use of their pickup trucks to complete the move.) Then, of course, there was the neverending hauling of trash and finally, all the cleaning. But somehow, we managed to vacate the old place on December 23...Christmas Eve Eve! (December 2009 was also the Christmas that wasn't. Boo hiss.) It almost killed us, but we did it. Thank heavens I have most of January to try to recuperate and maybe start unpacking...but I'm making no promises on that account. I might just live out of boxes until the spring thaw! (By then, my back and my spirit may have healed somewhat.) But one thing I will definitely commit to is a return to food blogging. Granted, I can barely find anything in the new kitchen, but I have some catching up to do before I start sharing new cooking adventures anyway...

I will begin with a recipe that I had originally intended to make for holiday gifts for co-workers and friends (in addition to the cranberry salsa and apple chutney), but didn't manage to pull it off. It was a cranberry loaf with a spicy twist that I read about on Anna's Cookie Madness blog--and that she highly recommended--called Texas Cranberry Jalapeno Bread. I thought I might make mini-loaves for the people at work, but instead, I ended up making two large loaves to take to a couple of Christmas parties that I was invited to.

It sounds a little strange, I know, but I really liked the peppery kick to a traditional cranberry orange loaf. The only thing I didn't like about the recipe was the half teaspoon of cumin that it calls for. In my opinion, it really overpowered the other flavors. I was thinking that one might substitute cinnamon, but I really think I will admit the spice altogether the next time I make it, so that I can taste the cranberries, the orange, and the zing of both the black pepper and the pepper jelly. That was another great thing about this recipe--it allowed me to use up a half jar of homemade pepper jelly that I found while cleaning out the fridge. (Note: I followed a version of the recipe from Recipezaar that included four tablespoons of pepper jelly, while Anna's version called for two tablespoons of pepper jelly and two tablespoons of salsa, which I thought sounded a little odd and potentially overpowering as well.) In any case, I think that this bread is perfect for the holidays and also to warm you up during the chill of winter!

Texas Cranberry Jalapeno Bread
(Source:
Recipezaar)

4 cups flour
2 cups sugar
1/2 cup light brown sugar
1 teaspoon salt
1/2 baking soda
1 tablespoon baking powder
1/2 teaspoon black pepper
1/2 teaspoon cumin (I will omit this next time!)
1 cup chopped pecans
1 bag cranberries, coarsely chopped
3 beaten eggs
3/4 cup orange juice
1 teaspoon vanilla
3-4 tablespoons jalapeno jelly (I used my homemade apricot pepper jelly)
1/2 cup butter, melted

Preheat oven to 350. In a large bowl, mix all dry ingredients and the cranberries. In a medium bowl, mix eggs, juice, vanilla, jelly, and butter.

Make a well in center of dry ingredients. Fold wet ingredients into dry and mix gently until ingredients are just combined.

Pour into 2 well-greased loaf pans. Bake 50-60 minutes. Cool in the pans for about ten minutes before turning out and cooling completely on a wire rack.

Makes 2 large loaves.