
Monday, October 16, 2006

A slothful, er, restorative weekend...


I hope you enjoy more pictures taken from my office window, because that's all I have to offer today. I wish I had a better food-related post to share with you, my friends, but there hasn't been much to blog about coming out of my kitchen this weekend--mostly just leftovers. This is due to two main factors. One is, as usual, the lack of an oven. But, keep your fingers crossed and send up a little prayer--the second new oven should be delivered tomorrow. Whether it will work or not, well, that's another story. But I will just be despondent if I can't start baking again soon. I am missing the glory of the high apple season! The back fridge is filled to the brim with lovely heirloom baking apples such as Wealthy and Wolf River, just begging to be fashioned into crumbles and pies and bars and loaves. And I am feeling a real need to bake some other kinds of bread, too. [big sigh]

More significantly, and for the first time in quite a long time, I did nothing this weekend. No big food projects of any kind, other than my kind roomie picking the rest of the peppers from the garden. This means that more pepper jelly will happen soon, but as I was out of Certo and canning jars, not this weekend. On a side note, why do all of the grocery stores order canning supplies just for the summer, and not enough for the fall when you really need them--that is, during harvest time??! It makes no sense. The only thing that makes less sense and is more maddening is watching Sandra Lee make pear crepes with pre-fab crepes, vanilla pudding from a pudding six-pack, and CANNED pears! But she she did use a real vanilla bean, so I guess that was one small redemption in an otherwise hellish recipe. But I digress...

So back to my unapologetic sloth this weekend. And I had plans, too! Anthony and Michelle of Endless Banquet fame reported that there would be an impromptu produce sale by a very special farmer named Patrice Fortier from Kamouraska, Quebec (about four hours northeast of Montreal, I'd estimate). But I just couldn't find the will to make the drive. Truth to tell, I couldn't find the will to do much that didn't involve my bed or the comfy counch! You see, we are in the thick of midterms at school, and I had a hellish grading load this past week, and I'm facing another one starting tomorrow. So I guess I just needed to be comatose for a couple of days and catch up on the sleep that I missed last week. [zzzzzzz]

The one thing I did make this weekend that I was craving was homemade butter pecan ice cream. As the lovely and talented Bakerina once said, ice cream is the only thing that will save us now! Of course, she said that during the sweltering summer, but every season is ice cream season to me. As my friends will attest, I like to bake lots of sweet things, but I actually don't have a big sweet tooth myself...except when it comes to ice cream, that is. Heck, one of my guilty pleasures is ice cream for breakfast. ;-) What?? It's dairy and eggs, right? For this particular batch, I used a slightly less rich version of the Bakerina's vanilla ice cream base (four egg yolks instead of six), one of my recently-acquired vanilla beans, and about a cup and a half of whole pecans toasted in butter. Heaven help us! It's just sinful! And here's the recipe. Enjoy it, and get some sleep afterwards, won't you? You deserve it!

Butter Pecan Ice Cream
(Source: adapted from Prepare to Meet Your Bakerina)

2 cups heavy cream
2 cups whole milk
1 vanilla bean
3/4 granulated sugar, divided
4 egg yolks
pinch (or two!) salt

1 1/2 cups whole pecans
3 tablespoons butter
pinch of salt

In a 3-quart saucepan, combine the milk, cream and half the sugar, and stir to combine. Split the vanilla bean with a paring knife, scrape the seeds out of the bean with the blunt side of the knife, and add both seeds and the bean husk to the pot. Bring to the boil. While the milk and cream are coming to the boil, beat the egg yolks with the remainder of the sugar in a large bowl until the mixture has lightened and the color is a paler yellow (about two minutes by hand).

Once the milk and cream have come to the boil, whisk them very gradually into the yolks, then add the salt. Rinse the saucepan which held the milk and cream, pour the whole mixture from the bowl back into the pan, and return to the heat, using a medium-low heat. Have another large bowl and a strainer close by. Stir the custard constantly as it cooks. You want to cook this until it coats the back of a spoon.

Strain the custard into its waiting bowl. Place your bowl into an ice bath and stir occasionally until the mixture has chilled. Cover it with plastic wrap and chill completely in the fridge for at least four hours, preferably overnight.

In a saute pan over medium heat, toast the pecans in the butter until they just start to brown. Remove from heat, sprinkle with salt, and set aside to cool completely.

When you are ready to churn the ice cream, set up your ice cream machine, pour in the custard (tasting it to see if it needs more salt, as chilling dulls flavor) and follow the manufacturer’s directions. Churn it until it holds a shape but is still somewhat soft. Add the pecans and churn a bit more until the nuts are mixed in well. Transfer to a lined loaf pan or a plastic container with a lid and let "ripen" in the freezer for at least two hours until firm before scooping and serving
.

Thursday, October 12, 2006

I'm full of beans today!

(Bonus points for anyone that can get the reference in the post title!)

Friends, this morning saw service call #4 from the appliance store. And does the (brand new) oven work now, you may well ask? Oh, why would you continue to ask this pointless question? Of course, it still doesn't work! That would just be silly. However, my roommate figured out that if you turn it to 150 and prop the door open a certain amount, you can get somewhat close to 300 degrees. So, we're golden (brown and delicious)! Truly, it has become a comedy of errors, and I think we're at the point where we have to start from square one and order another oven and let the merriment begin again. [heavy sigh]

In lieu of the celebratory post about the repaired oven that may well never come, I will share a recent culinary coup that no one I know fully appreciates. But you, my foodie friends, will surely share my joy. I have been trying to find a decent source of vanilla beans for sometime now, but they are just SO expensive! Even my beloved Trader Joe's has a jar of four scrawny beans for about $4. A dollar a bean is a lot better than $2-3 a bean which is common, but I wanted to do better, and get a higher quality bean to boot. So I turned to the most obvious source for gourmet food acquisitions--EBAY! I found a vendor called greenerdog with an Ebay store so that you didn't even have to wait out an auction. He had a "buy it now" option for ten Madagascar bourbon vanilla beans for $1.99, and the shipping was $2.95 no matter how many lots you bought! I knew it was a bit of a gamble, but at $0.20 a bean, I figured it was worth the risk. So I bought five lots (50 vanilla beans!) for about $13 with shipping. WOW! Moreover, I had barely hit send on my order when the package seemed to materialize in my mailbox. Seriously, it was two days at the most from order placement to delivery. The beans vary in size a little bit, of course, but they are all of a decent size, very flexible and supple, and they smell fantastic! I haven't made use of them yet, but I will report back when I do. In the meantime, I just thought I'd share a great deal with all the bakers out there in cyberland!

Monday, October 09, 2006

Short Ribs, Long on Flavor

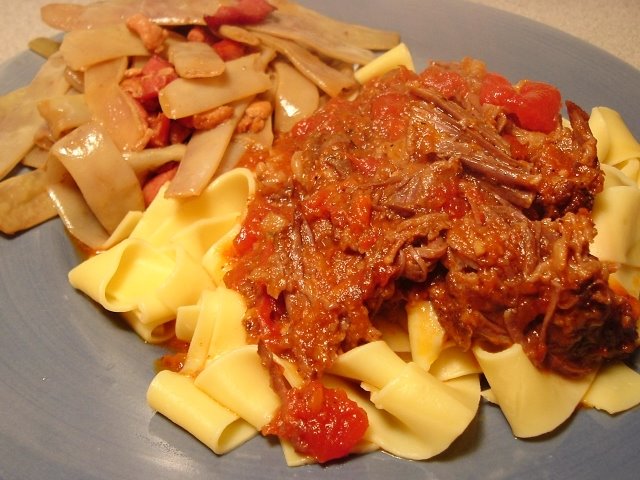
This is what happens when you stay home for a long holiday weekend; you watch too much Food Network, and you become obsessed with making things that you see on t.v.! Specifically, I saw Giada making Short Ribs with Tagliatelle that I just HAD to try immediately! So I found myself in the Wal-Mart at midnight Saturday night shopping for short ribs. Of course, because this is my life we're talking about, I ran into several problems. The first was that I could only find very large packages of short ribs--about three pounds at $2.68/lb., so it's not an inexpensive dish. Then again, it makes a TON, enough to freeze for another meal another day. Of course, if you can find a smaller package (a pound and a half), then you can halve the recipe below. But why would you want to? As it is, this fills a standard crockpot. And it's not that much more work to make the double batch and freeze the leftovers. But that's your call. Secondly, try finding tagliatelle in Plattsburgh! So I had to settle for some pappardelle from Trader Joe's that I still had rattling around in the pantry. (Maybe next time, I'll just make my own tagliatelle, which is an even wider pasta than pappardelle. Or I'll look for it the next time I'm in Montreal.)

But the biggest problem I had was getting the recipe off of Food Network's website when I needed it. Of course, it just came up for me just now, but I tried ALL DAY on Sunday, and I just got a blank screen when I clicked on that link. So I had to come up with an alternative recipe. I turned to a wonderful cookbook from the good people at Cooks' Illustrated called The Best Recipe: Italian Classics. In it, there was a recipe for Pasta and Rustic Slow-Simmered Tomato Sauce with Meat that was just the ticket. Of course, I had to put my own little twists on it here and there (like including some of the last peppers from my garden and using my crockpot to cook it all) and also a few things that I could remember from watching Giada make her version. And I believe that, in the end, I created something AMAZING! Seriously, this one is a keeper. So flavorful, and so hearty--a perfect dish for the nippier months. I served it with the beautiful beans that we picked up at Windmill Point Farm last weekend; although once you cook them, they change from looking like a vibrant Scarlet Runner Bean to a less appetizing greyish-green. But they still tastied delicious, especially cooked with a little bacon and some beef broth until tender. Delish!


Short Ribs in Rustic Slow-Simmered Tomato Sauce with Pappardelle
(Sources: Food Network and The Best Recipe: Italian Classics)

2 tablespoons olive oil
3 pounds beef short ribs (you may also wish to try pork spareribs or country-style ribs)
salt and pepper
2 medium onions, minced
2-3 large red peppers, cored, seeded and minced
6 medium cloves garlic, peeled and minced
1 cup red wine
1 28-oz. can diced tomatoes with juice (or better yet, use one 15-oz. can of regular tomatoes and one 15-oz. can of fire-roasted tomatoes)
1 small can tomato paste
1 1/2 cups beef broth
1 teaspoon dried oregano
pinch of hot pepper flakes (optional)

2 pounds pasta, cooked to al dente (according to package instructions)

parmesan cheese, freshly grated
fresh parsley, chopped (optional garnish)

Heat the oil in a large skillet. Season the ribs all over liberally with salt and pepper. Brown the ribs on all four sides in the skillet, about 8-10 minutes total. Remove the ribs to a plate and set aside. Add the minced onions, peppers, and garlic to the pan and saute until softened, 2-3 minutes. Add the red wine and deglaze for a minute or two, making sure to scrape up all the browned bits from the bottom of the pan. After the wine has reduced to something more like a glaze, add in the tomatoes, tomato paste, beef broth, oregano and red pepper flakes. Bring the sauce to a boil then remove from heat.

Add some of the sauce to the bottom of a preheated crockpot. Place the ribs in the pot next and cover them with the rest of the sauce. Cover and cook on high for four hours (or on low all day to have it ready when you get home from work!), or until the meat is literally falling off the bones. Place the ribs on a plate and remove the bones, tough cartilage and any excess fat. Using two forks, shred the meat, then add it back to the pot. Leave the meat and sauce to simmer together while you prepare your pasta. Serve with a generous sprinkling of grated parmesan and perhaps some chopped fresh parsley if you have it. MANGIA!

Sunday, October 08, 2006

Columbus Day Weekend


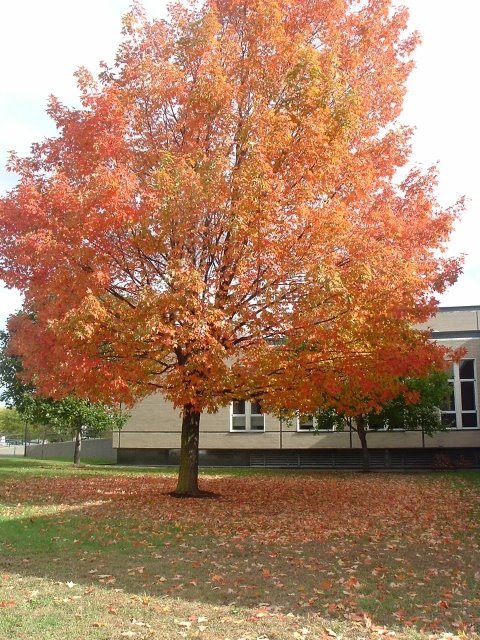
Ah, Columbus Day Weekend! This is my absolute favorite time of year, and after two years in a row of pretty crappy color, I am am enjoying every second of this magical and vivid season (behold a lovely tree on our local university's campus and the glorious view from my office window at the community college!). Normally, this is also my favorite time to take a road trip, but it just didn't work out this year. Mainly, we have so much work to do at home, from decorating for Halloween to harvesting everything that's left in the garden before the first killing frost, that it seemed like a better plan to stay home this year. Plus, school is just kicking my butt this semester, and getting lots of sleep over the three-day weekend sounded irresistible. As it turns out, we have had a very nice weekend without travelling. On Friday night, we had dinner with friends in their lovely little Mansard-style house in Peru, NY, the highlight of which was vanilla cake served with a brown sugar sauce on top. Yum! Then last night, my friend, Vicky, had a huge bonfire at her Adirondack cabin, and we ate bruschetta that I brought made from the last haul of tomatoes, campfire chili (both carnivorous and vegetarian varieties), cornbread with the last of the local sweet corn in it, hot dogs cooked on a stick, and of course, S'mores! We had so much fun! But perhaps the most fun was had by my dog, Grady. He got to run through the beautiful, colorful woods before sunset, play with my friend Terri's dog, Happy, steal food off the picnic table, and finally pass out by the roaring bonfire. Good times for a little hound!

With all the activities and projects (and, yes, the continued lack of an oven--though, there's supposed to be a man coming with a replacement part on Tuesday, but I'm not holding my breath), there hasn't been a lot of exciting cooking to talk about, but I do have two real time-saving ideas for quick meals to share. One comes from the ubiquitous Rachael Ray. Love her or hate her, the girl does come up with some clever shortcuts from time to time. The best one I've heard so far is using store-bought fresh or frozen ravioli to assemble a quick lasagna dish. I won't even bother posting a proper recipe. Just brown some hamburger and/or sausage (I like both), and add a jar of your favorite spaghetti sauce (I like Prego). Pour a little of the meat sauce into the bottom of an oblong baking dish, then place an even layer of cheese ravioli on top of it (it took 15 of them using the brand I bought). Add some more sauce over that, then a generous amount of shredded mozzarella and maybe some grated parmesan for good measure. Do another layer of ravioli (so probably 30 total for the casserole, depending on the size), more sauce, and top with lots more cheese. Bake it at 350 for about a half hour, and you have a quickie mid-week "lasagna." What a great tip for a working folks!

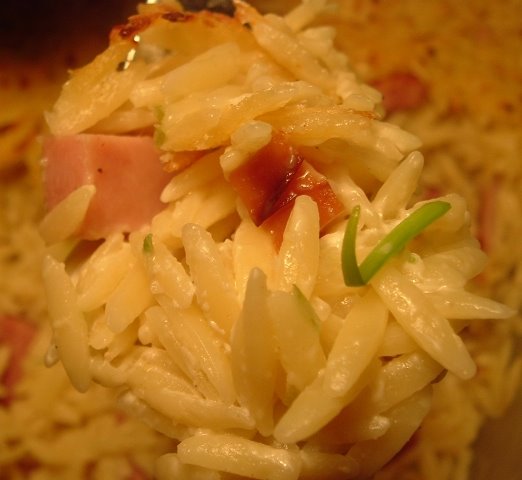
My second casserole comes from Gourmet Magazine by way of the guys over at Culinary in the Country. It is a remarkable recipe because it's comprised of just four main ingredients, but you'll be shocked at how much flavor the dish has, not to mention how easy it is to throw together. It's really just macaroni and cheese with an elegant and tasty twist. Here's the recipe:

Orzo with Ham and Goat Cheese
(Adapted from Gourmet)

1 lb. orzo
1/2 lb. (I used about 3/4 lb.) thickly-sliced ham, diced or coarsely chopped (I used a combination of maple ham and spicy capicola)
1/2 lb. mild soft goat cheese, crumbled
5 scallions, thinly sliced

Preheat broiler and lightly oil a flameproof three-quart shallow baking dish (two inches deep).

Cook orzo in a six-quart pot of boiling chicken broth until al dente. Reserve 3/4 cup pasta cooking broth, then drain orzo in a colander. Toss hot orzo with remaining ingredients, reserved cooking liquid (if needed), and salt and pepper to taste in a large bowl until cheese is melted.

Transfer orzo mixture to baking dish and broil two inches from heat until lightly browned, about four minutes.


Make either of these two easy casseroles, and you'll have plenty of time and no good excuse not to get out there and make the most of this gorgeous autumn season!

Friday, October 06, 2006

Happy Birthday, Tom!

Ok, so my friend Tom's birthday was a couple of weeks ago, and I missed it. But in my defense, I didn't know when it was until after the fact, and by then, I was already knee-deep in my preparations for Miss Vicky's affair. I figured that it was too late, but then at Pub Trivia last week, Tom said something that cut me to the quick. When I had the quizmaster lead the whole bar in a round of "Happy Birthday to You" for Vicky, he said, "My birthday was last week, and no one cared that much about me!" Now, you must understand that Tom is a cynical old curmudgeon but with a heart of gold, and that he wasn't being serious. All he really wanted to do was to get home to see his favorite t.v. show, "Eureka," so he was just vexed that we were taking extra time to sing to the birthday girl. Still, you cannot joke about birthdays around me! He might as well have said, "Gina, you are unkind to animals." In short, he got me right where I live. :-(

So I set about to rectify the situation. First of all, I did some sleuthing and found out Tom's favorite dessert. His national heritage is Slovenian, and his wife, June, told me that he ADORES plum dumplings, although she is only obligated to make them once a year because they are so labor-intensive. I was not at all familiar with this dessert, so I had to do some internet research. I guess I was thinking of dumplings cooked in a fruit puree such as blueberry or blackberry. But these are potato dumplings in which a whole fresh plum filled with cinnamon sugar is embedded. And not just any old plum, either--it has to be the small Italian prune plums, which are not that easy to find, let me tell you! And then the dumplings are boiled and served with a buttery, sweetened breadcrumb topping. I never did find a specifically Slovenian recipe, but it would seem that most Slavic and Germanic cultures have some version of the same thing. What I ended up making was an amalgamation of a Hungarian and a Serbian recipe that were almost identical.

My first batch turned out alright, despite using the wrong kind of potato for the dumpling. I used a waxy white potato, and you really want to use a starchy, Russet-type to make a smoother, lighter dough. So I decided to make a second batch with the right kind of potato, plus, I had read that the dumplings can also be made with apricots (as pictured), so I wanted to try that. And though all the recipes that I found called for fresh apricots to be used, I wondered why you couldn't use reconstituted dried apricots in the off-season? Well, not only can you do it, my official taster/roommate declared that she actually liked the dried apricot version better than the traditional plum dumpling! It certainly seems like the kind of thing to have in your fall and winter repertoire, because this dish is extremely hearty--a real stick-to-your-ribs affair. June told me that she and Tom eat these for a meal when she makes them, not just for dessert. They will certainly fill you up, that's for sure. They are just delicious, and I hope that Belated Birthday Boy, Tom agrees. (I haven't had a report back yet because they are saving the dumplings for the weekend when Tom's brother is coming for a visit, and apparently, he hasn't had plum dumplings for years and years!) So HAPPY BIRTHDAY, TOM...better late than never!

Hungarian/Serbian/Slovenian Plum Dumplings

Dough:
4-5 large potatoes (russet, starchy type), peeled and cut into large cubes/chunks
2 tablespoons butter
2 teaspoons salt, divided
2 eggs
1 teaspoon baking powder (optional, but makes a lighter dough)

3-4 cups flour (enough to make a soft, smooth dough)

Filling:
32 Italian prune plums, washed, dried well, split, and pitted*
½ cup sugar
2 teaspoons to 1 tablespoon ground cinnamon (to taste)

Topping:
2 cups fresh breadcrumbs
½ cup butter
½ cup sugar
2 teaspoons to 1 tablespoon ground cinnamon (again, to taste)

Fill a large saucepan with the chunks of potato and cover with water by an inch or two. Bring to a boil and throw in a couple of pinches of salt. Boil the potatoes until very tender and then drain. Add the potatoes to the bowl of a stand mixer and “mash” with the paddle attachment until fairly smooth. Add the two tablespoons of butter and the salt and mix in well. Let cool until almost room temperature (it can be warmish, but not hot). Add the eggs and mix again. Add the baking powder if you're using it, and the flour, cup by cup, just until you have a dough that is soft, smooth, and not too sticky to work with.

Flour your bench liberally, and roll out dough to about ½-inch thick**. (I like to divide the recipe in quarters before doing this—makes it a more manageable task, I think.) Your ultimate goal is 32 dumplings, maybe three or four inches square, so I cut each quarter into eight equal pieces. For each dumpling, take one plum, fill the cavity where the pit was with at least half but up to a full teaspoon of the cinnamon sugar. Close the plum, then place it in the center of a dumpling square. Fold the ends over the plum, and then pinch the edges to seal. Roll the dumpling around in your hands to smooth it out and even out the dough covering on the plum. Set aside on a pan liberally coated with flour, and don’t let any of the dumplings touch each other. Proceed making the rest of the dumplings—you might want to call a friend in to help. ;-)

Get a large pot of water boiling, and boil the dumplings in batches (no more than eight at a time, I’d say) for about 15 minutes. Meanwhile, toast the breadcrumbs in the butter until golden brown. Mix in the cinnamon and sugar. When the dumplings are done, roll each one in the sweetened breadcrumb mixture and serve hot. Three or four per person is plenty for a meal, while two would probably be enough for dessert.

These dumplings freeze beautifully. Just make sure they aren’t touching each other when you freeze them, and then just boil them for an extra four minutes or so past the regular cooking time when you’re ready to serve them.

*These dumplings can be made with fresh apricots, too, or with reconstituted dried apricots (or, if you must, canned apricots). To reconstitute dried apricots, place them in a saucepan, and cover with double the amount of orange juice. Bring the fruit to a boil, and then simmer for 10-15 minutes, or until the apricots are tender. Drain, pat dry, and cool before filling with cinnamon sugar and encasing each apricot in dumpling dough.

**The second time I made these, I decided not to roll the dough, but just divide it into 32 roughly equal pieces, and then press each out into a circle with my fingertips. Then I added the sugar-filled fruits, encased them in the dough, pressed the seams together, and then rolled the dumplings in my hands to make them more even. It was much easier to do it this way, I must say!

Tuesday, October 03, 2006

Notre-Dame-de-l'ÃŽle-Perrot

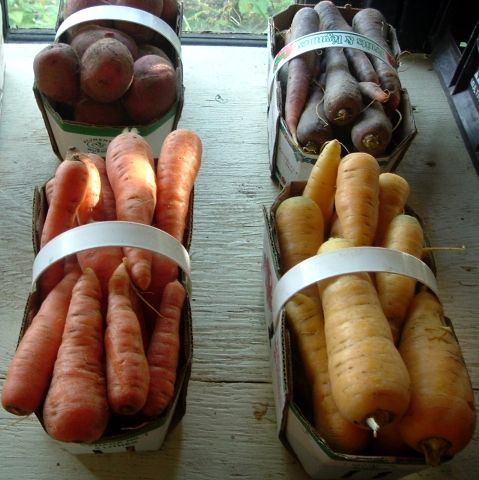
It was rumored that we might have one nice day this past weekend, so on Saturday morning, Cyd and I took off for an autumnal day trip to Quebec. We didn't even get out of Hemmingford, our tiny border crossing, before acquiring some of the biggest Wolf River apples I'd ever seen, two dozen fresh eggs, and four heads of local garlic along the Circuit de Paysan (the "peasant's route" or in English, I guess we'd say the scenic route). But our goal was to visit Notre-Dame-de-l'ÃŽle-Perrot, a lovely island about 30 minutes southwest of Montreal, near both the St. Lawrence River and Lac Saint-Louis. I had read about a very special organic farm located on the island called Windmill Point Farm, and I have been trying to get over there to check it out since the beginning of the harvest season, but it just hadn't worked out until now. So we thought we'd be there by noon, and then maybe we'd hit the Jean-Talon Market later that day. Little did we know that, due to either construction or that horrible overpass collapse in Laval or both, the traffic heading to the Mercier Bridge was backed up for hours and miles. After waiting for over an hour just to get to the beginning of the detour, we bailed and backtracked to Montreal to pick up Interstate 20 from the other direction. FOUR HOURS after we left home, we finally arrived at the beautiful Windmill Point Farm (it should have taken an hour and a half!). We were very lucky to find the farmer, M. Taylor, in residence, and he gave us a quick tour of the grounds, passionately professing his theories and methods of sustainable agriculture along the way. He strongly believes that Quebec should not be importing their food from as far away as Florida and California (losing most of their nutrients en route) when many things can be grown in the province with the continued cultivation of hardy varieties. Indeed, M. Taylor seems to take fiendish delight in growing things that people think can't be grown this far north. For example, he is growing a type of smooth-skinned kiwi that he was proud to show me. A kiwi! In Quebec! Can you imagine? He also specializes in several kinds of table grapes, and one of them which he refers to jokingly as "bubble gum grapes" were so tasty, that Cyd declared them well worth the four-hour drive! As for me, I was enchanted with his pears. He had one variety that is almost 300 years old called Ritson, and another one named North Brite that Cyd could not stop eating. When we got home, we did a blind taste test against some lovely Starkrimson (a red Bartlett, basically) that I picked up at the supermarket, and there was NO CONTEST! The two heirloom, organic varieties won the taste test by leaps and bounds. The Ritson has a wonderfully musky perfume, and the North Brite is so juicy and buttery and sweet that Cyd wouldn't even let me cook any of them, claiming them for fresh eating and nothing else! But I'm getting ahead of my story. We also managed to relieve M. Taylor of some chubby golden carrots, an enormous head of cabbage (both of which were promptly fashioned into cole slaw upon our return home), and some gorgeous beans that looked like Scarlet Runners, but were snap beans, not for shelling (he developed this kind of bean himself, of course). And lastly, we bought a bag of a kind of Japanese walnut called a "heart nut" because of its distinctive shape. I believe I am looking forward to trying these most of all. I am in a very walnutty place lately--I want them in or on everything!

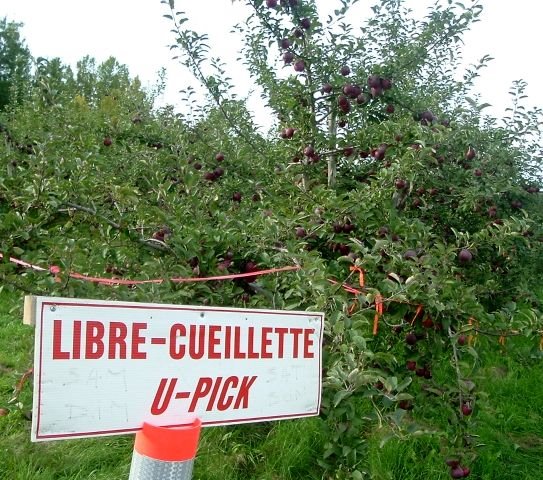
After leaving Windmill Point Farm, we passed an orchard nearby called Le Verger Labonté. It was a chaotic scene of fall fun, teeming with children visiting their petting zoo, taking hay rides, exploring the corn maze, and picking their own apples. As for me, I fought my way into the crowded shop to try and buy some Spartan apples, great for baking and just in season now. But Cyd wouldn't let me, as I already have at least four varieties of apples in the back fridge which has now just become an apple cooler (the dysfunctional oven is creating quite a baking backlog!). But we did buy a cute little take-and-bake apple pie, although they had just sold out of their "legendary muffins." Oh well. Next time. Or if my oven is ever back online, I'm make my own damn muffins! By this point in our adventure, it was already past five o'clock, so we decided to just grab some dinner (a Chinese buffet near Dorval that was unremarkable, except for the inexplicable Tahitian-style bamboo decor) and head back to the Etats-Unis. The return trip was pleasantly uneventful and mostly traffic-free.

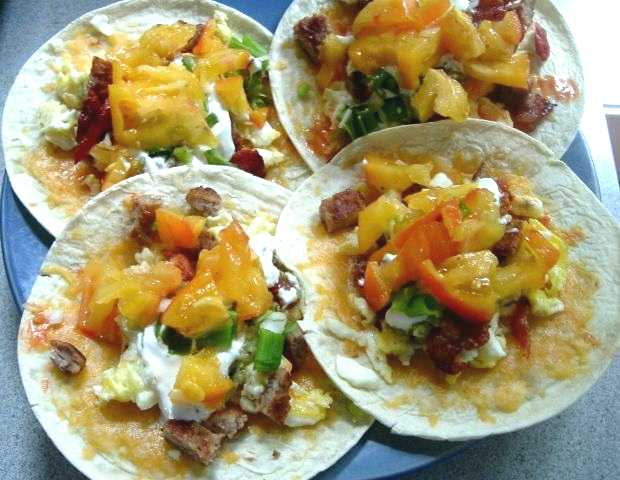
The next morning, I made some fabulous breakfast burritos with cheese, bacon and sausage, scrambled eggs, garden tomatoes, green onions, homemade tomatillo salsa, and sour cream. Then I got on with the big project of the day--pear butter. I used the Starkrimsons, the Ritsons, and a handful of the North Brites that were already starting to turn. I didn't get the yield that I was hoping for, but what I did produce was just heavenly...the very essence of autumn. I urge you to give it a try. After all, 'tis the season to be standing around a huge cauldron of spiced fruit when there's a nip in the air! I hope you all are enjoying this gorgeous fall season. It never lasts long enough, so drink it in (or taste it if you can)!

Maple Vanilla Pear Butter
(Source: adapted from Ball Blue Book)

7-8 pounds pears, peeled, cored, and cut into chunks
1/2 cup water
1 1/2 to 2 cups sugar (taste it!)
1/4 to 1/2 cup maple sugar (ditto)
1/4 to 1/2 cup maple syrup (ditto)
1 tablespoon vanilla
pinch salt

Add about a half cup of water to the chunked pears (just to keep them from sticking to the bottom) and cook over medium heat until the fruit is soft, about 20 minutes. Transfer to a food mill or food processor, and process until fairly smooth, but not completely liquified. Add the puree back to the pot, and add the sugars, syrup, vanilla, and salt. Cook over a low heat, stirring frequently, until thick enough to round up on a spoon. Fill sterilized jars and process for ten minutes in a water bath canner. The original recipe said the yield would be four pints, but I got just over half that. Perhaps I like my butter thicker than some folks?

Friday, September 29, 2006

Happy Birthday, Vicky!

Actually, my friend Vicky's birthday was this past Wednesday, but as it our custom in the Humanities Division, we celebrate each other on the closest scheduled meeting day so we can combine our official business with birthday pleasures...like CAKE! ;-) We draw names at the beginning of each school year, and then proceed "Secret Santa" style. I drew my dear colleague and friend, Vicky, this time around, and I have been sneaking around all week, getting things ready for her party. The problem was, we didn't actually have a meeting scheduled today (a freak fifth Friday of the month), so I had our division head send a fake e-mail around, saying that we had just one agenda item to take care of. Vicky was a little miffed, but she came anyway...whew! Vicky is an ex-hippie (maybe not that much of an "ex-!") who lives in a cabin in the woods and who is always fighting a good cause of some sort, so my theme was inspired by the activism of the 60's and 70's. I got some very groovy party decorations (lots of "Have a Nice Day" smiley faces) and favors (smiley-face bouncy balls and rainbow-colored miniature Slinkies), played some Beatles and Simon and Garfunkel, and designed this t-shirt as a gift for her.
The Martin Luther King, Jr. quote ("Our lives begin to end the day we become silent about things that matter") sums up her spirit and personality perfectly. I also had fun making her her own seal at this cool website which I highly recommend if you have some time to kill. Her last name is Sloan, her righteous indignation over injustices made the scales a fitting icon, and the Latin phrase translates to "Not a day without a line drawn." Originally, that was in reference to some particularly industrious artist, but I thought it fit Vicky in a different way, as she is often drawing the line over some important issue! ;-)

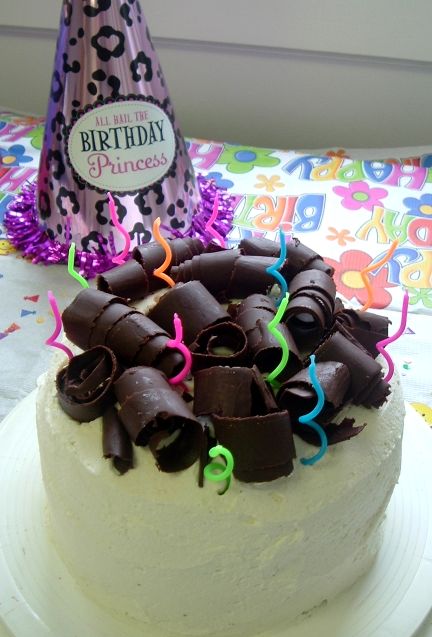
Then of course, I provided lunch for the folks. There's always one vegetarian in every crowd (ours is one of the other English teachers), so I decided to start with a cream of roasted tomato soup made with organic vegetable stock. The soup was one of Bobby Flay's dishes, and everyone was clamoring for the recipe (see below). I also made the blue cheese and walnut chicken salad and added some chopped apples and served it on cocktail croissants. And as two of Vicky's favorite dessert flavors are cherry (she's from Michigan originally) and chocolate, the grand finale was a gorgeous four-layer Black Forest Cake. I intended to make the whole thing from scratch, as is my way, but the oven is still on the fritz (sigh--yes, it's true, the repair guy came Thursday morning, but it apparently requires some part that needs to be ordered). Thus, I had to bake the cake layers at school, so I just used a dark chocolate fudge cake mix from a box. But LOOK at what you can do with a boxed mix if you set your mind to it!

I am pleased to report that I am returning home with empty dishes, other than one piece of cake that I saved to share with Cyd who was kind enough to help me make the chicken salad and the soup last night. Bless her heart! Anyhoo, here are the recipes for the soup and the cake, if anyone is interested in trying them out (the chicken salad can be found in an earlier post from 9/11/06 entitled, "Weekend in New England").

HAPPY BIRTHDAY, VICKY!

Cream of Roasted Tomato Soup
(Source: Food Network, Bobby Flay)

10 plum tomatoes, halved lengthwise, seeds removed (or you can "cheat" and use one 15-oz. can of plum tomatoes and one 15-oz. can of Muir Glen fire-roasted tomatoes for a similar effect)
1/4 cup olive oil, divided
6 cloves garlic, coarsely chopped
salt and freshly ground pepper, to taste
1 Spanish onion, diced (you can use any kind of onion here)
1 carrot, diced
3 cups vegetable stock (chicken stock would be fine, too, and beef stock might be even better)
1 tablespoon finely chopped fresh thyme (I used lime thyme from my garden--yum!)
1 1/2 cups heavy cream

Preheat oven to 325 degrees F. Place tomatoes in a large baking dish and drizzle with 2 tablespoons of the olive oil and sprinkle with the garlic, season with salt and pepper. Roast for 25 to 30 minutes, or until the tomatoes are soft.


Heat the remaining olive oil in a medium stock pot over medium heat. Add the onions and carrots and cook until the onions are soft, about 5 minutes. Add the roasted tomatoes, garlic, and the juices that have accumulated in the roasting pan. Add the stock and fresh thyme and cook for 20 minutes. Place the cream in a small saucepan over medium high heat and cook until reduced by half. Transfer the mixture to a blender and blend until smooth (I used my stick blender right in the pot), strain into a clean saucepan over low heat (I prefer not to strain--the bits add texture that I enjoy), stir in the reduced cream, and cook for 5 minutes.

Black Forest Cake
(Source:
www.allrecipes.com)
Prep Time: 30 Minutes Cook Time: 40 Minutes
Ready In: 2 Hours 10 Minutes Yields: 12 servings (I got 16--you don't need big slices, it's so rich)

Cake:

(*you can substitute a boxed cake mix here in a pinch)
1 2/3 cups all-purpose flour
2/3 cup unsweetened cocoa powder
1 1/2 teaspoons baking soda
1 teaspoon salt
1/2 cup shortening
1 1/2 cups white sugar
2 eggs
1 teaspoon vanilla extract
1 1/2 cups buttermilk


Filling:
1/2 cup kirschwasser (cherry brandy)--I cut this by half with cherry juice for a less "boozy" effect
1/2 cup butter
3 1/2 cups confectioner's sugar
1 pinch salt
1 teaspoon strong brewed coffee (I used coffee liqueur instead and added a teaspoon of vanilla, too)
2 -14-oz. cans pitted Bing cherries, drained (I used Morello cherries from Trader Joe's)

Frosting:
2 cups heavy whipping cream
1/2 teaspoon vanilla extract
1 tablespoon kirschwasser (I used the kirsch/cherry juice mix that was leftover)
1 (1 oz.) square semisweet chocolate (I used probably 4 oz. of bittersweet chocolate)

1. Preheat oven to 350 degrees F (175 degrees C). Line the bottoms of two 8-inch round pans with parchment paper circles. Sift together flour, cocoa, baking soda and 1 teaspoon salt. Set aside.

2. Cream shortening and sugar until light and fluffy. Beat in eggs and vanilla. Beat in flour mixture, alternating with buttermilk, until combined. Pour into 2 round 8 inch pans.

3. Bake at 350 degrees F (175 degrees C) for 35 to 40 minutes, or until a toothpick inserted into the cake comes out clean. Cool completely. Remove paper from the cakes. Cut each layer in half, horizontally, making 4 layers total. Sprinkle layers with the 1/2 cup kirshwasser (I used a pastry brush, and I didn't use anywhere near a half cup!).

4. In a medium bowl, cream the butter until light and fluffy. Add confectioners' sugar, a pinch of salt, and the coffee (or coffee liqueur and vanilla extract); beat until smooth. If the consistency is too thick, add a couple teaspoons of cherry juice or milk (I used some of the leftover kirsch/cherry juice mix which made the filling a lovely shade of pink!). Spread first layer of cake with 1/3 of the filling. Top with 1/3 of the cherries. Repeat with the remaining layers.

5. In a separate bowl, whip the cream to stiff peaks. Beat in 1/2 teaspoon vanilla and 1 tablespoon kirshwasser (I also added about three tablespoons of powdered sugar and two tablespoons of nonfat dry milk to stabilize the cream so that it would last through the party). Frost top and sides of cake. Sprinkle with chocolate curls made by using a potato peeler on semisweet baking chocolate (I melted my chocolate over a double boiler, spread it thinly over the back of a baking sheet, let it cool, and made thick curls with a bench scraper instead). I would also chill this before serving to set the layers and make it easier to cut.


Sunday, September 24, 2006

The oven saga continues...

I haven't posted in awhile, because I was hoping to make a celebratory declaration about the new oven's arrival. The good news is, it did finally arrive on Wednesday afternoon. The bad news is, it's been a nightmare ever since it got here! To begin with, it sat in the middle of the kitchen floor for three days until we could figure out how to get it into the old slot. You see, the top and back of it were a wee bit wider than main body of the stove, so it wouldn't slide back until it was raised up a an inch or two. At a swell faculty party Friday evening, my handy friends, Martie and Patti, suggested using some of those easy-glide feet that are for moving heavy furniture without scuffing your wood floors. We got some, but they didn't quite do the trick. So we finally decided just to haul the beast up onto wooden planks, which was easier said than done. Thanks to our super-humanly strong next-door neighbor, we managed it at long last. It looks a little tacky, but as long as it works, I don't care. But that's the bigger issue--it doesn't work. I tried baking a can of biscuits in there this morning for a trial run, and they were charcoal before they reached the minimum baking time. So later on in the afternoon, I tried making some cookies, turning the temperature down by fifty degrees, and the first batch still came out overdone before the minimum time! Near as I can tell, this awful appliance is running maybe 175 degrees too hot! So I'm going to have to give the retailer a call on Monday and see if it can be calibrated, or it might have to be replaced all together...so my personal hell continues. (Do you ever feel like the universe is out to get you? All I want is to bake a pie in my own house! Is that really too much to ask? AAAAAARRRRRRGGGGHHHHHH!)

Ok, now that I've had my little psychotic break/meltdown/temper tantrum, let me turn to more pleasant, autumnal tidings. Friends, we are in the full glory of apple season! As you know, I have already used some Ginger Golds and Paula Reds in some baked dishes this season, but on Friday afternoon, we went in search of the most prized apple in all of Christendom, the Honey Crisp. Dear readers, believe me when I say that there is nothing more wonderful than biting into a Honey Crisp apple (preferably, cold from the fridge). It is, as you might guess from the name, incredibly sweet, toothsome and crisp, and as you take each bite, there's a burst of fresh apple juice in your mouth. Just amazing! I don't even have a recipe to go with these apples, because it would be a crime to do anything other than savor the beauties in their perfect, fresh form. However, I did score an unexpected apple bonus at our local Everett Orchards on Friday. As we were paying for our Honey Crisps, I noticed a sign advertising an apple called "Wealthy" by special request only. I inquired about this variety, as I'd never heard of it. The lovely woman told me that it was an old-fashioned baking apple, and that they only had two trees' worth. In fact, she said that her mother usually claims all of the Wealthy apples for her own pies, but that they had a few leftover to sell this year. Hard-to-find, scarce supply, heirloom baking apples? She was singing my song! So I snapped up a half peck in short order, naturally! I will report back on the pies that result, once I get the oven situation under control, that is. :-(

But I would be remiss if I blogged without posting a single recipe. And I do have one to offer. The other wonderful surprise at Everett Orchards was discovering their terrific homemade cookies. We sampled a peanut butter-filled chocolate one and a decadent double-chocolate one that seemed to have a hint of coffee involved. But my favorite was a delicious maple-walnut cookie that I am now obsessed with replicating at home. Other than scorching the first batch in the hateful new oven, my initial effort yielded some tasty results. Here is the recipe:

Maple Walnut Cookies

1 cup brown sugar, firmly packed

1/4 cup maple sugar
3/4 cup butter-flavored Crisco (or swap out part of the shortening, which makes them soft, for butter, which will give them better flavor)
2 tablespoons maple syrup (of course, real!)
1 teaspoon vanilla
1 egg
1 3/4 cups all-purpose flour
1 teaspoon salt
3/4 teaspoon baking soda
1/2 teaspoon cinnamon
2 cups walnuts, toasted (do NOT skip this step or you'll be sorry!) and coarsely chopped

1. Heat oven to 375 degrees F. (that's 200 to me...ha ha)
2. Place brown sugar, maple sugar, shortening, maple syrup, and vanilla in the bowl of a stand mixer. Beat at medium speed until well blended. Add egg and beat well.
3. Combine flour, salt, baking soda, and cinnamon in another bowl. Add to shortening mixture; beat at low speed just until blended. Stir in chopped walnuts.
4. Drop dough by rounded tablespoons 3 inches apart onto ungreased baking sheets. (I used my standard cookie scoop here onto Silpat-lined pans.)
5. Bake one baking sheet at a time at 375 degrees F for 8 to 10 minutes for chewy cookies, or 11 to 13 minutes for crisp cookies. DO NOT OVERBAKE. Cool 2 minutes on baking sheet. Remove cookies to a rack to cool completely.

Makes about 2 dozen cookies (using the cookie scoop).

Tuesday, September 19, 2006

Happy Birthday, Steve!

My beloved colleague and office mate, Lee Ann, tells a sad tale about her husband, Steve, and his past birthday cakes. Steve, truth to tell, may be the more gifted cook in the household. Lee Ann holds her own, to be sure. In fact, she makes a great pickled vegetable dish a la Emeril that I am obsessed with! But Steve is a REALLY good and quite inventive cook. Last year, he made a remarkable twice-baked (acorn or butternut?) squash dish that was just amazing for Thanksgiving. But of course, one should not bake one's own birthday cake! So he tells Lee Ann what he might like each year, and Lord love her, she does try. But she reports that eventually, he stopped making requests, saying dismissive things like, "Oh, that's okay," or, "Don't worry about it. I don't need a cake." :-( So this year, she turned in desperation to Lindsey's Luscious to save the day. Little did she know that Lindsey's Luscious is still limping along without an oven! BOO HISS! (There are rumors that tomorrow might be the day, but I'm not holding my breath until I see the delivery truck in my driveway! But that's another post for another day...)

Meanwhile, back to Steve's birthday cake. Steve, it should be known, is a great lover of all things lemony. So he requested a lemon pound cake (or perhaps Lee Ann told him that I fancy myself the Queen of Pound Cake and he just specified the flavor...who can say?), but he was quite adamant that it be a very LEMONY lemon pound cake! And no other flavor should adulterate the lemons! So I set about to make as lemony a pound cake as I could muster up. I bought an entire bag of lemons to use, and came right home to begin zesting up a storm. The problem was, my longsuffering next-door neighbor didn't leave the spare key out for me, so I had to wait until he got home from work at 11:30pm (!) to accost him in his driveway and beg for oven time. So the cake wasn't finished until almost 2:00am (ugh!), but nevertheless, I think I may be onto something. It smelled heavenly, and the little bits that stuck to the middle of the bundt pan were quite tasty. But it's really all about the glaze! Wow! My mouth is puckering just thinking about that glaze! And after using the zest of four lemons and a quarter cup of juice in the cake, and the zest of two lemons and a half cup of juice in the glaze, it BETTER be lemony enough for the Birthday Boy! If not, as Lee Ann and I joked this afternoon, we'll just tie him down and start reaming lemons right into his pie hole and skip the cake altogether! Tee hee. Actually, I will make this again--for myself!--and I might do two things to up the lemon effect even more. One, I would like to track down some lemon oil and try adding it to the batter along with the zest and juice. And next time, I will poke holes in the bottom of the cake and soak it with glaze before I even turn it out of the pan, and then coat the top and sides as I did with this one. In any case, this is still one lemony pound cake, and I sure hope it's well-received at the party tonight. If not, next year, I'll buy TWO BAGS of lemons! ;-) HAPPY BIRTHDAY, Steve!

Follow-up: Lee Ann reported today that that the cake was "perfect," according to the Birthday Boy. (That's a gushing review coming from a rather taciturn fellow!) Plus, they have a one-year-old who had her first taste of a lemon dessert, and her reaction was to chuckle not once, but twice, and then do a little dance with her feet--high praise indeed! (Daddy must have passed on that lemon-loving gene.) Lee Ann was also kind enough to bring me a couple of sampler pieces to try, and I actually think it's one of the best things I've ever made! However, I have changed my opinion about adding lemon oil. This cake is PLENTY lemony as it is! Whoo! Pucker Power!

Steve's XTREME Lemon Pound Cake

2 sticks butter, softened
1/3 cup shortening
5 large whole eggs
3 cups sugar
1 tsp baking powder
1/4 tsp salt
3 cups all-purpose white flour (measure on the 3rd and last sift)

zest of 4 lemons, very finely grated (preferably, with a Microplane/wood rasp)
1 cup whole milk (If you want to live dangerously—and I always do—half and half makes it melt in your mouth!)

1/4 cup freshly-squeezed lemon juice
1 tsp vanilla

Preheat oven to 325. Spray or grease bundt pan and lightly flour entire surface. (Or the Pam with flour for baking makes it even easier!) Cream butter and shortening together at slow mixer speed. Add sugar and eggs, one at a time, alternating with the sugar. Begin and end with sugar. Scrape bowl often. When all added, set mixer on high speed for exactly four minutes. Sift flour three times, adding baking powder and salt on last sift, then measure three cups. Whisk the lemon zest into the flour mixture and set aside. Add the lemon juice and vanilla to the milk and stir. Add the milk and the flour mixtures to the bowl, alternating ingredients, beginning and ending with flour. Spoon batter gently into the prepared pan and smooth the top with a spatula.

The cake will take about 1 hour and 15 minutes to cook depending on your altitude, humidity and oven calibration. Test by inserting a knife or tester. It's done when it comes out a little oily but no batter. Cool on rack precisely 10 minutes and turn immediately out on a plate. Let it cool a bit, and then glaze with the recipe to follow.


XTREME Lemon Glaze

3 cups powdered sugar
1/2 cup freshly-squeezed lemon juice
zest of 2 lemons, very finely grated
1 tablespoon butter
splash of vanilla, optional

Whisk the powdered sugar and lemon together until smooth. Add the lemon zest and butter and microwave on high for 30 seconds to one minute (until butter is melted). Add a splash of vanilla, and whisk again until smooth. Coat pound cake with every last bit of the glaze (using a pastry brush is very helpful here), then let cool until set before serving.

Sunday, September 17, 2006

The Second (Tomato Tidal) Wave!

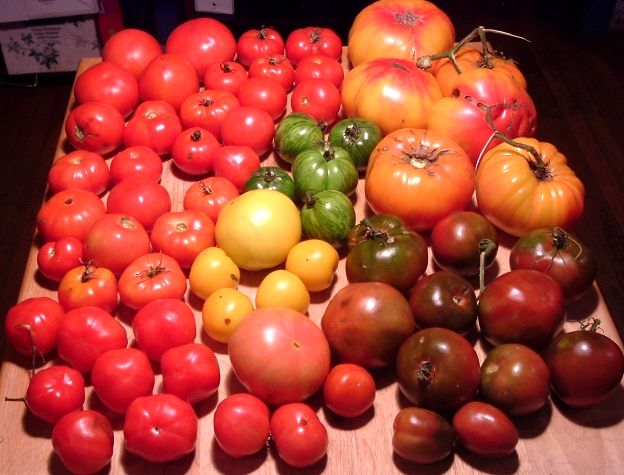
My roomie, Cyd, went outside to pick "a few" tomatoes to slice up for a salad last night, and this is what happened! Ah, the September Tomato! Is there anything sweeter? And isn't this a glorious rainbow of a crop? I like to grow heirloom varieties, especially those in unusual colors like the tangy, striped Green Zebra that you see in the middle of the picture, or some of the beautiful black varieties that you see to the lower right of the image. But my very favorite kinds are the enormous yellow, orange and red bi- or tri-colors (upper right-hand corner) that look like a sunset and have a wonderful balance of both sweet and acid flavors.

As heirloom tomatoes are not always as heavy-bearing as modern hybrids, I tend to overcompensate by overplanting. But I really scaled back this time--from my personal best (worst?) of about 80 plants to just 48 this year! (Tee hee.) I also like to save my own seeds from year to year. And if you think this is difficult to do or takes specialized equipment, think again! And it's a great way to grow different kinds of tomatoes that you happen to taste and enjoy and want to have again in the future. For example, when I was at the Burlington (VT) farmers' market a few weeks ago, I spied a Red Zebra (as you might guess, it looks just like the Green Zebra above, except that it's red with gold stripes--gorgeous!). So we bought the last two they had, and then came right home and saved the seeds so that I can grow it next season.

All you do is gently squeeze out the jellied insides of the tomatoes into a small plastic container (old yogurt cups works great). Rinse them a few times to wash away the majority of all the stuff that is not just the seeds, then fill the cup with water and set aside for a few days. Yes, they will start to smell a little funky and there may be some mold that floats on the top of the water. But fermenting the seeds is a very important step, because it removes the natural growth-retardant substance that coats the outside of the seeds. After about five days, carefully pour off the old water, and rinse the seeds a few more times. I then take a styrofoam plate and write the name of the variety on the rim with a Sharpie marker, and then spread the drained seeds out onto the plate, trying to make an even layer. Then just set the plate aside--somewhere it can't be disturbed--and allow the seeds to dry completely (a few days to maybe even a week). Finally, I put the saved seeds in a little paper coin envelope that I've labelled, store them in a dark, dry, cool place, and they will be ready to plant next March! This technique also works with peppers and squash, but I should mention that you only want to use non-hybrid varieties of vegetables for seed-saving. Some hybrids will produce infertile seeds that will not even germinate, and those that do germinate will not look exactly like the parent plant, so you don't know what you'll get. Then again, sometimes it's fun to be surprised, as I found out with my summer squashes that were natural cross-breeds from last season. They look odd, but they taste great. Finally, once you get into seed-saving and end up with more seeds than you would ever want to plant, you might want to join a seed-saving organization and trade seeds with others. I like to use the Garden Web Seed Exchange Forum where you can post a profile that lists the seeds that you're looking for and those that you have to share. Then you can arrange a swap with another member. It's great! You get all kinds of interesting seeds for the price of a stamp!

Enjoy the end of the harvest, my friends. And save a little something for next season's garden that can never come too soon.

Saturday, September 16, 2006

The House "Macaroni" Salad

I lost my mother less than a year ago, and I miss her so very much. She was a single mom, and I was an only child, so it was always just us against the world. We never had very much, but she gave me everything that I really needed--like love and a belief in myself. Because Mom sometimes worked as many as three jobs at a time, I learned to cook at a very early age. But it was never a chore; I always loved cooking. In fact, as early as fifth grade, I won the grand prize at my local county fair with my corn muffins, and went on to compete at the Oregon State Fair with them (where I placed third). My mother was a competent but uninspired cook. She had a small repertoire of meals that she rotated through, things that we both enjoyed, but she rarely struck out into new recipe territories. One thing that you could count on like death and taxes was that we would grill on the weekend. Mom would come home from work on Fridays and dig several kinds of meat out of the big, stand-up freezer, such as chicken, steak, and pork ribs. She would thaw them in the microwave and then give everything her standard teriyaki-style marinade of soy sauce (which she always pronounced "soya" sauce, as she hailed from Macon, Georgia originally), garlic powder, onion powder, and celery salt, and then refrigerate everything in Ziploc bags overnight. Over the weekend, she would fire up the charcoal grill and cook all the meat, always throwing a package of hot dogs in the mix for good measure, and that would provide most of our dinners into the next week. She would reheat the meat, nuke a baked potato and some frozen veggies, and that would be a typical evening meal. (My mother was OVERJOYED when the microwave came on the market, and we had what must have been the prototype very early on. It was HUGE, had a turn dial on it, and I swear that the lights dimmed when you turned it on! But that thing lasted FOREVER! They don't make 'em like that anymore.)

While mom was manning the grill, it was my job to make what we simply referred to as "macaroni" salad. But it wasn't the elbows with mayo/Miracle Whip, mustard and relish affair that most people are familiar with. This was an unusual combination of ingredients, including tuna, eggs and black olives, that my mom always credited to my dad, who was Hawaiian. Since then, I have been to Hawaii and sampled many teriyaki lunches that always come with white rice and macaroni salad on the side (back in the day, I guess they needed double carbs to pick those pineapples or herd that cattle!). The traditional version seems to involve only pasta and mayonnaise, with perhaps a grating of carrot, but that's it. So I'm not sure what to make of our house recipe, but this is how we always made it, and it is still one of my very favorite dishes. It also intrigues and eventually delights people at picnics and potlucks and such. Give it try while there is still some grilling weather left, why don't you?

Mom's Hawaiian "Macaroni" Salad

4 eggs , hard-cooked, peeled and chopped
1 lb. shell pasta (I prefer medium-sized)
1 cup mayonnaise
1 teaspoon granulated garlic
1 teaspoon celery salt
1/2 teaspoon black pepper
1 can tuna, drained
1 small can chopped black olives, drained
1 large carrot, grated
2-4 scallions, thinly sliced


Place the eggs in a large pot and fill with water. Bring to a boil, and add the pasta shells, cooking until tender. Rinse the pasta until quite cool and drain. Peel and chop the eggs. In a large bowl, stir together the mayonnaise, seasonings, tuna, olives, carrot, and scallions. Add the cooled, drained pasta and the chopped eggs, and stir gently to combine. Refrigerate for several hours or overnight. (You will probably need to add salt the next day according to your taste.) Goes great with teriyaki meats!

Friday, September 15, 2006

The Itinerant Pie-Maker's Road Show

The new oven delivery has been backed up to next week sometime, but it still looks like I'll be baking in my own kitchen again soon. In the meantime, I was invited to a dinner party tonight--more of a potluck, really--where I was assigned to bring a pie. The pie I made was another from my guru, Ken Haedrich, and his amazing apple pie tome, Apple Pie Perfect: 100 Delicious and Decidedly Different Recipes for America's Favorite Pie.

It's called Vanilla Bean Apple Cherry Pie. Wait..say it again...slowly. VANILLA BEAN APPLE CHERRY PIE. Are you weeping with joyful anticipation at just the utterance of those five glorious words? I thought so! Apples, cherries, and vanilla beans are truly a magical combination of flavors, especially topped with a lightly-spiced blond streusel. Divine! But don't take my word for it--better make one for yourself! Here's the recipe:

Vanilla Bean Apple Cherry Pie
(Source: Apple Pie Perfect, Ken Haedrich)

1 9-inch, unbaked pie crust, your favorite recipe

Filling:
1/2 cup sugar
1 vanilla bean (I used 2 teaspoons of vanilla bean paste instead)
8 cups apples, peeled, cored and sliced (I used Paula Reds this time)
1 tablespoon fresh lemon juice
1/3 cup cherry preserves (homemade, if you got 'em!)
2 tablespoons all-purpose flour

Crumb Topping:
1 cup all-purpose flour
2/3 cup sugar
1/4 teaspoon salt
1/8 teaspoon freshly-ground nutmeg (grating whole nutmeg makes all the difference!)
1/4 teaspoon ground cinnamon--optional (I know that the apples, cherries, and vanilla are supposed to be the featured players in this pie, but to me, crumbly topping just doesn't taste right without at least a dash or two of cinnamon!)
1/2 cup (one stick) cold, unsalted butter, cut into 1/4-inch pieces)

Prepare the pastry, chill it for at least an hour, and then roll it out. Place it in a (preferably, glass) pie pan and form an upstanding ridge (I fluted my edges, too, just to be sassy!). Freeze for at least 30 minutes.

Measure the sugar into a large mixing bowl. Halve the vanilla bean lengthwise and scrape the seeds into the sugar, then rub together with your fingertips. (Or you can just mix in vanilla bean paste instead, as I did.) Add the apples, lemon juice, and cherry preserves, and mix well. Set aside for ten minutes. Preheat the oven to 400 degrees. Shake the flour over the apples and mix well. If you're using a whole vanilla bean, take the whole pod and bury it under the center of the pie, just under the top layer of apples. Smooth the top of the filling with your hands, then place the pie on the center rack of your oven. Cover the pie loosely with aluminum foil to keep the vanilla bean from drying out. (Or skip this step if you're using vanilla bean paste.) Bake for 30 minutes.

While the pie is baking, make the topping. Combine the flour, sugar, salt and nutmeg in a food processor and pulse to mix. Scatter the butter pieces over the dry ingredients, and pulse until the mixture resembles fine crumbs. Transfer the topping to a mixing bowl and rub it between your fingers to make larger crumbs.

After 30 minutes, remove the pie from the oven and place it on a large, dark baking sheet covered with foil. Reduce the oven to 375 degrees. Carefully dump the crumbs in the center of the pie, spreading them evenly over the surface with your hands. Press down to compact them. Put the pie on the baking sheet and return it to the oven to bake for another 35 minutes or so, until the juices bubble thickly around the edge. (Cover the pie loosely with foil during the last 15 minutes if necessary to prevent the streusel from getting too brown.)

Transfer the pie to a cooling rack and let cool for at least an hour before serving--preferably, with a scoop of vanilla bean ice cream!

Tuesday, September 12, 2006

Chocolate-Chocolate Cream Pie

So we are still without an oven, but there may be hope on the horizon! My landlady assures me that they will be around over the weekend to install a new gas range, so keep your fingers crossed for me! In the meantime, people still need PIE! We were so desperate, that I had to take extreme and even slightly shameful measures. I actually broke down and bought a frozen pie shell (gasp!) to take to work to bake in the oven in our faculty lounge while I was doing my office hour on Monday. Then I carefully transported the crust back home to fill it with homemade chocolate cream pie filling, but then I topped it with chocolate Reddi-Whip from a can and some mini-chocolate chips. So this is definitely a cheater pie--not that chocolate cream pie is all that highbrow to begin with--but still, it is just heavenly...so homey and comforting! In fact, I thought I had already posted the recipe to a Yahoo group that I belong to, and I had to chuckle when I realized that on almost exactly the same date three years ago, my menu included both the potato corn chowder that I just posted the recipe for a few days ago, as well as this chocolate cream pie! So this must be a part of my seasonal repertoire for September. I also have been known to make this pie for Thanksgiving to have a chocolate option in and amongst all the pumpkin, pecan, squash or sweet potato pies. In fact, I have a little friend K, my office mate's daughter, who turns five today (I was lucky enough to attend her fabulous Charlotte's Web-themed party at this lovely farm last Saturday!), and for several years now, I have been making her one of these special "chocolate pudding pies," as she calls them. I usually take one for Thanksgiving as her mom, my dear friend, Lee Ann, is always kind to invite me and my roomie for the holiday. It is K's favorite pie and my favorite pie from childhood, too. And now I pass the recipe onto you so that you can make one for your special little friends--or big special friends--or you might not even want to share it at all because it's so darn good!

Chocolate-Chocolate Cream Pie
(Source: largely based on the classic Betty Crocker recipe)


9-in. pre-baked pie shell
1 1/4 cups sugar
1/3 cup cornstarch
6 tablespoons cocoa (I use five Dutch-process plus one black to make a darker chocolate filling)
1/2 teaspoon salt
3 cups milk (I don't usually have whole milk, so I use 2 cups half-n-half + 1 cup 2% milk or 2 1/2 cups milk plus 1/2 cup heavy cream)
4 egg yolks, slightly beaten
4 tablespoons butter (cut into pieces)
2 teaspoons vanilla

Mix sugar, corn starch, cocoa and salt in a large saucepan. Gradually stir in the milk. Cook over medium heat, stirring constantly, until mixture thickens and boils. Boil and stir for one minute. Stir some of the hot mixture gradually into the egg yolks, then add this mixture back into the saucepan. Boil and stir for another minute. Remove from heat. Stir in the butter and vanilla. (You may wish to strain the custard at this point to make sure it's ultra-smooth.) Pour into the cooled pie shell. Press a piece of plastic wrap down onto the filling. Refrigerate about two hours or until set. Serve with Chocolate Reddi-Whip and a sprinkle of mini chocolate chips (or regular-sized ones chopped up a bit or shavings or what you will).

Monday, September 11, 2006

Weekend in New England (Fanilows, HOLLA!)

If there is anything more wonderful than autumn in New England, I sure don't know what it might be (well...except for Disneyland any time of year--but it's neck-in-neck)! You know, when you get depressed about your life and how things aren't working out exactly as you planned, it's time to remind yourself that not everyone can just decide on a given Sunday to take a road trip through the glory that is Vermont in the fall, through the backroads and rural byways, where another postcard image greets you around each bend in the road. And that's just what we did this past Sunday. The back story is that I have been on a chicken quest lately. I keep a small backyard flock, and some of my girls are just getting too old to lay faithfully, so it was time to add to the clan. I don't hatch my own eggs as I don't have a rooster, and furthermore, I don't have the heart to "dispatch" all of the extra cockerels that result. And as I only have room for about a dozen birds, I can't order chicks from a hatchery as I don't have separate quarters for a chick nursery, plus, I can't handle 25 of them, which is the minimum order (to preserve their body heat in transit). So I usually buy a few hens each year at local fairs. But there were barely any for sale this year at the Franklin County Fair in Malone, NY, and one family bought out the whole joint (more than 30 birds!) at the Champlain Valley Fair in Essex Junction, VT two weeks ago. In short, I was out of luck chicken-wise, and it seemed that all hope was lost. But then I heard about a poultry swap to be held in Berlin, VT (near Barre and Montpelier). SCORE! I managed to acquire six new pullets, including an Ameraucana that lays blue eggs, an "Easter Egger" mix that lays green, two Salmon Faverolles that lay pink, and a barred Cochin and a Silver-Spangled Hamburg that lay plain old brown eggs, but are just so darn pretty themselves! In anticipation of our autumnal adventure/Chicken Quest, I packed a lunch for us that, I now realize, seems highly inappropriate. I made the most wonderful chicken salad sandwiches inspired by a recipe from one of my very favorite blogs . Blue cheese and walnuts in chicken salad? Inspired, I say! I made mine with a pre-fab deli chicken, so this is very quick and easy, and it makes a lot--enough for lunches every day of a busy work week. Here's the basic recipe, but feel free to add and delete things according to your own tastes and what you have on hand:

Blue Cheese and Walnut Chicken Salad

one whole roasted deli chicken, skinned, boned and cut into bite-sized pieces
1 cup walnut pieces, toasted (do NOT be tempted to skip this step...you'll be sorry)
4 ounces blue cheese, crumbled
1/4-1/2 onion, finely chopped (to taste)
3/4-1 cup mayonnaise
1 teaspoon Dijon mustard (I prefer whole-grained)
2 tablespoons white balsamic vinegar (you can use regular balsamic, but you will turn everything a somewhat unappetizing greyish-purple)
1 tablespoon honey
1 teaspoon celery salt (omit in favor of chopped fresh celery if you have that)
salt and pepper to taste

Other possible additions: one chopped apple OR some halved red grapes, and any fresh herb(s) that floats your boat

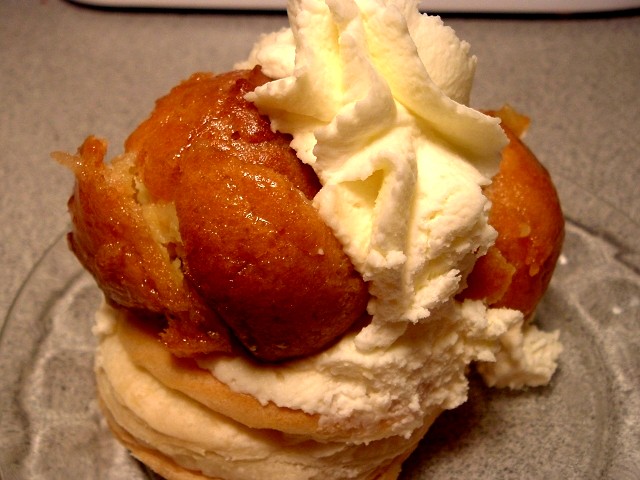
After the poultry swap, we travelled on to tiny Marshfield, VT, to check out a bakery that some friends at work raved about called Rainbow Sweets. When we arrived, we realized that we had already been there some years ago, when we were travelling along route 2 on our way to either New Hampshire or perhaps Maine. And though a bit (ok, more than a bit!) overpriced, the pastries are excellent and the baker-owner is a real character who is worth the price of admission by himself! We were lucky enough to be there on a Sunday when he makes cherry-cheese Danish, so we bought two of those, along with a slice of a gorgeous fresh blueberry torte layered with pastry cream and whipped cream, and also two of the most amazing St. Honore pastries. His version had a puff pastry round on the bottom and a couple of caramel-covered cream puffs on top (like you would use to form a croquembouche--G.J., feeling you here!), with everything glued together with sweetened whipped heavy cream. INCREDIBLE! We had our eye on some of his decadent chocolate desserts, too, but as our bill for five pastries was already almost $21, we stopped there. But if you ever find yourself in Marshfield, VT, it's definitely worth stopping in.

Our final stop before we had to get the chickens back home to New York was lovely Cabot, VT, just another four miles or so beyond Marshfield, and home to the world-famous Cabot Creamery. We got a gander at their massive cheesemaking plant and sampled all of their products before purchasing some of their Private Stock sharp cheddar (very sharp, complex flavor), some Mild Reserve cheddar (great nutty finish!), a flavorful garlic and fine herbes cheddar, a habanero cheddar (yowie!), and their newest creation--Harpoon Cheddar, flavored with Harpoon IPA (India Pale Ale). That ought to keep us in cheese for another week or so...tee hee.

So that was another fabulous fall weekend in New England. And now, the apples are coming in, so stay tuned for the next tale of autumnal splendor coming soon!

Saturday, September 09, 2006

A Great Sadness: The End of the Corn Season

We had some truly transcendent sweet corn earlier this season, but several of our most recent batches have been downright chalky! :-( So Friday, I decided to make a run down to my favorite farmstand in Peru, NY, called Rulf's, and get some of their legendary corn. Well, it was certainly better than the starchy stuff we've been getting lately, but still not fabulous. As it did not stand up to the ultimate test of corny goodness--that is, right from the cob with just butter, salt and pepper--I decided that it was destined for the soup pot instead. My potato corn chowder is a spin-off of Ina Garten's. It's simple and oh-so-delicious and just perfect on a rainy day like today when the nip of fall is definitely in the air. We did major barnyard chores today, cleaning out the chicken coop and both of the rabbit hutches, so it was very nice to come inside and warm up with a comforting bowl of this yummy chowder. You should try it. It makes a huge pot for dinner tonight and tomorrow and/or lunches all week, and the leftovers freeze beautifully for that moment, weeks or months hence, when you need a tasty reminder of summery sweet corn.

Corn and Potato Chowder

2 tablespoons olive oil
4 tablespoons butter
8 ounces bacon, chopped
2 very large onions, chopped
1 teaspoon celery salt (I would have preferred to use a couple of stalks' worth of chopped celery to be sauteed with the onions, if I would have had any on hand)
1 teaspoon ground coriander
1/4-1/2 teaspoon cayenne pepper
2 teapoons salt (I used about a tablespoon of vegetable salt this time)
1 teaspoon black pepper
1 teaspoon tumeric
1/2 cup all-purpose flour
12 cups chicken broth
3 pounds potatoes, peeled or unpeeled, cut into bite-sized chunks
10 large ears of corn, cut from the cob
2 cups cream (half-n-half, whipping, or heavy--your call)

Garnishes: fresh chives and shredded extra-sharp cheddar (our favorite is McCadam Adirondack Cheddar if you can get it where you live)

Melt the butter with the olive oil in an eight-quart stock pot. Add the bacon pieces and saute until browned. Add the chopped onions and cook for about ten minutes until the onion is translucent. Add all of the seasonings and the flour, stirring well to combine. Cook the floured mixture for about three minutes, then slowly add the broth, stirring constantly. Bring to a boil and add the potatoes. Continue to boil the soup gently for 10-15 minutes or until the potatoes are tender.

Blanch the corn for three minutes (or I just nuke mine on the cob, husks and all, for about eight minutes until it's cooked halfway). You can skip this step if you're using frozen corn. Add the corn to the soup and cook for at least another five minutes. Turn the heat down to very low and add the cream, stirring gently to combine. Taste to correct the seasoning, then serve steaming hot in big bowls, garnished with a few snips of fresh chives and some grated sharp cheddar.

Friday, September 08, 2006

The September Tomato: The First Big Haul!

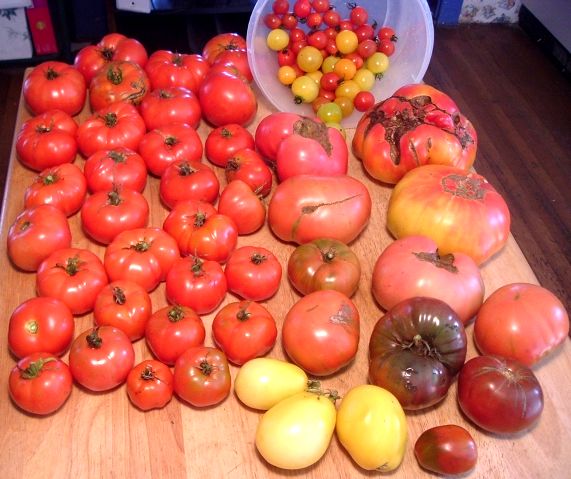
So I went outside this morning to pick "a few" tomatoes for my friend, Vicky, who lives in a cabin way out in the woods and has no garden--at least, not this year. (She's been working on more pressing matters like getting an operational shower and putting in a floor!) Anyhoo, I went out there to grab a handful of tomatoes for my dear friend, and LOOK what happened!
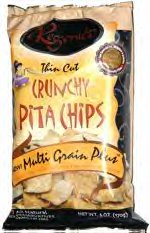
Sheesh! Now the deluge...and the race to get the rest of them to ripen before the first frost, which could be any second now in this part of the world! :-( Good thing you don't need an oven to make bruschetta--LOTS and LOTS of bruschetta! Oh, which reminds me. I found the yummiest pita chips at Sam's Club. They are called Regenie's Multi Grain Plus Thin Cut Crunchy Pita Chips. It says they contain fiber-rich grains like flaxseed and linseed and are low in saturated fat, but I am not fooled for a moment into believing that they are actually good for you. Nevertheless, they are mighty tasty and just perfect for scooping up some zesty bruschetta made with sweet, sun-ripened garden tomatoes. Just thought I'd pass along that serving suggestion for those of you who are overrun with tomatoes at this time of year! Savor it, friends. It is over all too soon. And the winter is long...much too long. :-(

Tuesday, September 05, 2006

Ovenless but not downtrodden...

The gods may have seen fit to take away my baking powers for awhile, but they won't stop me from making both savory and sweet items on the stove top (she says, shaking an angry fist heavenward)! And I have two good ones to share...

I was reading my pal, Randi's blog the other day, and she made a lovely tabouleh salad for a community event. And that reminded me that I also made a tasty sort of Italian-style tabouleh recently from the couscous that I procured from my beloved Trader Joe's. Yes, yes, Italian and tabouleh (which is a traditional middle eastern salad) may be mixing cultures inappropriately, but I assure you that the end result was scrumptious and well worth trying. Plus, it's really quick and easy, and fairly healthful to boot (which is not usually my way)! Here's the recipe:

Italian-Style Tabouleh Salad

1/2 cup boiling water
1 1/4 cup dry couscous
6 tablespoons olive oil
1/3 cup lemon juice

1 tomato, small dice
1/2 onion, finely chopped
1 or 2 roasted red peppers, chopped (you could swap out chopped green peppers here)
½-1 cup black olives, sliced

1/2 cup freshly-shredded parmesan
2 (or more!) tablespoons persillade (or use a couple of tablespoons of chopped fresh parsley and a couple/few cloves of minced garlic instead--I just had persillade on hand so I used it)
salt and pepper to taste

Other possible additions: diced cucumbers and/or garbanzo beans

Stir the boiling water, olive oil and lemon juice into the couscous, cover and let sit five minutes, then fluff with a fork. Add the tomatoes, onions, peppers, olives, persillade (or parsley and garlic), and salt and pepper. Blend ingredients thoroughly, then serve at room temperature, or refrigerate to chill if you prefer (which I do prefer…also to give the flavors a chance to marry).

Just because the oven is on the fritz doesn't mean that we can't have dessert! Here is one of my favorite no-bake treats, riffing on Rice Krispie treats, but this one is made with Golden Grahams cereal and mini-chocolate chips, producing something akin to that campfire favorite, S'mores. This recipe also falls into the "quick and easy" category, and everyone will just gobble them up--which is a good thing, because the cereal loses its crunch after a day or two.

S’more Treats

4 tablespoons butter
4 tablespoons margarine (I am generally anti-margarine, but using all butter makes for great flavor but can make the resulting bars too hard)
1 bag marshmallows (10 oz.?)
1 teaspoon vanilla
8 cups Golden Grahams-type cereal
½- 1 cup mini-chocolate chips

In a very large saucepan or small stockpot over low heat, melt the butter and margarine together. Then add the marshmallows, and cook until completely melted, stirring frequently. Remove from heat and stir in the vanilla, then quickly add the cereal. Stir gently but thoroughly to coat all of the cereal with the marshmallow mixture. Spray an oblong baking dish and your hands with pan spray. Press the cereal into the dish evenly. Sprinkle the top with ¼ - ½ cup of mini-chocolate chips and lightly press the chips down into the bars. Flip the whole thing over and repeat the remaining chips. Let cool to room temperature before slicing and serving.
Monday, September 04, 2006

Last batch of market pies...

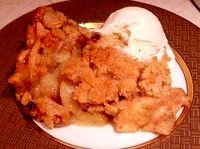
A couple of weeks ago when my oven was still working somewhat, I made some lovely pies for the farmers' market. And I keep meaning to share some of the recipes. Two of them were new, and one was a very old favorite. I was particularly proud of a wonderful blueberry-apple lattice pie that makes a lovely transition from summer's berries to fall's first apples. I combined recipes from Pascale Le Draoulec's American Pie, and the pie master, Ken Haedrich's fabulous apple pie primer, Apple Pie Perfect. For the market, I made nine-inch lattice top pies, but as I had some leftover apples, I made two small pies with crumble topping for Cyd who helped me get things ready for the market without too much complaint. ;-) The picture is of the little pies, but I'll give you the full pie recipe below:

Apple-Blueberry Pie

2 unbaked pie crusts (recipe of your choice)

2 cups of blueberries
6 Ginger Gold apples, peeled, cored and sliced
1 cup sugar
2 tablespoons corn starch
2 tablespoons quick-cooking tapioca
1 tablespoon lemon juice
1/2 teaspoon cinnamon
1 tablespoon butter

Combine filling ingredients, except for the butter, in a large bowl gently with a wooden spoon. Pour the filling into a nine-inch pie pan lined with one unbaked crust. Top the filling with small pieces of the butter. Cut the other crust into strips and form a lattice top. Crimp edges to seal. Glaze with some egg wash and sprinkling of a coarse sugar if desired. Bake at 425 degrees for about 25 minutes. Reduce oven temperature to 375 degrees, and bake for another 40-45 minutes or until the juices bubble thickly. Cool at room temperature for at least one hour before slicing and serving.
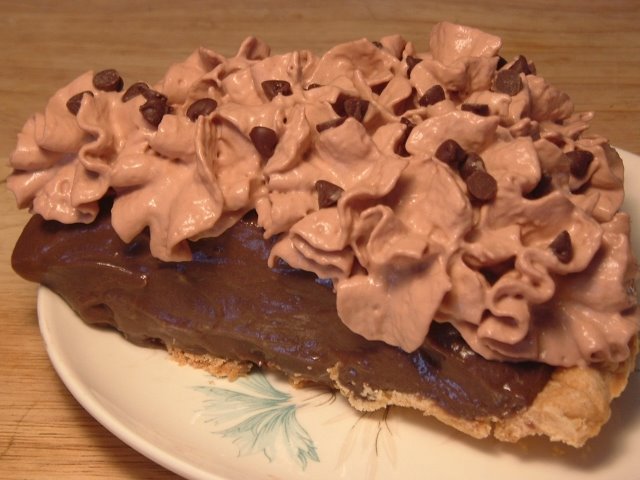
I also made a couple of my very favorite kind of pie for the market, that is to say, PECAN! It's a little early, I suppose, but I never turn down pecan pie no matter what time of year, so I figured there must be some people like me out there. This is my go-to, tried-and-true recipe that came from my dear friend Kurt by way of Betty Crocker, I believe. And the only way that it can be improved upon (according to my blogger pal, Anna) is to toast the pecans beforehand and brown the butter. I agree.

Browned Butter Pecan Pie

one unbaked pie crust

2/3 cup brown sugar (preferably, dark)
1 cup corn syrup (I like half light and half dark, or try the new brown sugar flavor)
1/3 cup butter, melted and browned to at least golden, if not caramel brown in color
1 teaspoon vanilla
3 eggs
2 tablespoons flour

pinch salt
1 1/2 cups pecans, whole, lightly toasted (I've been known to go as high as 2 1/2 cups!)

Mix thoroughly all ingredients except the nuts, then fold in the pecans gently so as not to break them up. Pour filling into a pie pan lined with the unbaked crust. Bake at 350 degrees for about 50 minutes, or until the filling has set (is no longer wobbly). Cool thoroughly before serving, preferably with a scoop of vanilla ice cream!


Unfortunately for me, both pecan pies sold at the market, so I didn't get to take one home for my dessert! ;-) I considered whipping up another one, but I remembered a similar recipe that I had been wanting to try for a long time called Fruits of the Forest Pie, sort of like pecan pie but made with mixed nuts. Once again, this is an amalgamation of Ken Haedrich's recipe from his book, Pie, and the pie that won first place in the nut category in the 2003 National Pie Championships from a woman named Emily Lewis. It turned out very good, but I used a raw nut mix from Trader Joe's, and I toasted the nuts myself. When I make it again, I might buy pre-roasted nuts (no salt or lightly salted), and I definitely want macadamias involved next time, too! Still, this was a yummy pie, the ultimate nut-lover's experience!

Fruits of the Forest Pie

one unbaked pie crust

4 eggs, lightly beaten
2/3 cup packed brown sugar
1 teaspoon vanilla
I cup light corn syrup (I used the brown sugar flavor instead)
1/2 teaspoon salt
5 tablespoons melted butter, melted and browned (between golden and caramel-brown)
2 1/2 cups lightly toasted mixed nuts

Whisk together all ingredients except the nuts until thoroughly combined. Gently fold in the nuts so as not to break them up. Pour into a pie shell lined with the unbaked crust. Bake at 350 degrees for 45-50 degrees or until filling is set (no longer wobbly). Cool completely before slicing and serving.

Friday, September 01, 2006

Fugly Contest Cake

So I read on another blog that Nordicware was having a 60th anniversary recipe contest called "Bundts Across America," and that they were looking for recipes that represented each state of the union. And though I have no doubt that some fancy pastry chef in NYC will win with, say, a black-and-white bundt, or a Brooklyn Blackout bundt, or even a Harlem brown sugar-sweet potato-pecan bundt, I thought I might throw my hat into the ring as well and try to represent another part of the state that is not the Big City. I conceived of a cake that celebrated our dairy industry (butter, milk and cream), the wild blueberries which are abundant, and both maple sugar and maple syrup. Sounds good, right? Little did I know that it would all end in disaster!

There has been a cataclysmic event in my life--that is, the loss of my oven. The gas man came yesterday to fix the problem, but after replacing both the tank and the regulator, it still isn't working. So it's probably the oven valve, which is very bad news. The part alone is $250, plus a couple hours of labor, so you might as well buy a new oven! And I'm not sure how my landlady is going to feel about that. UGH! Seriously, I am a food blogger, for cripes' sake! How long will I survive without an oven?? Plus, I am supposed to sell at the farmers' market again soon! AARRRGGGH!!

Anyway, back to the bundt contest. The deadline was today, so last night, I borrowed my next-door neighbor's oven to bake my cake. And as it turns out, his oven is almost as bad as mine! After baking for 45 minutes, it still looked like raw batter, so I cranked up the heat by 25 degrees. 15 minutes later, still not much was happening, so I crankled it up another 25 degrees. 15 minutes later, it seemed done, but now the top was burned! I didn't have the time--or the ingredients--to start over again, but I figured I could slice off the top, and it would be inverted anyway. Or would it? Though I had liberally greased and floured the pan, it stuck, and some of the cake's surface ripped off as I released it from the pan. Plus, it was still a bit underbaked near the center. Then the glaze I made, though tasty, came out pretty thick when cooled. The good part is, it tastes like maple candy. The bad part is, it kind of hides the detail in the cake, which goes against the whole point of the Nordicware baking contest! Of course, for this particular cake, more coverage may be a good thing, as it's just FUGLY. Below is the evidence thereof, and yes, tragically, the photo had to be submitted along with the recipe. [sigh] Oh well, you win some, you lose some. I'm losing this one. Too bad, as I really wanted the holiday tree pan and the sand castle pan :-(

Still, the cake was tasty, so if anyone out there would like to make it, here's the recipe:


Wild Blueberry-Maple Streusel Pound Cake

Maple Sugar and Walnut Streusel:
½ cup flour
¼ cup brown sugar
¼ cup maple sugar
½ teaspoon cinnamon
¼ teaspoon salt
6 tablespoons butter, cold, cubed
½ chopped walnuts, toasted, chopped

Blueberry Pound Cake:
2 sticks butter, softened
1/3 cup shortening, plus extra for lubing the pan
5 large whole eggs
3 cups sugar
1 teaspoon baking powder
1/4 teaspoon salt
3 cups all-purpose flour (measure on the 3rd and last sift)
1 cup whole milk or half-n-half
1 teaspoon vanilla
3 cups blueberries (preferably, wild)

Maple Glaze:
2 tablespoons butter
¼ cup maple syrup
1 teaspoon vanilla
1 cup powdered sugar

Preheat oven to 325. In a food processor, pulse together the dry ingredients for the streusel (the flour, sugars, cinnamon and salt). Add the pieces of cold butter and pulse 10-12 times or until the pieces are the size of tiny peas or it looks like coarse meal. Add the chopped walnuts and mix in gently with your fingers. Place the streusel in the refrigerator until the cake batter is prepared.

Grease bundt pan liberally with shortening and lightly flour entire surface. (Or the pan spray with flour for baking makes this even easier!) Cream butter and shortening together at slow mixer speed. Add sugar and eggs, one at a time, alternating with the sugar. Begin and end with sugar. Scrape bowl often. When all added, set mixer on high speed for exactly four minutes. Sift flour three times, adding baking powder and salt on last sift, then measure 3 cups. Add vanilla to milk and stir. Add milk and flour to mixer bowl, alternating ingredients, beginning and ending with flour, but reserve the last 1/2 cup of flour to toss with the blueberries before gently folding them into the batter by hand. Carefully spoon about one third of the batter into the prepared bundt pan and even out the top with a spatula, then top with about half of the prepared streusel mixture. Top that layer with another third of the batter and the remaining half of the streusel. Add the last third of the batter on top, and smooth again with a spatula.

Bake at 325 degrees for an hour to an hour and 15 minutes depending on your altitude, humidity and oven calibration. Test by inserting a knife or other cake tester. It's done when it comes out a little oily but no batter. Cool on rack precisely 10 minutes and turn immediately out on a plate.

To make the glaze, melt two tablespoons of butter in a small saucepan with the maple syrup. Remove from heat, add the vanilla, and whisk in a cup of powdered sugar until smooth. Spoon onto the top of the bundt cake and let cool until set. Cake may be served warm or cold.