Ok, forget the pound cakes, forget the pies, and forget the jams and jellies! We have stumbled upon the key to untold wealth and culinary fame! And as such things often happen in food history (the unleavened bread that becomes a pretzel, the unrisen cake that becomes a brownie, the unmelted bits in a chocolate cookie become Toll House cookies, and so on), we stumbled upon it by accident.
I should stop saying "we" because all credit for this discovery must go to the roommate, Cyd. We were watching the man who should have been my husband, Alton Brown's new show last night, "Feasting on Asphalt." (So far, I'm not impressed. And does he--or his audio people--understand that we can't hear him when he's trying to speak over the roar of his hog's motor? Sheesh!) Anyway, AB and crew stopped at a restaurant in or near Savannah, I believe, and had their breakfast at "The Biscuit Place." And man, did those biscuits look GOOD! Cyd and I began to bemoan the lack of good biscuits around here, the gold standard being the Hardees' biscuit. So we did a quick web search and found a copycat recipe, and decided to try it for brunch today. Cyd got up much earlier than I did, as is generally our custom, though last night, it was because I was up all night trying to keep Grady from screaming, crying, and howling to get to Prunelle who is in full-blown heat right now. UGH! (Spay and neuter your pets! You'll sleep better. Or if you have purebred show dogs and can't, may you be blessed with friends that you could ship one of them off to during that special time of the year!)
Anyway, Cyd very kindly decided to make brunch for us, and wanted to have the biscuits ready for when I finally rolled out of bed. But there was one BIG problem. It would seem for all of her Food Network viewing--not to mention decades of slavish devotion to Martha Stewart--Cyd did not understand that there was a difference between all-purpose and self-rising flour! OOPS! Suffice it to say, the resulting bread product was rather...stumpy...not tall and fluffy as one might have hoped. Still, neither of us had the will or the patience to remake them. We decided just to eat the stubby little buns because we were really hungry. And guess what? They were darn good! They were rich and tender, and I told her if you threw some blueberries or cranberries and some nuts in there with a bit more sugar, you'd have some dynamite scones! And that's when Cyd declared her own fabulousness at inventing....wait for it....BISCONIES!! We're trademarking that name, so don't even think of stealing it! We're gonna take the farmers' market, and the WORLD by storm! Tee hee. ;-)
Sunday, July 30, 2006


Saturday, July 29, 2006
Farmers' Market, Take Two
 Many of you have been very kind and supportive about my fledgling efforts to offer my wares at my local farmers' market, so I thought I'd give a report on my second appearance there today. In short, it was FABULOUS, and way beyond my expectations, thanks in large part to my colleagues at work who came down to patronize me (no, no, I mean to buy stuff from me!). And I think it also went better this time--actually doubling profits from my first attempt (whoo-hoo!)--because I am a wee bit farther along the learning curve. Last time, if you'll recall, I learned to make fewer large (bundt-sized) pound cakes, to consider repricing the smaller loaves, and, most of all, to make more pie for the people! So I did all of those things. I only took two large bundts, and I dropped the price of the loaves by a dollar (from $7 to $6 on the advice of my roommate who said that, psychologically, $7 gets rounded up to ten bucks in the customer's mind, while $6 is still close to five bucks...and I believe her wacky logic might have been correct). And I made twice as many pies this time, which nearly killed me, and yet, I do believe that the people would buy as many pies as I could crank out!
This week's selection included the beloved jumbleberry-peach along with cherry-red raspberry, strawberry-rhubarb crumble, and for the non-fruit crowd, a couple of truly sinful Toll House pies. This was also on the recommendation of my roomie, who I almost had to take to task when the fruit pies sold within the first hour or so (the first two were gone before I even had all of my stuff unloaded and my table set up!), but the Toll House pies sat there, looking very neglected and lonely, until the afternoon. I wasn't too distressed about it, because it was my intention to eat one of them myself this evening if it didn't sell (Cyd was banking on this, too, which may have been the ulterior motive behind her suggestion in the first place), and the other one would be filed in the "Freezes Beautifully" section of the cookbook. And let me assure you, I know in my heart that these were some DELICIOUS pies! I followed the classic Toll House pie recipe, but in an homage to my blogger pal and fellow pecan pie enthusiast, Anna, I browned the butter a bit, toasted the walnuts, and though the recipe did not call for vanilla (WHY??), I added a good glug to gild the lily. Of course, as I was making the filling, I snuck a taste of the batter, and BOY HOWDY, was it good! But late in the day, two young men talked themselves into buying one, providing that I could guarantee that it would be luscious and gooey. I assured them that it was. That left one for me and Cyd, and I was secretly thrilled. But then, wouldn't you know, another couple wandered by eventually, and even though I said it wasn't for sale, that I wanted to keep it for myself (you should have seen their faces until I said I was kidding!), they bought the last pie. Still, it is CLEARLY all about summer fruit pies. I even got my first two special orders! And since I just received the most glorious, 640-page tome written by my new pie hero and personal guru, Ken Haedrich, simply and perfectly titled, Pie, there will be much more pie to follow...oh yes, there shall!
But the most surprising and exciting development of the day, and my newest farmers' market lesson learned is that THE PEOPLE WANT JAM! I took 36 jars with me to sell, and I returned with only eight jars, I think. I sold most of the lovely strawberry-rhubarb which you may recall from a post last month, most of my signature blueberry-lime that I made last weekend (though the people were a bit nervous about the lime factor, to be sure), and every single jar of the garlic-onion-pepper jelly that I made last fall from about two dozen kinds of peppers in my garden. The folks were a little frightened initially, but it was all about offering free samples. Nearly everyone who dipped their Cheez-It into the spicy goo coughed up four bucks for a jar immediately after tasting it (reading that back, it sounds wrong, doesn't it?). And to think, I threw a box of the pepper jelly in the car on a whim, thinking that not many people would dig it as much as we do around here. It also helped when I explained that we mainly use it to glaze roasted chicken (but don't put it on until halfway through the baking time, or all that sugar will make a burned bird). So now, I guess I need to bust out the canner again, and make more jam. Perhaps another savory flavor, like the blueberry chutney? Hmm...we must ponder this further. We must also try to figure out why some members of the public (excluding small children, naturally) feel that it is appropriate to grab a handful of your sampling crackers to munch on as they pass by your table. Do they think that I am hawking product for Nabisco? ("That caviar is a garnish!" Name the film...)
Anyway, long story short (too late!), it was a very successful Saturday at the market, and it made me feel like all the work over the past two weeks was worth it! The problem is, I'm due back there next Saturday, so now I have only one week to prepare. UGH! The no sleep rule will, no doubt, be in effect, but not tonight. I'm beat! But before I bid you all adieu, I must show you some of the treasures of the season acquired today from my fellow vendors...
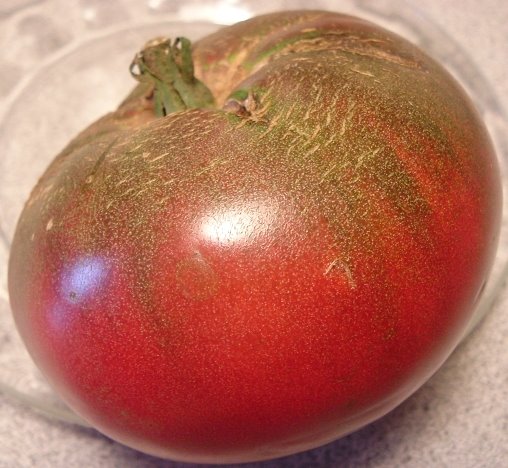 Behold the tomato that I paid $1.75 for, and I was happy to do it. An organic, heirloom Purple Cherokee that is miraculously ready a month before my own heirloom varietals (ok, they have greenhouses!). Unfortunately, I think the farm stand down the road that we bought from last week was peddling grocery store tomatoes. :-( So this taste of things to come must serve to tide us over a bit.
And this was THE find of the day. Absolutely GORGEOUS sweet, fragrant plums that looked like a sunset and smelled like summer itself. And no, I will not be making these into a pie! These are to be snacked on and savored fresh.
I also bartered jam for a loaf of walnut chive bread from the marvelous bread vendor (who, by the way, informed me that the lady that bought my tragic cherry pie last time was looking for me last week--she wanted to buy another one! LOL!), and some lettuces and corn from another nice fellow. Happy, happy girl! I hope everyone out there is enjoying the summer season and regularly visiting your local farmstands and markets.
P.S. I must give a shout-out to my dear friends, Tom and June, on their 29th wedding anniversary today! Anyone who knows them envies their relationship which is still full of great love, deep friendship, good humor, and mutual respect even after all these years. And although June got to the market too late for the coveted cherry-red raspberry pie, I hope they enjoyed the strawberry-rhubarb crumble pie that she did manage to procure for their special evening together. HAPPY ANNIVERSARY, Tom and June! :-)
Tuesday, July 25, 2006
Strange (but tasty!) squashes abound...
I have a favorite gardening blog called DirtSunRain. And to paraphrase the author of that site, my blogger pal, Steven, nature is lots of fun when you just let her do her own thing, and then you may reap sometimes surprising results. Last year, I planted all kinds of summer squash, winter squash, and pumpkins. And this year, I got all kinds of volunteers that came up in the latter part of the spring, so I decided to grow them out and see what they might produce. There is one patch that appears to be various colors and types of zucchini, but now I'm not sure if there wasn't some cross-pollination with some yellow crookneck squash as well. Indeed, I thought the squash that I picked for dinner tonight was a Gold Rush zucchini, but the skin was bumpy like crookneck, and furthermore, it had a band of green around the base. So who knows its parentage, but it turned out to be a tasty little mutt!
 I wanted to prepare it fairly simply as befits a gorgeous garden-fresh veggie, so I seeded it but left the pretty skin on, chopped it into maybe half-inch(?), bite-sized pieces, and sauteed it in a few tablespoons of olive oil and one tablespoon of butter along with some chopped onion and a few cloves of minced garlic. Once the squash was fairly tender, I seasoned it up with my favorite herbed sea salt blend (called Herbamare), freshly-ground black pepper, a mere splash of balsamic vinegar, and a couple of tablespoons of minced fresh basil (the beautiful purple-colored opal basil as well as some lemon basil). Then I garnished it with a generous handful of shredded parmesan cheese and let it melt on the top a bit before serving. WOW! So easy, and so delicious! This is the glory of summer! And did I mention that we purchased the first local tomatoes from the woman down the road who had her plants in the ground (protected by Wall-o-Waters) by March? But I will save the tomato post(s!) for another day. Tonight, I leave you with a picture of my squash dish. (Don't hurt your head when you try to dive through your monitor to get at it!)
UPDATE: I decided to prepare the other half of the mongrel squash in the same manner as above and take it for a potluck at work today, as it seemed like the sort of thing that would be good hot or even once it cooled to room temperature. It was a gamble as people tend to fear what they do not recognize instantly on a buffet, and after all, it is squash, and some people have vegetable issues. But when I went to pick up my casserole dish after my class let out, I was thrilled to see that they darn near ate every last bite of it! And the lovely gal who organized the affair, Jenny, assured me that it was delicious, and that she doesn't even like squash! ;-) Tee hee.
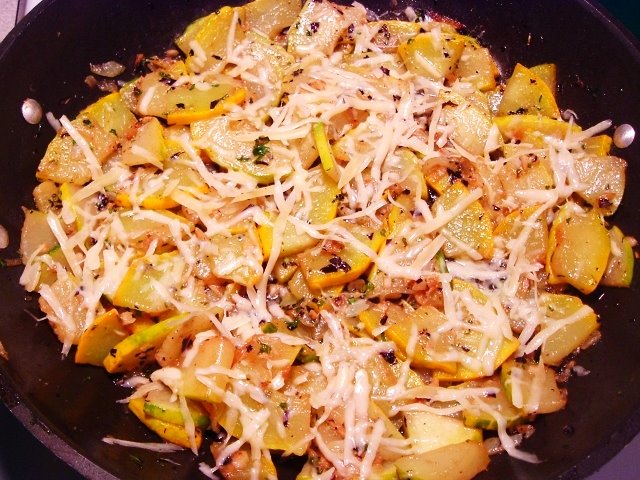 I wanted to prepare it fairly simply as befits a gorgeous garden-fresh veggie, so I seeded it but left the pretty skin on, chopped it into maybe half-inch(?), bite-sized pieces, and sauteed it in a few tablespoons of olive oil and one tablespoon of butter along with some chopped onion and a few cloves of minced garlic. Once the squash was fairly tender, I seasoned it up with my favorite herbed sea salt blend (called Herbamare), freshly-ground black pepper, a mere splash of balsamic vinegar, and a couple of tablespoons of minced fresh basil (the beautiful purple-colored opal basil as well as some lemon basil). Then I garnished it with a generous handful of shredded parmesan cheese and let it melt on the top a bit before serving. WOW! So easy, and so delicious! This is the glory of summer! And did I mention that we purchased the first local tomatoes from the woman down the road who had her plants in the ground (protected by Wall-o-Waters) by March? But I will save the tomato post(s!) for another day. Tonight, I leave you with a picture of my squash dish. (Don't hurt your head when you try to dive through your monitor to get at it!)
UPDATE: I decided to prepare the other half of the mongrel squash in the same manner as above and take it for a potluck at work today, as it seemed like the sort of thing that would be good hot or even once it cooled to room temperature. It was a gamble as people tend to fear what they do not recognize instantly on a buffet, and after all, it is squash, and some people have vegetable issues. But when I went to pick up my casserole dish after my class let out, I was thrilled to see that they darn near ate every last bite of it! And the lovely gal who organized the affair, Jenny, assured me that it was delicious, and that she doesn't even like squash! ;-) Tee hee.
Monday, July 24, 2006
Straight up food porn.
 Have you ever been so enchanted with the meal that you've created that you must photograph it? Ok, maybe that's only an obsessive food blogger's issue. But will you please look at the amazing dinner that we had tonight? Behold the half-pound Delmonico steak, marinated with olive oil, balsamic vinegar, Worcestershire sauce, Dijon mustard, Montreal steak seasoning, and TONS of garlic, then cooked on the grill and topped with sliced and sauteed baby portabellas.
Then when I went up to the store this afternoon to get my daily fix of the teeny-tiny but delectable sweet corn from the back of the farmer/neighbor's pick-up, I spied some lovely, freshly-picked string beans, so I had to have those, too! I prepared them first by browning some thick bits of pancetta in a little olive oil, then adding half of a chopped sweet onion, and--of course--several cloves of minced garlic. Then I added in the beans and sauteed them for awhile until they picked up some color and flavor. Finally, I added some chicken stock, covered the pan, and let them steam until tender.
We considered having a salad. We flirted with the idea of a baked potato (especially as they had some nice red ones for sale at the corn truck). We perhaps should have also purchased some of the first wild blueberries of the season and fashioned an amazing dessert of some sort. But all of this felt like it would be gilding the lily. Indeed, I may never cook or eat again, as I can't possibly top this magnificent summer supper! Forget the farmer's market...I clearly need to open up Lindsey's Luscious Steakhouse!
Sunday, July 23, 2006
Hummus!
Sorry, gang. I have not been preparing exciting foods to blog about lately, as I am gearing up for the farmer's market next weekend. (The last of the double-dark chocolate buttermilk pound cakes have just come out of the oven, thank you.) But I made a snack to go with lunch today, and it falls into the same category as jam: why would anybody buy it? The snack? Hummus and pita chips. So easy, so good!
In my usual fashion, I offer general guidelines rather than a recipe. For the hummus, I drain a 15 ounce (?) can of garbanzo/chickpea/ceci beans and dump them into the food processor. I throw in maybe four big cloves of garlic ("never too much garlic!"), the juice of at least one lemon, probably two (I like it very lemony), a couple of good pinches of salt, a tablespoon of tahini (sesame paste), and then I swirl some olive oil around the bowl maybe four times (approximately four tablespoons) and process until smooth and creamy. Taste it to see if it needs more salt, and you may want to add more lemon juice or olive oil (or both!) to get it to the desired consistency. I like to sprinkle some parsley on the top for color and for freshness, and that's it!
As for the pita chips, I confess, I used to buy them, too. But then I took a Lebanese cooking class, and the teacher showed us a very easy method. You use a pizza wheel to cut pitas into triangles. Then you separate each piece into two (peel apart the two layers of the pita) and arrange them in a single layer on a baking sheet. Drizzle the pita chips with olive oil and sprinkle them with salt. Bake them at 400 degrees for 4-5 minutes, or until golden brown. (Watch them! They will go from too pale to burnt if you look away for a second!) You won't believe how good these pita chips are. You better make a bunch, because they will disappear! Serve them with the hummus. DE-LISH!
I also like hummus on sandwiches and to dip raw veggies into, but my very favorite application is to bread and fry some fish fillets, and serve them on a bed of lentils and rice (try this incredible recipe for muhjadarrah), and top the fish with with some thinned-out hummus as a sauce. Soooooo yummy! When June and I co-hosted a Lebanese dinner at her house (we took the cooking class together and decided to create a practical final exam for ourselves, inviting our friends to come and evaluate our learning), we made this dish for the entree. Even people who are a bit "iffy" about fish enjoyed it!
Ok, I need to wrap this up and head back to the kitchen to make pie crusts. I am going to be ready for that farmer's market next week or kill myself trying! Seacrest out.
In my usual fashion, I offer general guidelines rather than a recipe. For the hummus, I drain a 15 ounce (?) can of garbanzo/chickpea/ceci beans and dump them into the food processor. I throw in maybe four big cloves of garlic ("never too much garlic!"), the juice of at least one lemon, probably two (I like it very lemony), a couple of good pinches of salt, a tablespoon of tahini (sesame paste), and then I swirl some olive oil around the bowl maybe four times (approximately four tablespoons) and process until smooth and creamy. Taste it to see if it needs more salt, and you may want to add more lemon juice or olive oil (or both!) to get it to the desired consistency. I like to sprinkle some parsley on the top for color and for freshness, and that's it!
As for the pita chips, I confess, I used to buy them, too. But then I took a Lebanese cooking class, and the teacher showed us a very easy method. You use a pizza wheel to cut pitas into triangles. Then you separate each piece into two (peel apart the two layers of the pita) and arrange them in a single layer on a baking sheet. Drizzle the pita chips with olive oil and sprinkle them with salt. Bake them at 400 degrees for 4-5 minutes, or until golden brown. (Watch them! They will go from too pale to burnt if you look away for a second!) You won't believe how good these pita chips are. You better make a bunch, because they will disappear! Serve them with the hummus. DE-LISH!
I also like hummus on sandwiches and to dip raw veggies into, but my very favorite application is to bread and fry some fish fillets, and serve them on a bed of lentils and rice (try this incredible recipe for muhjadarrah), and top the fish with with some thinned-out hummus as a sauce. Soooooo yummy! When June and I co-hosted a Lebanese dinner at her house (we took the cooking class together and decided to create a practical final exam for ourselves, inviting our friends to come and evaluate our learning), we made this dish for the entree. Even people who are a bit "iffy" about fish enjoyed it!
Ok, I need to wrap this up and head back to the kitchen to make pie crusts. I am going to be ready for that farmer's market next week or kill myself trying! Seacrest out.
Friday, July 21, 2006
More jam today!
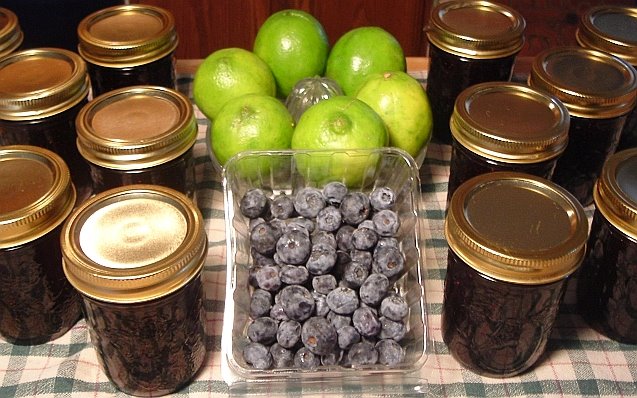 Oh, friends. All the heat and humidity and the bugs and the planting and the weeding and the watering and the sore body and the sunburns...it was all worth it! Because now, we begin the reaping! I have tender, succulent baby summer squashes, both gold and a Mediterranean grey (koosa), the first few ripe tomatoes (ok, only grape tomatoes thus far), and BLESS THEM, the good folks that sell sweet corn out of the back of their pick-up up the way are vending at last! We had two ears apiece at lunch; they were Lilliputian but ever-so-tasty!
 And of course, the attempts to preserve summer's bounty continue. Today's jam is one of the first flavors that I ever made, way back in the day, and it's still my very favorite: BLUEBERRY LIME! It's made with added pectin, so it might be cheating a bit, but it's so easy and so good! Truly, I have no idea why people buy their jam at the store, especially with all those preservatives added and high fructose corn syrup as the main ingredient. Ugh. When in less than an hour, you have jam for the rest of the year, through the dark, winter months when we all yearn for a taste of summer sun and sweetness. However, I will not be hoarding this batch for myself. I will be selling these jars at the farmer's market next Saturday (let's hope!), along with some of the strawberry-rhubarb, and perhaps my signature hot pepper jelly from the end of last year's harvest as well. Wish me luck!
Blueberry-Lime Jam
(Source: Ball's Blue Book)
4 1/2 cups blueberries (I prefer wild blueberries, if you can find them)
1 package (1 3/4 oz.) dry pectin
5 cups sugar
1 tablespoon lime zest, finely grated
1/3 cup lime juice (fresh, of course!)
Crush blueberries one layer at a time. Combine crushed blueberries and pectin in a large saucepot. Bring to a boil, stirring frequently. Add sugar, stirring until fully dissolved. Stir in grated lime peel and lime juice. Return to a rolling boil. Boil hard one minute, stirring constantly. Remove from heat. Skim foam if necessary.
Ladle hot jam into hot jars, leaving 1/4-inch headspace. Adjust two-piece caps. Process 15 minutes in a boiling water canner. Yield: about 6 half-pints
Wednesday, July 19, 2006
From marriage pie to adultery pie! (So soon?)
Why adultery pie? Because this one's cheatin'! ;-)
So Monday night when it was 85 billion degrees out and the air was disinclined to move at all, I wanted some dessert, but I was not about to fire up the oven to bake anything, which would have been redundant. So here's what I did to make a delicious Mud Pie/Hula Pie type of deal (and coming from the gal who vowed to make more "real" pie, I am bound to receive some flack for this...bring it on!):
Truthfully, this is not a recipe so much as it is an assembly process. You make (or buy!) an Oreo crust. You fill it with 2/3 to maybe 3/4 of a carton of your favorite brand of coffee ice cream (we are passionate Breyer's people here) that has been softened, which takes about 30 seconds in the unmerciful summer swelter, though you could even do this on defrost in the microwave. Spoon it into the crust and then pack it down in there and smooth it well with a spatula. Freeze this for an hour or two until it firms up again, then top the pie with your favorite chocolate sauce (I shared a great recipe back for the same back in May if you'll recall) and a lot of very roughly chopped roasted macadamia nuts. It can go back in the freezer to harden more or at this point or you can consume it as is with a dollop or squirt of whipped cream if you have it. Ta-dah! An absolutely scrumptious dessert made with just four ingredients and no cooking involved! Ooh, I just love it! (Faithful readers have surely deduced my kryptonite by now...it's ICE CREAM!)
So Monday night when it was 85 billion degrees out and the air was disinclined to move at all, I wanted some dessert, but I was not about to fire up the oven to bake anything, which would have been redundant. So here's what I did to make a delicious Mud Pie/Hula Pie type of deal (and coming from the gal who vowed to make more "real" pie, I am bound to receive some flack for this...bring it on!):
Truthfully, this is not a recipe so much as it is an assembly process. You make (or buy!) an Oreo crust. You fill it with 2/3 to maybe 3/4 of a carton of your favorite brand of coffee ice cream (we are passionate Breyer's people here) that has been softened, which takes about 30 seconds in the unmerciful summer swelter, though you could even do this on defrost in the microwave. Spoon it into the crust and then pack it down in there and smooth it well with a spatula. Freeze this for an hour or two until it firms up again, then top the pie with your favorite chocolate sauce (I shared a great recipe back for the same back in May if you'll recall) and a lot of very roughly chopped roasted macadamia nuts. It can go back in the freezer to harden more or at this point or you can consume it as is with a dollop or squirt of whipped cream if you have it. Ta-dah! An absolutely scrumptious dessert made with just four ingredients and no cooking involved! Ooh, I just love it! (Faithful readers have surely deduced my kryptonite by now...it's ICE CREAM!)
Sunday, July 16, 2006
Farmer's Market Debut!
 It has been my dream for years to sell homemade goods at our local farmer's market, but being that this is New York State, the official procedures are very involved and time-consuming. In fact, I didn't even have time to get ready last year before the season was almost over! This year, I vowed that it would be different. So I had my water tested in March, and started contacting the state office for agricultural markets and food safety in April to have my kitchen inspected (the idea was to be ready for the opening of the market in May). SIX WEEKS later, I finally got the inspector to confirm that I did not have a dirt floor and that my fridge was at the right temperature. But once again, the market had begun, and all of the highly-coveted outdoor spaces had already been claimed. So the market manager told me that she would contact me whenever a seasonal vendor couldn't make it on a given Saturday. Well, yesterday was the big day at long last! I am pleased to report that, largely due to the generous support of my friends from school (I sent out an "everybody" e-mail at work last Thursday to let people know that I was going to be selling at the market), I did very well, and I had a great time, too. I even sold cakes to our City Court Judge and to our former mayor and his partner! And though I only had a few days' notice to bake, I sold almost everything that I took with me, but I also learned what I might do differently next time.
My original vision was to make my fortune based on pound cake. I LOVE pound cake, and I have just a scrumptious heirloom recipe that I use. And I am aware of many other profitable businesses that I wanted to model myself after, such as Nonnie's Traditional Southern (as seen on Oprah) and Maridee's Country Cakes (as profiled on the Food Network). The problem is combatting the "Oh, it's just pound cake?" factor. People don't seem to understand that there's that crap you can buy pre-made in the grocery store, and then there's REAL, homemade, decadent pound cake--even though I did give free samples. And they balked a bit at the prices that I set, too. I charged $7 for a large loaf and $12 for the larger bundt. Mind you, Nonnie's charges SIXTY BUCKS for a bundt-sized pound cake (but in a gorgeous, decorative hatbox), and Maridee charges THIRTY for the cake alone. So I thought $12 was very reasonable. After all, real ingredients cost real money, as does hand labor--something the people of semi-rural Plattsburgh just don't seem to appreciate. Also, I learned that people mostly wanted to buy smaller cakes and not the large bundts, unless they have an event coming up. (The only products that I didn't sell were the few big bundt cakes that I took, despite the fact that I assured people that you can easily freeze half for future cravings.) So lesson #1 was to make even more of the half-sized loaves and consider re-pricing them.
The other thing I learned was to MAKE MORE PIE! Like I said, I only had a few days' notice to bake, so I only made a few pies to take (ooh, a rhyme!). I made just two flavors, the beloved Jumbleberry-Peach and Black Cherry Almond Crumble. I usually make cherry pie with canned pie cherries because you can't find them fresh or frozen here. But this time, I thought I'd try using frozen sweet black cherries. Of course, my friend, June, cherry pie connoisseur ne plus ultra, said that she could not in good conscience sanction a sweet cherry pie, as she fervently believes that one may only make cherry pie with sour pie cherries (or it's not tangy enough). Truthfully, I agree with her, but I thought I'd give it a whirl. As Ina would say, how bad could it be? I used some lemon juice in the filling to give it more tang, cut back on the sugar, and added some spices, too. And let me just say that the pies went in the oven looking GORGEOUS! However, they came out like...well...I wanted to cry when I saw them, and NOT out of joy. The sweet cherries had exuded so much juice that the crumbly topping was submerged, and therefore, did not get crispy. Moreover, I wasn't entirely certain that the filling had set or that the bottom crust got done (because you can't see the bottom of those disposable metal pans). And the worst part was that one of the pies got scorched on one side in my wonky oven! To reiterate, I was in tears. I told my roommate that I had made "Blackened Abortion Pie," which is what it looked like, and I declared that I couldn't possibly sell them at the market. What a tragic waste of time and ingredients! But faithful Cyd, another celebrated pie connoisseur, assured me that she would still buy something that looked like that, and to take them to sell anyway. She also advised wrapping the pies in multiple layers of plastic wrap to covereth a multitude of sins. ;-) Tee hee.
So that's what I brazenly did. Of course, I sold the Jumbleberry-Peach pies within the first hour which did not surprise me. They were BEAUTIFUL! I did this rustic-looking lattice top with wide strips...just lovely. Of course, there was some squawking over the pie pricing, too. I charged $12 for a 9-inch pie, but one woman commented on how she buys her pies for $10 at the farmstand that I posted about the other day. And I told her, sure, but they use pre-made frozen crusts and canned filling! (And I'm not sure on this point, but I think their pies are 8-inch, too.) Furthermore, the ingredients alone come to between six and eight dollars for each pie, again, as real ingredients such as expensive fruits cost more. Not to mention the labor! Whoever coined the expression "easy as pie" never made one from scratch! If I charged ten dollars a pie, that may be a profit of only two dollars each. And I don't think I'd put in the effort (during a heat wave, I might add!) to make a homemade pie for two bucks, not to mention spending the money on electricity and propane to bake it, the gas to drive it a half hour to the market, and the stall rental fee for the privilege of selling it to customers! Basically, I'd be making pies for free! But as is my way, I digress...
Meanwhile, back at the market, I was down to just the cherry pies left. At one point, this lady came along to consider buying one of the pies. She had the demeanor of a lawyer, kind of brusk and business-like. She bought a cherry pie (I wisely swapped the scorched one for a nicer one), and then I noticed that she had taken one of my cards. I immediately thought to myself, she is just the sort to call me and say, this is the worst, god-awful pie I have ever had, and I demand my money back, or I'll take you to small claims court! On my way home from the market, I was seriously planning what I was going to do when she called, because I just knew she would. My plan was to give her a refund AND bake her a better pie to apologize. Well (hang in there, this is the big finale to the world's longest story), sure enough, she called last night and left a message while my roommate was online. So Cyd brings me the phone to hear the message, holding it up to my ear as I am washing dishes in the kitchen, and as soon as I hear, "Gina, this is So-and-So, and I bought one of your pies today," I thought, Oh Lord, here we go! I am really going to cry now. But she continues, saying, "...and I just have to tell you that it was THE BEST PIE I HAVE EVER HAD IN MY LIFE, and I sure hope you'll be back at the farmer's market next time so I can buy another one!" LMAO!!! Is that PRICELESS or what?? It just goes to show that the worst homemade pie still is still miles and days better than the best pre-fab pie.
The epilogue is (there's more??), June came down to check on me at the market, and she was eyeing the last cherry pie, and I told her, no, don't buy it, becuse it didn't turn out like I would have hoped, and besides, you prefer sour cherry pie anyway. So she ended up buying a double-dark chocolate buttermilk pound cake (the only large bundt I sold all day). And though she reported that she and her husband loved the cake, now she is going to be mad at me for talking her out of that cherry pie! Anyway, that's the end of my tale, but I couldn't be happier about that phone call than if I had won an Oscar! And the big market lesson #2? BAKE MORE PIE! Maybe it's a sign from the universe and/or a telepathic message from Pascale LeDraoulec? We'll see in another couple of weeks when I return to the market if I'm any further along the learning curve...
Wednesday, July 12, 2006
Smooth(ie) Sailing
It started with my Orange Julius obsession. And now I have a new one. Here is my story...
When I was away last weekend, I attended the annual Sailfest celebration in New London, CT, only about an hour from where I was staying for the dog show. In fact, if you caught the news last Saturday night, you would have heard about some old man who plowed into a couple of dozen festival attendees with his car at the very same Sailfest. This was just a half hour before I got there, and had I not gotten lost (I wrote down the wrong exit number and overshot my destination), I would no doubt have been one of those unfortunates who was run down. Happily, as it turned out, I was not run over, plus I ended up getting to see the most precious little seaport of Mystic, CT, and I had the most delicious pizza for lunch at Mystic Pizza, made famous by the Julia Roberts/Lili Taylor/Annabeth Gish 80's film of the same name.
 I was not expecting the pizza to live up to its hype, but it was truly in my top five pizzas of all time. The dough was tender inside and crispy outside like great bread. I had the house special with sausage, pepperoni, meatball, mushrooms, and onions but without the green peppers that I don't care for. It doesn't sound all that "special," but it was all about the fine quality of the ingredients. Being in a town of Portguese influences, the meats seemed home-cured in that Old World style, and they were not chintzy with the delicious toppings, either! Great stuff. Check it out if you're ever there.
But pizza is not even what I wanted to post about, so let's move on, shall we? After my wonderful lunch, I backtracked to New London to check out Sailfest. There were tons of incredible food vendors there. Of course, I was already full from lunch, but the many ethnic chicken kebob-type things were making me hungry all over again! I did not indulge, but I couldn't pass up a free sample of the new smoothies at the Dunkin' Donuts truck. I tried both the wild berry and the mango-passion fruit varieties. And let me tell you, they were SO GOOD! In fact, when I was done at the festival, I stopped at the first Dunkin' Donuts that I passed and bought myself a large wild berry smoothie. I almost fainted when the guy told me what I owed--it was almost five bucks! Good heavens! I am an impoverished teacher, so I cannot afford to develop a commercial smoothie habit. Thus, I have devised my own homemade version that I will now share with you good people. And trust me, this is good stuff...not like the glop that my ridiculous roommate makes and calls a "smoothie." She just mixes nearly an entire tub of yogurt with a mish-mash of (often) uncomplementary fruits in a blender and calls it a smoothie. Where I come from, we call that yogurt with fruit in it. Dumb, very dumb. ;-) Try this instead...
Gina's Citrus Berry Smoothie
1 cup milk (surprisingly, I prefer lowfat milk)
1/2 cup (good-quality) vanilla yogurt
1/2 cup frozen orange juice concentrate
1 cup berries of your choice (I like a blend of raspberry, blackberry and blueberry)
1/4 cup sugar (or Splenda, if you're trying to be good)
about 8 standard ice cubes
Blend until smooth...hence, the name.
When I was away last weekend, I attended the annual Sailfest celebration in New London, CT, only about an hour from where I was staying for the dog show. In fact, if you caught the news last Saturday night, you would have heard about some old man who plowed into a couple of dozen festival attendees with his car at the very same Sailfest. This was just a half hour before I got there, and had I not gotten lost (I wrote down the wrong exit number and overshot my destination), I would no doubt have been one of those unfortunates who was run down. Happily, as it turned out, I was not run over, plus I ended up getting to see the most precious little seaport of Mystic, CT, and I had the most delicious pizza for lunch at Mystic Pizza, made famous by the Julia Roberts/Lili Taylor/Annabeth Gish 80's film of the same name.
 I was not expecting the pizza to live up to its hype, but it was truly in my top five pizzas of all time. The dough was tender inside and crispy outside like great bread. I had the house special with sausage, pepperoni, meatball, mushrooms, and onions but without the green peppers that I don't care for. It doesn't sound all that "special," but it was all about the fine quality of the ingredients. Being in a town of Portguese influences, the meats seemed home-cured in that Old World style, and they were not chintzy with the delicious toppings, either! Great stuff. Check it out if you're ever there.
But pizza is not even what I wanted to post about, so let's move on, shall we? After my wonderful lunch, I backtracked to New London to check out Sailfest. There were tons of incredible food vendors there. Of course, I was already full from lunch, but the many ethnic chicken kebob-type things were making me hungry all over again! I did not indulge, but I couldn't pass up a free sample of the new smoothies at the Dunkin' Donuts truck. I tried both the wild berry and the mango-passion fruit varieties. And let me tell you, they were SO GOOD! In fact, when I was done at the festival, I stopped at the first Dunkin' Donuts that I passed and bought myself a large wild berry smoothie. I almost fainted when the guy told me what I owed--it was almost five bucks! Good heavens! I am an impoverished teacher, so I cannot afford to develop a commercial smoothie habit. Thus, I have devised my own homemade version that I will now share with you good people. And trust me, this is good stuff...not like the glop that my ridiculous roommate makes and calls a "smoothie." She just mixes nearly an entire tub of yogurt with a mish-mash of (often) uncomplementary fruits in a blender and calls it a smoothie. Where I come from, we call that yogurt with fruit in it. Dumb, very dumb. ;-) Try this instead...
Gina's Citrus Berry Smoothie
1 cup milk (surprisingly, I prefer lowfat milk)
1/2 cup (good-quality) vanilla yogurt
1/2 cup frozen orange juice concentrate
1 cup berries of your choice (I like a blend of raspberry, blackberry and blueberry)
1/4 cup sugar (or Splenda, if you're trying to be good)
about 8 standard ice cubes
Blend until smooth...hence, the name.
Tuesday, July 11, 2006
Dearly beloved, we are gathered here for...marriage pie.
Friends, I am in love. No, no, not in that way. But with a lovely memoir that I just discovered (and only four years after it was published--whoops!) called American Pie: Slices of Life (and Pie) from America's Back Roads by Pascale Le Draoulec. In the book, Ms. Le Draoulec takes a job as the food critic at the New York Daily News, and decides to road trip from San Francisco rather than flying to make the move. And the theme and guiding force in her travels is PIE--to go wherever friends or strangers recommended a good piece of pie could be found. In seeking out places where real people still made real pie, Le Draoulec hoped to find the roots and the essence of America, particularly as a first-generation American born to French parents. Before this memorable road trip, Le Draoulec only knew of tarts, not pie. But in her travels in not one, but two, Volvos named Betty with her companion, Kris (among others) riding shotgun, the author found way too many specimens that she termed, "dumpster pie"--pies that masqueraded as the real deal, but after the first bite, quickly found their permanent homes in the nearest dumpster. But they also discovered such wonders as an "accidental" apple-blueberry pie in Natchez, Mississippi, hubbard squash pie in Vermont, belgian pies from Door County, Wisconsin, and many other delectable specimens (and don't think I won't be trying my hand at each of these recipes in due course!). But the pie that was the pinnacle of the road trip was found in Montana at the Spruce Park Diner. It was a huckleberry peach pie, a so-called "marriage pie" where two fruits complement each other yet retain their individual characteristics. I was intrigued, especially as one of the best pies in my repertoire is a Dutch peach-blueberry pie, so I felt sure that this one would be right up my alley! (Remind me to post that recipe at some point, will ya?)
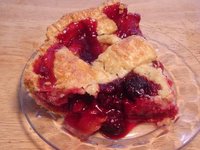 Huckleberries are wild, bluish-black berries whose flavor is often described as being like blueberry but more tart and less tame. Of course, as I am east of the Rockies, I have no access to huckleberries. But I thought perhaps a triple berry mix of raspberries, blackberries, and blueberries in combination with peaches might yield their own magical result. The only error in judgment I made was to try a crust recipe from Chez Panisse that, although extremely flaky and tasty, was just too short of a dough to be able to work with properly. You could either chill it until it was brittle, or leave it out for a few minutes and quickly have a dough too soft to even lift off the work surface. GRR! Furthermore, after the crust was baked, it lacked structural soundness. You can see in the picture that part of the top had already shattered, the lattice had snapped in half, and just seconds after I took the picture, the rear portion of the crust fell backwards, breaking off from the filling. UGH! It still tasted awesome, but next time, I will try a different pastry recipe. I still don't have a definitive pie crust that I always use, but I am honing in on it slowly but surely. My ideal crust has both butter for flavor and shortening for exceptional flakiness. I know, I know, I can hear the purists gasp and clutch their hearts, but the best crust I ever had was from a couple of gals calling themselves Sister Pie in Sebastopol, CA, one of the greenest, crunchiest, most organic spots in the country, and their crust was made with shortening (organic shortening, but still, I think I've made my point!). Truth to tell, I am also not above using a butter-lard combination, again for both flavor and flakiness. Here next to Quebec, lard crusts are very popular. You can even buy frozen ones in their grocery stores. But I digress...
My point is--and I do have one--is that this book was so inspirational to me and reinforced so many of my own food philosophies which are sorely tested in this fast-paced world of culinary shortcuts. Why, I was just at my favorite local farmstand this past weekend, and I saw that they are now selling their own preserves. But I was HORRIFIED when I looked at the label and saw that the main ingredient in their "farmstand" jams and jellies was high-fructose corn syrup! YEGADS! And to make bad matters worse, a sign listing the different varieties of their "homemade" pies indicated that only the apple pies contained fresh fruit--all others used canned filling. CANNED FILLING! At a FARMSTAND! What is the name of all that is holy is the world coming to? It's just so discouraging. But then I read a book like American Pie, and my faith is restored. There are still people out there who care enough to take the time to make real pie the right way. And I aim to be one of them! So it's July, and though we're already at the halfway point of 2006, I am adding another resolution. In addition to starting a food blog, always having homemade vinaigrette in the fridge, and baking more bread, I also vow to bake more pie, REAL pie. If you wish to join me, you might want to start with the recipe below or a variation thereof. It is a definitive example of "marriage pie."
The Spruce Park Diner's Rustic Huckleberry Peach Pie by Laura Hansen
(Source: Pascale Le Draoulec's American Pie)
Crust:
1 9-inch double-crust (Laura uses the recipe on the back of the Crisco can)
Filling:
3 cups of huckleberries (fresh or frozen)--I substituted a triple berry blend here
2 cups of peaches, sliced and peeled (fresh or frozen)
1 cup of sugar
3 tablespoons of tapioca (I used four tablespoons of tapioca flour, and it was perfect--the filling held together but was still supple and juicy)
*I also added a teaspoon of vanilla and just a pinch of pumpkin pie spice to the filling.
Pick your huckleberries clean of stems and leaves. If you plan on freezing them, do not wash them as they will release too much juice when they cook. In your favorite mixing bowl, gently toss huckleberries, peaches, and sugar together. Add tapioca, mix well but gently. Score bottom crust with a fork (I did not do this as I was afraid of leakage). Pour fruit mixture in your deep-dish pie tin lined with your crust. Cut the remaining dough into four wide bands, interlay them on top of the pie to create a weave effect. Sprinkle top with 1 tablespoon of sugar (I brushed on some egg wash before sprinkling on the sugar). Bake at 350 degrees for 75-90 minutes (mine had to go the full hour and a half for the bottom to get done--and it does bubble over, so bake it on a lined sheet pan or be prepared to have berry napalm all over your oven!). Top crust should be golden brown.
 Huckleberries are wild, bluish-black berries whose flavor is often described as being like blueberry but more tart and less tame. Of course, as I am east of the Rockies, I have no access to huckleberries. But I thought perhaps a triple berry mix of raspberries, blackberries, and blueberries in combination with peaches might yield their own magical result. The only error in judgment I made was to try a crust recipe from Chez Panisse that, although extremely flaky and tasty, was just too short of a dough to be able to work with properly. You could either chill it until it was brittle, or leave it out for a few minutes and quickly have a dough too soft to even lift off the work surface. GRR! Furthermore, after the crust was baked, it lacked structural soundness. You can see in the picture that part of the top had already shattered, the lattice had snapped in half, and just seconds after I took the picture, the rear portion of the crust fell backwards, breaking off from the filling. UGH! It still tasted awesome, but next time, I will try a different pastry recipe. I still don't have a definitive pie crust that I always use, but I am honing in on it slowly but surely. My ideal crust has both butter for flavor and shortening for exceptional flakiness. I know, I know, I can hear the purists gasp and clutch their hearts, but the best crust I ever had was from a couple of gals calling themselves Sister Pie in Sebastopol, CA, one of the greenest, crunchiest, most organic spots in the country, and their crust was made with shortening (organic shortening, but still, I think I've made my point!). Truth to tell, I am also not above using a butter-lard combination, again for both flavor and flakiness. Here next to Quebec, lard crusts are very popular. You can even buy frozen ones in their grocery stores. But I digress...
My point is--and I do have one--is that this book was so inspirational to me and reinforced so many of my own food philosophies which are sorely tested in this fast-paced world of culinary shortcuts. Why, I was just at my favorite local farmstand this past weekend, and I saw that they are now selling their own preserves. But I was HORRIFIED when I looked at the label and saw that the main ingredient in their "farmstand" jams and jellies was high-fructose corn syrup! YEGADS! And to make bad matters worse, a sign listing the different varieties of their "homemade" pies indicated that only the apple pies contained fresh fruit--all others used canned filling. CANNED FILLING! At a FARMSTAND! What is the name of all that is holy is the world coming to? It's just so discouraging. But then I read a book like American Pie, and my faith is restored. There are still people out there who care enough to take the time to make real pie the right way. And I aim to be one of them! So it's July, and though we're already at the halfway point of 2006, I am adding another resolution. In addition to starting a food blog, always having homemade vinaigrette in the fridge, and baking more bread, I also vow to bake more pie, REAL pie. If you wish to join me, you might want to start with the recipe below or a variation thereof. It is a definitive example of "marriage pie."
The Spruce Park Diner's Rustic Huckleberry Peach Pie by Laura Hansen
(Source: Pascale Le Draoulec's American Pie)
Crust:
1 9-inch double-crust (Laura uses the recipe on the back of the Crisco can)
Filling:
3 cups of huckleberries (fresh or frozen)--I substituted a triple berry blend here
2 cups of peaches, sliced and peeled (fresh or frozen)
1 cup of sugar
3 tablespoons of tapioca (I used four tablespoons of tapioca flour, and it was perfect--the filling held together but was still supple and juicy)
*I also added a teaspoon of vanilla and just a pinch of pumpkin pie spice to the filling.
Pick your huckleberries clean of stems and leaves. If you plan on freezing them, do not wash them as they will release too much juice when they cook. In your favorite mixing bowl, gently toss huckleberries, peaches, and sugar together. Add tapioca, mix well but gently. Score bottom crust with a fork (I did not do this as I was afraid of leakage). Pour fruit mixture in your deep-dish pie tin lined with your crust. Cut the remaining dough into four wide bands, interlay them on top of the pie to create a weave effect. Sprinkle top with 1 tablespoon of sugar (I brushed on some egg wash before sprinkling on the sugar). Bake at 350 degrees for 75-90 minutes (mine had to go the full hour and a half for the bottom to get done--and it does bubble over, so bake it on a lined sheet pan or be prepared to have berry napalm all over your oven!). Top crust should be golden brown.
Friday, July 07, 2006
A quickie out of guilt...
No, friends, I have not abandoned you. But this week saw the start of the second summer school session, so I had to get ready for that. And then (way too) early this morning, I left for West Springfield, MA (well, technically, I am writing you from the glamorous Motel 6 in Enfield, CT, but close enough) to compete in some dog shows over the weekend. So it will no doubt be next week before I can do a proper post, but here's a quick tide-over snack, if you will. This hardly even counts as a recipe, but we have become OBSESSED with it at my house, and have been coating an amazing array of foods with it from chicken to baked potatoes to pizza and pasta. We have threatened to flavor ice cream with it next! Tee hee. This remarkable condiment is called persillade, and despite the fancy French name, it can be whipped up in seconds, and has but three main ingredients. Persillade is a parsley and garlic sauce, not unlike a salsa verde, green sauce, chimichurri, or pesto. And man, is it DELICIOUS! All you do is run out to your herb garden and hack off a fistful of either flat-leaf or curly parsley (or both!), rinse it off, and toss it into the food processor (you want about three tablespoons of chopped parsley in total). Also throw in three cloves of good garlic (I like hot, reddish-purple varieties myself) and process until finely chopped. Then stream in two tablespoons of a good-quality extra-virgin olive oil until you have a pesto-like consistency (not completely smooth...with bits still visible in the emulsion). Season with salt and pepper to taste, and that's it! Then keep it in the fridge and use it on anything that would benefit from a hit of herbal freshness and big garlicky kick. It is just scrumptious on everything--meat or fish, potatoes or pasta, and all kinds of veggies. It has become the definitive summer condiment here at Lindsey's Luscious. Next time I make it, I might also squeeze a little fresh lemon juice into the mix, but it's yummy enough without. Punch up your summer cuisine with persillade! You'll thank me for it.
Monday, July 03, 2006
One for the chocoholics!
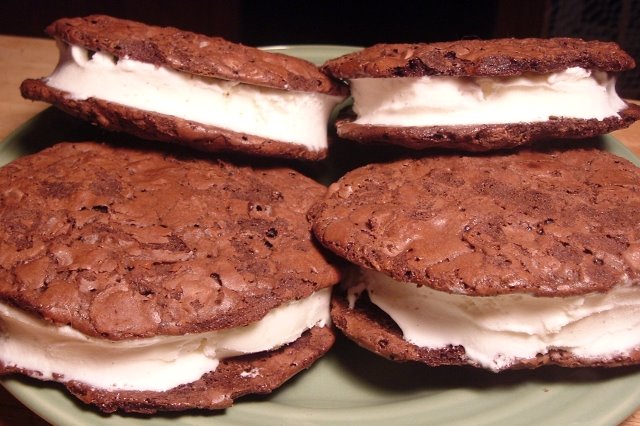 Sometimes, you just need some chocolate. And this recipe will either satiate that need...or kill you in the process! I ran across this on another blog and had to give it a try. The cookies are incredibly rich and so chocolately that one cookie is usually more than enough. But if you want to go for broke, sandwich two of them together with some good vanilla bean ice cream...YUM!
TRIPLE-CHOCOLATE COOKIES
(Source: Bon Appétit, July 2005)
10 ounces bittersweet (not unsweetened) or semisweet chocolate, chopped
1/2 cup plus 2 teaspoons all purpose flour
3 tablespoons unsweetened cocoa powder (I used black cocoa--try Hershey's Dark)
1/4 teaspoon baking powder
1/4 teaspoon salt
1 cup plus 1 tablespoon sugar
5 tablespoons unsalted butter, room temperature
3 large eggs
1 1/2 teaspoons vanilla extract
6 ounces (1 cup) semisweet chocolate chips
Position rack in center of oven and preheat to 350°F. Line 2 large rimmed baking sheets with parchment paper. (I used Silpat-lined baking sheets.) Stir chopped chocolate in top of double boiler set over simmering water until melted and smooth; remove from over water. (I did this in 30-second intervals in the microwave instead.) Cool melted chocolate 10 minutes.
Meanwhile, sift flour, cocoa powder, baking powder, and salt into medium bowl. Using electric mixer, beat sugar and butter in another medium bowl until crumbly. Add eggs, 1 at a time, beating well after each addition. Continue to beat until mixture is light, pale, and creamy, about 5 minutes. Add lukewarm melted chocolate and vanilla and beat just until blended. Fold in dry ingredients, then chocolate chips.
Drop chocolate cookie batter by 1/4 cupfuls onto prepared baking sheets, spacing 2 inches apart. Bake cookies, 1 baking sheet at a time, until tops are evenly cracked but cookies are not yet firm to touch, about 16 minutes (mine took a minute or two less than that). Cool cookies completely on baking sheets. Using metal spatula, carefully transfer 4 cookies to each of 4 large resealable plastic bags, arranging in single layer (I used one gallon-sized bag with wax paper between the cookie layers). Freeze cookies overnight. (Can be made 3 days ahead. Keep frozen.)
Makes about 16.
Friday, June 30, 2006
An embarrassment of (summer) riches...
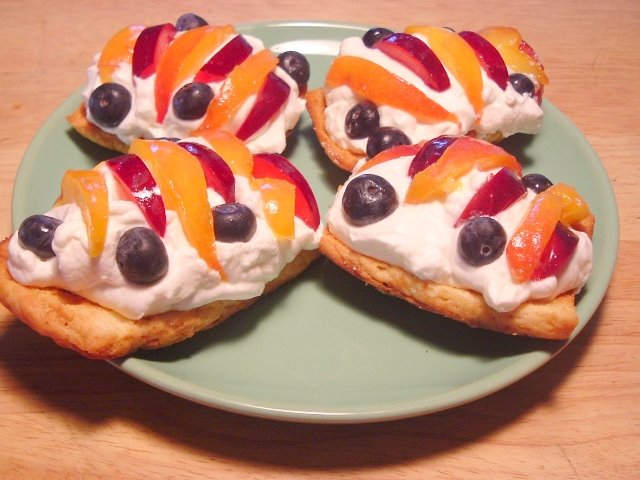
Fruit, glorious, fruit! It's everywhere! We have leftover blueberries, plums, pluots and nectarines from the the fruit tart last weekend, there are leftover strawberries from the jam-making (if you can believe it), and there are peaches because....well, they are in season, and they are darn good this year. Even my dear friend, Rob, in Ohio told me today that he had just made, not one, but THREE strawberry-rhubarb pies! Now you must understand what an amazing feat this is, as Rob's motto is normally, "It's better to know someone who bakes pies than to bake them yourself." I'm not sure if I can claim any credit for this development, but I want to believe that I am spreading the gospel of pie and, in some small way, making the world a better (certainly, sweeter!) place. ;-)
But what to do with all these lingering fruits before they turn on us? King Arthur to the rescue! I don't know if the rest of you are on KA's mailing list, but I just received the most wonderful recipe in their e-mail newsletter for what they're calling Honey Shortcake Biscuits. LORD--EE, are they good! I made them with just AP flour, but you can also try the whole wheat version that I bet would be toothsome and delicious. Also, I thought I'd like my shortcakes a bit sweeter, so I added an extra three tablespoons of granulated sugar to my dough. Of course, I used buttermilk because I am still in my Buttermilk Period. And I baked them on Silpat-lined sheet pans. I did glaze them, and I encourage you to do the same, even if you don't have the Fiori di Sicilia--just use the vanilla by itself or with a little orange extract which will mimic the Creamsicle-like flavor of Fioro de Sicilia, or you could add a few drops of butter-flavored extract or even a little almond extract in combination with the vanilla. And one final tip, eat the shortcakes warm the first day, but try toasting them the next day--YUM! And though Cool Whip will do in a pinch (oh, simmer down, food snobs--it's good, and you know it!), indulge yourself and whip up some real, slightly sweetened cream, and top the sliced biscuits with a generous pillow of soft cream and any of your favorite summer fruits. This recipe is elegant enough to serve for guests, and yet so quick and easy! I made the shortcakes the other day before work to have with dinner that night, and I never have enough time to do anything extra before work! That's how easy they were. And delectable to boot...what's not to like, as Ina would say?
HONEY SHORTCAKE BISCUITS
(Source: King Arthur Flour)
Dough:
2 1/2 cups (10 ounces) whole wheat flour, white or traditional
1/2 cup (2 1/8 ounces) bread flour
3/4 teaspoon salt
2 1/2 teaspoons baking powder
1/2 teaspoon baking soda
1/2 cup (1 stick, 4 ounces) cold unsalted butter*
3 tablespoons (2 1/4 ounces) honey
1 large egg
3/4 cup (6 ounces) buttermilk
*Reduce salt to 1/2 teaspoon if you use salted butter.
To make biscuits using all-purpose flour: Substitute 3 cups King Arthur Unbleached All-Purpose Flour for the whole wheat and bread flours. Reduce the buttermilk to 2/3 cup. (I forgot to do this, and they turned out fine...very tender.)
To make biscuits using milk, rather than buttermilk: Increase the baking powder to 1 tablespoon, and eliminate the baking soda.
Glaze (optional...but advisable!):
1/4 cup (1 3/4 ounces) sugar
1/4 teaspoon Fiori di Sicilia (optional)
2 teaspoons vanilla extract
2 teaspoons water
Preheat the oven to 400°F. Lightly grease a baking sheet or line it with parchment paper.
In a large mixing bowl, whisk together the flours, salt, baking powder and baking soda. With a pastry fork or cutter, or using an electric mixer, cut in the butter until the flour mixture is crumbly. In a small bowl or large measuring cup, whisk together the egg, buttermilk, and honey. Add, all at once, to the flour mixture, and blend lightly and quickly with a fork until the mixture is evenly moistened.
Turn the dough out onto a floured work surface, and fold the dough over on itself three or four times, until it comes together. Pat the dough out (or roll very lightly with a rolling pin) into a 9" square (3/4"-thick). Cut the dough into 16 squares, and transfer the biscuits to the prepared baking sheet.
While this next step is optional, it gives the biscuits a lovely, shiny, tasty crust. In a small microwave-safe bowl, whisk together the glaze ingredients. The Fiori di Sicilia, while optional, will give the biscuits a lovely citrus-vanilla accent. Place the bowl in the microwave, and microwave very briefly (maybe 15 to 20 seconds), until the glaze is very hot and starting to bubble. Remove it from the microwave, give it a stir, and brush it over the biscuits.
Bake the biscuits for 20 to 22 minutes, until the tops are golden brown. Remove them from the oven and serve warm, or cool on a rack. Yield: 16 biscuits.
Tuesday, June 27, 2006
The New Red Queen Says: JAM EVERY DAY!
"It's very good jam," said the Queen.
"Well, I don't want any to-day, at any rate."
"You couldn't have it if you did want it," the Queen said. "The rule is jam tomorrow and jam yesterday but never jam to-day."
"It must come sometimes to 'jam to-day,'"Alice objected.
"No it can't," said the Queen. "It's jam every other day; to-day isn't any other day, you know."
"I don't understand you," said Alice. "It's dreadfully confusing."
--Through the Looking Glass, Lewis Carroll
Finally...finally...we have reached that gossamer intersection where the rhubarb is not yet done ("I'm not quite dead!") and the strawberries are in their sweet and juicy prime (just like me, tee hee). And in this magical hour, friends, I dare to usurp the Red Queen's throne and decree, JAM EVERY DAY! Indeed, the canning and preserving season has officially begun, and I have completed a mammoth inaugural batch of the most AMAZING ruby/garnet goodness--that is to say, a very fine strawberry-rhubarb jam. And I did something very daring. I decided to meld together two recipes that I was intrigued by and...YIKES...not use any added pectin. (Say it with me: commercial pectin is for sissies!) First, I was mesmerized by the pictures of Zarah Maria's jam in Copenhagen, but she reported that the resulting spread, from a recipe in Sensational Preserves, was overly-tart. So I was also guided by Christine Ferber's Mes Confitures, by way of Jen the Bakerina, and the recipe that introduces an innovative technique and also calls for more sugar. And somehow, though jam and jelly-making are scientific processes that the faint of heart should not toy with, I managed to produce a jam that actually set up without extra pectin and what's more, tastes MARVELOUS. I will explain my process, but it should be noted that every preserving effort is risky and the final result is never guaranteed. But that's half the fun, no?
I started with this: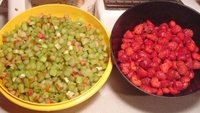
That happened to amount to almost seven pounds of rhubarb harvested from my own backyard and four and a half pounds of the enchanting Quebecois strawberries in separate plastic bowls. The rhubarb had been washed and cut into half-inch pieces, and the strawberries had been hulled and mostly left whole, except for the largest which I halved. I added equal amounts by weight of sugar to each bowl (which is a SHLOAD of sugar--my roomie wandered into the kitchen, saw the massive sugar mountains atop the fruit, and inquired when I had begun a mining operation!), covered and refrigerated them overnight to soak in their own juices . The next evening, I added the rhubarb and its syrup to a GINORMOUS pot (I actually had to borrow a cauldron from my school's food service to accommodate it all--and stand on a step ladder to be able to see inside and stir!), and also the syrup strained from the strawberries. Ferber's technique is to boil the syrup first, then add the strawberries and rhubarb so that they cook less and retain a fresher flavor. But I was worried that the rhubarb might not be tender enough for my liking if I did it that way. So I started cooking the rhubarb and syrup together along with the juice of three lemons as well as the emptied lemon rinds tied up in a double layer of cheesecloth.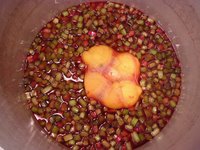 I brought this to a boil, skimmed off the foam, and attempted to bring it to 221 degrees, although it stalled at 220 for some reason. After at least five minutes waiting for it to gain that one degree, I gave up, fished out the lemon bag, and added in the strawberries and the juice of another lemon. I brought everything to a boil, skimmed the foam, and brought the jam to the setting point of 221 degrees (inexplicably, it finally managed to acquire that elusive last degree). At this point, I did a spoon test, the results of which were inconclusive. The plate-in-the-freezer test yielded something a bit too soft for my liking, so I attempted to keep it boiling at 221 for another five minutes, though it vaccillated between 221 and 219 of its own accord.
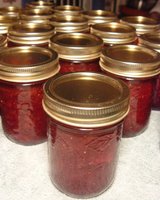
 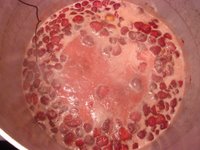 After five minutes, I panicked and called it quits for fear of vulcanizing the final product. I jarred the beautiful, delicious stuff up into half-pints and processed them in three batches in a water bath canner for 10 minutes apiece. When I was finally done with the last batch, I turned around, and to my amazement, discovered 27 jars of glorious strawberry-rhubarb jam on my counter! The only thing left to do was wait to see if it would set. And as the modern-day prophet, Tom Petty, said so eloquently, "the wai-ai-ai-ting is the hardest part!" But by morning, it looked promising for the set, and by the time I got home from work, it was JAM!
Now, I would like to pick people's brains on the most desirable consistency for jam? I wouldn't want to turn the jar over and have it run like syrup to the other end, but neither would I want it not to move at all and stay stuck to the top (bottom) of the jar. I think, ideally, it should fall down to the bottom (top) in more or less one plop. But, with or without added pectin, mine usually hesitates, quivers, then breaks a bit and slides down the side. Or most of it falls down mostly in a whole clump in the middle, but with a bit of syrupy-ness on either side. What do other jam-makers out there think? I'd like to hear your opinions. Of course, by the time the jam is refrigerated, it firms up quite a bit, but is never tough or rubbery. So I think all is well.
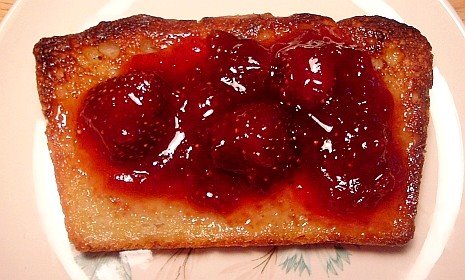
But I would be remiss if I ended my tale of strawberry-rhubarb glory without a word of thanks to Jen. Pectin-less jam-making is fraught with peril and jangles the nerves, and therefore should not be undertaken without a wise mentor who provides sufficient emotional support, and she did that for me. All hail the Bakerina! And we also praise her for the beloved rice bread recipe, as I have just pulled two loaves of the heavenly stuff from the oven. And the craggy, crispy toast I will make of it shall receive an annointing of tangy red ripe lusciousness come morning! (Sing it again: "the wai-ai-ai-ting is the hardest part!")
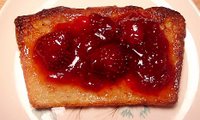
UPDATE: Just LOOK at it! It's almost too pretty to eat....well...almost!
"Well, I don't want any to-day, at any rate."
"You couldn't have it if you did want it," the Queen said. "The rule is jam tomorrow and jam yesterday but never jam to-day."
"It must come sometimes to 'jam to-day,'"Alice objected.
"No it can't," said the Queen. "It's jam every other day; to-day isn't any other day, you know."
"I don't understand you," said Alice. "It's dreadfully confusing."
--Through the Looking Glass, Lewis Carroll
Finally...finally...we have reached that gossamer intersection where the rhubarb is not yet done ("I'm not quite dead!") and the strawberries are in their sweet and juicy prime (just like me, tee hee). And in this magical hour, friends, I dare to usurp the Red Queen's throne and decree, JAM EVERY DAY! Indeed, the canning and preserving season has officially begun, and I have completed a mammoth inaugural batch of the most AMAZING ruby/garnet goodness--that is to say, a very fine strawberry-rhubarb jam. And I did something very daring. I decided to meld together two recipes that I was intrigued by and...YIKES...not use any added pectin. (Say it with me: commercial pectin is for sissies!) First, I was mesmerized by the pictures of Zarah Maria's jam in Copenhagen, but she reported that the resulting spread, from a recipe in Sensational Preserves, was overly-tart. So I was also guided by Christine Ferber's Mes Confitures, by way of Jen the Bakerina, and the recipe that introduces an innovative technique and also calls for more sugar. And somehow, though jam and jelly-making are scientific processes that the faint of heart should not toy with, I managed to produce a jam that actually set up without extra pectin and what's more, tastes MARVELOUS. I will explain my process, but it should be noted that every preserving effort is risky and the final result is never guaranteed. But that's half the fun, no?
I started with this:
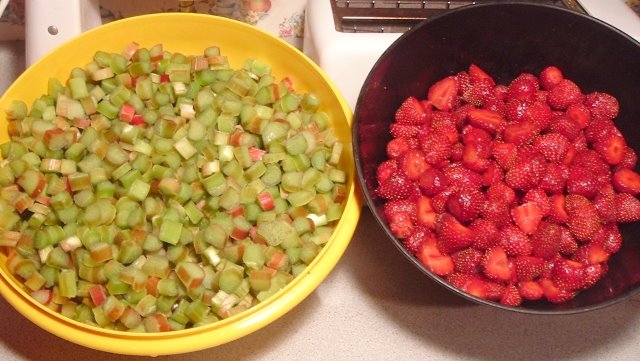
That happened to amount to almost seven pounds of rhubarb harvested from my own backyard and four and a half pounds of the enchanting Quebecois strawberries in separate plastic bowls. The rhubarb had been washed and cut into half-inch pieces, and the strawberries had been hulled and mostly left whole, except for the largest which I halved. I added equal amounts by weight of sugar to each bowl (which is a SHLOAD of sugar--my roomie wandered into the kitchen, saw the massive sugar mountains atop the fruit, and inquired when I had begun a mining operation!), covered and refrigerated them overnight to soak in their own juices . The next evening, I added the rhubarb and its syrup to a GINORMOUS pot (I actually had to borrow a cauldron from my school's food service to accommodate it all--and stand on a step ladder to be able to see inside and stir!), and also the syrup strained from the strawberries. Ferber's technique is to boil the syrup first, then add the strawberries and rhubarb so that they cook less and retain a fresher flavor. But I was worried that the rhubarb might not be tender enough for my liking if I did it that way. So I started cooking the rhubarb and syrup together along with the juice of three lemons as well as the emptied lemon rinds tied up in a double layer of cheesecloth.
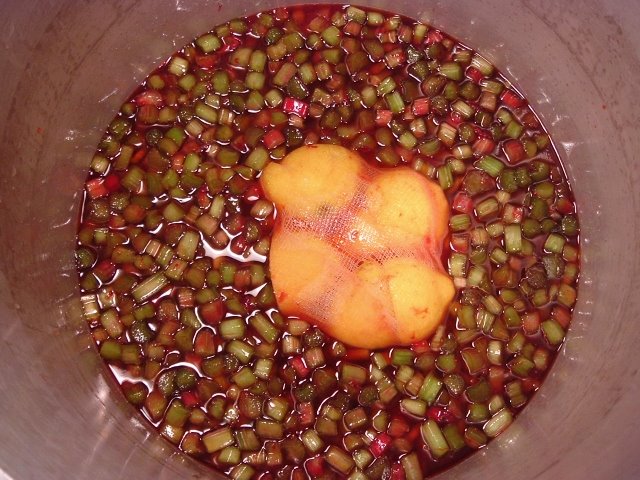 I brought this to a boil, skimmed off the foam, and attempted to bring it to 221 degrees, although it stalled at 220 for some reason. After at least five minutes waiting for it to gain that one degree, I gave up, fished out the lemon bag, and added in the strawberries and the juice of another lemon. I brought everything to a boil, skimmed the foam, and brought the jam to the setting point of 221 degrees (inexplicably, it finally managed to acquire that elusive last degree). At this point, I did a spoon test, the results of which were inconclusive. The plate-in-the-freezer test yielded something a bit too soft for my liking, so I attempted to keep it boiling at 221 for another five minutes, though it vaccillated between 221 and 219 of its own accord.
 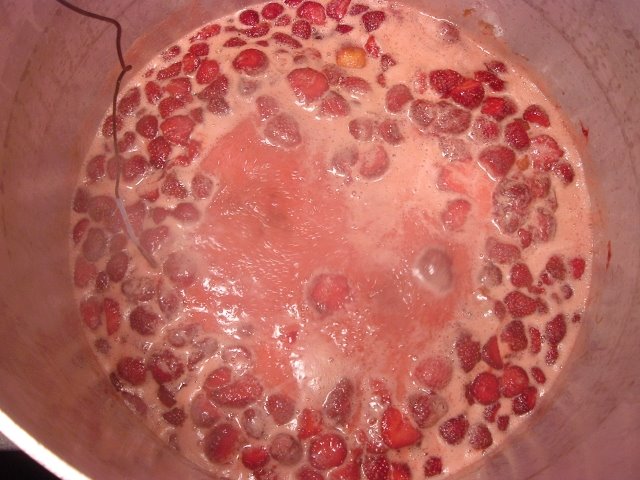 After five minutes, I panicked and called it quits for fear of vulcanizing the final product. I jarred the beautiful, delicious stuff up into half-pints and processed them in three batches in a water bath canner for 10 minutes apiece. When I was finally done with the last batch, I turned around, and to my amazement, discovered 27 jars of glorious strawberry-rhubarb jam on my counter! The only thing left to do was wait to see if it would set. And as the modern-day prophet, Tom Petty, said so eloquently, "the wai-ai-ai-ting is the hardest part!" But by morning, it looked promising for the set, and by the time I got home from work, it was JAM!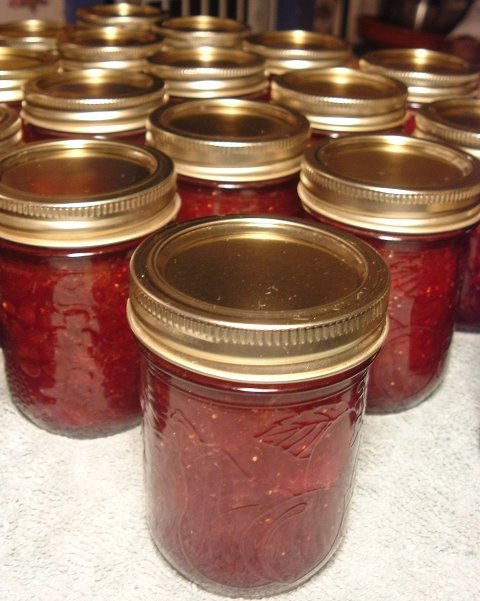
Now, I would like to pick people's brains on the most desirable consistency for jam? I wouldn't want to turn the jar over and have it run like syrup to the other end, but neither would I want it not to move at all and stay stuck to the top (bottom) of the jar. I think, ideally, it should fall down to the bottom (top) in more or less one plop. But, with or without added pectin, mine usually hesitates, quivers, then breaks a bit and slides down the side. Or most of it falls down mostly in a whole clump in the middle, but with a bit of syrupy-ness on either side. What do other jam-makers out there think? I'd like to hear your opinions. Of course, by the time the jam is refrigerated, it firms up quite a bit, but is never tough or rubbery. So I think all is well.
But I would be remiss if I ended my tale of strawberry-rhubarb glory without a word of thanks to Jen. Pectin-less jam-making is fraught with peril and jangles the nerves, and therefore should not be undertaken without a wise mentor who provides sufficient emotional support, and she did that for me. All hail the Bakerina! And we also praise her for the beloved rice bread recipe, as I have just pulled two loaves of the heavenly stuff from the oven. And the craggy, crispy toast I will make of it shall receive an annointing of tangy red ripe lusciousness come morning! (Sing it again: "the wai-ai-ai-ting is the hardest part!")
UPDATE: Just LOOK at it! It's almost too pretty to eat....well...almost!
Monday, June 26, 2006
I went to a garden party...

Finally...a Sunday afternoon decent enough to have a backyard get-together, and it seemed like every house in the county had the same idea! As for me, I was invited to my friend June's house for a sort of homecoming celebration for one of our former colleagues who was in town for a visit. We had a lovely time just noshing and chatting and drinking margaritas and playing croquet. And since it was a special occasion, I thought I should prepare a couple of nice dishes to take with. The first is an appetizer called Veggie Pizza that is a little on the trashy side, as it is crescent roll-based, but it masquerades as an elegant hors' d'oeuvres and people always love it. Plus, it showcased some of the wonderful fresh vegetables that we got at the farmers' market at St. Chrysostome, incuding the purple spring onions, broccoli, and both the orange and green cauliflowers, not to mention some fresh dill from the herb garden.
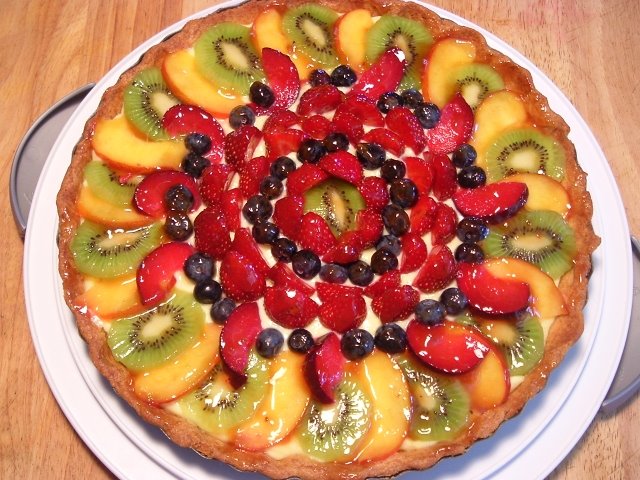
And then for a very special touch, I made my best "WOW" factor dessert, a fresh fruit tart. In the past, I have followed Ina Garten's recipe to the letter, but her shortbread crust, while tasty, ends up being a bit tough as a base; your fork has a hard time piercing it, and then the pastry cream oozes out and your fruit might get away from you, too! So this time, I decided to try Gale Gand's sugar cookie recipe for the base, filled with Ina's pastry cream, and then my trusty decorator and roommate, Cyd, made a lovely design on top with various fruits, such as plums, nectarines, kiwi, and the local strawberries and blueberries that we got in Canada. For the finishing touch, I shellacked the top of the tart with some homemade apricot jam that I melted and strained and applied lightly with a pastry brush until it had a glossy shine. Beautiful! I am pleased to report that the tart (and the pizza) got rave reviews at the garden party, as did my wonderful friend, Janice's gorgeous homemade strawberry-rhubarb pie. I'll definitely have to shake her down for that recipe another day. In the meantime, here are the ones for the treats that I took to share. Give them a try at your next backyard (or indoor) affair!
Veggie Pizza
2 cans refrigerated crescent rolls
3/4 cup mayonnaise
2-8-ounce packages cream cheese, at room temp.
1 teaspoon dill (or 1 tablespoon of fresh dill, finely chopped)
2 green onions, chopped
your favorite fresh veggies
Unroll the crescent rolls into a rectangular shape and press to seal the perforations. Bake at 375 for approximately 12 minutes, or until golden brown. Set aside to cool to room temperature.
Mix together (I use a food processor) the mayonnaise, cream cheese, dill and green onions until well-blended and fairly smooth. (I often throw in some other things to this mixture, such as a tablespoon of Dijon mustard, a teaspoon of granulated garlic, a teaspoon of celery salt, some cracked black pepper, a pinch of cayenne, or whatever calls to me when I open the spice cupboard. I also sometimes throw in other fresh herbs during the summer when my garden is going strong. Be creative!)
When the crescent roll crusts have cooled, spread half of the cream cheese mixture on both "pizzas" and then top with your favorite fresh vegetables. I like carrot, broccoli, cauliflower, and red pepper myself, but it's your call. Refrigerate until the cream cheese layer firms up, cut into portions, and serve.
Fresh Fruit Tart
Cookie Crust (adapted from Gale Gand):
3/8 cup granulated sugar
6 tablepoons unsalted butter, softened at room temperature
1/3 cup vegetable shortening (I like butter-flavored Crisco)
1/2 egg (beat it, then pour approx. half in)
1/4 teaspoon pure vanilla extract
1/4 teaspoons baking powder
1 3/4 cups flour
In a mixer fitted with a paddle attachment (or using a hand mixer), cream the sugar, butter and shortening until fluffy. Add the egg, vanilla and baking powder and mix. Add the flour and mix. Shape the dough into a large flat disk, kneading briefly if necessary to bring the dough together. Wrap in plastic wrap and chill 1 to 2 hours. On a lightly floured surface, roll out the dough 1/4-inch thick. Transfer to a 11-inch tart pan. Refrigerate (or freeze) until firm. Place a round of parchment paper over the tart shell and fill with pie weights. Bake blind for 20 minutes at 350 degrees. Carefully remove the parchment and weights, prick the shell all over with a fork, and return to the oven, baking the crust until golden brown, another 15-20 minutes. Allow to cool to room temperature.
Pastry Cream (adapted from Ina Garten):
8 large egg yolks
3/4 cup sugar
3 tablespoons cornstarch
pinch salt
2 cups whole milk
2 tablespoons unsalted butter
1 teaspoon pure vanilla (I like vanilla bean paste for this)
2 tablespoons heavy cream
In the bowl of an electric mixer fitted with a paddle attachment (or using an electric hand mixer), beat egg yolks and sugar on medium-high speed about 3 minutes, until mixture is light yellow and falls back into bowl in a ribbon. On low speed, beat in cornstarch and salt. In a large saucepan, bring milk to a simmer. Slowly pour milk into egg mixture, whisking steadily, then pour back into saucepan. Cook over medium heat, stirring constantly with a whisk or wooden spoon until mixture is thick, about 4 minutes (or less). Bring to a boil and cook on low heat 2 to 3 more minutes. (Taste to be sure cornstarch is cooked.) Remove from heat; mix in butter, vanilla, and cream. Pour through a strainer into a bowl. Place plastic wrap directly onto custard and refrigerate until cold.
Place baked tart shell on a serving plate and spread pastry cream over bottom of shell. Select a variety of your favorite fruits (wash, peel, slice, etc.--and sprinkle cut fruit with lemon juice to keep from browning) and make a casual arrangement. You might consider using any of the following: raspberries, blueberries, blackberries, halved strawberries, grapes (in small clusters), sliced mango, sliced papaya, sliced kiwi, sliced bananas, sliced plums, thinly sliced oranges or limes. Place larger fruit first, then fill spaces with berries. Use colorful fruit, such as halved strawberries or a grouping of raspberries, near the center for focus and height.
Glaze the fruit with about a half cup of melted apricot jelly (or strained jam) or honey using a pastry brush. Refrigerate until time to serve...but it is best if you prepare the separate elements and combine them right before serving so that the crust doesn't get soggy!
Saturday, June 24, 2006
Summer, summer, summer (it's like a merry-go-round...oh oh oh)!
The herb garden that needed replenishing and the fact that there are STILL no strawberries to be had locally drove me to a culinary pilgrimage across the border along the Circuit du Paysan yesterday. We almost turned back in fear when we arrived at our closest, usually traffic-less border (Hemmingford), and saw that the lines were backed up for days like it often is at the main Champlain border. But since we would have had to wait in the eternal line even if we did a U-turn, we decided just to press on. We were convinced that it had to be increased security due to the recent threat against the Sears Tower. But the nice Canadian border guard said no, that it was just holiday traffic. (I had forgotten that today is the Fete Nationale du Quebec, aka Saint-Jean-Baptiste Day--the national holiday of Quebec, celebrated with much more enthusiasm and fanfare than Canada Day in July.) Once we made it through Checkpoint Charlie (more like Checkpoint Charles, if one pronounced it SHARL), we happily poked into not one, not two, but three different nurseries (all owned by members of the same family, the Dauphinois-es?) and found many delightful plants for the porch, the window boxes, and of course, the herb garden. Then we stopped by our favorite butcher, the Boucherie Viau, and because that damn George Bush still won't let us buy beef (or prescription drugs) in Canada, we acquired two boneless pork roasts and two pounds of their bacon, smoked on the premises. Finally, we arrived at our main destination, the farmers' market at St. Chrysostome, held every Friday and Monday throughout the summer. Well, it was immediately clear that we had lumbered into STRAWBERRY HEAVEN! Each vegetable vendor had flats and flats of the local beauties, and the people were carting them off at an astonishing rate. I quickly muscled my way in among the Quebecois to claim my own flat of gorgeous, fragrant gems. At $10 CDN (that's nine Americanos) for about six quarts, I would have taken another flat, had I not spent most of my Canadian cash at the nurseries. Boo hiss. (I'm feeling a return trip coming on, maybe even on Monday!) As we had run out of money, and I was scheduled to meet friends in town for dinner, we headed back to the Etats-Unis, cleverly taking the Cannon Corners route to Mooers Forks where we were the only car in line when we arrived at the border. And the only thing that gave me more delight was landing in driveway and opening my trunk to see THIS--a veritable farmers' market in my trunk! WOW! Take a moment and soak in the glory of it...and of summer's bounty.
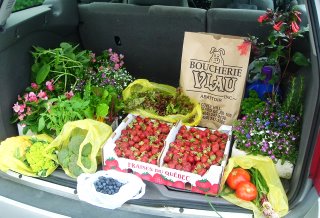
What you are looking at includes many herb plants (curly parsley, flat-leaf parsley, sage, rosemary, thyme (stop that singing!), lemon thyme, dill, Greek oregano, and lemon basil. There is also some rainbow chard and a spaghetti squash plant. There are some pretty pink fibrous begonias and lobelia in shades of purple, blue, and white. You can see the package of pork products (dig that alliteration--and the cute pig in their logo!) There is also a gorgeous, fresh lettuce behind those wonderful strawberries. And in the front row, from left to right, is some cauliflower in both orange and green hues, broccoli, blueberries, a couple of hothouse tomatoes, and some truly stunning purple spring onions. Doesn't it just make you want to weep with joy? (Maybe I'm just weird that way!)
In celebration of our haul of goodies from Quebec, I decided to create a fabulous brunch today based on the recommendation of my beloved friends, John and Keith. Despite the fact that they now live in Oregon, they still cook like Californians, meaning they try to use fresh, seasonal, organic items in everything that they make. And as Keith is mostly vegetarian (just fish), their menus are usually meatless, too (not that even the most passionate carnivore would miss the meat if invited to a meal prepared by Keith and John!). In fact, I believe that I will quote Keith here, with his kind permission--my first guest blogger! I will add my commentary in brackets...
Hello my dear friends. This is only going out to the people who I know love good food. Sad, only 4 people... It is just too delicious and simple to keep it all to ourselves. You may already be doing it, or perhaps you could share a recipe, too.
We use a larger ramekin [I used two Buffalo china/diner bowls because we wanted three eggs apiece], crack a couple of eggs from the girls [they have chickens, too!], throw in some heavy cream [I maybe used two tablespoons?], sun-dried tomatoes [I used some of the ones that John and Keith gave me on my visit in April!], an herb [I used the newly-replanted lemon thyme], and top it with cheese [I used a jack blend and some parmesan as well], salt and pepper, put it in a water bath and throw it in the oven on 400 while you are getting ready for the day. About 20-30 minutes later [next time, I'll try 25 minutes--as they didn't look done on top at 20 minutes, but the yolks were too firm at 30], yum! yum! It's a kind of clean-out-the-fridge kind of thing, and we make it the night before while cooking dinner and refrigerate it until the morning when the first early bird arises and throws it in the oven (usually John. But hey, I make it). We have been known to throw in the leftover mashed potatoes in the bottom, too. I cannot take full credit for this as I first read a recipe from Michelle Anna Jordan's California Cooking, except we call it "ramekins gone wild". --Keith and Senor Juan.
Not being food bloggers, John and Keith do not photograph their food as often as I do. (They also probably don't have cold meals because they have to be photographed before being eaten! tee hee) I'm sure that their baked/shirred eggs look prettier than mine, but here's a shot of our brunch today. Also featured is the delicious bacon from the butcher in Covey Hill, QC and the yummy herb walnut bread that I made the other day--remember, the one that imploded on top due to overproofing? Tasted great, though! And then the plate was garnished with a few purloined cherry tomatoes that we pocketed at one of the nurseries. ;-) Now, doesn't that look good enough to eat?
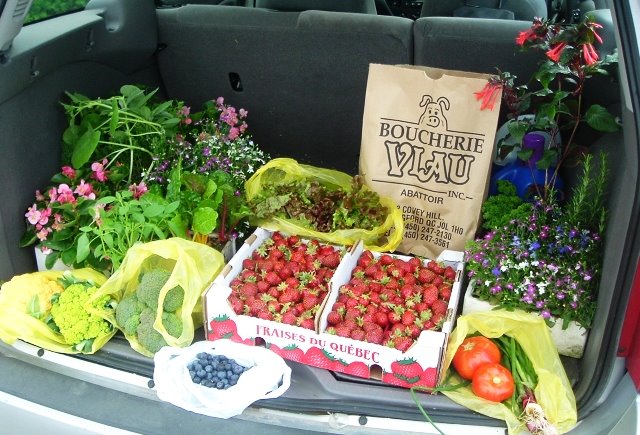
What you are looking at includes many herb plants (curly parsley, flat-leaf parsley, sage, rosemary, thyme (stop that singing!), lemon thyme, dill, Greek oregano, and lemon basil. There is also some rainbow chard and a spaghetti squash plant. There are some pretty pink fibrous begonias and lobelia in shades of purple, blue, and white. You can see the package of pork products (dig that alliteration--and the cute pig in their logo!) There is also a gorgeous, fresh lettuce behind those wonderful strawberries. And in the front row, from left to right, is some cauliflower in both orange and green hues, broccoli, blueberries, a couple of hothouse tomatoes, and some truly stunning purple spring onions. Doesn't it just make you want to weep with joy? (Maybe I'm just weird that way!)
In celebration of our haul of goodies from Quebec, I decided to create a fabulous brunch today based on the recommendation of my beloved friends, John and Keith. Despite the fact that they now live in Oregon, they still cook like Californians, meaning they try to use fresh, seasonal, organic items in everything that they make. And as Keith is mostly vegetarian (just fish), their menus are usually meatless, too (not that even the most passionate carnivore would miss the meat if invited to a meal prepared by Keith and John!). In fact, I believe that I will quote Keith here, with his kind permission--my first guest blogger! I will add my commentary in brackets...
Hello my dear friends. This is only going out to the people who I know love good food. Sad, only 4 people... It is just too delicious and simple to keep it all to ourselves. You may already be doing it, or perhaps you could share a recipe, too.
We use a larger ramekin [I used two Buffalo china/diner bowls because we wanted three eggs apiece], crack a couple of eggs from the girls [they have chickens, too!], throw in some heavy cream [I maybe used two tablespoons?], sun-dried tomatoes [I used some of the ones that John and Keith gave me on my visit in April!], an herb [I used the newly-replanted lemon thyme], and top it with cheese [I used a jack blend and some parmesan as well], salt and pepper, put it in a water bath and throw it in the oven on 400 while you are getting ready for the day. About 20-30 minutes later [next time, I'll try 25 minutes--as they didn't look done on top at 20 minutes, but the yolks were too firm at 30], yum! yum! It's a kind of clean-out-the-fridge kind of thing, and we make it the night before while cooking dinner and refrigerate it until the morning when the first early bird arises and throws it in the oven (usually John. But hey, I make it). We have been known to throw in the leftover mashed potatoes in the bottom, too. I cannot take full credit for this as I first read a recipe from Michelle Anna Jordan's California Cooking, except we call it "ramekins gone wild". --Keith and Senor Juan.
Not being food bloggers, John and Keith do not photograph their food as often as I do. (They also probably don't have cold meals because they have to be photographed before being eaten! tee hee) I'm sure that their baked/shirred eggs look prettier than mine, but here's a shot of our brunch today. Also featured is the delicious bacon from the butcher in Covey Hill, QC and the yummy herb walnut bread that I made the other day--remember, the one that imploded on top due to overproofing? Tasted great, though! And then the plate was garnished with a few purloined cherry tomatoes that we pocketed at one of the nurseries. ;-) Now, doesn't that look good enough to eat?
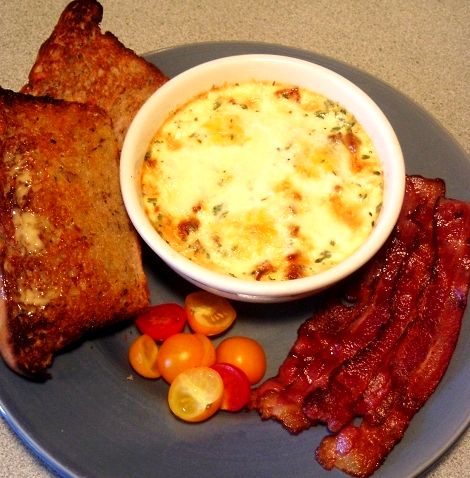
Thursday, June 22, 2006
Where my dogs at?!

The weather is warming up, and we all need some refreshing treats. I personally have taken to making my nightly Orange Julius-type beverage that I become obsessed with during the warmer months. But as I have already shared that recipe, let me share one for all of my doggie friends to help keep them cool this summer.
There is a a wonderful ice cream stand that we sometimes travel past in the summer after camping trips along the St. Lawrence in southern Ontario. And if the dogs are with us, we always have to get a doggie-sized scoop of beef-flavored ice cream for them. (They sell this doggie ice cream for $0.50 a cup. Not bad, and the dogs adore the stuff!) But this place is 45 minutes from where we live in Malone, NY, so we don't get there too often. Thus, I decided that I needed to come up with my own recipe for frozen doggie treats. Now, if you don't mind taking out a second mortgage for Frosty Paws, then go right ahead and buy those instead and disregard this post. But for the frugal dog-lover out there, may I suggest the following economical substitute...
For a meaty ice cream (and who among us hasn't longed for that?), take a 32-ounce container of plain yogurt, a small container of beefy dog food (I used a package of Cesar's "Beef in Meaty Juices"--yum, yum!), add about a teaspoon of granulated garlic, and blend it well with a stick blender (or in your regular blender or food processor if you prefer). You could freeze this mixture in ice cube trays and then transfer the frozen cubes to a large Ziploc freezer bag to dispense as needed. But I was worried about having the lingering stench of Cesar meatiness on my ice cubes after this project, so I just filled some tiny plastic Solo cups with the yogurt mix. After they are frozen, I simply pop them out of the cups and then throw the frosty treats to my puppies who just love them. This "recipe" made 15 servings, and the cost of ingredients was less than three bucks. So I think at $.20 a treat, that's much more economical than Frosty Paws, plus I know exactly what's in it. (I may market this under the name, Hoggin' Dogz...ha ha!)
You can also do a vegan variety with peanut butter and honey. Use a 32-ounce container of vanilla yogurt, then add about a half a cup of peanut butter, and about a tablespoon of honey. (I haven't tried it yet, but you might also like to throw in a mashed banana for good measure!) Blend this well, and once again, fill little cups of the stuff and freeze it. Without the banana, this yielded 16 Dixie-sized cups, which is about $.18 a treat. And I'm not sure that the dogs don't like this flavor better than the beefy variety! Give these ideas a try, and help your doggie friends stay cool this summer. :-)
Culinary woes abound at Lindsey's Luscious...
Well, gang, I'm in a bit of a food blogging depression. First of all, we are coming on TWO WEEKS without being able to post photos, which would be even more upsetting if I had anything great to post! And believe me, it's not for the lack of trying. As you may have noted, I have been in a bit of a buttermilk place lately. And Anna over at Cookie Madness posted a recipe for a Buttermilk Pecan Pie that sounded awesome. After it's baked, you should end up with a creamy buttermilk layer topped with a crunchy pecan layer...yum! But I got the brilliant idea to throw a half a cup of chocolate chips into the mix. Well, the chocolate bits melted and coagulated with the buttermilk custard so that it didn't separate into different layers. And though the resulting pie tasted good, the filling ended up, at best, an unappetizing grayish color, and at worst, not unlike bits of sewage floating about in a gelatinous, mucus-like goo. As AB would say, definitely NOT good eats! :-(
So I shifted gears and decided to pay heed to my bread-baking resolution and try another recipe that I found for an herb bread from the famous Cincinatti ice cream makers, Graeter's. I made a couple of amendments to the recipe--as you know by now is my way--by including some thyme (my favorite herb) and also some granulated garlic (garlic is always welcome to the party!). Those turned out to be very good decisions. The tragedy came when I accidentally overproofed my loaves. I guess I was still in winter mode where proofing takes twice as long as it should, and as it has been warm and humid lately, my dough basically imploded at the end of the final rise while I was trying to preheat the cantankerous oven. The resulting bread was delicious and still had a very nice texture and crumb. But the tops of the loaves were not gently domed as they should be, but sunken in, like a surfer's thigh that has been gouged by a shark bite or perhaps attacked by a flesh-eating disease of some sort. BOO HISS!
Ah well, cooking--like life--teaches us about both triumphs and disappointments. And we wouldn't appreciate the views from the mountaintops if we hadn't suffered through the valleys now, would we? Ok, ok, enough with the saccharine platitudes. It's back to the drawing board. I will report back. In the meantime, I hope you all are having more luck in the kitchen these days than I am. If so and you want to try these recipes and hopefully succeed where I have failed, here they are:
Buttermilk Pecan Pie
1 1/2 cup whole pecans
1/2 cup butter, room temperature
1 1/4 cups granulated sugar
1/4 cup brown sugar
2 teaspoons vanilla
3 eggs
3 tablespoons flour
1/8 teaspoon salt
1 cup buttermilk
1 uncooked pie crust, use a 9 inch deep dish
Preheat oven to 350 degrees F. Place pecans on a cookie sheet and toast for 8-10 minutes or until aromatic. Let cool, then chop coarsely.Reduce oven heat to 300 degrees F.
In a mixing bowl, beat together butter and both sugars. Beat in vanilla and eggs; Stir in flour and salt. Add buttermilk and stir until fully incorporated. Stir in pecans. Pour into pie shell.Place in oven (set on a cookie sheet to catch drips) and bake at 300 for 1 hour and 15 minutes. Cool completely, then chill.
Miriam's Herb Bread
yield: 1 loaf (I would double this recipe...eat one loaf and freeze the second for future use.)
1/2 cup warm water
1/2 cup warm milk
2 tablespoons sugar
1 tablepsoon dry yeast
2 tablespoons unsalted butter, softened (I used it, of course!)
1 teaspoon salt
1 tablespoon dried parsley
1/2 teaspoon dried tarragon
1/2 teaspoon dried dillweed
1 t dried minced onion
*I also added 1/2 teaspoon dried thyme and 1 teaspoon granulated garlic
1/3 cup chopped walnuts
2 1/2 cups bread flour (I used AP for a softer interior)
Combine warm milk and warm water with sugar in large bowl and add yeast, stirring well to dissolve. Let proof. Add butter, salt, herbs and onion. Add half of flour and mix well. Add nuts; mix. Add just enough flour to make dough easy to handle; turn out onto lightly floured work surface and knead until smooth and elastic, 8-10 minutes.Grease a clean large bowl and place dough in it, turning dough over to coat top. Cover and let rise in warm place until double in size (about 1 hour). Punch dough down. Roll into 18"x9" rectangle, then roll up, beginning with short side of dough. With heel of hand, press ends to seal. Fold ends under loaf. Place seam side down in greased 9"x5"x3" loaf pan. Cover and let rise till doubled in bulk (time will vary). Preheat oven to 375 degrees F. Place loaf in lower middle rach of oven. Bake 25-30 minutes or till top sounds hollow when tapped. Turn out of pan and brush top with butter or milk. Cool on wire rack.
So I shifted gears and decided to pay heed to my bread-baking resolution and try another recipe that I found for an herb bread from the famous Cincinatti ice cream makers, Graeter's. I made a couple of amendments to the recipe--as you know by now is my way--by including some thyme (my favorite herb) and also some granulated garlic (garlic is always welcome to the party!). Those turned out to be very good decisions. The tragedy came when I accidentally overproofed my loaves. I guess I was still in winter mode where proofing takes twice as long as it should, and as it has been warm and humid lately, my dough basically imploded at the end of the final rise while I was trying to preheat the cantankerous oven. The resulting bread was delicious and still had a very nice texture and crumb. But the tops of the loaves were not gently domed as they should be, but sunken in, like a surfer's thigh that has been gouged by a shark bite or perhaps attacked by a flesh-eating disease of some sort. BOO HISS!
Ah well, cooking--like life--teaches us about both triumphs and disappointments. And we wouldn't appreciate the views from the mountaintops if we hadn't suffered through the valleys now, would we? Ok, ok, enough with the saccharine platitudes. It's back to the drawing board. I will report back. In the meantime, I hope you all are having more luck in the kitchen these days than I am. If so and you want to try these recipes and hopefully succeed where I have failed, here they are:
Buttermilk Pecan Pie
1 1/2 cup whole pecans
1/2 cup butter, room temperature
1 1/4 cups granulated sugar
1/4 cup brown sugar
2 teaspoons vanilla
3 eggs
3 tablespoons flour
1/8 teaspoon salt
1 cup buttermilk
1 uncooked pie crust, use a 9 inch deep dish
Preheat oven to 350 degrees F. Place pecans on a cookie sheet and toast for 8-10 minutes or until aromatic. Let cool, then chop coarsely.Reduce oven heat to 300 degrees F.
In a mixing bowl, beat together butter and both sugars. Beat in vanilla and eggs; Stir in flour and salt. Add buttermilk and stir until fully incorporated. Stir in pecans. Pour into pie shell.Place in oven (set on a cookie sheet to catch drips) and bake at 300 for 1 hour and 15 minutes. Cool completely, then chill.
Miriam's Herb Bread
yield: 1 loaf (I would double this recipe...eat one loaf and freeze the second for future use.)
1/2 cup warm water
1/2 cup warm milk
2 tablespoons sugar
1 tablepsoon dry yeast
2 tablespoons unsalted butter, softened (I used it, of course!)
1 teaspoon salt
1 tablespoon dried parsley
1/2 teaspoon dried tarragon
1/2 teaspoon dried dillweed
1 t dried minced onion
*I also added 1/2 teaspoon dried thyme and 1 teaspoon granulated garlic
1/3 cup chopped walnuts
2 1/2 cups bread flour (I used AP for a softer interior)
Combine warm milk and warm water with sugar in large bowl and add yeast, stirring well to dissolve. Let proof. Add butter, salt, herbs and onion. Add half of flour and mix well. Add nuts; mix. Add just enough flour to make dough easy to handle; turn out onto lightly floured work surface and knead until smooth and elastic, 8-10 minutes.Grease a clean large bowl and place dough in it, turning dough over to coat top. Cover and let rise in warm place until double in size (about 1 hour). Punch dough down. Roll into 18"x9" rectangle, then roll up, beginning with short side of dough. With heel of hand, press ends to seal. Fold ends under loaf. Place seam side down in greased 9"x5"x3" loaf pan. Cover and let rise till doubled in bulk (time will vary). Preheat oven to 375 degrees F. Place loaf in lower middle rach of oven. Bake 25-30 minutes or till top sounds hollow when tapped. Turn out of pan and brush top with butter or milk. Cool on wire rack.
Monday, June 19, 2006
Baking takes a backseat this weekend...
I am sad to report that I have done no cooking nor baking of any note this weekend, as we finally had some good weather, and--better late than never--the garden HAD to go in! My back and legs may never be the same, and I am sunburned and bug-bitten to boot, but weather and the Good Lord providing, we will have lots of delicious veggies in a couple-to-few months' time. I am not done yet, as the relatively mild winter (and more to the point, lack of a protective snow cover) proved quite detrimental to my lovely perennial herb garden. So many plants need to be replaced there, but I did manage to get the lion's share of the planting in the vegetable gardens done, including 48 individual varieties of tomatoes (mostly interestingly-colored heirlooms, all grown from seed, as is my passion) and 17 types of both hot and sweet peppers. And I must tell you, that I really scaled back this year! I usually grow about 70 different varieties of tomatoes, but I'm getting old and starting to slack off. ;-) I was also pleasantly surprised to find lots of cucumber and squash volunteers this year that we will let grow and just see what we end up with. And other than some greens and other tidbits here and there, that might just have to do for this year's garden. Below are the tomatoes and peppers that I'm growing for anyone who is interested in such things. And I promise, I will be back to food blogging very soon--stay tuned!
TOMATOES:
Amish Gold
Aunt Ruby's German Green
Better Boy
Big Rainbow
Black from Tula
Black Plum
Black Prince
Cosmonaut Volkov
Craig's Magnus
Craig's Matchless
Dona
Earl of Edgecombe
Farmer's Market #1
Ferris Wheel
Flamme'
Galina
Gilbertie
Glasnost
Golden Roma
Grandpa's Cock's Plume
Green Zebra
Hillbilly
Isis Candy Cherry
Italian Beefsteak
Lemon Boy
Lucky Cross
Mortgage Lifter Bicolor
Mr. Stripey
New Zealand Pink Pear
Oltraolny
Paul Robeson
Polish
Porter's Dark Cherry
Old German
Old Yellow Candy Stripe
Quimbaya
Rio Grande
Rose de Berne
Sasha's Altai
Stupice
Sun Sugar
Super Marmande
Sweet Cluster
Sweet Olive
Tangella
Wolford's Wonder
Yellow Bell
Yellow Pear
PEPPERS:
Ancho
Antohi Romanian
Big Chile
Cascabella
Diamond
Golden Cayenne
Golden Greek
Habanero
Mild Jalapeno
Orange Sunsweet
Pepperocini
Placido
Purple Jalapeno
Red Beauty
Serrano
Sweet Chocolate
Tabasco
TOMATOES:
Amish Gold
Aunt Ruby's German Green
Better Boy
Big Rainbow
Black from Tula
Black Plum
Black Prince
Cosmonaut Volkov
Craig's Magnus
Craig's Matchless
Dona
Earl of Edgecombe
Farmer's Market #1
Ferris Wheel
Flamme'
Galina
Gilbertie
Glasnost
Golden Roma
Grandpa's Cock's Plume
Green Zebra
Hillbilly
Isis Candy Cherry
Italian Beefsteak
Lemon Boy
Lucky Cross
Mortgage Lifter Bicolor
Mr. Stripey
New Zealand Pink Pear
Oltraolny
Paul Robeson
Polish
Porter's Dark Cherry
Old German
Old Yellow Candy Stripe
Quimbaya
Rio Grande
Rose de Berne
Sasha's Altai
Stupice
Sun Sugar
Super Marmande
Sweet Cluster
Sweet Olive
Tangella
Wolford's Wonder
Yellow Bell
Yellow Pear
PEPPERS:
Ancho
Antohi Romanian
Big Chile
Cascabella
Diamond
Golden Cayenne
Golden Greek
Habanero
Mild Jalapeno
Orange Sunsweet
Pepperocini
Placido
Purple Jalapeno
Red Beauty
Serrano
Sweet Chocolate
Tabasco
Friday, June 16, 2006
Et tu, Blogger?

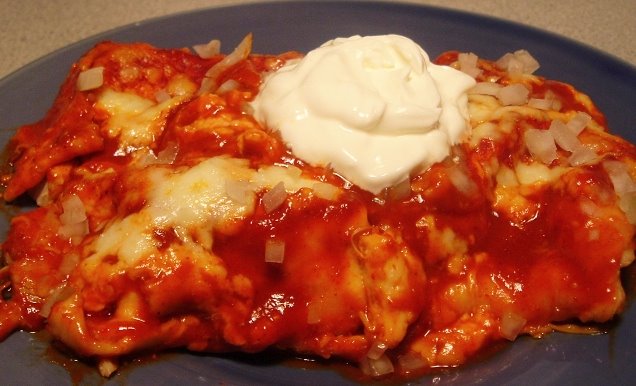
I suppose it’s high time that I posted something. I know I have gone a few days without doing so, but I have been waiting for Blogger to get its act together. However, I might be waiting a LONG time, so I’m just going to trudge ahead. I know Blogger is free, and you get what you pay for, but COME ON! It’s been over a week now that people have been having problems posting photos. It can be done, but it is...involved. You see, you can post photos using Firefox, but not Internet Explorer. But the computer that has Firefox on it is so old (Windows won’t even support it in another month!) that I can’t download from my digital camera. So I must download to one computer, e-mail myself the pictures, download them to the other computer, post the images using Firefox, and did I ever mention that we live out in the boonies and still use dial-up? UGH! But they are labors of love for you, dear readers!
So today, because you have been patient, I will offer two recipes. The first comes from a faaaabulous new website that I stumbled on doing a Google search for, of all things, Hershey’s Dark Cocoa (which we STILL don’t have here in our podunk grocery stores…boo hiss!). It’s called "This Corrosion" and the gal who writes it is HYSTERICAL! Furthermore, she linked me to the funniest site ever called "The Gallery of Regrettable Food." I urge you foodies to check it out, and read ALL the way through it—but I warn you, go to the bathroom first, or you’ll be sorry! ;-) Anyway, this very funny blogger who refers to herself as Mags also posts recipes from time to time, and she offered a great one for a sort of Greek pasta salad. It’s yummy, very pretty, and super-easy, too…well, except that I had to go to FOUR different stores (and then back to the first one—don’t ask) to find the right dressing for it. But it was darn well worth it! Here it is:
Mags’ Greek-Style Pasta Salad
16 oz. cooked whole wheat pasta (I used a whole wheat/semolina blend penne)
1 cup toasted and chopped walnut pieces (don’t be tempted to skip the toasting step!)
1 cup crumbled Feta cheese (I chose a tomato and basil varietal)
1 cup finely chopped red onion (I used a Vidalia because that’s what I had, and I soaked the pieces in some cold water while I worked on the rest of the ingredients, to take some of the bite out of the raw onion)
3 cups chopped baby spinach leaves (I used one package of defrosted chopped spinach, squeezed of excess water because I forgot to buy fresh spinach…oops!)
1/2 cup Girard Champagne Vinaigrette (the one in the triangle bottle--if you can't find it, I also recommend Ken's Steak House Greek dressing)
salt and pepper to taste
*I also took it upon myself to add about a half a can of black olives, quartered, and several smallish Campari tomatoes, chopped. One might also consider some diced cucumber, but I myself did not.
I’m embarrassed to offer the recipe for the next dish. It’s not even a recipe, just a methodology. And it’s SO Sandra Lee, that I’m quite mortified about it. But in my defense, I got home late (after hitting all those stores in search of the champagne vinaigrette!), and dinner had to be done in time for Matt Lauer’s explosive interview with Britney Spears. ;-) This idea actually came from the Cooks' Illustrated message boards. Someone asked for some ideas about what to do with a grocery store rotisserie chicken. And one respondent said that she made chicken enchiladas with it. What a great, go-to meal for a weeknight!
So here’s what I did. I de-skinned and deboned the rotisserie chicken, and chopped up the meat. Then I divided it into ten portions to correspond with the number of tortillas in the package. I used six-inch flour tortillas because my roommate gets grumpy when I use corn tortillas which, truth to tell, I would have preferred for this. I placed some chicken and some shredded Mexican cheese blend that I had leftover from a previous nacho incarnation in each tortilla, rolled them up, and placed them in a glass baking dish (eight in a row, and the last two tucked in along the side) with some enchilada sauce covering the bottom of the dish. I poured the rest of the 28 oz. can of sauce over the top of the enchiladas, and then tossed on about a half pound of crumbled Mexican queso fresco. I baked them uncovered for 30 minutes at 350 F, and then served them garnished with chopped onion and a big old blob of sour cream. I suppose black olives would have been good, too, but I didn’t think of it—despite the fact that I had plenty left over from the pasta salad. Geez! My brain is not working at optimal levels. My roommate started a new job this week (HOORAY!), and the whole household has been awakened by that godless alarm clock at 5:30am (BOO)! And as I am nocturnal, this means that I have had a total of about 12 hours’ sleep in the past three nights. So on that note, I bid you all night-night.
Subscribe to:
Posts (Atom)