See? This is what happens when you finally get a day off and you end up watching too much Food Network! You end up with a dinner menu consisting of pancakes and meatloaf! (If they can do chicken and waffles, why not pancakes and meatloaf?) I was watching some show about diner cuisine, and I was subsequently possessed by the desire--no, the desperate need--for pancakes and a meatloaf sandwich! (Obviously, I am restricting my carbs. Tee hee.)
The pancakes were good, but were not from scratch (don't judge me!). They were made from a lovely organic buckwheat mix that I picked up somewhere on my travels. (I prefer edible souvenirs when I road trip...or cookbooks. But I digress...) However, please allow me a short discourse on meatloaf. Previous to this evening, I thought that I already had the very best meatloaf recipe in the whole world, given to me by my wonderful friend, Twonky Bellonkamy (aka Tony Bellomy). But recently, I was forwarded a meatloaf recipe from one of my PBGV acquaintances, highly recommended by another friend who deemed it a "killer meatloaf!" So I thought I'd give it a whirl. Well, bygum, I think our house meatloaf has been supplanted! This really was the best meatloaf I've ever had! I know meatloaf can be very subjective, so I guess I'll just say that it's exactly how I prefer my meatloaf to be. Tender and moist, but not falling apart, and flavorful without the spices and other additions overpowering the meat itself. To be fair, the recipe was VERY similar to my friend Tony's, with two notable changes. One is the omission of a topping. You know, that ketchup/brown sugar/worcestershire affair, which I enjoy, but don't really need--especially if my goal is a meatloaf sandwich. And then the one ingredient that sets this recipe apart is the inclusion of Bloody Mary mix (as opposed to ketchup or tomato soup or the like). Now, as I am not a drinker, I didn't have any Bloody Mary mix on hand, but I was able to locate a few recipes on the 'net that I integrated to create a tasty homemade version. It made about six cups of the stuff, so I froze the leftovers for future meatloaves--of which there will be MANY following my new favorite recipe! And here 'tis...
BLOODY MARY MEATLOAF
1 pound ground beef (sirloin, if you can swing it!)
½ pound Italian sausage (I like a garlicky version--and this is my addition, by the way, as I prefer a beef/sausage mix for my meatloaf. The original recipe called for one pound of beef only.)
1 small onion, finely chopped
1 green pepper, finely chopped (OPTIONAL, as I do NOT prefer it! But I did mince a few jalapeno slices and threw them in for good measure and a bit of a kick. Yum!)
1 cup quick oats (NOT instant!)
1 teaspoon salt
½ teaspoon pepper
½-1 teaspoon granulated garlic (to your preference--"never too much garlic" is my motto)
1 egg
1 cup Bloody Mary Mix* (preferably, a spicyand/or beefy variety!)
Mix all ingredients together well by hand. Form an oblong-shaped loaf on a lined cookie sheet. Bake at 350 degrees for about an hour.
*Spicy Beefamato-like Bloody Mary Mix
46 oz. tomato juice
8 oz. beef bouillon
½ teaspoon pepper
2 teaspoons celery salt
½ teaspoon onion powder
juice of one lemon (or lime juice would be great, too!)
3 tablespoons Worcestershire sauce
3 tablespoons juice from jalapeno/nacho slices
3 tablespoons vinegar (I like apple cider vinegar, but white is fine)
2 tablespoons sugar
Tabasco to taste (several good glugs—don’t be timid!)
Sunday, May 21, 2006
Saturday, May 20, 2006
Happy Flea and Tick Season!

I rarely divert from my format of recipes-with-stories. But it's May, and my thoughts have turned, not to romantic love, but to the love of my animals. Now I do love them, but having so many of them on a teacher's paltry salary, it can be a challenge to provide the best possible medical care. Don't get me wrong--I would go without groceries for myself before they would lack for food or a necessary trip to the vet. But some of the medications that you get from your vet are just ridiculously expensive! For example, at my vet, Frontline Plus for flea and tick controls has just gone up to $17 a dose! And I have FOUR dogs! That would be $68 a month! Now, I don't blame the vet themselves, but it's the drug companies--the same type of company that loves to gouge us humans--that jack up their prices, knowing they have us over a barrel. And every year, when it's time to stock up on Frontline and Heartguard, I become quite cranky about it! :-(
But one major benefit of being involved in the world of purebred dogs over the last few years is that I have learned LOTS of tips from breeders who maintain a large number of dogs in their kennels and need to keep costs down. The first concerns flea and tick control. I use Frontline Plus, as do most people I know, though there are other good products out there like Revolution and Sentinel. And each of these can be purchased for about HALF PRICE (that's including the shipping!) if you order these medications from Australia where you don't need a prescription for them. The company that I order from is called IPet International (Pet Shed is another popular one), and they have a website from which you can order directly. But I think I may have saved another couple of bucks by bidding on Ebay instead of ordering directly (actually, I didn't really bid--I chose the "buy it now" option). This is the same product made by the same manufacturer, Merial. The packaging is slightly different, as the dog's weight is expressed in kilos rather than pounds. Also, the seller has 100% positive feedback on Ebay and has thousands of feedback responses. Most of the posts speak to the speed of delivery from Australia to the States. It usually takes 7-10 days from Sydney, and they promise to ship within 24 hours of placing your order. I just ordered six doses of the largest size (89-132 lbs.), and that will take care of my four 25-45 pound dogs for the whole flea and tick season!
What's that you say? Six doses for four dogs for six months? How does that work? Well, this is the other tip that I got from several of my dog breeder friends--splitting the doses. One extra-large dose (the red box with the Bernese Mountain Dog, I believe) can be split between all four of my medium-sized dogs. The dose for an 89-132 pound dog is 4.02ml. Based on weight, Prunelle needs .67 ml, Rosie needs double that (1.34 ml), and Percy and Grady need approximately 1 ml. Do the math, and you'll find that that works out perfectly when you split the extra-large dose. One breeder I knows just kind of eyeballs the application, but I couldn't do it. One dog would always end up with way more than his/her share, leaving another dog short-changed. So I squeeze out the dose into a small ramekin and again, use a syringe (with the needle removed) to measure the correct amounts, and then squirt the medicine from the syringe between each dog's shoulder blades. Ta-dah! Four dogs treated for the price of one (HALF the price of one if you get your Frontline from Australia)!
So that takes care of your fleas and ticks, but what about heartworms? Typically, Heartguard is the drug of choice for heartworm preventative (or Interceptor is also used). But I stopped using Heartguard a couple of years ago when I got my youngest dog, and his breeders explained how they safeguard their dogs against heartworms for pennies a month. Following their advice, I bought a vial of injectible ivermectin (this is cattle wormer, but it's the same drug as in Heartguard) from my local feed store. It was about $40, but it lasts forever--I've had mine for two years and have barely made a dent in it! Then I already had 1.0 cc syringes from one dog's allergy shots, but I bought a 3 cc one as well. I also bought a liter of propylene glycol (the ingredient that keeps soft dog treats soft like Pupperoni and Jerky Treats) from the Wal-Mart pharmacy. Now there is some discussion that propylene glycol (in ENORMOUS quantities!) may be a carcinogen, so you could use olive oil or vegetable oil instead, but ivermectin won't mix in water. Each month, I take 3 cc's of either propylene glycol or oil and mix it with just .1 cc of the ivermectin (pay attention to that decimal point, please--that's one-tenth, not one whole cc!). Many sources online will tell you that the formula is .1 cc of ivermectin (undiluted in a base) per 10 pounds of the dog's body weight is correct. But that would be an appropriate dose if your dog were INFESTED with internal parasites! But as a simple monthly heartworm preventative, you need only a tiny fraction of that amount. That's why you dilute it in a base. Anyway...once you dilute the invermectin and mix it well, then you administer it at .1 cc per 10 pounds of doggie. You can squirt it onto a piece of bread or a favorite treat, but I just open their mouths and squirt it onto their tongues to be sure that they got it. And that's it. I have my dog's blood tested for heartworm regularly as directed by their vet, and they are heartworm-free! I actually think that my dogs are more protected now, as I keep them on heartworm preventative all year round, not just May-October like I used to when I was buying Heartguard. Oh, I should tell you that ivermectin can be fatal to collies and related herding breeds (shelties, for example). I don't know all of the breeds that might be affected, but if you already use Heartguard on your dog, you would be fine, as it is the same drug. Of course, it is always in your best interests (and your dog's!) to check with your veterinarian before trying any of the ideas that I have shared.
Have fun with your pets this summer, and give them a smooch from me and mine! :-)
Tuesday, May 16, 2006
Where's MY gingham apron?? GRRR!
I have a dream, friends. (I know it's almost Memorial Day, not Martin Luther King, Jr. Day, but bear with me.) I know some would think it's a silly dream, but it's MY dream nonetheless. I do not dream of WINNING the Pillsbury Bake-Off, no. But I DO dream of mincing in with the rest of the Bake-Off finalists, cheerily garbed in our blue-and-white gingham aprons, eager to craft innovative things with crescent rolls and such, with my beloved friend, Kurt (who shares my Bake-Off dream), cheering me on. But, sigh, it seems it is not meant to be. I enter faithfully every year (now that it has become an annual event), but I just can't seem to come up with anything that uses fewer than six mainly pre-fab ingredients (with a minimum of two "eligible" products per dish) and can be made in 15 minutes or less and is healthful to boot! Indeed, that's not really cooking is it? It's really just assembling (or re-assembling) preprepared foodstuffs, and I have no idea why someone would pay a million dollars for THAT! Ok, the cynical side of me knows why...a million bucks is chump change after they get a bunch of suckers like me to go out and buy a ton of Pillsbury products that we wouldn't normally purchase just to experiment with recipe ideas. It's just sad that it's not a REAL cooking contest like when it started and all that was required was that you use Pillsbury flour! Ok, I take it back. Last year's winner was close to real cooking. It was a takeoff on pecan pie made with bashed-up granola bars. In fact, I keep meaning to try it, as it sounded very good. But this year, the winner made chicken and stuffing, and GUESS what the stuffing was made out of? Prefab waffle sticks! And the chicken was glazed with the maple-flavored pancake syrup that comes with the waffle stix! Now I must admit, it was very creative and EXACTLY what usually wins the contest, namely, an unusual use of qualifying ingredients. And it was very simple and perfect for a work week dinner, which they also look for, and I wouldn't even doubt that it actually tasted good. I myself enjoy that combination of sweet and savory. Still, the bottom line is, what the Bake-Off has become just flies in the face of everything that I hold dear--that is, my main cooking philosophy that good food made with real ingredients takes time and effort, just as do all important things in life.
But every year, I try again, to no avail. And I think some of my ideas have been darn good! I can fashion many a wonderful thing out of a can of crescent rolls, let me tell you! The Salmon en Croute I devised was extremely tasty, and the Cherry Almond Bread Pudding was nothing short of decadent! But would they accept me into the holy gingham sisterhood? Noooooo! Well, screw them, I say! I will share my ideas with you dear people instead. The recipe I was thinking about today that is perfect for your Memorial Day barbecue and all of the other summer cookouts coming up is a marinated bean salad. And I must admit, this is dangerously close to not cooking at all, in the PBO tradition. It mostly involves opening up a lot of cans, which the marvelous Nigella Lawson claims is truly satisfying, and I agree--even if it seems like cheating. The original recipe was an homage to a delicious salad that I had from the salad bar at the wonderful Wegman's flagship store in Syracuse, NY. I adapted it to include edamame which was a qualifying ingredient in the Bake-Off last year (as were Green Giant corn and Progresso black beans!). But I have also been known to replace the edamame with whatever bean or legume that I have on hand. Along with the black beans, one might consider dark red or light red kidney beans, cannellini beans, or my fave, chickpeas/garbanzos/ceci beans. Ooh! Fresh, springtime fava beans would be excellent, too! But you do what you feel led to do. As always, I encourage you to play around with the ingredients and amounts until the resulting dish pleases you...and not those damn Bake-Off Nazis! Tee hee.
(Now don't you go entering this recipe yourself next year...you KNOW I will try, try again! The pain of rejection fades like that of childbirth...and you find yourself doing it again! My gingham dream never fadeth...though, come to think of it, last year, it was some off khaki-and-red number designed by Todd Oldham, of all things! Bring back the blue-and-white apron, I say, and bring back actual COOKING to the contest! Hear me, oh guardians of the sacred Bake-Off!)
Soy Good Edamame Salad
(Bake-Off entries HAVE to have cutesy names...it's de rigeur, as Martha would say!)
2 quarts water
generous pinch of salt
2 10-oz. bags (frozen) shelled edamame*
1 15 oz. can corn
1 19-oz. can black beans, drained
3 cloves garlic, peeled and minced
1/4 cup roasted red peppers (about one large one from a jar), chopped
1/4 cup onion, chopped (about a quarter of a large one)
1/2 cup olive oil
1/4 cup white wine vinegar
1/2 teaspoon salt (or to taste)
1/4 teaspoon black pepper (or to taste)
1/4 cup parmesan cheese, shredded
1/4 cup fresh basil leaves, very thinly sliced
1. Bring a large pot of water to a boil (enough to cover the soybeans--at least two quarts) with a good pinch of salt. Add the frozen edamame and bring them back to a boil. Boil for 6-7 minutes or until tender. Drain, and cover with cold water for a few minutes to cool. Drain again. (This would also be the drill for fava beans, though you'd need to peel the skins, too. And obviously, skip this step altogether if you are using all canned beans.)
2. Combine edamame, corn, drained black beans, minced garlic, chopped red peppers and onions in a large bowl. Dress with the olive oil and white wine vinegar, salt and pepper. Mix well so that everything is coated.
3. Cover salad and refrigerate for at least a couple of hours or overnight. Just before serving, toss with the shredded parmesan cheese and thinly sliced basil.
*Switch out the edamame for any bean(s) you like!
Saturday, May 13, 2006
Yeah! She lives!
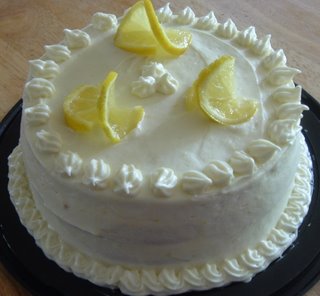

Well, I never would have thought it possible just a day ago, but it's OVER. At long (VERY LONG!) last, the school year has come to a close. And my immediate plans include, after finishing this entry, taking a shower, falling into bed, and waking up maybe Monday morning? I was at my desk every night this week until 11pm or midnight, and last night was the longest haul. I left school around 10:30 (the night janitor, Wolfgang--nope, not making that up--teased me about slacking off and leaving "early!"), but I still had to go to the store and get things for a party at school the next day. As usual, I had volunteered to bring the birthday cake. But I had a vision for a lemon-blueberry creation that I was worried might freak people out a bit. Plus, the chocoholics sometimes take the staunch position that it's ain't dessert without at least some chocolate! So I decided, since we were celebrating several summer birthday people at once, to make TWO cakes. Ok, so perhaps this was not the wisest decision, considering that I arrived home to begin baking around midnight! (Why do I do it to myself? Someone please explain it to me?)
Now I must confess something to you, my friends, and I know I have made this confession to you before. (Five months into a blog, and she's already repeating herself? Sheesh! But I'm just that serious about it!) Although I have many excellent from-scratch cake recipes that I often rely on, I am a big fan of the box cake mix. (Oh, take your hands off your hearts and stop that silly gasping!) It is really difficult to get a cake from scratch that rivals the texture of the box mix, as giant machines process the ingredients until they are super-fine, producing that feather-light quality. However, I do believe in doctoring up the mix, riffing on it, and making it one's own. And I hold nearly religious convictions about frosting! I will allow the box mixes, but please skip the can o'frosting. What kind of space-age polymer must bind up all that cloying goo so that it might have a stable shelf life? ICK! No, indeed, make your own frosting, I implore you!
For the lemon-blueberry affair, I began with French Vanilla cake to which I added extra vanilla, the zest of one lemon, and I swapped out some of the water for the juice of the lemon. I didn't want an extremely tangy cake, but something just gently lemony. I baked two 8-inch cakes, and when they were cool, I levelled them off, split the layers each in half, and filled them with some of the wild blueberry jam that I make every summer (about 1 -1/2 cups total). I was also careful not to take the jam too close to the edge of the cake so that it didn't leak out of the layers as I assembled the cake. For the frosting, I used a lemon-cream cheese recipe from Bon Appetit . It was very delicious, but very, very soft, even after setting up in the fridge, making it devillishly difficult to pipe. So perhaps it needed a little extra powdered sugar? And I definitely should have cut the recipe in half! In any case, here it is:
Lemon-Cream Cheese Frosting
2 8-ounce packages cream cheese, room temperature
3/4 cup (1 1/2 sticks) unsalted butter, room temperature
4 cups powdered sugar
1 teaspoon grated lemon peel
1 teaspoon vanilla extract
Using electric mixer, beat cream cheese and butter in large bowl until light and fluffy. Gradually beat in powdered sugar. Beat in lemon peel and vanilla. Cover and refrigerate until just firm enough to spread, about 30 minutes. Makes about 4 1/2 cups.
Bon Appétit, August 2001
I must tell you, though when I first told people that the cake was blueberry-lemon, I was met with a continuum of responses from surprise to suspicion to mild disdain. But after they tried it, well, the whole cake quickly DISAPPEARED! It was gone long before the chocolate cake was, much to my amazement. And it looked really, really pretty with four layers sandwiched together with all that blueberry goodness! (The picture doesn't do it justice as that was the last knackered piece that I managed to save for my roomie. And I had to wrestle it away from the others before smushing it into my tiny office fridge all day, and then transporting it all the way home between two flimy paper plates. I'm surprised it hadn't become lemon-berry crumble by the time I thought to photograph it!) Anyway...it was delicious, and it's definitely a combination that I'll make again. Very summery.
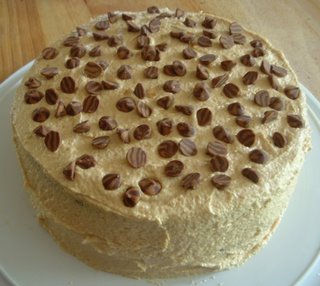
For the chocolate-peanut butter cake, I prepared a Dark Chocolate Fudge cake mix, adding some extra vanilla (see a pattern here?) and about a teaspoon of espresso powder to make the flavor even deeper. I baked two 9-inch layers, and had it not already been obscenely late, I might have split those layers, too, but I simply didn't have the will. For the frosting, I used a peanut butter-cream cheese recipe from Godiva. And I sprinkled a generous amount of chocolate and peanut butter swirled chips on both the middle and top layers. It looked cute, but I must say, I didn't care for the faux peanut butter flavor of the chips. The next time I make this cake, I will decorate it with miniature Reese's cups like I normally would (the store was out of them last night, so that's why I went another way--oh well, live and learn!). Nevertheless, people were duly impressed, and I was happy to return home with two empty cake carriers!
Peanut Butter Cream Cheese Frosting
1 package (8 ounces) cream cheese, at room temperature
2 ½ cups confectioner's sugar
4 tablespoons (1/2 stick) unsalted butter, at room temperature
2/3 cup chunky peanut butter (or smooth is fine, too)
2 teaspoons vanilla extract
Beat cheese, confectioner's sugar, butter and peanut butter in a large mixing bowl with electric mixer at low speed, about 1 minute or until well blended. Increase speed to medium-high and beat for about 3 minutes or until light and fluffy. Scrape down sides of bowl, then add vanilla. Beat 1 minute. Spread frosting evenly over cake in pan using a small offset spatula.
Tuesday, May 09, 2006
Finals Week: ARRRRGGGHHH!!
I am in the thick of it, friends. It's finals week at the two institutions of higher learning where I teach, and the NO SLEEP RULE is firmly in effect until this weekend! Someone remind me again why I thought it was a good idea to be gone for a week recently? DUH! But I am taking a moment away from the eternal grading of papers (running screaming away from the mountains of work is more like it!) to share with you two of my stand-by recipes for when there is precious little time to craft great works of culinary genius. These are recipes for any old "no news is good news, middle of a mid-year day" (bonus points to the first person who gets that reference!). And your minimal efforts will be greatly rewarded, I assure you.
Since I seem to be in a layered dish/casserole kind of place lately, let me start with one of my all-time favorites, cavatini. This recipe originally came from one of my favorite people in the world--a former student and also roommate of mine--Karen. I have tinkered with it a bit, but it's easy and delicious, and always a crowd-pleaser at potlucks and such. Really, it's a great dish to turn to when your family grumbles that you've made spaghetti yet AGAIN! I myself could happily eat spaghetti once a week, but this is a nice variation on that theme. It's also similar to lasagna, but MUCH less labor-intensive! In fact, this is the Taco Bell philosophy of food, whereby you simply rearrange the same ingredients to give the illusion of a new menu item! ;-)
Cavatini
1 lb. ground beef (or Italian sausage)
32 oz. jar of your favorite spaghetti sauce
7 oz. box pasta shells (or whatever shape pleases you!)
2 cups shredded mozzarella (at least!)
8 oz. can of mushrooms, drained
1 pkg. pepperoni slices (look for Emeril’s if you can find it—yum!)
Brown ground beef (or sausage). Drain the meat and add spaghetti sauce and mushrooms. Prepare pasta and drain. Layer pasta, then meat mixture, then pepperoni slices, then cheese, and repeat the layers. Cover with foil and bake at 350 degrees for 30 minutes. Let stand 10 minutes before serving.
*Note: You can throw in any desired veggies with the meat mixture. I sometimes sauté an onion and/or garlic with the beef or sausage. I also use real mushrooms instead of canned when I have them on hand (sautéed with the meat, of course). Further, you could add something like cubed zucchini or yellow squash to the mix, which I often do in the summer when I have too much squash around! So vary this recipe according to whatever you have around and feel like adding in.
The next recipe is another great one for the busy work week. It looks involved (mostly because it won't let me single-space the ingredients for some reason!), but it doesn't take that long to put together, and it makes an enormous VAT of food that can be used for leftovers the second night, or to throw into a plastic container and take to work for lunch the next day. And it's actually pretty healthy to boot! (I know that healthful food generally goes against our philosophy at Lindsey's Luscious, but call this a happy accident!) I shared this recipe with my work colleagues a few years ago, and to this day, my division coordinator makes the sauce and keeps it on hand for an Asian dressing to put on pita sandwiches and the like. Her family refers to it as "Gina's Sauce!" :-D I hope you'll enjoy it, too.
Chicken Sesame Noodles
1 pound box vermicelli (or thin spaghetti), cooked and drained
4 breasts boneless chicken, poached and sliced
2 large carrots, peeled and shredded
1 small bunch green onions, sliced thinly
1 cup (or more) green peas (or pea pods or sugar snaps), blanched
1 red pepper, cored, seeded and sliced thinly
1 jalapeno pepper, cored, seeded and minced
1/4 cup peanut butter
1/2 cup rice vinegar
2 large cloves garlic, peeled and roughly chopped
1 tablespoon hoisin sauce
1 teaspoon sesame oil (or to taste)
2 1/2 tablespoons peanut or vegetable oil
1 teaspoon chili paste (or to taste--I prefer two myself!)
1 tablespoon brown sugar
1/2 teaspoon powdered ginger (a grating of fresh would be even better!)
salt and pepper to taste
2/3-1/2 cup roasted, dry roasted, or honey roasted cashews, halves or pieces
1. Cook pasta according to package directions. Poach chicken breasts in the same pot with the vermicelli. Drain pasta, rinse with cold water until cool, then drain again. Slice chicken when cool enough to handle.
2. Put cooled pasta and chicken in a large bowl. Add prepared vegetables. Mix gently with hands to combine everything well.
3. In a blender or food processor, puree the peanut butter, vinegar, garlic, hoisin, oils, chili paste, sugar, and spices until smooth. Pour over other ingredients. Make sure everything is coated thoroughly.
4. Serve at room temperature or chill in the refrigerator. Garnish with cashews before serving.
*Note: You could add or substitute anything you like in this dish, such as some shredded Napa cabbage, bean sprouts, sliced water chestnuts, etc. And I'm sure that it would be good with, say, shrimp instead of chicken. Be creative!
Sunday, May 07, 2006
Taters!
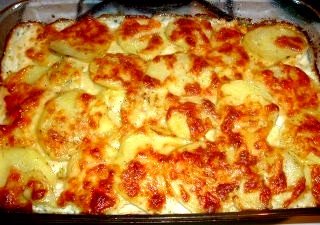
So...I made the Potatoes Dauphinois to go with dinner tonight, and I thought folks might like to see how they turned out, especially since I've been going on and on about them! :-) Oh, and I realized in making them that the recipe didn't say what temperature to bake them at. I went for the standard 350 degrees for 45 minutes, and they turned out like this. But I should mention that my potato slices were, say, less than a quarter inch, NOT a half-inch (and I wouldn't want them any thicker than that!). So take that under advisement...
Friday, May 05, 2006
The Culinary Sleuth Strikes Again!

In my next-to-the-most-recent post entitled, "After a shocking 11-day silence...," I waxed not very poetically about a most excellent French-inspired banquet that I enjoyed while at my dog breed's annual national event in Sacramento last week. Upon returning home, I e-mailed the very talented and genial caterer named Pam Tobin, herself a breeder of Great Pyrenees (dog people are good folk!), and she was EXTREMELY gracious in sharing the recipes that she used for the menu that night with me. And I, in turn, am "paying it forward" with her kind permission. Now I'm not sure about the original source of each recipe--some are Pam's and some are from other sources as well. But wherever they come from, I'm sure that you will enjoy these dishes--ESPECIALLY the Gratin Dauphinois. Outstanding!
STUFFED PORK ROAST
serves 6
4 lb. pork roast, boneless (typical of what you find in the store)
If they aren't already split, then lay them on the cutting board and split them horizontally to the end of the roast but not cutting through the roast. Next turn the roast around and cut it again horizontally so that now you have a butterfly effect and the roast can be laid flat out. Set aside.
Grand Marnier Apricot Stuffing
1 cup finely diced dried apricots (best to use a food processor)
1-1/2 cups Grand Marnier
Combine the apricots and 1 cup of Grand Marnier in a small saucepan. Heat to boiling and remove and set aside.
1 lb bulk pork sausage, cooked and drained and set aside
1 cup (2 sticks) butter
2 cups coarsely chopped celery
1 large yellow onion, chopped
1 lb herb stuffing mix
1 cups slivered almonds
2 cups chicken stock or canned chicken broth
1/2 teaspoon dried thyme
Melt 1/2 cup butter in skillet over medium heat. Add celery, onion and sauté for 10 minutes. Transfer to a large mixing bowl. Add the stuffing mix, apricots with the liquid, and almonds. Mix together. Heat the remaining 1/2 cup butter and stock in small saucepan until butter melts. Pour over the stuffing mixture and add remaining 1/2 cup Grand Marnier. Stir well, and season with thyme.
Lay your stuffing mixture, beginning in the center of the pork roast, in a thin layer working within 1/2 inch of the edges. Make sure that the stuffing mixture is spread thinly. That way, after the roast is cooked and sliced, it will reveal a nice even spiral. Roll the roast tightly, fat side out and tie off with string (if you don't have any, ask your butcher at the store for string to roll your roast for cooking).
Herb Rub for Pork Roast
1/2 teaspoon garlic powder
1/2 teaspoon dried rosemary
1/4 teaspoon dried sage
1 teaspoon salt
1 teaspoon coarse ground pepper
Place the roast on a rack in a roasting pan. Coat roast with 2 tablespoons olive oil and apply the herb coating. Cook at 350 degrees for approximately 1-1/2 hr. Use meat thermometer to determine cooking time.
TRI-TIP (BEEF) ROAST
4-5 lb. tri-tip roast
Oven roast at 350 or cook on the BBQ or rotisserie. Slice roast against the grain and serve with choice of sauces (below).
Peppercorn Sauce (Sauce au Poivre)
4 servings
1/4 cup finely chopped shallots
1 oz. butter (1/4 stick)
1 tablespoon cracked black (or green) peppercorns
1/2 cup red wine (Cotes de Rhone or pinot noir)
8 fl oz. demi-glace (you can use 1-1/2 oz of Demi-Glace Gold reconstituted in 8 fluid ounces of hot water)
2 tablespoons finely chopped parsley
Prep:
Melt butter in sauce pan and sauté shallots for approximately 2 minutes until transparent. Add peppercorns and red wine, and reduce to an essence (approx 2-3 minutes.) Add the demi-glace and stir with a whisk until glace is dissolved. Add water and simmer until the sauce is thick enough to coat a spoon. Blend in chopped parsley and serve over broiled steak. Sauce is best over steak with all fat trimmed. Steaks can be either pan fried, broiled, grilled or whatever the preference.
Bordelaise Sauce
serves 4
1/4 cup finely chopped shallots
1 oz. butter (1/4 stick)
4 oz. diced beef bone marrow*
1/4 teaspoon cracked black peppercorns
1 sprig fresh thyme
1/2 cup red wine (Cotes de Rhone or pinot noir)
1 cup demi-glace (you can use 1-1/2 oz. Demi-Glace Gold reconstituted in 8 ounces of hot water)
Melt butter in a saucepan and sauté shallots for approximately 2 minutes until transparent. Add red wine and reduce for about 2-3 minutes to an essence. Add thyme and peppercorns and reduce further for approximately 2-3 minutes until almost no liquid remains. Add demi-glace and simmer for about 5-6 minutes until sauce begins to thicken. In a separate pan, simmer diced bone marrow in water for 3-4 minutes. Drain water and add diced marrow to sauce and simmer for approximately 2 minutes. Serve over tournedos, beef tenderloin steaks or rump steaks.
*If bone marrow is not available, you an substitute butter instead. Sauce is excellent over grilled or roast beef as well.
Cognac Mustard Sauce
serves 4-6
1 cup cognac
3 cups manufacturer's cream or heavy cream
3 tablespoons coarse ground mustard
In a saucepan add the cognac and reduce to 1/3. Add the cream, reduce to 1/2 again. Add mustard and whisk. Note: manufacturer's cream will foam and bubble over and needs to be watched carefully but is preferred in this menu for the texture that compliments the pork.
Gratin Dauphinois (Potato Bake)
serves 6
1 clove garlic (minced in food processor)
4 tablespoons butter
2 lbs. boiling potatoes (sliced very thinly, 1/2 inch thick, food processor works best)
1 teaspoon salt
1/2 teaspoon ground pepper
1/8 teaspoon nutmeg
1/4 lb. gruyere cheese, shredded
1/2 cup manufacturer's cream or heavy cream
1/2 cup whole milk
Spread in shallow baking dish the minced garlic and dot with 1 tablespoon butter. Spread half of the sliced potatoes in the dish, sprinkling with half each of the salt, pepper, nutmeg and cheese. Cut 2 tablespoons of the butter into small bits and use to dog (LOL! canine Freudian slip--I think she meant "dot!") the surface. Spread the remaining potatoes on top and sprinkle them with the remaining salt, pepper, nutmeg and cheese. Cut the remaining tablespoon of butter into small bits and use them to dot the top.
In a small saucepan over medium-high heat, bring the cream and milk just to a boil. Pour the milk over the potatoes, sliding knife between the edges of the pan and the potatoes to help the milk run underneath. Bake until the milk is absorbed and a golden brown crust forms 35-45 minutes. The timing depends upon how thinly the potatoes are sliced. Serve immediately from the dish.
Chocolate Mousse
6 oz. semi-sweet dark chocolate, chopped coarsely
4 tablespoons butter
pinch salt
1 teaspoon vanilla extract (pure)
2 tablespoons strong coffee, or 4 teaspoons brandy or orange-flavored liqueur
4 large eggs, separated
2 tablespoons sugar
1 cup chilled manufacturer's cream or heavy cream
Melt chocolate, then whisk butter in one tablespoon at a time. Stir in salt, vanilla, and coffee until mixed well. Whisk in egg yolks one at a time before adding the next, and then set aside. In a clean bowl, stir egg whites over a saucepan of hot water until slightly warm, 1-2 minutes. Remove bowl, and beat with mixer at medium speed until white peaks form. Raise to high speed and slowly add sugar beating until soft peaks form. Whisk one quarter of the whites into the chocolate mixture and lighten, then gently fold in remaining egg white. Whip cream to soft peaks, gently fold into the mousse, spoon into bowls and refrigerate at least 2 hrs. Can be make 24 hrs ahead.
Gorgonzola, Walnut and Pear Salad
mixed greens
grape tomatoes
cranberries, dried
candied or toffee walnuts
pear slices (canned or fresh)
Gorgonzola cheese (crumbled over top of salad )
Dress with red wine vinaigrette or champagne pear vinaigrette or any vinaigrette of your choice.
Thursday, May 04, 2006
Maple season continues...
You may have noticed a maple theme running through my blog, as spring is sugaring time here in the North Country. And once all that magical golden amber liquid is is distilled and bottled, what DO we do with it all? Well, I have two suggestions. The first is my favorite granola recipe which I baked and bagged and distributed to my wonderful colleagues at work one holiday season, and there was much rejoicing. I suggest eating it with a mixture of vanilla custard-style yogurt and sour cream, some extra vanilla extract, and sugar to taste...a faux Swedish cream, if you will. Of course, this kind of works against the health aspects of granola, but....WHO CARES?? It's scrumptious!
Gina’s “Never Too Many Nuts!” North Country Granola
½ cup maple syrup (can also use honey, or a combo)
½ cup brown sugar
1 stick butter, melted
½ cup vegetable oil
1 tsp. salt
1 tsp. vanilla
½-1 tsp. cinnamon
6 cups rolled oats
1 cup wheat germ (or I use wheat “flakelets” from my local co-op)
¼ cup sesame seeds
¼ cup sunflower seeds
½ cup walnut pieces
½ cup whole almonds
½ cup pecan pieces
½ cup macadamia halves
water to sprinkle
Mix the first seven ingredients together. Pour over the oats, wheat flakes, seeds and nuts, and mix to coat thoroughly. Sprinkle the whole mixture with a little bit of water, until nice clumps start to form (help this along by squeezing it together with your hands). Carefully spread the granola out onto a large baking sheet. Bake at 325 degrees for about 20 minutes until golden brown, being sure to stir the mixture a few times as it cooks to help everything brown evenly.
*Note: You can obviously increase or decrease the amount/kinds of nuts to suit your taste. And after the granola is baked, you may also want to add your favorite dried fruit(s)!
The next maple recipe was part of a salmon dish that I enjoyed at the divine restaurant at Simon Pierce Glassworks in Quechee, Vermont. (Beth, the Kitchen Mage, HOLLA! I know you are always up for another good salmon recipe!) Lord knows I will never eat there again, because I couldn't possibly afford it. But my roomie won a gift certificate there, and it was one of the most sublime meals we've ever had! They did a cedar-grilled salmon served with the following apple-maple-mustard sauce, and also an autumn vegetable hash and a cranberry coulis. And when I contacted them afterward to commend them for the fine fare, the chef was generous enough to share the recipes. I know, I know! This menu has no business being posted in spring, but once I mention these delights, I know someone will ask for all three recipes. So I'll just post them now and stay WAY ahead of you all! (And yes, I do realize that these are restaurant batches, but I have faith that your elementary school left neither you nor your math skills behind!)
APPLE MAPLE MUSTARD SAUCE
2 cups apple cider vinegar
2 cups apple cider
2 cups maple syrup
3 cups dijon mustard
½ gallon heavy cream
Combine first four ingredients. Reduce by ½, add heavy cream. Reduce until desired consistency. Salt and pepper to taste.
CRANBERRY COULIS
1 cup white sugar
1 cup apple juice
1 cup orange juice
2 cup cranberry juice
4 cup frozen or fresh cranberries
Caramelize sugar. Add juices and cranberries. Reduce by 1/3. Mix in blender. Strain, cool, use.
AUTUMN VEGETABLE HASH
10 lb potatoes – peeled, medium dice, tossed with canola oil
10 lb butternut squash – peeled, medium dice
2 lb leeks – cut lengthwise then ½ moons
1 lb dried cranberries
1 bunch thyme, minced
½ cup garlic, minced
Roast potatoes and butternut squash at 350 °f oven 20 minutes or until golden brown but still al denté. Sauté leeks with garlic and thyme. In large mixing bowl toss ingredients, add salt and black pepper to taste. Finish with butter and toasted walnuts.
Monday, May 01, 2006
After a SHOCKING 11-day silence...
Hello, dear readers! I am throwing myself at your mercy to beg for your forgiveness for being incommunicado for so long. Here's my story (and I'm sticking to it). Last Friday evening, something suddenly came up (as Marcia and her nose said to Doug Simpson), and I made last-minute travel arrangements to be in Portland, OR on Sunday. I was at my desk working from 3pm to 2am trying to make arrangements to be gone all week, as I also had already planned to be at the PBGV National in Sacramento from Wednesday through Sunday. After flying the red-eye back from California, arriving in Albany yesterday morning and STILL having to drive 2 1/2 hours back home, I only managed to unpack, start a load of laundry, and bathe the incontinent, elderly cocker spaniel (and no, that's not some kind of euphemism) before I passed out and napped for a few hours. Then I was up late just trying to read and respond to all of my e-mail and was back up-and-at-'em for work this morning. My day rushed by at a feverish pace as I tried only semi-successfully to straighten out all of the little (or big!) problems that cropped up in my extended absence at this inopportune point in the semester. And it's almost 9pm now, and where am I? Still at my desk--procrastinating on grading the MOUNTAIN of papers that have collected while I was gone.
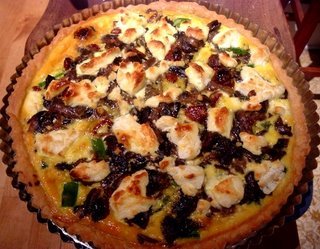
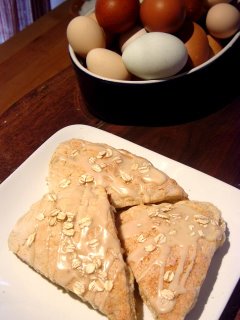
However, this seems the perfect time to dilly-dally just a bit more and make at least one extensive post to my neglected blog. Of course, I have been gone for a week, and have mostly been eating out sans cooking. But there were a few culinary highlights of my journey that I wish to share with all of you. Let me begin with the Oregonian portion of the adventure. I had business in Portland by day, but afterwards, I would drive an hour and a half south to some little, teeny town out in the boonies called Falls City (near Dallas, which is, in turn, outside of Salem) to visit my delicious friends, John and Keith. I mentioned my beloved friend, John, in the banana bread post of April 14. He has recently moved from Sonoma County, CA with his partner, Keith, and they have a magical little spread of land (2.6 acres, I believe) that they are simply transforming into their own Eden (à la Adam and Steve...tee hee!). There are raised vegetable beds, a berry thicket, flower gardens, orchards, a magnificent greenhouse right off the kitchen, and even a chicken coop and run attached to the house! In addition to much landscaping, they are working feverishly to restore the lovely old Victorian home itself, and while they are doing all of this, they are also making many Adirondack chairs at their workshop "downtown" (across from the new community center and kitty-corner from the town's one little grocery/hardware/video store) to get ready to sell at the Salem Saturday Market in a couple of weeks. Whew! And still they had time to host a surprise out-of-town guest and make me the most wonderful, homemade dinner! Did I mention that the poor things don't even have a proper oven or fridge because of the impending kitchen remodel and some dubious wiring? Nevertheless, they prepared for me a scrumptious meal of shrimp tacos on homemade tortillas with fresh cilantro from their greenhouse, a salad of their own sunflower sprouts (also from the greenhouse) with homemade blue cheese dressing, and a vegetable tart with mushrooms, onions, asparagus, their own sun-dried tomatoes (sweet like candy to my soul), and thyme (again from the greenhouse), and of course, with some fresh eggs from their hens as a binding and then fresh goat cheese on top. That's right! That tart above was baked in a toaster oven--can you imagine? And the tacos were made on an appliance entitled, The BIG G-ASS GRILL! I brought dessert--a trashy pie from the Village Inn to remind John and myself of our days in Salt Lake City, Utah. It was the beloved Caramel Pecan Silk Supreme Pie, also available at Baker's Square restaurants, as they are the same company. The bottom layer is pecan pie, the middle is cheesecake, and the top is French Silk. Then there's whipped cream and a drizzle of both chocolate sauce and caramel sauce and a sprinkling of pecans to garnish. It doesn't compare to a homemade pie, but it was pretty yummy nonetheless! And on top of all of this culinary glory, Keith got up early the next morning and made us maple-oatmeal scones! YUM! Keith, though currently a crafter of Adirondack furniture, is a pastry chef at heart. I can make things taste good, but he can also make them truly beautiful! (See photo above.)
One night, while poor Keith was still slaving away at the workshop, John and I toddled off to the coast which was only about an hour away, and we had a marvelous dinner at The Blackfish Cafe in Lincoln City. After a refreshing Lemon Drop (which I am declaring the summer cocktail of choice this year!), we chose a Saigon noodle salad for an appetizer. It was delicious, though in my opinion, needed more noodles and fewer bean sprouts! But the dressing was great (if I were to guess, I'd say rice wine vinegar and a little fish sauce were involved), and the overall effect of the dish was very fresh and flavorful and tangy. Then for dinner, I had a perfectly cooked skillet-roasted chinook salmon basted with fennel-lime butter and an Oregon blue cheese potato gratin. John had grilled breast of duck with wild huckleberry conserve, a Tillamook white cheddar, sage and walnut risotto, and Granny Smith apples with white cabbage and a housemade huckleberry gastrique. As is our way (and this should be everyone's way!), we switched plates about halfway through to share our choices with one another. Incredible!
Sadly, the Californian part of my travels was less interesting food-wise, as I was at the Red Lion Motel in Sacramento and was mostly at the mercy of their dining room and banquet hall...with one notable exception. My breed club, the Petit Basset Griffon Vendéen Club of America, has an affiliated foundation for health and rescue, and they put on a wonderful fundraising dinner called "The Nose Knows." It was a wine-tasting event and a play on words, as the PBGV is a scenthound. Cute, huh? The (French) menu was outstanding! We began with a cheese course, including a lovely Blue D'Auvergne, a hard/aged chèvre, a triple-crème brie (which was way too horsey for me, truth to tell), and a Gruyère de Comté. Dinner consisted of pork roast with a fruit and nut stuffing, and a very tender tri-tip of beef with three sauce choices--bordelaise, peppercorn, and a DIVINE cognac mustard sauce. But the best thing was a most magnificent scalloped potato affair--truly, the best potatoes that I have ever had, and most of the people at my table said the same thing. In fact, as is my way, I took it upon myself to go in the back and track down the caterer to introduce myself, compliment her on the meal, and browbeat the recipe out of her! She explained that the potatoes were sliced very thinly and layered with a mixture of manufacturer's cream (like English double cream--heavier than heavy cream--which explains why they were so heavenly!), Gruyére, minced garlic, and nutmeg. WOW! In the European tradition, after supper, they served a salad of mixed field greens, sweet Gorgonzola, candied pecans, sliced pears, and either dried cranberries or cherries--not sure which, but it was just excellent. For dessert, we had a very good chocolate mousse that some thought wasn't sweet enough (again, in the European way), but I enjoyed. So even though I didn't do any cooking over the past week, I did some very sublime eating, and I wanted to share my experiences with all of you (especially those like my new blogger friend, Sue, who sent me a well-deserved scolding via e-mail after a week of blog silence). But I'm back now, and if I ever get away from my desk and make it home to my own kitchen, I will post again...
Thursday, April 20, 2006
Tarte au Sucre: An Ode to Quebec
When I first moved to this region almost six years ago, I had only two goals in mind: get as close to New England as possible and reside next to a large body of water (preferably, the ocean). Well, I am not in New England proper nor am I seaside, but I am just a stone's throw across Lake Champlain from Vermont. Not bad. And though I am not thrilled about living in the land of six to seven months of cold ("Always winter, never Christmas?"), I do love distinct seasons, particularly the riotous fall color, and also being no more than a half day's drive from many wonderful places such as the Big Apple, Beantown, and a good chunk of Maine. But the one thing I didn't anticipate in moving here was how much I ADORE living on the border of Quebec. We are a mere six miles from Hemmingford, QC, and about an hour from the wonderfully cosmopolitan city of Montreal. We often joke that our closest grocery store is in another country, except that (mini-marts not withstanding), it's no joke! It's true! So when life in the cowtown formerly known as Ober's Corners (home to 18 houses, one convenience store, and of course, one Catholic church) gets to be a bit mind-numbing, it is a pure JOY to have a bit of France in your back yard! And for the passionate cook and foodie, Quebec is a culinary wonderland! Why, just across the border begins the Circuit de Paysan (technically, the peasant's route, but we might say the scenic route!). If you follow it, you will encounter orchards, vineyards and cideries, old-fashioned butchers (the kind that smoke their own meats), cheesemakers, apiaries with local honey, Old World bakeries who make amazing breads, and in the summer, farmer's markets with fresh produce. Just incredible!
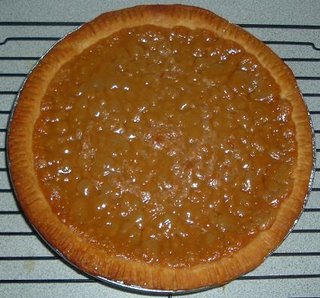
At the school where I teach, I am a member of the Cultural Affairs Committee and a former chair of our annual Diversity Celebration. So I am frequently involved with bringing different kinds of ethnic activities to campus. The favorite thing I like to do is to host a "Dinner and a Movie" night where we watch a movie from a particular culture and then discuss it over a meal featuring that country's cuisine. I already talked about our Indian night in a previous post, but this year, we are focusing on our neighbor to the north, Quebec. Tomorrow night, we are watching a film called The Seduction of Dr. Lewis which is set in Quebec, and then we will enjoy some regional desserts afterward. My contribution will be the traditional Quebecois sugar pie. I know people think first of maple in this area, but according to Julian Armstrong's A Taste of Quebec, maple syrup is not usually plentiful in the Laurentians. So a more common dessert than the maple pie is one made of brown sugar and cream. Indeed, I've never seen a grocery store up there without sugar pies in the bakery section! They're delicious and caramel-ly, sort of like a pecan pie without any nuts (though not as jiggly, as it is not an egg-based affair).
The tarte au sucre recipe that I have adapted is called Fleur-Ange's Sugar Pie (handed down from someone's grandmother named Fleur-Ange Vanier Rochon--let that roll off your tongue!). However, it calls for a double crust which I have never seen around here. So I make an open-faced pie. Also, I double the filling for a deep-dish confection. Other than that, the recipe is embarrassingly simple. Here it is:
Fleur-Ange's Sugar Pie
2 cups brown sugar
6 tablespoons all-purpose flour
2 cups whipping cream, light cream or half-and-half
2 teaspoons vanilla extract or a couple of pinches of freshly-ground nutmeg
pastry for a 9-inch (deep dish) pie
In a small saucepan, combine brown sugar, flour and cream. Place over medium heat and bring to a boil, stirring constantly, until thickened. Boil for two minutes, remove from heat, and stir in the vanilla or nutmeg. Let cool. Pour filling into prepared pie shell. Bake in a preheated 375 degree oven for 40-45 minutes or until top crust is golden.
Sunday, April 16, 2006
HAPPY EASTER (Bawk, bawk!)
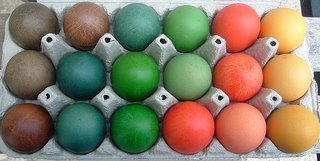
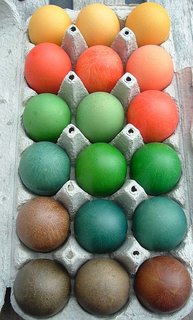
Given that my hens are laying so well right now, I have eggs coming out of my ears, and I need to do something with them. The obvious choice is to hard-cook and dye some for Easter. But have you ever wondered what would happen if you dyed BROWN eggs? Well, here's the answer. Kinda pretty, huh? HAPPY EASTER, everyone! :-D
Saturday, April 15, 2006
Time to get down to (Easter) business!

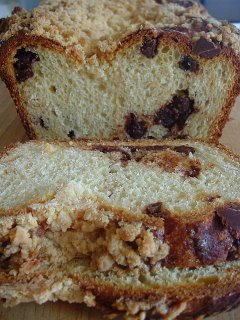
As Easter Sunday quickly approaches, I decided it was time to stop futzing around and get to work on some holiday-appropriate treats. As has become my custom, I had been reading the Cook's Illustrated message boards, and a nice gal named Debby shared her recipe for babka (a brioche-like sweet bread/coffee cake of Polish origin). She worked with a Martha recipe for babka with a chocolate filling, but she swapped out a more traditional cheese and raisin filling for the chocolate. Both sounded yummy to me, so I gave babka a try...
Well, I had my three babka in the oven by 2am (yes, I am a nocturnal baker), but thank goodness that streusel hideth a multitude of sins! They looked nice, but Lord only knows what I'm going to end up with. What a nightmare! And it's all my own doing! First of all, I wanted to try both the chocolate version and the cheese one, so I made half batches of both fillings. But with three loaves, that doesn't work out right, does it? God help the math impaired! And there were other problems, too. First, there was the chocolate version. I chose, instead of the chopped chocolate that the recipe calls for that I'd just use chocolate chips (and not cut them up further). Bad idea! Trying to roll that tender dough over all those bumps just tore it all up. And forget about twisting it as the instructions demand! I just ended up mashing it into the pan in a bit of a rage. :-( Then there was the cheese cafuffle. I decided to use cream cheese instead of the farmer's cheese that Debby recommended. But then adding an egg yolk and sour cream made it pretty runny. I tried to get it to set up a bit in the fridge before spreading it on the dough, but it still gooshed out of the edges of the jelly roll. I probably have no filling left at all in that one! And for the last one, I had lost my will to care anymore, so I just threw the remainder of the chocolate bits on the dough and drizzled it with the remaining cheese filling and rolled the beast up! Now I never did get much of a twist going on, and for the last two, I ended up folding the barely-twisted logs in half and just tossing them into the pan like that. Heaven knows what will become of all this. I was anticipating a thousand dollars' worth of butter down the drain!
But there seems to have been an Easter miracle. So far, I have only sliced and sampled the strange chocolate-and-cheese hybrid, but it was lovely inside--sweet, tender, with a tight crumb, a dark, crusty exterior, and a delectably crumbly streusel topping. To say the very least, this is a very forgiving bread--hard to mess up, though I gave it my best try! ;-) Next time I make this (there will be a next time, and perhaps a new Easter tradition!), I will dutifully chop my chocolate, and I think I might just use the cream cheese filling from the King Cake that I made for Mardi Gras (just cream cheese sweetened with sugar) without the egg and sour cream that made this cheese filling so loose. In fact, truth to tell, this dough might also make a better King Cake (not as dry). Hmm...someone remind me that I need to try that next year! But I digress. What follows is the Chocolate Babka recipe, then the steusel topping, then Debby's cheese filling if you want to swap it out for the chocolate. You may also want to sprinkle on up to a cup of golden raisins over the cheese filling as Debby does, but I find all raisins to be wrinkled little abominations that ruin otherwise perfectly good food. But you do what you have to do. I won't judge you. ;-)
Chocolate Babka (a la Martha)
Makes 3 loaves
When shaping the babka, twist dough evenly throughout the length of the roll a full five to six turns. The babka can be prepared up to Step eight and frozen for up to a month before baking. When ready to bake, remove from freezer; let stand at room temperature for about five hours, and bake.
1 1/2 cups warm milk (110°)
2 packages (1/4 ounce each) active dry yeast
1 3/4 cups plus a pinch of sugar
3 whole large eggs, room temperature
2 large egg yolks, room temperature
6 cups all-purpose flour, plus more for work surface
1 teaspoon salt
1 3/4 cups (3 1/2 sticks) unsalted butter, cut into 1-inch pieces, room temperature, plus more for bowl and loaf pans
2 1/4 pounds semisweet chocolate, very finely chopped
2 1/2 tablespoons ground cinnamon
1 tablespoon heavy cream
1. Pour warm milk into a small bowl. Sprinkle yeast and pinch of sugar over milk; let stand until foamy, about 5 minutes.
2. In a bowl, whisk together 3/4 cup sugar, 2 eggs, and egg yolks. Add egg mixture to yeast mixture, and whisk to combine.
3. In the bowl of an electric mixer fitted with the paddle attachment, combine flour and salt. Add egg mixture, and beat on low speed until almost all the flour is incorporated, about 30 seconds. Change to the dough hook. Add 2 sticks butter, and beat until flour mixture and butter are completely incorporated, and a smooth, soft dough that’s slightly sticky when squeezed is formed, about 10 minutes.
4. Turn dough out onto a lightly floured surface, and knead a few turns until smooth. Butter a large bowl. Place dough in bowl, and turn to coat. Cover tightly with plastic wrap. Set aside in a warm place to rise until doubled in bulk, about 1 hour.
5. Place chocolate, remaining cup sugar, and cinnamon in a large bowl, and stir to combine. Using two knives or a pastry cutter, cut in remaining 1 1/2 sticks butter until well combined; set filling aside.
6. Generously butter three 9-by-5-by-2 3/4-inch loaf pans; line them with parchment paper. Beat remaining egg with 1 tablespoon cream; set egg wash aside. Punch back the dough, and transfer to a clean surface. Let rest 5 minutes. Cut into three equal pieces. Keep two pieces covered with plastic wrap while working with the remaining piece. On a generously floured surface, roll dough out into a 16-inch square; it should be 1/8 inch thick.
7. Brush edges with reserved egg wash. Crumble a third of the reserved chocolate filling evenly over dough, leaving a 1/4-inch border. Refresh egg wash if needed. Roll dough up tightly like a jelly roll. Pinch ends together to seal. Twist five or six turns. Brush top of roll with egg wash. Carefully crumble 2 tablespoons filling over the left half of the roll, being careful not to let mixture slide off. Fold right half of the roll over onto the coated left half. Fold ends under, and pinch to seal. Twist roll two turns, and fit into prepared pan. Repeat with the remaining two pieces of dough and remaining filling.
8. Heat oven to 350°. Brush the top of each loaf with egg wash. Crumble a third of streusel topping (recipe follows) over each loaf. Loosely cover each pan with plastic wrap, and let stand in a warm place 20 to 30 minutes.
9. Bake loaves, rotating halfway through, until golden, about 55 minutes. Lower oven temperature to 325°; bake until babkas are deep golden, 15 to 20 minutes more. Remove from oven, and transfer to wire racks until cool. Remove from pans; serve. Babkas freeze well for up to 1 month.
Streusel Topping
Makes 3 3/4 cups. (This topping is the crowning glory of babka!)
1 2/3 cups confectioners' sugar
1 1/3 cups all-purpose flour
12 tablespoons (1 1/2 sticks) unsalted butter, room temperature
In a large bowl, combine sugar, flour, and butter. Using a fork, stir until fully combined with clumps ranging in size from crumbs to 1 inch.
Debby's Cheese Filling
2 - 7.5 ounce packages farmer’s cheese
½ cup sugar
½ cup sour cream
pinch salt
1 egg yolk
zest of ½ lemon
3/4- 1 cup golden raisins (optional)
Put all ingredients (except raisins!) into a food processor and mix until smooth, about 1 minute. Debby recommends making a batch and a half, or even doubling it if your family REALLY likes a cheesy babka! The filling stores in the fridge up to a week and can also be used as a yummy crepe filling.
Friday, April 14, 2006
Banana bread is love...
I know it's Eastertime, and banana bread has no traditional place in the holiday (and would also be a no-no in Passover celebrations!), but when three aging bananas have been staring at you for a few days, what else can you do? Let them completely go to rot/waste? OF COURSE NOT!
The following banana recipe was given to me by a friend, actually the ex- of one of my very dearest friends, John. The recipe is entitled, Elva Williams' Banana Bread, and I believe Elva was our friend, Mark's grandmother (I am a teacher, and always like to give credit where credit is due!). Regardless of the origin of this recipe, you must believe me when I say that it is the MOST INCREDIBLE banana bread that you have ever or will ever eat! It is absolutely--dare I say it?--LUSCIOUS! Now my mother was known to make a very fine banana nut bread and gave away lots of mini-loaves of it as Christmas gifts, but this recipe is much, much better than hers. (Sorry, Mom!) In fact, I shouldn't even be giving this recipe away...I should be making my fortune with it! But as it was selflessly shared with me, so will I pass it on to all of you. And THAT is certainly in keeping with the spirit of this week's holidays! (I am trying hard to resist the temptation to claim that this is the banana bread that the Lord would come out of His tomb for..because that would be wrong--well, it would be right, but just a wee bit blasphemous. Tee hee.) So without further ado...
Elva Williams’ Banana Nut Bread
1. Sift together the following and then set aside:
2 cups sifted flour
1 teaspoon baking soda
½- ¾ teaspoon salt
2. Chop ¾ cups walnuts or pecans (I use at least a cup if not 1 ½ cups!) and sprinkle with a little of the flour mixture. (This helps the nuts to not sink to the bottom of the bread.)
3. Cream ¾ cup softened butter and add 1 ½ cups sugar and cream together. Add 1 beaten egg, and mix again. Then add 1 teaspoon of vanilla and mix again.
4. Mash 3 medium overripe bananas (I use a pastry cutter for this) which should yield about a cup. Add the banana mash to the wet ingredients and mix again.
5. Add the flour mixture and ½ cup buttermilk to the rest of the wet ingredients in thirds, alternating the flour and buttermilk. If you don’t have buttermilk, you could add 2 tablespoons of powdered buttermilk to the dry ingredients and then use ½ cup of water in this step. Or if you have neither wet nor dry buttermilk, then add 1 tablespoon of white vinegar to a half cup of milk and let it sit and clabber (get curdled-looking) before you begin this recipe.
6. Mix in the nuts.
7. Bake at 325 degrees for 1 hour-1 hour and 10 minutes for one large loaf, or 50-55 minutes for two small loaves or about 45 minutes for four gift-sized loaves. (I prefer the latter even if I’m not giving the loaves away because it makes more golden-brown-and-delicious crust!)
8. Try not to gobble the whole loaf down in one day's time (note that I said, TRY!).
Sunday, April 09, 2006
Easter comes early...


Happy Palm Sunday! I know that we're still a week away from Easter, and to look at the landscape here, you still see lots of brown, not green. The temps have still been in the 30's at night, so you'd think that the calendar is LYING about the advent of spring. But I have had some definite clues lately that the seasons are changing. First of all, at school, the students are already in shorts and flip-flops. Secondly, I attended what has become an annual tradition in my household--the all-you-can-eat pancake breakfast at Sanger's Sugar House in Ingraham, NY (The official count: pancakes=6, sausages=6, cartons of milk=2, nap=1 big one!). But the thing that has convinced me that spring is upon us at last is that my beloved hens have finally started laying like gangbusters (see top photo)! Yes, Easter eggs are plentiful around here, and I didn't even have to dye them. And as a special, unexpected bonus, when I was at the feed store last weekend buying scratch grains for my girls, I serendipitously ran into a nice man who was trying to share his ducks' eggs with the store owner. The owner was kind of scared, saying "I don't know what the wife will think if I bring these home!" So I saw an in, and I made my move, volunteering to take them off his hands (see bottom photo). ;-)
So what is a gal to do with all of these eggs? I'm glad you asked. Now duck eggs are not good fried, as they are very thick, and the yolk is almost pasty. But in addition to being great for baking, if you whip them up with some milk or cream, they make an EGG-cellent omelette or quiche. As luck would have it, I had a luncheon to cater on Friday, so quiche it was! I worked from a basic recipe for Quiche Lorraine from the cookbook without equal, The Joy of Cooking. But instead of bacon, I used hot capicola (a spicy Italian ham), and instead of sautéed onions, I used a large, sweet onion, sliced thinly and caramelized in a bit of butter and olive oil. Wait, that's not Quiche Lorraine! Onions make it Quiche Alsacienne, I believe. Well, anyway...instead of diced Swiss cheese, I used an aged (sharp) provolone, shredded, and doubled the amount called for (as is my way when anything calls for cheese!). The resulting quiche was spicy and delicious! I made two, and they disappeared at the luncheon! Here is the recipe if you'd like to try it:
Capicola, Caramelized Onion, and Aurrechio Quiche
9-inch pie crust
1 large onion (preferably, a sweet variety), sliced thinly
1 tablespoon olive oil
1 tablespoon butter
1 teaspoon brown sugar
4 oz. hot capicola, sliced into very thin strips (a chiffonade, as Martha would say!)
1 cup of Aurrechio (aged/sharp provolone), shredded
3 large (chicken) eggs or 2 duck eggs (or a combo!)
2 cups milk or cream (I like half-n-half)
1/2 teaspoon salt
1/4 teaspoon pepper
few dashes of hot sauce (to taste)
1 tablespoon chives
1 tablespoon parsley
Preheat the oven to 375 degrees. Press a pie crust into a fluted tart pan and chill. Slice the onion and caramelize it in a hot pan with olive oil and butter and a bit of brown sugar until the onion is a deep brown (20-30 minutes). Sprinkle the sliced capicola in the bottom of the pie crust, then sprinkle the caramelized onion on top of that. Then sprinkle on the cheese.
In a bowl, whisk the eggs with the milk or cream and add the salt, pepper, hot sauce, and herbs. Pour the custard mixture carefully over the other ingredients in the pie shell, and then bake for 35-40 minutes or until the top is golden brown and the center of the quiche is no longer jiggly. I prefer to serve this warm or at room temperature, but it's pretty good from piping hot to cold from the fridge!
Friday, March 31, 2006
Chewy, nutty, multigrain goodness!

Dear readers, I hope you have been noting my faithful compliance with my New Year's resolution to bake more bread. And not that I have joined the Lo-Carb Cult or anything, but I have really been craving a good whole grain bread. Now I have been known to buy Milton's original, multi-grain bread out of Del Mar, CA (but available at your local Sam's Club), touted as the best-tasting bread in the world or some such. And it is pretty good, but a wee bit pricey (can you tell that I live on a teacher's salary and that how to save a buck is an ongoing theme here at Lindsey's Luscious?). So as usual, I wanted to be able to make my own multi-grain loaf at home and have it be, well, edible. Lo and behold, the good people at Cook's Illustrated must have heard my prayer, because they recently published a fine recipe for just such a bread. The picture shows the result of my first attempt, and I was pleased with the loaves that I produced.
The one important thing I would do differently is NOT assume that there would be more oven spring upon baking. Indeed, there was seemingly none at all! I had only let them rise to the top of the pan for their final proof (as it was getting late and I wanted to bake them and then get to bed!). Next time, I would let them rise to at least an inch or more OVER the top of the pan before baking. As a result, my loaves were a little shorter (and denser) than I would have preferred, but they sure were TASTY, especially toasted and buttered! Yum!
A couple of additional notes on the recipe:
I used a whole-grained porridge mix from King Arthur Flour, and after the requisite hour of soaking in hot water, it looked like...well, it looked the same as it did when I first poured the hot water over it! So I ended up cooking it on the stovetop for maybe 45 minutes until it was good and porridgy before continuing with the bread. Also, though the recipe calls for an oatmeal topping, I had another King Arthur item hanging around my freezer (can you tell I'm in spring cleaning mode?), a bag of seeds labelled "artisan bread topping," if memory serves. So I used that instead. But I would recommend an egg wash for the top of the loaves instead of just cooking spray. It would help even the oatmeal stick better, plus make your loaves pretty and shiny! And with these caveats in mind, I give you...
Multigrain Bread
By: Erika Bruce-CI
6 1/4 ounces 7-grain hot cereal mix -- 1 1/4 cups
20 ounces boiling water -- 2 1/2 cups
15 ounces unbleached all-purpose flour -- 3 cups
7 1/2 ounces whole wheat flour -- 1 1/2 cups
4 tablespoons honey
4 tablespoons unsalted butter -- melted and cooled
2 1/2 teaspoons instant yeast
1 tablespoon table salt
3/4 cup unsalted sunflower seeds
1/2 cup old-fashioned rolled oats
Place cereal mix in bowl of standing mixer and pour boiling water over it: let stand, stirring occasionally, until mixture cools to 100ºF and resembles thick porridge, about 1 hour. Whisk flours together in a medium bowl.Once grain mixture has cooled, add honey, melted butter, and yeast. Stir to combine. Attach bowl to stand mixing fitted with dough hook. With mixer running on low speed, add flours, 1/2 cup at a time, and knead until dough forms a ball, 1 1/2 to 2 minutes: cover bowl with plastic wrap and let dough rest for 20 mintues. Add salt and knead on medium-low speed until dough clears the side of the bowl, 3 to 4 minutes (if it does not clear the side of the bowl, add 2 to 3 tablespoons additional all-purpose flour and continue mixing); continue to knead dough for 5 more minutes. Add seeds and knead for another 15 seconds. Transfer dough to a lightly floured surface and knead by hand until the seeds are dispersed evenly and the dough forms a smooth, taut ball. Place dough into a large greased container and cover with plastic wrap. Allow to rise until doubled, 45 to 60 minutes.Adjust the oven rack to middle position and heat oven to 375ºF. Spray two 9 by 5-inch loaf pans with cooking spray. Transfer dough to lightly floured surface and pat into 12 bu 9-inch rectangle; cut dough in half crosswise with a knife of bench scraper. Shape loaves and coat with oats; cover lightly with plastic wrap and let rise until double in size, 30 to 40 minutes. (Dough should barely spring back when poked with knuckle). Bake until internal temperature registers 200ºF on instant read thermometer, 35 to 40 minutes. Remove loaves from pans and cool on wire rack before slicing.
Wednesday, March 29, 2006
Lust and Avarice: A Tale of Cherry Pie

In my last post, I referenced both my friend, June, and an amazing cherry pie. And I promised to tell the tale and follow through with the recipe, so I mean to make good on my promise (redemption seems a worthy aim during the Lenten season). First, let me tell you about June. Now, by all outward appearances, June is the most reasonable of persons. Indeed, she is a psychology professor and an expert on the brain itself. But when it comes to cherry pie, she loses all rationality, and her many virtues quickly yield to such vices as lust, greed, avarice and dare I add, gluttony? (I know, 'tis unsavory to mention that particular sin on a food blog! Tsk, tsk!) Do you doubt me? Listen to this anecdote and then judge...
Around the holidays, say at Thanksgiving or Christmas, June becomes quite prolific in the kitchen. In fact, she wowed her family a couple of years ago with a sublime Rachael Ray creation that I have since added to my own harvest-time repertoire, Pumpkin Soup with Chili Cran-Apple Relish (ok, fine, I'll post the recipe for that, too!). Moreover, in a show of great devotion and attentiveness to her family's desires, she offers to bake each person his or her own favorite pie, whatever it might be. Doesn't that sound extraordinarily kind and generous? But NO, it is a thinly-veiled deception! You see, she makes everyone else a pie, so that she may make herself her beloved cherry pie and be able to consume it all--without sharing! How's that for holiday spirit? Lust, greed, avarice, gluttony, I've said, and I'll say them again! Of course, all villians get their come-uppance at the end of a good story, and June's is no exception. As is always the way, her family never shows as much interest in their requested pies as they do in her coveted cherry pie, and her devious plan is always thwarted! So she has taken to baking two cherry pies at each major holiday, but they are devoured just as quickly, or perhaps doubly so. Poor June!
Because her tale is so tragic, I have taken to baking her her own special cherry pie when the occasion warrants. I have used the recipe on the back of the Oregon pie cherry label with great success, but one day, I saw a show on the Food Network about a bakery in Michigan that Mario Batali raves about, and I quote him, "I don’t think I've ever had as good a pie as Grand Traverse Pie Company's Cherry Crumb Pie... It's a religious experience." I think it's only right to tell you that you can buy their pies online, but for a pretty penny (about twenty bucks without shipping)! So when I saw that pie I thought, I could make something like that! So here is the recipe that I adapted and prepared for June's last birthday (that ended in a big -0!). She declared it the best she'd ever had, and that is high praise, considering the source. I think you'll really like it, too.
Cherry Pie with Almond Crumb Topping
1-9 inch single pie crust
Filling
2 cans pitted tart red cherries – water pack (or 4 cups)
1 ½ cups sugar, divided
1/3 cup cornstarch
pinch of salt
1 tablespoon butter
3-4 drops almond extract
½ t vanilla
Topping
¼ cup almonds (ground)
½ cup all-purpose flour
½ cup packed brown sugar
pinch of salt
4 tablespoons butter, cold, cubed
½ cup sliced almonds
Prepare pastry and line a 9-inch pie plate. Flute the edges. Chill in the fridge while you make the filling.
Drain the cherries and reserve one cup of the liquid (no more!). In a saucepan, combine ¾ cup sugar, the cornstarch, and a dash of salt. Stir in reserved cherry juice. Cook and stir over medium heat until thickened and bubbly. Cook and stir one minute more. Remove from heat and stir in the remaining ¾ cup sugar, butter and extracts, then the cherries. Fill pastry with the cherry mixture.
In a food processor, grind ¼ cup of almonds. Add the flour, brown sugar and salt, and pulse until blended. Add the butter and pulse until the mixture resembles coarse crumbs. Then stir in the ½ cup of sliced almonds (don’t process after that!). Sprinkle the crumb topping over the cherry filling. Cover edge of pie with foil. Place pie on a lined baking sheet as it WILL bubble all over! Bake at 375 degrees for 30 minutes. Remove foil and bake for about 30 minutes more. Cool on wire rack (at least two hours!) before serving.
Oregon Cherry Pie
1 1/2 cup sugar (more or less to taste)
3 tablespoons corn starch
2 cans Oregon Red Tart Pie Cherries, drained, reserve juice from one can
1/4 teaspoon red food coloring (optional)
1/4 teaspoon almond extract (I add at least a half teaspoon of vanilla, too!)
1 tablespoon butter
Pastry for two-crust 9-inch pie
Preheat oven to 400 degrees F. Drain the cherries and reserve the juice from only one can. In a saucepan, stir the cherry juice into the combined mixture of the cornstarch and sugar. Cook over medium heat, stirring constantly until thickened. Gently stir in cherries and optional ingredients. Remove from heat. Pour filling into pastry lined pie pan. Dot with butter. Adjust crust, seal and vent. Bake 45 minutes or until crust browns and filling begins to bubble. If necessary, cover edges with aluminum foil during the last 15 minutes to prevent over-browning. Cool pie several hours to allow filling to thicken before slicing. Makes 8 servings.
Pumpkin Soup with Chili Cran-Apple Relish
Difficulty: Easy, Prep Time: 20 minutes, Cook Time: 25 minutes, Yield: 8 first course or 4 entree servings
1 tablespoon extra-virgin olive oil
2 tablespoons butter
1 fresh bay leaf
2 ribs celery with greens, finely chopped
1 medium yellow onion, finely chopped
salt and pepper
3 tablespoons all-purpose flour
2 teaspoons poultry seasoning or 2 teaspoons ground thyme
2 teaspoons hot sauce, or to taste
6 cups chicken stock
1 (28-ounce) can cooked pumpkin puree
2 cups heavy cream
1/2 teaspoon freshly grated nutmeg
Relish:
1 crisp apple, such as McIntosh or Granny Smith, finely chopped
1/4 red onion, finely chopped
2 tablespoons lemon juice
1/2 cup dried sweetened cranberries, chopped
1 teaspoon chili powder
2 teaspoons honey
1/2 teaspoon ground cinnamon
Heat a medium soup pot over medium to medium high heat. Add the oil and melt the butter. Add bay, celery, and onion. Season the veggies with salt and pepper. Cook 6 or 7 minutes, until tender. Add flour, poultry seasoning and hot sauce, to taste, then cook flour a minute. Whisk in chicken stock and bring liquid to a bubble. Whisk in pumpkin in large spoonfuls to incorporate it into the broth. Simmer soup 10 minutes to thicken a bit then add in cream and nutmeg. Reduce heat to low and keep warm until ready to serve.
While soup cooks, assemble the relish: combine apple, onion, lemon juice, cranberries, chili powder, honey and cinnamon. Adjust seasonings in soup and relish and serve soup in shallow bowls with a few spoonfuls of relish.
Tuesday, March 28, 2006
Paying my debts in baked goods...

It seems every time I try to leave town, something catastrophic happens--usually of an automotive nature--and last week was no exception. I was scheduled to attend a conference in Albany, and I was hurrying down the Northway (as I-87 is known in these parts) to meet my carpool of colleagues. Mind you, I knew I was tempting fate. The evil money-grubbers at the dealership where I took my car the week before last charged me 65 bucks to say, "You need new tires." And they had warned me that the right rear tire was ready to blow any second. Even my roommate had repeatedly advised me to keep to the small, state route and off the freeway ("Stay on the path--beware the moors!"). But did I listen? NOOOO! Sure enough, that tire blew out on the Northway, and even though I was passing someone when it happened, fortunately, there wasn't an accident. Actually, I barely felt it--I wasn't even sure what happened at first until I heard a strange whirring sound, then slowed down until it started thumping! Also, I was lucky in that this happened right at an exit, so I pulled off, and coasted to a stop right in front of a handful of houses. Now I have no cell phone at the present time, so I began knocking on doors. No one was home at the first one, but on my second attempt, a very nice man let me in to use his phone to call my colleagues to come pick me up and to get my longsuffering next-door neighbor (who also had begged me to get new tires before this happened!) and my roommate to come deal with the car and get it home. Long story short (too late!), I made it my conference, and between the nice man whose house my car was beached in front of, my neighbor and my roommate, they managed to get the donut spare on the car and get her back home until I could have four, brand-spanking new tires put on at Sam's Club. (They are really the best place to go for tires, by the way. Not only are they the cheapest, but you get free road hazard and also rotating and balancing for life! Just FYI...)
So clearly, I had some debts to repay, not only to the people mentioned above, but also to a nice lady at school who works in the business office who gave me a ride home after my conference. And as is my way, I pay my debts in baked goods! First, for Ken and Cyd (my neighbor and roommate, respectively), they have been bugging me to make a berry pie for them forever. And though I usually use frozen berries when they're not in season, I happened to have two cans of Oregon Blackberries on hand. (This was a none-so-subtle hint from my neighbor awhile back when I asked him to pick up some canned cherries for me, and he slipped some blackberries in there as well!) Do you folks know about Oregon (brand) canned fruit? This is NOT fruit pie filling, mind you--this is just the berries. I discovered them when I was trying to find pie cherries to make a pie for my dear friend, June, who is disturbingly obsessed with cherry pie. But I can never find (sour) pie cherries in the supermarkets or even at farmer's markets around here, and I consider it a perpetual mystery that you can't buy them frozen either. So you can either get canned cherry pie filling (BLECH! The cherries get very mushy as they are cooked twice, plus the ratio of goo-to-fruit is unacceptable!), or buy canned pie cherries and make your own filling. This is infinitely preferable, in my opinion, unless you can find them fresh. Anyway, the pie recipes are on the back of the labels on the cans, and they are just excellent. Below is the recipe for the blackberry pie, and it was the best one I've ever made! The filling was just perfect--not too tight or too runny. (One day, I will also post my famous Cherry Crumb Pie recipe made with the Oregon pie cherries, but I already have too many recipes to share today , and the post is reaching encyclopedic proportions as it is!) I would like to add that I hold no stock in the Oregon Fruit Company, but as I grew up in Oregon and consider it home, it makes me happy to give them a shout out. (HOLLA!)
Because I myself do not enjoy fruit pie, I decided that I deserved a special dessert, too. After all, I had to endure Sam's Club on a Saturday morning, did I not? ;-) So I decided to try the sumptuous Lemon Almond Torta from Melissa over at the wonderful Traveler's Lunchbox site. As she has already posted a gorgeous picture and the recipe, I will just provide the link to it. I would add two recommendations to the recipe. One, make sure to use blanched almonds for the almond-flour mixture in the cake. I used unblanched, and the texture wasn't as refined as I would have liked. Secondly, I don't know what was the vision was for spreading eight tablespoons of lemon curd over the cake and then three more in the middle? It ended up having a big pool of lemon in the center (making it difficult to determine whether the cake was done, so I may have overbaked it by five minutes), and I simply would have preferred an even layer of lemony goodness all over the cake. So that's my $.02 on the recipe. But do try it! It is delicious! I gave half of the blackberry pie and a couple of pieces of the lemon-almond cake to Ken (refer to the picture above), and also a piece of cake to the lady in the business office who gave me a lift home on Friday, as she happens to be very keen on lemon desserts as I am! And of course, the roomie got the other half of the pie and some of the cake as well. ;-)
For the man who let me use his phone and loaned us tools to help remove the flat tire, I made some cookies from a recent issue of Martha Stewart's Everyday Food. It was a recipe sent in by a reader for Chocolate Pecan Pie Bars. Decadent! I actually cut the chocolate in about half (I know, I know...the chocoholics are screaming blasphemy, but I like the nuts to dominate rather than the chocolate--just my preference), and instead of just pecans, I used a combination of pecans, walnuts, almonds, and macadamias. Delish! The recipe is also below. And finally, what is pie or cake without ice cream? Since I was out of the beloved Edy's Double Vanilla, I decided to make my own damn Double Vanilla, adapting a recipe from our old friends across the lake, Ben and Jerry. To their sweet cream base, I added a whole tablespoon of Watkins double-strength vanilla (I adore Watkins, especially for ground cinnamon, vanilla and other extracts), and also a tablespoon of Nielsen-Massey's vanilla bean paste so that the ice cream has the highly-desirable specks in it! I have a small, Cuisinart brand electric ice cream maker that produces soft-serve in 20-30 minutes, but I like to "ripen" the ice cream for another two hours in the freezer. And I take a tip from Martha by lining a large loaf pan with a double-length of plastic wrap, filling it with the soft ice cream, covering it with the remainder of the length of plastic, and then freezing it until firm. This makes it easy to scoop in one long motion down the loaf pan. Works great! Recipe also follows. We'll just call this post, DESSERT OVERLOAD! Tee hee!
Oregon Blackberry Pie
2 cans Oregon Blackberries*
6 tablespoons sugar (more or less according to your preference)
3 tablespoons cornstarch
2 tablespoons lemon juice
1 tablespoon butter
Pastry for a two-crust pie
Drain the berries and reserve the syrup from one can. Stir the blackberry syrup into the combined mixture of the cornstarch and half of the sugar. Cook over medium heat, stirring constantly until thickened and clear. Cook 1 minute longer. Gently stir in remaining sugar, blackberries and lemon juice. Let stand while preparing pastry. Line a 9 inch pie pan with pastry and fill with fruit filling. Dot with butter. Adjust top crust on pie, cutting slits for steam to escape (or I cut out little hearts with a tiny cookie cutter myself!), and seal. Bake at 400 degrees for about 30 minutes or until filling is bubbly and crust is golden brown. Makes one 9-inch pie.
*Oregon Boysenberries, Blueberries, Loganberries, Marionberries or Red Raspberries may be substituted.
Chocolate Pecan Pie Bars
1/2 cup unsalted butter, room temperature
2 tablespoons unsalted butter, melted
1/4 cup light brown sugar, packed
1 1/4 cups all-purpose flour
1/2 teaspoon salt
3 large eggs
3/4 cup light corn syrup
1/2 cup granulated sugar
2 cups semi-sweet chocolate chips
2 cups pecans, coarsely chopped
32 servings, 1 hour 25 minutes 25 mins prep
Preheat oven to 350. Line bottom and sides of a 9x13 inch baking pan with aluminun foil. In the bowl of an electric mixer, beat 1 stick room-temp butter, brown sugar, flour,and salt until coarse crumbs form.
Pour mixture into prepared pan; press firmly into bottom. Bake until lightly browned, 25-30 minutes. Let cool, 10 minutes.
Meanwhile, in same large bowl, mix eggs, corn syrup, granulated sugar, and 2 TBS melted butter until well combined. Add chocolate chips and pecans; spread over crust. Bake until set, 25-30 minutes. Cool completely in pan before lifting out (use foil to lift). Cut into 32 bars.
Ben & Jerry's Sweet Cream Base #1 (This is Ben and Jerry's most popular base, as it has a creamy texture, medium body, and a subtle, understated taste. It's especially good as a background for fruit, cookies, and candy.)
2 large eggs (Note: This does call for uncooked eggs to those that should not eat them such as children, pregnant women or people with compromised immune systems. Also, I sometimes use just one egg for a lighter-textured ice cream.)
¾ C sugar (I sometimes pull back to a generous 1/2 cup of sugar as cream is sweet by itself.)
2 C heavy or whipping cream
1 C milk
Whisk the eggs in a mixing bowl until light and fluffy, about 2 minutes. Whisk in the sugar, a little at a time, then continue to whisk until completely blended, about 1 minute more. Pour in the cream and milk and whisk to blend. (Note: I often make this is a blender.) Makes 1 quart.
Subscribe to:
Posts (Atom)