Saturday, January 27, 2007

Happy (Triple) Birthday!

Photo Credit: Marion Quaggatuggu

It's a triply special day around my house today. First of all, my roomie's friend, Rachel, is spending the weekend with us, and it's her birthday. I made her the special French toast this morning by request. And it also happens to be my beloved boy, Grady, the PBGV's birthday. He's three today and still acts like a demon puppy! (But I gave him a piece of birthday French toast, too.)


Lastly, and most germaine to this space, it is also the one-year anniversary of this fine blog! That's right. Exactly one year ago today, as I was holed up in the back bedroom during a stretch of subzero weather, sitting in front of the one working heat source in the house at the time, I made the serendipitous decision to start my own food blog. And 130 posts and almost 12,000 hits later, and here we are! It has been a great experience writing about my adventures (and misadventures) with cooking and baking, and it has been fun and rewarding to be a part of such a vibrant online community and network of foodie friends and bloggers. So, thanks everyone for your readership, your comments and e-mails, and for your wonderful support. I truly appreciate it!

Ok, so...onward to post 131 and year number two! :-)

Friday, January 26, 2007

Potluck Puzzler

So...I auditioned for a play back in December, and now that the new semester has begun, the cast is getting together for a potluck to get acquainted and to coordinate the rehearsal schedule. Now, Lord knows I love a potluck better than most folks, but this one really had me flummoxed. The e-mail we received said that we should all bring an appetizer or side dish. What is the vision here? Who will be bringing entrees or, more to the point, desserts?! Very odd. Nevertheless, I have been racking my brain to come up with an appetizer that I could throw together tonight after getting home late from taking the old basset hound to the vet, and that could easily be transported tomorrow and be held at work in some fashion until the appointed hour for the gathering. I considered many different hors d'oeuvres, but they all seemed too complicated. It is my fervent belief that you can get as fancy as you want, but when you get down to it, people at potlucks and Superbowl parties just want their deviled eggs and crock pot cocktail weenies in a grape jelly-laden sauce! And this thought--of crock pot-based meats--reminded me of a great recipe that I got a few years ago from my friend and colleague at work, Carey.

You see, every year, my officemate, Lee Ann, throws a party at her house in Saranac Lake, celebrating the annual Winter Carnival held in their town (complete with parade, precision rhythmic lawn chair performers, and an honest-to-goodness castle made of ice blocks from the lake). After watching the parade with other folks crazy enough to brave the sometimes subzero temps, people make their way back to Lee Ann's to warm up and share a potluck feast. The theme of the Winter Carnival is oftentimes ironically tropical, so one year, our friend, Carey, showed up to the party bearing a crock pot full of one of her mom's favorite recipes, Hawaiian Meatballs. Man, were they good! And they are so easy because you can cheat and use frozen meatballs (which can be acquired for a reasonable price at your local Sam's Club--at least, that's where Carey and I get ours). Trust me, people will gobble them up and be none the wiser. Now my crockpot isn't huge, so I only make about half of the following recipe at one time. And sometimes, I half it again to make the meatballs for a delicious dinner served over steamed rice. But for the affair tomorrow night, it will be the standard crock pot full. Oh, and one of my chocolate buttermilk pound cakes because I couldn't help my damn self. Tee hee. ;-)

Hawaiian Meatballs

6 pounds frozen meatballs (I prefer the smaller 5/8-ounce ones to the larger one-ouncers)
2 tablespoons vegetable oil
2 cups pineapple juice (can use reserved juice from canned pineapple)
6 tablespoons cornstarch
6 tablespoons soy sauce
6 tablespoons white vinegar (I like to use rice wine vinegar, too)
12 tablespoons water
1 cup sugar (next time, I might try brown sugar for at least half of this)
1 teaspoon ground ginger
2 cans all-natural chunk pineapple (Dole, unsweetened)
4 green peppers, cut into strips (optional--but they add flavor and color and just look nice in there!)
Other optional additions that I favor: an inch of finely-grated fresh ginger, 2 minced garlic cloves (or a teaspoon of granulated garlic), lots of black pepper, and maybe a dash of cayenne

Defrost meatballs in store packaging in the refrigerator overnight. Add meatballs to the crock pot when ready to make the sauce. Heat the oil and pineapple juice together on medium high in a medium saucepan. While it is heating, in a bowl, whisk together the corn starch, soy sauce, vinegar, water, sugar, and ginger (and black pepper and cayenne, if using). Add the slurry to the saucepan when the oil and juice are hot. Whisk constantly (so that the sauce does not get lumpy) until it thickens. When it is thick, remove from the heat and immediately stir in the pineapple and peppers (and the fresh ginger and minced garlic, if using). Pour this mixture over the meatballs in the crock pot. Mix up the meatballs and sauce. Cover and heat on low to medium for at least two hours. It will sufficiently stay 4-5 hours on low heat with an occasional stir.

Sunday, January 21, 2007

Now THAT'S a cupcake!

As usual, I have hit the ground running for spring semester 2007! So, of course, all significant cooking and baking projects have come to a screeching halt--except for one. This past weekend, I was still trolling the favorite Epicurious recipes thread on the CI message boards. One recipe that garnered repeated mention was Gourmet's Double Chocolate Layer Cake. There are actually over 800 reviews of this recipe on the Epicurious site, almost entirely favorable (four forks!) and mostly gushing about how it's the best chocolate cake and frosting in the universe and how everyone can call off the search for the definitive chocolate cake--this is it! Well, I don't know about all that. I still long for the whisper-soft, cloud-like texture of my beloved Chocolate Velvet Cake. But I can say that the cupcakes that I made from this recipe are superlative. They are extremely dark and chocolately, like an old-fashioned Devil's Food cake, and though the texture looks coarse to the eye with its somewhat open crumb, it's very springy, tender and moist.

Moreover, the ganache frosting is just decadent! Some Epicurious reviewers found it "too chocolately" and concluded that it took the focus off of the deep chocolate flavor of the cake itself. But I don't get "too chocolately" when you're making a chocolate dessert! So I disagree. The frosting makes the cake, and I don't even really like frosting as a general rule. However, I made one big mistake. I decided to try and whip the ganache, thinking that it might make a creamy, fluffy topping. But actually, in the chill of my winter kitchen, it quickly became hard like a truffle. Now some might enjoy that, but it's really all about a shiny, supple layer of bittersweet ganache, particularly when allowed to come up to a normal room temperature before serving. So I actually ended up scraping off the ganache, remelting it (whisking to reincorporate the butter), and refrosting two dozen of the cupcakes! Ugh! But it was well worth the extra effort to correct the problem. And the best thing about this cake is, it seems to get better--moister, more flavorful--a day or two (or three!) after you make it. Good thing, too, as I made WAY too many! Next time, I will half the recipe and make 18-20 cupcakes instead. Or I might try this as a bundt cake, which I think would be faaaaabulous.


Double Chocolate Cupcakes
(Source: Gourmet, March 1999)

For cupcakes:
3 ounces fine-quality semisweet (or bittersweet) chocolate
1 1/2 cups hot brewed coffee (you can substitute plain hot water, but you don't really taste the coffee, just a dark chocolate flavor)
3 cups sugar
2 1/2 cups all-purpose flour
1 1/2 cups unsweetened cocoa powder (as with the chocolate, the better the cocoa, the better the cake!)
2 teaspoons baking soda
3/4 teaspoon baking powder
1 1/4 teaspoons salt
3 large eggs
3/4 cup vegetable oil
1 1/2 cups well-shaken buttermilk
3/4 teaspoon vanilla

For ganache frosting:
1 pound fine-quality semisweet (or bittersweet) chocolate
1 cup heavy cream
2 tablespoons sugar
2 tablespoons light corn syrup
1/2 stick (1/4 cup) unsalted butter

Special equipment
three 12-cupcake pans

Make cupcakes:
Preheat oven to 300°F. and line bottoms of pans with cupcake papers. Finely chop chocolate and in a bowl combine with hot coffee. Let mixture stand, stirring occasionally, until chocolate is melted and mixture is smooth.

Into a large bowl sift together sugar, flour, cocoa powder, baking soda, baking powder, and salt. In another large bowl with an electric mixer beat eggs until thickened slightly and lemon-colored (about 3 minutes with a standing mixer or 5 minutes with a hand-held mixer). Slowly add oil, buttermilk, vanilla, and melted chocolate mixture to eggs, beating until combined well. Add sugar mixture and beat on medium speed until just combined. Fill cupcakes two-thirds full (no more!) and bake in middle of oven until a tester inserted in center comes out clean, about 25 minutes.

Cool cupcakes in pans on racks. Run a thin knife around edges of each cupcake and invert them onto the racks. Cool completely. Cupcakes may be made 1 day ahead and kept in an air-tight container at room temperature.

Make frosting:
Finely chop chocolate. In a 1 1/2- to 2-quart saucepan, bring cream, sugar, and corn syrup to a boil over moderately low heat, whisking until sugar is dissolved. Remove pan from heat and add chocolate, whisking until chocolate is melted. Cut butter into pieces and add to frosting, whisking until smooth. Transfer frosting to a bowl and cool, stirring occasionally, until spreadable (depending on chocolate used, it may be necessary to chill frosting to spreadable consistency).

Spread frosting (fairly thinly) on cupcakes. Cupcakes keep, covered and chilled, 3 days. Bring to room temperature before serving.

Makes 36-40 cupcakes.

Tuesday, January 16, 2007

BRRRRRR!!!

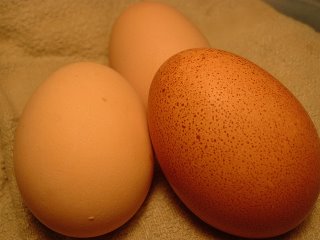
You think it's a little COLD? I don't know if you can tell from this picture, but if you look closely, you can see what happened to the eggs this morning. The one in the lower/center is normal, but the top two eggs were frozen in their shells--whites and yolks together--and retained that shape. I guess it's payback time for all that griping about the unseasonably warm winter! We are currently at -1 and dropping! And to top it all off, my vacation officially ends today--BOO HISS! I'm due at school in the morning at 8:30am--GACK!! So I better open the cabinets where the pipes are so that the heat can get to them, turn on the taps to the diameter of a pencil, and head to bed. A typical but brutal start to "spring" semester! UGH!

Sunday, January 14, 2007

A spicy, mid-winter meal...

I'm afraid that I don't have an exciting "what I made for dinner last night" report to share with you today. (Why do people suggest that that is the worst kind of blog entry, anyway? I love to hear about what folks are making, especially everyday foods, because I like to steal ideas for my own dinners! I don't get it.) Anyway, I have no real dinner recipe to share, but I will offer an unpaid product endorsement. We finally got around to trying some of the Rossi pasta that my friend, Kurt, gave me for Christmas, along with the jar of vodka sauce that came with the gift assortment. So I browned up some garlic and cheese sausage that I unearthed from the freezer, added the jar of vodka sauce and some heavy cream, and served it over Rossi Italian spice linguini. It was FANTASTIC! It was the best pasta dish either one of us has had in a long time--we both kept commenting on it through dinner. It was really excellent. Check them out at www.rossipasta.com. The website also has lots of recipes.

Now I may not have had an entree recipe for you, but I have one for dessert! Sadly, I'm getting down to the wire on my leisure baking time. But yesterday, Cyd and I decided that we needed something chocolatey, and I have had this recipe in the hopper of things to try for quite some time. Instead of making a whole cake, I made mini-bundts instead. And though the recipe called for covering the whole cake with a pecan glaze, the cakes came out so delightfully crispy on the outside (like a brownie!), that I decided to just fill the little depression in the mini-bundts and let it go a little bit over the sides, but not all over. Topped with a good dollop of whipped cream, and we were in spicy chocolate heaven! I'm sure that these would make excellent cupcakes as well.

Mexican Chocolate Mini-Bundts
(Source: adapted from
www.epicurious.com, Gourmet April 2004)

For cakes:
2 sticks (1 cup) unsalted butter
1/2 cup Dutch-process unsweetened cocoa powder
3/4 cup coffee or espresso
2 cups granulated sugar
2 large eggs
1/2 cup well-shaken buttermilk
2 teaspoons vanilla
2 cups all-purpose flour
1 teaspoon baking soda
3/4 teaspoon cinnamon
1/8 (up to 1/4) teaspoon cayenne
1/4 teaspoon salt

For glaze:
1 1/2 cups chopped pecans
1/2 stick (1/4 cup) unsalted butter
1/2 cup half-and-half
1/2 cup confectioner's sugar
5 oz fine-quality bittersweet chocolate (not unsweetened), finely chopped
1 teaspoon vanilla
1/4 teaspoon salt

Special equipment: a 9-inch tube pan or 12-cup bundt pan or 10-12 mini-bundt pans

Make cake:
Put oven rack in middle position and preheat oven to 350°F. Butter cake pan well and dust with flour, knocking out excess.
Melt butter (2 sticks) in a 3-quart heavy saucepan over moderately low heat, then whisk in cocoa. Add water and whisk until smooth, then remove from heat. Whisk in separately sugar, eggs, buttermilk, and vanilla.

Sift together flour, baking soda, cinnamon, cayenne and salt into a bowl, then sift again into cocoa mixture and whisk until just combined (don't worry if there are lumps).

Pour batter into cake pan and bake until a wooden pick or skewer comes out with a few crumbs adhering, 40 to 55 minutes (the mini-bundts took just 25 minutes).

Cool cake in pan on a rack 20 minutes (15 minutes is plenty for mini-bundts, until pans are no longer to hot to touch), then loosen edges with a thin knife and invert onto a plate.

Make glaze:
Spread pecans in 1 layer in a shallow baking pan (1 inch deep) and bake until fragrant and a shade darker, 6 to 8 minutes. Cool pecans slightly in pan on a rack, about 5 minutes.

Melt butter in a 2-quart heavy saucepan over low heat, then stir in half-and-half and confectioners sugar. Add chocolate and cook, stirring, until smooth. Remove from heat and stir in pecans, vanilla, and salt. Cool glaze until slightly thickened, about 5 minutes.

Spoon glaze over top and sides of cake (cake will still be warm) and spread with a small offset spatula or knife.

Cooks' note:
Cake (with glaze) can be made 2 days ahead and kept at room temperature in a cake keeper or covered with an inverted bowl.

Makes 10 to 12 servings.

Saturday, January 13, 2007

One Resolution Keeper, One Resolution Buster

Sigh...what to do with that regular, old mid-week chicken for dinner? It's the culinary conundrum that plagues the nation on a daily basis. And I got some beautiful bone-in, skin-on breasts at the grocery store recently that were buy one package, get one free...yippee! So I was reading through some recent posts on the Cooks Illustrated message boards, as I am wont to do, and someone started a thread about the most popular recipes on those boards. One that came up was the so-called Cornell Chicken. According to a very informative post on www.roadfood.com, the recipe was created in 1946 by a young professor at the University of Pennsylvania, Bob Baker, for a dinner in honor of the governor of Pennsylvania at that time, Edward Martin. A few years later, Professor Baker joined the faculty at Cornell, and eventually, the recipe was printed in a university publication, and from that point forward became known as "Cornell Chicken." This is the same chicken that is served up to thousands of patrons--presidents included!--every September at Baker's Chicken Coop Barbecue Stand at the New York State Fair in Syracuse. But you can make it yourself at home. At the fair, they grill up chicken halves, and I made bone-in, skin-on breasts myself. But if you've made some health-related New Year's resolutions, this would also give excellent flavor to boneless, skinless breasts, not to mention, the brining function of this marinade would help keep them moist. Now keep in mind, this is not a quick fix, as you'll want to marinade your chicken for at least a couple of hours, and up to 12. Actually, I ended up marinating mine even longer than that, and it was fine. It will taste stronger of the marinade, of course, and I confess that I was worried that it would be pickled with all that vinegar! But interestingly, it ended up tasting like it was flavored with white wine. The next time I make this recipe, I think I will also add some dijon mustard to the marinade, and of course, some garlic, as is my way. Professor Baker just died this past March at age 84, but it is great to think that this delicious recipe is his legacy.

To serve with the Cornell Chicken, I decided to make my very favorite potato dish on this earth called Melting Potatoes from Barbara Kafka's definitive cookbook, Roasting: A Simple Art. Be forewarned, this is certainly NOT a low-cal dish, and I don't want to play a role in derailing anyone's diet resolutions. So if need be, I admonish you to walk away from the computer now before it's too late. Don't even look at the recipe! Just walk away! Ok, for those naturally-thin or fearless chubby people who are still reading, let me assure you that, if you make these potatoes, you be a hero--nay, a god--to your family, friends, or whomever you choose to serve them to, IF you can bring yourself to share them, that is! The technique, while a little time-consuming, is easy, and the results, simply divine. The potatoes come out crispy on the outside and so tender and flavorful on the inside that they almost melt in your mouth--hence, the name. Along with the Cornell Chicken, all you need to do is throw together a green salad or your favorite veggies as a side dish, and that's a dinner worth crowing about!


Cornell Chicken
(Source: Professor Bob Baker, Cornell University)

1 egg
1 cup cooking oil
2 cups cider vinegar
3 tablespoons salt
1 tablespoon poultry seasoning
1/2 teaspoon pepper
chicken (this makes enough for ten halves!)

Put egg and oil in blender, blend to emulsify. It will have the consistency of mayonnaise. (Note that if there is any water at all in the blender, this will not happen.) Add vinegar, continuing to blend. Add seasonings and blend until dispersed throughout. Marinate chicken for at least three hours and up to 12. Grill as usual. You may also use the marinade as a basting sauce.

Melting Potatoes
(Source: Roasting: A Simple Art, Barbara Kafka)
Yield: 8 -10 servings

3 tablespoon butter cut in 6 pieces, plus 1 tablespoon reserved in the refrigerator
3 tablespoons olive oil
6 large baking potatoes (about 3 pounds)
1 teaspoon kosher salt
freshly-ground black pepper
2 cups chicken stock (homemade is best, but you can also use low-sodium canned)

Place rack on top third of oven. Heat oven to 500 degrees. Put the 3 tablespoons of butter into an 18-by-12-by-2-inch roasting pan. Set pan over medium heat just until butter has melted. Remove. Add olive oil. Peel potatoes. Cut in half lengthwise, then cut each in half again. Cut each quarter into 3 wedges. Put in roasting pan. Roll wedges in butter and oil until evenly coated. Arrange so they touch as little as possible. Sprinkle with salt and pepper. Roast for 15 minutes. Turn wedges with a pancake turner. Roast 10 minutes more. Turn again. Roast 10 minutes more. Remove pan from oven. Turn wedges again and making sure to turn white sides on each wedge face up. Add stock. Return to oven for 15 more minutes. Dot wedges with small pieces of reserved butter then serve.


*Note: After the last fifteen minutes in the oven (before adding the last pat of butter), the potatoes can be held for 4-6 hours if necessary. When ready to serve, add the butter and roast for another 15 minutes if the potatoes were at room temperature, or for just five minutes if the potatoes were still warm.
**Another Note: This recipe also works well with the broth from a braised pot roast. And throw some chunks of carrots in there to roast along with the potatoes--they come out SO sweet! YUM!

Friday, January 12, 2007

"Hit up Magnolia and mack on some cupcakes!"

I got some great Christmas/Hanukkah gifts from my sweet friend, Rosanne, who has been so supportive of my fledging efforts at catering and baking for the farmers' market. Her new vision for me is to jump on the cupcake craze that started with the Magnolia Bakery in NYC and is still sweeping the nation. To encourage me in this endeavor, she sent me four cookbooks from three different bakeries in the City: The Magnolia Bakery Cookbook, The Buttercup Bake Shop Cookbook, More from Magnolia: Recipes from the World Famous Bakery and Allysa Torey's Home Kitchen, and Sweet Serendipity: Delicious Desserts and Devilish Dish.

Serendipity is the Upper East Side gift shop and cafe' that is home to the infamous Frrrozen Hot Chocolate made even more famous by Oprah and which I've blogged about previously. Then, of course, I had heard of the Magnolia Bakery--I mean, who hasn't--especially after the Andy Samberg and Chris Parnell homage to the cupcakes in their video, "Lazy Sunday" on SNL, and the bakery was also referenced on "Sex in the City" and in the movie, Prime. As for the Buttercup Bake Shop, the name was vaguely familiar, and I think I remember reading in a guide book or on a web page somewhere that, if you couldn't get your hands on Magnolia cupcakes, then try the ones at the Buttercup Bake shop, that they were equally delicious. Well, it wasn't until I received these cookbooks and started to read up about the bakeries that I realized the reason for the similarity. Their recipes are, in fact, identical, because the owners of the two bakeries used to be co-owners of the Magnolia before an apparently ugly split. If you're interested in the whole tawdry story, read this fascinating article. What I find the most interesting is that, not only are Magnolia and Buttercup spin-offs of one another, it would seem that almost every cupcake bakery in the City is related to all the others like the characters in a soap opera or, given all the lawsuits and bad feelings, a more appropriate comparison may be the Bloods and the Crips!

Despite all the bakery politics and infighting down south, I thought I'd try my hand at baking up a batch of both bakeries' most popular cupcake, the vanilla-vanilla. I hate to have to say it, but I don't see what all the fuss is about! The cupcakes were okay, I guess. Truthfully, the cake was a bit on the dry side for me and a bit coarse in texture. And admittedly, I have never been a friend of frosting, especially if there's no cream cheese involved in it, but I found the vanilla "buttercream" overly sweet, and it dries out far too quickly and becomes unappealingly hard. Still, I will try to keep an open mind and try their chocolate cupcakes next. But they would have to be pretty phenomenal to be worth $1.75 apiece! Jeesh! If you want to judge for yourself, here's the recipe used by both Magnolia and Buttercup:

Vanilla-Vanilla Cupcakes
(Source: More from Magnolia by Allysa Torey)
Makes about 2 dozen cupcakes, depending on the size of your cupcake papers and muffin tins

1 1/2 cups self-rising flour
1 1/4 cups all-purpose flour
1 cup (2 sticks) unsalted butter, softened
2 cups sugar
4 large eggs, at room temperature
1 cup milk
1 teaspoon vanilla extract

Preheat oven to 350 degrees. Line two 12-cup muffin tins with cupcake papers.

In a small bowl, combine the flours. Set aside. In a large bowl, on the medium speed of an electric mixer, cream the butter until smooth. Add the sugar gradually and beat until fluffy, about 3 minutes. Add the eggs, one at a time, beating well after each addition. Add the dry ingredients in three parts, alternating with the milk and vanilla. With each addition, beat until the ingredients are incorporated but do not overbeat. Using a rubber spatula, scrape down the batter in the bowl to make sure the ingredients are well blended. Carefully spoon the batter into the cupcake liners, filling them about three-quarters full. Bake for 20–25 minutes, or until a cake tester inserted in the center of the cupcake comes out clean.

Cool the cupcakes in the tins for 15 minutes. Remove from the tins and cool completely on a wire rack before icing. Ice the cupcakes with either vanilla buttercream (recipe below) or chocolate buttercream.

Note: If you would like to make a layer cake instead of cupcakes, divide the batter between two 9-inch round cake pans and bake the layers for 30-40 minutes.

Vanilla Buttercream:
Makes enough for one 2-layer 9-inch cake or 2 dozen cupcakes*

1 cup (2 sticks) unsalted butter, softened
6 to 8 cups confectioners’ sugar
1/2 cup milk
2 teaspoons vanilla extract

Place the butter in a large mixing bowl. Add 4 cups of the sugar and then the milk and vanilla. On the medium speed of an electric mixer, beat until smooth and creamy, about 3-5 minutes. Gradually add the remaining sugar, 1 cup at a time, beating well after each addition (about 2 minutes), until the icing is thick enough to be of good spreading consistency. You may not need to add all of the sugar. If desired, add a few drops of food coloring and mix thoroughly. (Use and store the icing at room temperature because icing will set if chilled.) Icing can be stored in an airtight container for up to 3 days.

*Note: If you are icing a 3-layer cake, use the following recipe proportions:
1 1/2 cups (3 sticks) unsalted butter
8 to 10 cups confectioners’ sugar
3/4 cup milk
1 tablespoon vanilla extract


Thursday, January 11, 2007

It's almost over...boo hoo.

There's no denying it now. Winter Break is quickly drawing to a close. I'm down to one more week before the insanity begins again. It all just flew by so fast! But I'm feeling good about about the projects that I managed to accomplish around the house. There are a few left, as always, but I think I can still get them in under the wire. In the meantime, with the countdown clock ticking, I've had my teeth cleaned, my hair cut, did a premature spring cleaning of the whole house, had the heater repaired, made a vet appointment for Rosie the basset and Pudge the cat, cleaned the chicken coop, and even squeezed in two trips to Montreal less than a week's time. Whew!

Part of heading north has to do with trying to check off the Golden Globe-nominated films that don't play in our one cineplex town. If it's not animated or it doesn't star Jim Carrey, Will Farrell, or Steve Carell, it just doesn't come here. Sometimes, it boggles the mind why certain films don't play locally, such as the one we saw tonight, Dreamgirls. With that cast? With Beyonce' and Eddie Murphy and Jamie Foxx?? Who knows. It was faaaaabulous, by the way. People actually broke out into applause after some of the big numbers in the film. And that Jennifer Hudson, WOW! What a stroke of genius in casting her as Effie! She'll bring you to your knees with "You're Gonna Love Me." Look for her come Oscar time! And to think, she LOST on "American Idol." That'll teach 'em!

Anyway, after the movie, my friends and I decided to continue our Smoked Meat Tour of Montreal. Maybe a month ago, we tried to go to Schwartz's Deli, reputed to be the definitive smoked meat establishment in Montreal. (Smoked meat, for the uninitiated, is a close kin to say, our pastrami or even corned beef.) We attempted to eat at Schwartz's, but the omnipresent line outside was too darn long. So we opted to go directly across the street to The Main Deli, reported to be the second-best smoked meat operation in the city. But tonight, we lucked out. It was very cold (currently, 11 degrees F.), and it was a bit past the ideal dinner hour on a weeknight, and there was no line at Schwartz's, and there were actually seats inside! It's a tiny little joint, and you have to dine family-style, sharing a table with other patrons, but we were excited just to have made it inside. So here's our review, comparing the two. The homemade french fries at Schwartz's were incredible, and personally, I was enamoured of their pickles (a brand called Putter's?), but all of us agreed that both the cole slaw AND the smoked meat were preferable at The Main! This is one of those classic Montreal debates like St-Viateur's bagels versus Fairmount's, but as for me and mine, no waiting in line at Schwartz's for us! Moreover, at The Main, you can get kreplach (dumpling) soup and authentic varenyky (like Polish pierogi, but of Russian or Ukrainian tradition), and you can use a credit card (helpful to us Americans)--so why wait in line out in the elements across the street?

Lest you think I'd end this post without a recipe, I'll share one silly one (no, not for smoked meat!). I am still enjoying some leisurely baking while I have a little more time off, and it doesn't get any easier or more childish than this one. But hey--school's still out, and this kid is still at recess! This is an older Martha recipe (via daughter, Alexis) for a jazzed-up Rice Krispie treat that also includes Cap'N Crunch and Froot Loops. Hey, I wonder what a chocolate version would be like--you know, with Cocoa Krispies or Cocoa Pebbles or Cocoa Puffs (or all three)? Hmm...I should try that next time!

Confetti Squares
(Source: www.marthastewartliving.com
)

9 tablespoons unsalted butter (you'll hate me for saying so, but margarine makes a more tender treat)

1 teaspoon salt (very important to cut the sweetness)

12 cups (2 1/2 bags) miniature marshmallows (I prefer large ones that have less of the powdery stuff that keeps them all separate as I believe it makes for a creamier marshmallow coating)

6 cups Rice Krispies cereal

6 cups Cap'n Crunch cereal

6 cups Froot Loops cereal

vegetable-oil cooking spray

1. Lightly spray a 9-by-9-by-2-inch baking pan with vegetable-oil cooking spray; set aside. Melt butter in a large pot over medium heat. Add salt and marshmallows; stir with a wooden spoon until melted. Remove from heat. Add Rice Krispies, Cap'n Crunch, and Froot Loops, and stir until combined.

2. Transfer the mixture to the prepared pan. To prevent sticking, coat your hands with vegetable spray, and press the mixture evenly into the pan. Let cool, about 30 minutes.

3. Cut into 3-by-3-inch bars. Store in an airtight container for up to 3 days.

*This recipe makes nine GINORMOUS, tall bars. I usually half this recipe and use a 9x13 pan.


*Follow-up: LOOK! I tried them with Cocoa Pebbles (about 2/3 Cocoa Pebbles and 1/3 Rice Krispies because I didn't have enough Cocoa Pebbles to do a whole batch), and I think this is my favorite combination ever!

Friday, January 05, 2007

Midnight Pasta

So I'm on winter break and my sleeping schedule is all screwed up. I've reverted to my very nocturnal ways like I always do when I'm on vacation (check the times on some of my posts lately!). Moreover, I have been plagued recently with severe carpal tunnel at night. In short, I'm not sleeping much, and when I do, I'm sleeping at weird times. This also tends to mess up my meal schedule. Like today, I ended up eating my lunch at an odd hour (3pm), and when my roommate got home from work and was ready for dinner, I wasn't that hungry. So she made a sandwich and later, I just had a smoothie and thought I was done for the night. But around 11pm, when I was watching some backlogged Martha tapes (another critical goal for my winter break--getting through the stack of Marthas and Oprahs!), that woman sucked me in, d#mn her! Her guests on the episode that I happened to be watching were Johanne Killeen and George Germon of the famed Al Forno restaurant, and they were there to promote their new cookbook, On Top of Spaghetti.

Part of this book chronicles a friendly competition between the couple who often get home very late at night after working at the restaurant. The game is to come up with simple "midnight pasta" dishes made of few ingredients that can be completed by the time the water boils and the pasta cooks. The one that grabbed me tonight and drove me to the kitchen at an obscene hour was called Fettucine with Mascarpone and Egg. It's not unlike Fettucine Alfredo, but with mascarpone instead of butter. The problem was, of course, that at midnight in the tiny hamlet formerly and charmingly known as Ober's Corners, I was lacking in the mascarpone department. However, I had an abundance of cream cheese leftover from holiday baking projects. I wondered if a similar dish could be made swapping out regular cream cheese for the mascarpone? Well, I am happy to report that you can! Don't get me wrong, I am sure that it is much better with mascarpone, but it was darn good with cream cheese, too. I also swapped out pappardelle for fettucine because that's what I had on hand. And, of course, I had gorgeous fresh eggs from my hens that I knew would be lusciously profiled in this dish. I love this recipe because it's so quick and easy (takes as much time as making a box of mac and cheese!), it's obviously flexible, and it includes a great trick. While you are boiling the pasta, you make the simple egg-based sauce in a metal bowl over the pasta pot, creating a de facto water bath to melt the cheeses and keep the eggs from curdling (as seen below). Isn't that clever?


Fettucine (or Pappardelle) with Mascarpone (or Cream Cheese) and Egg
(Sources: www.marthastewartliving.com and also www.foodandwine.com
)
Serves 2


2 large eggs
3 tablespoons mascarpone cheese (or cream cheese in a pinch)
1/2 cup freshly grated Parmigiano-Reggiano cheese, plus more for serving if desired
kosher salt
freshly ground pepper , to taste
1/2 pound dried fettuccine (or pappardelle)

Fill a stockpot with 6 quarts of water, cover, and bring to a boil. In a medium stainless steel bowl, beat the eggs with the mascarpone or cream cheese, 1/2 cup Parmigiano, 1/2 teaspoon salt, and 1/4 teaspoon pepper. Set aside.

Add 3 1/2 tablespoons salt to the boiling water and add the fettuccine or pappardelle. Cover partially just until the water returns to a boil, then uncover, stir the pasta, and cook until al dente.

While the fettuccine is cooking, carefully hold the metal bowl just slightly over the boiling water to warm the egg and cheese mixture, stirring occasionally. When the fettuccine is cooked, drain and add it to the bowl; toss well. Serve immediately, passing the extra Parmigiano at the table.

Tuesday, January 02, 2007

Resolutions: Past and Present

So, one of my New Year's resolutions this year is to try one new (to me) restaurant in Montreal each month. That's about how often I get there, but we end up going to the same favorite restaurants over and over again, though Montreal is a wondrous and diverse foodie paradise! To help me in my quest, I will turn to one of my very favorite blogs, An Endless Banquet, and their incredible A to Z restaurant guide to Montreal. The thing I like about the list is that it includes high-end, fancy eateries, but also a lot of local neighborhood joints. Last month, when my friends and I were up there to take in a movie (The Queen...brilliant!), we also had dinner at this great little Haitian restaurant called Ange et Ricky, as directed by the Endless Banquet Guide. Don't ask me the proper names of the dishes because they were Haitian(?) translated into French! But we had fried chicken, and something not unlike dirty rice that was served with their delicious house hot sauce, fried plantains, some spiced beef, and a great vegetable ragout. We washed everything down with their homemade vanilla lemonade, and even tried some homemade candies for dessert. We ate until we nearly popped like ticks, and yet our bill was only around thirty bucks for the three of us! So I hope to continue working my way through the Endless Banquet Guide in the coming months.

But I would like to reflect, for a moment, on one of my food resolutions from 2006, that is, to bake more bread. I feel that I definitely made good on that promise. I made bread, oh yes, I made lots of bread. There were brioches and challah and ciabatte and whole wheat "Z bread" and sourdough and multi-grain. But I feel that I am going to bust last year's loaf record wide open before winter's even over this year thanks to the recipe that has been sweeping the globe since it was first published in the New York Times in early November. That's right, it's even more infectious than Amish Friendship Bread, and that is the minimalist no-knead bread from Jim Lahey of my favorite bakery in NYC, Sullivan Street Bakery, by way of Mark Bittman's NYT column(s). I know I'm a little late to the party on this one, but better late than never (which should be my Native American name, as my friends can attest!), especially when it comes to the bread recipe that has rocked the culinary world. I don't mean to make melodramatic overstatements, but this method of making homemade bread is right up there with the discovery of fire and the invention of the wheel! People, listen to me. NO. KNEAD. BREAD. No kneading. None. Nada. Zip. Zilch. Bupkiss. It's nearly effortless. Notice I did not say quick, though. The trade-off is the long, long, LONG rising time that does the work of kneading for you. You don't believe me, do you? How can you make (edible) bread without at least some kneading? Well, I did it, and so have countless others (just check out the lengthy threads on messages boards such as those at Cooks Illustrated and eGullet). And below are the pictures to prove it. Let me give you the recipe as originally printed in the New York Times, and then I'll walk you through my first attempt with a pictorial essay of sorts, ok? Ok!

No-Knead Bread
(Source: Adapted from Jim Lahey, Sullivan Street Bakery via Mark Bittman and the New York Times)
Time: About 1½ hours plus 14 to 20 hours’ rising

3 cups all-purpose or bread flour, more for dusting
¼ teaspoon instant yeast
1¼ teaspoons salt
Extra flour, cornmeal or wheat bran as needed

1. In a large bowl combine flour, yeast and salt. Add 1 5/8 cups water, and stir until blended; dough will be shaggy and sticky. Cover bowl with plastic wrap. Let dough rest at least 12 hours, preferably about 18, at warm room temperature, about 70 degrees.

2. Dough is ready when its surface is dotted with bubbles. Lightly flour a work surface and place dough on it; sprinkle it with a little more flour and fold it over on itself once or twice. Cover loosely with plastic wrap and let rest about 15 minutes.

3. Using just enough flour to keep dough from sticking to work surface or to your fingers, gently and quickly shape dough into a ball. Generously coat a cotton towel (not terry cloth) with flour, wheat bran or cornmeal; put dough seam side down on towel and dust with more flour, bran or cornmeal. Cover with another cotton towel and let rise for about 2 hours. When it is ready, dough will be more than double in size and will not readily spring back when poked with a finger.

4. At least a half-hour before dough is ready, heat oven to 450 degrees. Put a 6- to 8-quart heavy covered pot (cast iron, enamel, Pyrex or ceramic) in oven as it heats. When dough is ready, carefully remove pot from oven. Slide your hand under towel and turn dough over into pot, seam side up; it may look like a mess, but that is O.K. Shake pan once or twice if dough is unevenly distributed; it will straighten out as it bakes. Cover with lid and bake 30 minutes, then remove lid and bake another 15 to 30 minutes, until loaf is beautifully browned. Cool on a rack.

Yield: One 1½-pound loaf.

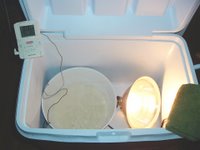
Let me start by explaining this contraption. Because my old house is very cold and drafty, I have trouble getting breads to rise in the winter. So I use a regular insulated cooler, a 40-watt lightbulb, a probe thermometer, and a dish towel to make my own homemade proof box. I put the light down in the cooler and turn it on. I place my bread bowl next to the light, and also dangle the thermometer down inside to keep tabs on the temperature in the box. And then I use the folded dish towel to vent the lid to maintain the desired temperature, from 70-90 degrees. This is kind of a crappy pic, but if you click on the image and look closely, you can see that the temperature inside the proof box is a perfect 71 degrees. It's a great trick for winter baking.


Ok, so I mixed the ingredients in my favorite bread bowl with nothing but a wooden spoon which literally took less than a minute. It's such a wet dough, really more like a thick batter. In fact, Mark Bittman, in a follow-up column responding to the no-knead phenomenon, suggests cutting the water back to a cup and a half, as does the demo video that Lahey himself made. Bittman also suggests upping the salt to almost a tablespoon, as a lot of bakers found the bread under-seasoned, so I did that. Then I just covered the bowl with plastic wrap, dropped it down into the proof box, and went to bed, leaving the bread to do its thing. 18 hours later, it looked like this, all fluffy and bubbly! Imagine that, from a mere pinch of yeast!
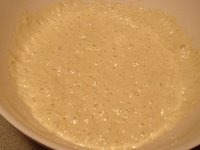


Next,I scraped the dough out onto a heavily-floured Silpat, worked in just enough flour so that I could handle it a little, folded it over at 3 and 9 o'clock, and also at 6 and 12, and plopped it back onto the Silpat to rest, covered lightly with plastic wrap, for 15 minutes.


While the dough was resting, I prepared a flour sack towel (or a couche, if you insist) by heavily dusting it with a mixture of both flour and cornmeal which I draped over a small (eight-inch) bowl. When 15 minutes was up, I placed the dough down in the bowl (though it had become looser and so sticky that I couldn't really make a proper ball or a seam on the bottom, even with lots more flour), sprinkled it with more flour and cornmeal, folded the ends of the towel over it, and put it back in the proof box for closer to three hours than just two (as Bittman reported) until it doubled and almost filled the bowl, comme ca.


Toward the end of the second rise, I preheated the oven to 450 degrees with my cast-iron dutch oven inside. When the dough was ready, the idea was to dump the dough right into the hot pan. The problem was, despite lots and lots of flour and cornmeal, the sucker was really stuck to the towel! So I ended up using the tip of a knife to free the dough from the towel into the dutch oven. Most of it ended up in the pot, but I had to scrape maybe another golf ball-sized amount of dough off of the towel with the knife, and I just tossed it in the pot, too, on top of the rest of the dough. It looked crazy, as Tyra would say and you can see, but I baked it anyway just to see what would happen.


Well, would you believe THIS happened? Look at it! It's just GORGEOUS!
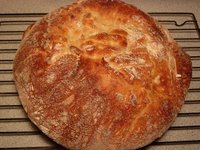


Because it's such a soft dough that spreads to conform to the shape of the pan that you bake it in, it wasn't as tall as I would have liked. My dutch oven is pretty big (8 quarts), and the resulting loaf was only a little over two inches high. But look at that lovely, open (holey) crumb! But it's all about the crust with this bread. When it's fresh from the oven, it's shatteringly crisp (you can actually hear "la musique du pain" or the crackling as it cools). Though it will become chewier the next day, you can always crisp it back up with a ten-minute stint in the oven. And most importantly, it tasted great. The long, slow fermentation makes for delicious flavor, though not as pronounced and tangy as, say, sourdough. Still, for such little effort, the result is more than impressive. Why would you want to bake bread any other way?
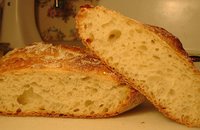


I am going to keep practicing and experimenting with the method, of course. First, I will try cutting back on the water. Second, I must figure out a new plan for the second rise so that it doesn't stick on me when it's time to turn it out into the pot. And speaking of pots, I might have to break down and buy a smaller dutch oven. Some other recipe testers have reported that something between 3 1/2 and 4 quarts might be perfect to get a loaf that is more like four inches high. Having said all that, this recipe is very forgiving and pretty much mistake-proof, so matter what you do to it, the bread will probably turn out. I urge you to give it a try, even if you've never baked a loaf of bread in your life. Make it your New Year's resolution!

*Follow-up: I tried a second loaf, and I used whole-wheat white flour that actually needed the entire 1 5/8 cups of water. To solve the sticking problem, I lined the bowl for the second rise with a piece of parchment with flour and cornmeal on it, and it turned right out when it was time (although I could have just baked it on the parchment itself if I needed to). And I broke down and bought a small cast iron pot (just under four quarts--25 bucks at T.J. Maxx!) to bake my no-knead breads in, and I produced a loaf that was about four inches! Yeah!

Now...what to serve with this lovely bread? I decided to make a simple soup from a fun recipe that I had encountered here and there around the internet. It's called Lasagna Soup, and true to its name, it really does taste just like lasagna, but with a fraction of the effort (see? this eternal post has a theme). It was very easy to make (especially if you use a food processor for the cutting and chopping parts), it tasted great, and it was perfect for sopping up with crusty slices of the no-knead bread. What more do you need?

Lasagna Soup
(Source: adapted from
www.recipezaar.com)

1 pound bulk Italian sausage (I used half sweet and half hot)
2 cups onions, chopped
1 cups carrots, diced
2 cups mushrooms, sliced
2 tablespoons garlic, minced (5 or 6 cloves...or more!)
4 cups chicken broth
1 can Italian-style stewed tomatoes, chopped (14 1/2 oz--I used diced fire-roasted)
1 can tomato sauce (10 3/4 oz)
1 teaspoon dried oregano
1 teaspoon dried basil
*if you didn't use any hot sausage, you may want to add a pinch of hot pepper flakes (1/4 teaspoon)

salt and pepper
1 cup mafalda (mini-lasagna noodles) or campanelle pasta
2 cups fresh spinach, chopped (I used one box frozen cut leaf)
1 cups provolone cheese or fresh mozzarella, diced (or a little of both)
1/4 cup parmesan cheese, shredded
4 teaspoons thinly-sliced fresh basil

Brown sausage in a large saucepan over medium-high heat. Add onions and carrots; saute 3 min. Stir in mushrooms and garlic, and saute another 3 min.

Add broth, tomatoes and tomato sauce, herbs and red pepper flakes (if using), and salt and pepper to taste. Bring to a boil. Drop in pasta and simmer until cooked, about 10 minutes or acccording to package directions. Stir in spinach and cook until wilted. (I tasted the soup at this point, and it actually tasted a little flat to me, so I grabbed my handy-dandy tube of double-concentrated tomato paste and squeezed in about a tablespoon. Then I spied a opened bottle of Cabernet Sauvignon on the counter and poured in a good glug of that. And those two little adjustments did the trick!)

Place 1/ 4 cup mozzarella or provolone cheese into serving bowls and pour hot soup on top. Garnish with parmesan and basil. Serve with a green salad, and I like a scoop of cottage cheese on the side, and of course, some crusty (no-knead!) bread.


HAPPY NEW YEAR!

Lucky number 2007...welcome to it! According to southern tradition (though I couldn't be any farther north and still be in the USA!), for the New Year's Day meal, I made my inaugural batch of Hoppin' John, a kind of one-dish rice pilaf with smoked pork and black-eyed peas. As the mythology goes, the black-eyed peas are for luck, any greens you include symbolize wealth (the recipe I used called for fresh parsley for some greenery), and the rice also connotes prosperity. So Hoppin' John is supposed to give you the triple-whammy of good fortune in the new year. Let's hope for that! ;-)


I am still entrenched in my Cooks Illustrated phase, so I returned to American Classics and tried their excellent recipe for Hoppin' John. Interestingly, the dish is cooked, not on top of the stove as is typical, but baked in the oven for the most part. The value in this method is rice that cooks very evenly and comes out perfectly fluffy. In fact, it worked so well that I may try this technique on some of my other rice dishes in the future. And thought Hoppin' John is usually thought of as a New Year's dish, it makes for such a tasty and hearty casserole that it should be served any night of the year for dinner!

Hoppin' John
(Source: American Classics)

butter for greasing the baking dish
1 tablespoon vegetable oil
6 ounces cooked ham, cut into 1-inch dice (about 1 1/4 cups--I used country ham)
4 ounces bacon (about four slices), cut into 1/2-inch dice
1 medium onion, diced
3 medium cloves garlic, minced
1 1/2 cups long-grain white rice
1 1/2 teaspoons minced fresh thyme leaves (or 1/2-3/4 teaspoon dried)
1/2 teaspoon red pepper flakes (you might want to cut this to 1/4 if you don't like things very spicy!)
2 bay leaves
2 cups homemade or canned (low-sodium) chicken broth
1 teaspoon salt (I omitted this because of the salty country ham I used)
black pepper, to taste
1 (10 ounce) package frozen black-eyed peas, thawed and rinsed (do NOT use canned--too mushy!)
2 tablespoons minced fresh parsley leaves (You can use dried--I did--but fresh is much better for this)

1. Preheat the oven to 375 degrees. Butter a 9x13 baking dish and set aside.

2. Heat the oil in a large skillet over medium-high heat. Add the ham and cook until fat has rendered (3-6 minutes). Add the bacon and cook until somewhat crisp (about 3 minutes). Remove the ham and bacon with a slotted spoon to a plate lined with paper towels. Set aside.

3. Reserve about 2 tablespoons of the fat in the pan and lower the heat to medium. Add the onion and saute for about 3 or 4 minutes until softened. Add the garlic and cook for just 30 seconds more. Stir in the rice, thyme, and red pepper and cook, stirring frequently, until the rice is well-coated with oil, about one minute more. Transfer the rice mixture to the prepared baking pan along with the bay leaves.

4. Return the skillet to the heat, and add the chicken stock, 1 1/2 cups water, and salt and pepper to taste. Raise the heat back to medium-high, scraping up the browned bits from the bottom of the pan. Add the black-eyed peas, ham and bacon, and bring to a boil. Pour over the rice mixture and stir to combine everything.

5. Cover the baking dish tightly with aluminum foil and bake for 20 minutes. Remove from the oven, stir the rice (add another 1/4 cup of water if it looks too dry), re-cover, and return to the oven for another 20-25 minutes or until the rice is cooked through. Remove the dish from the oven, stir in the parsley, re-cover, and let stand for 5-10 minutes before serving (traditionally, with cornbread).

I wish you all peace, good health, happiness and prosperity in the new year!

Sunday, December 31, 2006

World Peace (Cookies) in the New Year

Technically, I still have through today to bake Christmas cookies, right? Who's gonna stop me? The Diet Police won't be issuing calorie violations until next week. And they won't start running the gym membership and weight loss program commercials on an endless loop until then either, nor the low-fat, lightened-up recipe programs on the Food Network for a few more days. So I say, what better way to ring in the New Year than with COOKIES?! And I made two winners this afternoon. The first I happened upon, of all places, at NPR's website. I had heard a program that aired recently with Dorie Greenspan promoting her new cookbook. The particular cookie featured was rugelach, but when I did a search for the recipe, I happily discovered some wonderful-sounding sable recipes as well. I will get to the "plain" sables and their variations (pecan, spice, and lemon) in good time, but today, we wanted something chocolately in the house. So I tried the cookies formerly known as Korova Cookies but re-dubbed World Peace Cookies when a taster decided that one bite of these exquisitely chocolatety gems could bring together all nations and peoples. What an appropriate sentiment as we usher in 2007! The cookies remind me quite a bit of the beloved Mexican Chocolate Icebox Cookies, but richer and more chocolatey, with a bite of saltiness instead of the heat from cayenne and cinnamon.

The second cookie I made was a white chocolate macadamia variety. I have been jonesing for some of these since I brought home real white chocolate chips from Trader Joe's just after Thanksgiving. And macadamia nuts are one of my favorite foods in the whole world. You know, I spent four years in Hawaii as young child (from infancy to age four), so of course, I don't remember much about it. But I still love swimming in the ocean, going barefoot, and eating things like rice and macadamia nuts (not necessarily together, but then again, that doesn't sound bad...a kind of tropical pilaf, perhaps?). In any case, Anna at Cookie Madness must have been on the same wavelength, as she baked two different versions of macadamia cookies this week (one with white chocolate and one with butterscotch chips). I took guidance from both recipes and sort of amalgamated the two with one or two teeny adaptations of my own. They turned out just heavenly! The secret? Browning then cooling the butter back to a solid form before making the cookies. YUM! If there is anything in the world better than the flavor of browned butter, I'm sure I don't know what it is! It adds such a nutty, salty flavor with overtones of caramel that pairs perfectly with the macadamias and the white chocolate. Delish! The recipes follow.

HAPPY NEW YEAR, everyone! (And don't let them take your Christmas cookies away until they pry them from your cold, dead hands!)


World Peace Cookies

(Source: Dorie Greenspan on www.npr.org)

1 1/4 cups all-purpose flour
1/3 cup unsweetened cocoa powder
1/2 teaspoon baking soda
1 stick plus 3 tablespoons (11 tablespoons) unsalted butter, at room temperature
2/3 cup (packed) light brown sugar
1/4 cup sugar
1/2 teaspoon fleur de sel or 1/4 teaspoon fine sea salt
5 ounces bittersweet chocolate, chopped into chips, or a generous 3/4 cup store-bought mini chocolate chips

Makes about 36 cookies (I only got 16 out of each roll=32)

Sift the flour, cocoa and baking soda together.

Working with a stand mixer, preferably fitted with a paddle attachment, or with a hand mixer in a large bowl, beat the butter on medium speed until soft and creamy. Add both sugars, the salt and vanilla extract and beat for 2 minutes more.

Turn off the mixer. Pour in the flour, drape a kitchen towel over the stand mixer to protect yourself and your kitchen from flying flour and pulse the mixer at low speed about 5 times, a second or two each time. Take a peek -- if there is still a lot of flour on the surface of the dough, pulse a couple of times more; if not, remove the towel. Continuing at low speed, mix for about 30 seconds more, just until the flour disappears into the dough -- for the best texture, work the dough as little as possible once the flour is added, and don't be concerned if the dough looks a little crumbly. Toss in the chocolate pieces and mix only to incorporate.

Turn the dough out onto a work surface, gather it together and divide it in half. Working with one half at a time, shape the dough into logs that are 1 1/2 inches in diameter. Wrap the logs in plastic wrap and refrigerate them for at least 3 hours. (The dough can be refrigerated for up to 3 days or frozen for up to 2 months. If you've frozen the dough, you needn't defrost it before baking -- just slice the logs into cookies and bake the cookies 1 minute longer.)

GETTING READY TO BAKE: Center a rack in the oven and preheat the oven to 325 degrees F. Line two baking sheets with parchment or silicone mats.

Working with a sharp thin knife, slice the logs into rounds that are 1/2 inch thick. (The rounds are likely to crack as you're cutting them -- don't be concerned, just squeeze the bits back onto each cookie.) Arrange the rounds on the baking sheets, leaving about 1 inch between them.

Bake the cookies one sheet at a time for 12 minutes -- they won't look done, nor will they be firm, but that's just the way they should be. Transfer the baking sheet to a cooling rack and let the cookies rest until they are only just warm, at which point you can serve them or let them reach room temperature.

SERVING: The cookies can be eaten when they are warm or at room temperature -- Greenspan prefers them at room temperature, when the textural difference between the crumbly cookie and the chocolate bits is greatest -- and are best suited to cold milk or hot coffee.

STORING: Packed airtight, cookies will keep at room temperature for up to 3 days; they can be frozen for up to 2 months.

White Chocolate Macadamia Nut Cookies
(Source: Cookie Madness )

2 sticks butter (Anna used salted, and so did I)
1 cup packed brown sugar
1 cup granulated sugar
2 large eggs
1 teaspoon vanilla
2 tablespoons whole milk
2 2/3 cups all-purpose flour
scant 1/3 cup cornstarch
1 teaspoon baking soda
1/4 teaspoon salt (could omit salt altogether if using salted nuts)
1 generous cup halved macadamia nuts (I used the roasted and salted kind)
1 cup white chocolate chips (real ones, not "white morsels")

First, brown the butter. Place butter in a saucepan and heat over medium until the butter melts, smells good and turns brown around the edges. This should take about 3-5 minutes. Butter might foam up a bit. Remove from heat and pour butter into mixing bowl. Place mixing bowl in refrigerator for two hours or until butter is just set but still kind of soft. If you leave it in longer, you’ll need to soften it again. (I used a fairly shallow bowl, and the cooling time was just over an hour.)

Add both sugars to the bowl of a stand mixer with the butter and cream together. Beat in egg, vanilla and milk. Sift together flour, cornstarch, baking soda and salt. Stir flour mixture into butter mixture just until incorporated. Mix in toasted macadamia nuts and white chocolate chips. (Then this is an optional step, but I chilled my dough for at least an hour before baking off the cookies--I always think this is best with buttery doughs.)

Drop dough by rounded tablespoons onto a Silpat (or parchment)-lined pan. Bake at 375 degrees for 12 minutes (11-13 – check at 11). Remove to a wire rack to cool.

Makes about 4 dozen.


Saturday, December 30, 2006

A CI Breakfast Bonanza, or Never Too Many Eggs in One Day!

Hey, Gina, what are you doing for your holiday break from school?

<----You're looking at it! Prunelle the PBGV captures the essence of my non-activity here as she snuggles in a sleeping bag. (Remember the tragedy of the broken oven? The next chapter is going to be the tale of the busted propane heating monitor! BRRR!) I haven't even been doing much in the way of exciting cooking either, since we have been mostly subsisting on all of the leftovers and holiday goodies. But one thing that I do enjoy when I have some time off of work is making indulgent breakfasts, as you may have noted from the previous post about Eggs Benedict. Well, today, it was all about making some "f#ckin' FRENCH TOAST!" (Movie reference, anyone?) I consider myself a master of the art of French toast, but I tried a different recipe this morning. I have recently rediscovered a couple of cookbooks on my shelf from the publishers of Cooks Illustrated, and this French toast is from The America's Test Kitchen Cookbook. I don't know about you, but I just love Cooks Illustrated in all its forms--magazine, cookbooks, and their website, especially the message boards where I get lots of good ideas and recipes and foodie fellowship. If you've never read any of their stuff, it's quite fascinating how they take a recipe and test it many different ways before concluding that they have achieved the best version. And the fascinating part is how they describe in lively and humorous detail exactly where each previous version fell short of the ideal and why. So for those of us always searching for the very best version of a dish, this can be a huge shortcut, a big time- and money-saver.

As for the CI French toast, interestingly, their recipe is almost exactly like my own version. I thought I was the first one clever enough to add some flour to the egg dunk to make a more substantive crust, I always add a little sugar and vanilla (and eschew cinnamon), and I am a firm advocate for using some type of sweet, eggy bread like challah, brioche, or today I used a Hawaiian sweet loaf. And besides warm maple syrup, I also like a little powdered sugar sprinkled on for good measure--takes me back to my childhood. This is a superlative French toast, trust me. Sometimes you don't need really fancy things with goat cheese or pine nuts or arugula or shaved truffles all piled up in a tower on your plate. Sometimes you just need a really excellent interpretation of a beloved classic. Sometimes, you just need some f#ckin' French toast! ;-)

French Toast
(Source: The America's Test Kitchen Cookbook)

Makes 4-5 challah slices, 6-8 sandwich slices (I made 6 thick Hawaiian bread slices and I needed to double this recipe!)

1 large egg
2 tablespoons unsalted butter, melted, plus extra for frying
3/4 cup milk
2 teaspoons vanilla extract
2 tablespoons granulated sugar
1/3 cup unbleached all-purpose flour
1/4 teaspoon table salt
4 - 5 slices day-old challah bread (3/4-inch-thick) or 6 to 8 slices day-old sandwich bread

1. Heat 10- to 12-inch skillet (preferably cast-iron) over medium heat for 5 minutes (I used a big electric skillet). Meanwhile, beat egg lightly in shallow pan or pie plate; whisk in butter, then milk and vanilla, and finally sugar, flour, and salt, continuing to whisk until smooth. Soak bread without oversaturating, about 40 seconds per side for challah or 30 seconds per side for sandwich bread. Pick up bread and allow excess batter to drip off; repeat with remaining slices.
2. Swirl 1 tablespoon butter in hot skillet. Transfer prepared bread to skillet; cook until golden brown, about 1 minute 45 seconds on first side and 1 minute on the second. Serve immediately. Continue, adding 1 tablespoon butter to skillet for each new batch.

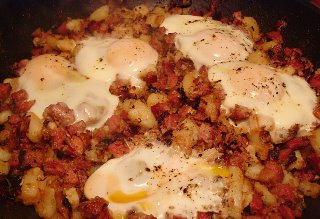
As you can imagine, with a breakfast like that, there was no need for lunch today. But by dinner time, I felt compelled to continue my breakfast motif, and the Cooks Illustrated breakfast theme in particular. You see, I was rummaging around in the big freezer, looking for something to make for dinner, and I found an orphaned corned beef, leftover from last spring when I bought an extra one at a St. Patrick's Day sale price. I have never in my life made corned beef hash, but I have been hankering for some, so I thought I'd tried my hand at it. Once again, I turned to the good people of CI, this time, to a cookbook called American Classics. Despite the fact that it took an inordinate amount of time to cut and chop everything (though my new Rachael Ray knife made it that much less tiresome!), and I accidentally broke one of my egg's yolks as you can see (ugh!), it was really good! I would definitely make this again, especially as a breakfast-for-dinner meal that I like to do when I'm working and don't have time for a big breakfast in the morning. If you'd like to try it for yourself, here's the recipe:

Corned Beef Hash
(Source: American Classics)

2 pounds russet potatoes, peeled and cut into 1/2-inch dice
1/2 teaspoon salt
2 bay leaves
4 slices bacon, diced
1 medium onion, diced
2 medium garlic cloves, minced
1/2 teaspoon fresh thyme leaves, minced (dry works nearly as well, but use half as much)
1 pound corned beef, minced (pieces should be 1/4-inch or smaller, thick slices of corned beef from the deli would be fine here)
1/2 cup heavy cream
1/4 teaspoon hot pepper sauce (or maybe one teaspoon?! chickens!)
4 large eggs (up to 6, I think)
salt and pepper

1. Bring the potatoes, five cups of water, salt and bay leaves to a boil. Once boiling, cook the potatoes for four minutes, then drain and set aside.

2. Cook the bacon in a large, nonstick skillet over medium-high heat for a couple of minutes until the fat starts to render. Add the onion and cook until softened and slightly browned, about eight minutes. Add the garlic and thyme and cook for less than a minute. Add the corned beef and stir to combine. Mix in the potatoes, reduce the heat to medium, then pour the heavy cream and hot sauce over everything. Loosely pack the hash down with a spatula and cook undisturbed for four minutes. Invert the hash, one section at a time, folding the browned parts back into the hash. Continue this process until the potatoes are cooked through and everything is sufficiently browned to your liking.

3. Crack each egg over the top of the hash and sprinkle them all with salt and pepper. Reduce the heat to medium-low, cover and cook until the eggs are set, about six minutes. Serve in wedges with an egg on top of each section. Serve immediately.

Tuesday, December 26, 2006

Merry Christmas! (Redux)

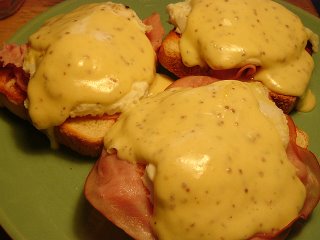
So...how was your Christmas? Ours was low-key but very nice. We started our day with a late breakfast--brunch really--featuring the miraculous Christmas eggs. In fact, one of the Ameraucanas presented us with a special blessing on the very day, the first blue egg of the season (lower right in photo). To showcase our eggy bounty, I decided that Eggs Benedict would be just the ticket. Of course, I realized too late that we were lacking English muffins, so I used some Texas toast instead. And I also used honey ham instead of Canadian bacon. Actually, even more than Eggs Benedict, I love Eggs Copenhagen, which I first had at a charming bistro in the New York's Theatre District called Pigalle. Instead of ham or Canadian bacon, you swap out smoked salmon, and you have Eggs Copenhagen. DELISH! But whatever you pair your eggs with (it could be asparagus or artichoke hearts for you veggie folks out there), it's all about the Hollandaise. My favorite version comes from a cute little volume by Linda Kay Bristow called Bread & Breakfast, and the recipe is entitled Carol's Hollandaise Sauce. Carol Mickelsen is, apparently, the innkeeper of the San Benito House in Half Moon, California, and the following is her amazing Hollandaise recipe:

Carol's Hollandaise Sauce
(Source: Bread & Breakfast, Linda Kay Bristow)

4 egg yolks
1 tablespoon lemon juice (or two!)
1/2 pound (2 sticks) butter, cut into small chunks
1 tablespoon Dijon-style mustard (I prefer whole-grained...I like how it looks)
1/3 cup sour cream
dash salt (I would omit this...it's plenty salty without)
dash white pepper (I just use black as it already has the mustard grains in there)

In the top of a double boiler, whisk together egg yolks and lemon juice, gradually adding the butter. Continue stirring. When mixture has thickened, add the mustard, sour cream, salt (if using), and pepper. Serve over Eggs Benedict or your favorite vegetables.

*Note: I half this recipe, and it still makes enough sauce for 3 or 4 people!

After brunch, we snuggled in for an afternoon movie fest, waiting for neighbor Ken to get done with his barn chores before we opened presents. Then we played board games (Pictionary and Taboo) until it was time to consume the Christmas feast that I posted about yesterday. Fun! So what did you all get for Christmas? I think my friends and loved ones were sending me a strong message with my gifts. ;-) I got three new heavy-duty cake pans, The King Arthur Flour Cookie Companion, one of those rabbit-ear pepper mills, and a fabulous pasta assortment from a company called Rossi Pasta. There were six pastas (angel hair, pumpkin spice fettucine, wild mushroom linguini, parsley garlic fettucine, leek and onion linguini, and Italian spice linguini) along with one jar of vodka sauce. Yum! I don't know much about this company out of Marietta, Ohio, but apparently, they make signature pastas for the likes of Harry & David and Williams-Sonoma. I will try them out and let you know. But the best present of all, from roomie Cyd and neighbor Ken, was this:
That's right. Try not to hate. It's the Rachael Ray knife set! I know that she can be saccharine and annoying, but I have always envied her for her orange Santoku knives from Furi. And now I think I am going to have to spring for the seven-inch, too, I think (on sale for $58 at Amazon!). Love them!

Once again, I hope everyone had a wonderful Christmas and that you got everything that you wanted. (If not, that's why God gave us the after-Christmas clearance sales!)

Monday, December 25, 2006

Merry Christmas!

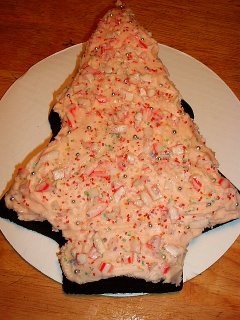
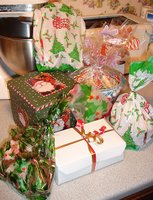
MERRY CHRISTMAS, everyone! I hope those of you who celebrate Christmas are having a very joyful one. I still feel like I'm in hustle-and-bustle mode myself. Yesterday, I ran around to all the neighbors delivering cookies, and this special peppermint brownie tree to the nice farmer behind us who lets us use part of his property to house the chickens and plant vegetables in the summer. (Thank you!)

Then today, I zipped around town, delivering another Raspberry Almond Torte to Janice's house for the Feast of the Seven Fishes with her family, and also dropping off some bittersweet fudge sauce for my chocoholic friend, Angela. I also popped in on June and Tom to deliver some gifts, but I'm afraid none of those were homemade. For June, I got a copy of Elf which I love so much and she has never seen, and also some chocolate-covered dried sour cherries from my last Trader Joe's pilgrimage. For Tom, I got canned tamales (I know, I know, but he loves them for some reason, and June won't allow him to buy them for himself!) and also the best raspberry jam in the world from the dog-catcher/jam-maker in Mooers. I used to think his quad-berry with four different kinds/colors of raspberries was the best. But the last time I was up there, he gave me a sample jar of his low-sugar raspberry, and I swear, that stuff tastes just like fresh raspberries! (And Tom is always complaining that he loves raspberries, but not raspberry-flavored things. This ought to change his tune!) After the Konda-Foleys, it was off to the traditional Christmas Eve Chinese food dinner before the candlelight and carols service at the Lutheran church.

Sounds like a full Christmas Eve, eh? But after we got home from church, I still had to prep the roast beast with a wet rub made of garlic, salt, black pepper, whole-grain mustard, balsamic vinegar and olive oil. Cyd also made the batter for her gorgonzola popovers (it's better if it sits overnight). And finally, I needed to bake my pies. Since it will be a very small affair tomorrow with just me and the roomie, her friend, Rachel, and our dear next-door neighbor, Ken, we are keeping it very simple and just including our personal favorites. Shrimp with a spicy remoulade will be the pre-function. Then we will have the rib roast but instead of Yorkshire pudding, we'll have the gorgonzola popovers (a tried-and-true Martha recipe). We'll also have herbed red potatoes (that's right, with fresh herbs from the garden--might as well!), brussel sprouts with bacon (ick--those are for Cyd), and succotash for me (which Cyd hates). Then, for dessert, we will have the very best pecan pie in the whole world--yes, I'm brazen enough to make that claim!

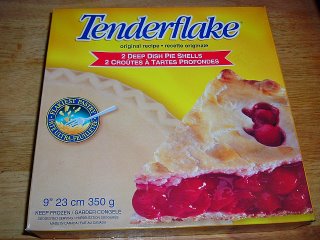
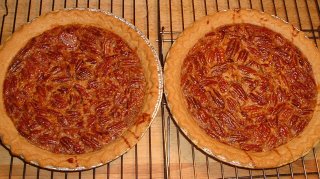
As I have posted about before, the recipe I use comes from my beloved friend, Kurt, by way of, I believe, Betty Crocker? But I have made adaptations to the recipe over the years, like increasing the amount of pecans (more is more!), adding a pinch of salt, and using half dark and half light corn syrups (or, even better, using the new brown sugar-flavored Karo corn syrup). Other adaptations I have made even more recently, largely due to Anna over at Cookie Madness, herself an obsessive pecan pie baker and addict. Her insistence on toasting the pecans and browning the butter beforehand took my pecan pie to a whole new level! But the best change that I have made to the recipe comes from living so near to Quebec. Across the border, they don't fear lard as we do, and they embrace the ultra-flakiness that a lard crust provides. The best-selling brand of lard in their stores seems to be something called Tenderflake, and the same company also makes frozen pie shells. The package says that they are deep-dish pie crusts, but that is a laughable claim. Not only are they small (eight inches?), but they are very shallow. So I make one recipe for the pecan pie filling, but divide it into the two smaller shells. As I am the sort that likes a very low goo-to-nuts ratio, this is a PERFECT solution to the problem of too much of the gelatinous goo. Along those same lines, I am trying one more tip from Anna about using potato starch in place of flour as a thickener. She says that it makes the filling less wobbly and jelly-like but still soft and supple. We'll see. I tried it this time, and the filling seemed to bake up the same way. (I'll let you know more about the taste and texture after we sample the pies tomorrow.)*

Whatever you're cooking and serving for the big day tomorrow, I hope you enjoy your meal surrounded by friends and family and joy and peace.

MERRY CHRISTMAS!

*Follow-up: Anna was right, as usual. The potato starch worked perfectly in the pies. It made a soft but less gelatinous filling that tasted great. I definitely recommend trying it as a thickener for your favorite pies.


Thursday, December 21, 2006

Cookie Party!

Well, it's almost upon us now, the big C-day! Are you ready? I am proud to announce that--mainly thanks to Cyd--we finally have the last of the Halloween down (gasp!), a little bit of external holiday trim on the house, and we even have a tree put up. Oh, it's bare, with no ornaments or lights, and no presents underneath, for that matter, but it's up! And it smells good, too. So with three days left, we are right on schedule (tee hee). A sure sign of the season is that yesterday was the (hopefully, annual) Padula Christmas Cookie Swap at my dear friend Janice's house. But the big props must go to her amazingly talented daughter, Dominica, who gets the golden apron this year. You cannot believe how full-on Martha she went for the affair yesterday! Just look at the table that greeted us when we walked in, down to the recipe card and mini-rolling pin favors and the personalized cookie place cards! TOO FABULOUS!

And though the guests came just to exchange cookies, we were surprised and delighted with a delicious Italian luncheon to boot! We began with two kinds of stromboli, ham and cheese and salami and cheese, then there was a delicious green salad with pears, pistachios, and dried cranberries. The main dish was something that Dominica christened a "mansagna"--kind of a cross between manicotti and lasagna. Basically, it was a lasagna but made with crepes instead of pasta. So even though it looks heavy, it ends up being much lighter and not as overwhelmingly filling. For dessert, in addition to the authentic Italian Padula cookie assortment, Dominica made my new favorite dessert, the walnut tart from the faculty holiday party a couple of weeks ago. That night, after the party, I actually took two pieces of it home with me to share with Cyd, but it was SO good that I ended up eating both of them myself! It's actually a very simple tart with few ingredients, but it tastes like a cross between baklava and pralines. I have been begging for the recipe since that party, and Janice and Dominica were so sweet to give me a cute little recipe binder as a Christmas gift, and the first recipe in it was the blessed walnut tart! I will share the recipe below, but first, look at the cookies that we swapped after the meal.


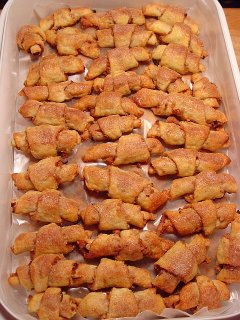
For those of you unfamiliar with the logistics of the traditional cookie exchange, everyone bakes a dozen of the same kind of cookie for each invitee. We had six guests in attendance, so I baked six dozen apricot and walnut rugelach. Then, if you're not as stressed out as I was yesterday (grades were due at school, and I was under the gun!), you should package each dozen individually so that it's easier on your host(s) and guests. Of course, my beloved friends, Janice and Dominica, had extra treat bags available for use by forgetful losers like yours truly. :-( Then everyone gets one dozen cookies from every other party guest, and you leave with six dozen different kinds of yummy cookies (my personal haul is pictured there to the right). Now, if that's too much temptation to leave around your house, then you can assemble mix-and-match cookie trays for your friends or, as in my case, for your neighbors. What a fun and helpful holiday activity, eh? Thanks, Padulas! Same time next year? ;-)

Dominica's Walnut Tart
(Source: A Taste of Home Dec/Jan 2002)

Crust:
2 cups flour
3 tablespoons sugar
3/4 cup cold butter
2 egg yolks, lightly beaten
1/4 cup cold milk

Filling:
1 1/2 cups sugar
1 1/2 cup heavy cream
1/2 teaspoon cinnamon
1/4 teaspoon salt
2 cups coarsely chopped walnuts (I haven't made this yet myself, but I am always in favor of toasting nuts a bit beforehand to bring out their flavor)

In a bowl, combine flour and sugar. Cut in butter until mixture resembles coarse crumbs. Combine egg yolks and milk; stir into flour mixture until blended. With lightly floured hands, press dough onto the bottom and up the sides of a 12-inch tart pan with a removable bottom. Line the shell with foil. Bake at 375 degrees for 12-15 minutes until lightly brown. Meanwhile, in a saucepan, combine sugar, cream, cinnamon and salt. Bring to a boil over medium heat, stirring constantly. Remove from heat and add walnuts. Remove foil from pastry shell and pour filling into the pastry. Bake for 20-25 minutes or until golden brown.

*Dominica recommends using less filling and pastry overall and making another smaller tart with the remainders. Otherwise, she believes that the filling in the tart becomes too thick and gooey, more like pecan pie. She prefers the filling to be thinner and set up more. Just an idea...

Wednesday, December 20, 2006

Happy Hanukkah!

I have been invited to a holiday cookie party tomorrow, and there are six invitees, so each of us needs to bring six dozen cookies to swap. We got a preview of my friend June's gingerbread cut-outs tonight at pub trivia, and they were spicy and delicious! But the thought of rolling out, cutting, and then frosting 70 cookies made me want to take my own life. I am still making batches of toffee for relatives and another cranberry-orange pound cake for my roomie's parents, so I needed something less involved for my cookie offering. I honestly considered Rice Krispie treats at one point (fancy ones, mind you, with Froot Loops and Rainbow Pebbles and such, a la Alexis Stewart). But when I was at the health food co-op yesterday, I spotted a beautiful bag of finely-diced dried apricots, and I had a vision. I would make a version of one of my favorite holiday cookies, that Jewish and/or Eastern European favorite, rugelach. Rugelach is made with a rich, unsweetened cream cheese dough, filled with cinnamon sugar, nuts, and/or some kind of fruit. You roll out small rounds of dough, sprinkle on the filling ingredients, cut into triangles, and then roll each cookie up, not unlike canned crescent rolls. The recipe I use is from 1999's Holiday Baking Magazine from Woman's Day. This fabulous magazine is also the source of my croissant bread pudding recipe. I am absolutely OBSESSED with holiday baking magazines--I need a 12-step program! Anyway, the original recipe is for rugelach filled with hazelnuts and brown sugar, but I play fast and loose with this template. This time, I swapped out toasted walnuts for the filberts, and added an equal amount of the diced apricots for good measure. Whatever you fill yours with, they would be perfect for your cookie swap, holiday party, and particularly, for Hanukkah (I think our Jewish friends are up to six candles as of tomorrow night, if I am not mistaken).

Hazelnut and Brown Sugar Rugelach
(Source: Holiday Baking Magazine, 1999)


For the pastry:
1 cup unsalted butter, at room temperature
1/2 lb. cream cheese, at room temperature
1/4 teaspoon salt
2 cups all-purpose flour

For the filling:
1 1/3 cups hazelnuts (or walnuts or pecans)
1/3 cup firmly packed brown sugar
1/3 cup granulated sugar
2 teaspoons ground cinnamon
4 tablespoons (1/2 a stick) unsalted butter, melted and cooled

* 1 1/3 cup dried apricots, finely diced (or dried fruit of your choice), optional

For the topping:
1/4 cup granulated sugar
3/4 teaspoon ground cinnamon
1 egg white, beaten with 1 tablespoon water (I used a whole egg)

To make the pastry, in a large bowl, combine the butter and cream cheese. Using an electric mixer set on high speed, beat until smooth. Mix in the salt. Reduce the speed to low, add the flour, and mix just until a dough forms. Turn the dough out onto a floured work surface. Using floured hands, form the dough into a log. Cut into 4 equal pieces. Flatten each piece into a disk and wrap separately in plastic wrap. Refrigerate until firm, at least 2 hours or as long as overnight.

Preheat an oven to 350°F. To make the filling, spread the nuts on a baking sheet and toast, stirring occasionally, until they deepen in color, about 10 minutes. Let cool, then chop finely. Increase the oven temperature to 375°F.

Butter 2 baking sheets (I prefer to use Silpats instead). Let the dough disks stand at room temperature for about 10 minutes to soften slightly. Meanwhile, in a small bowl, mix together the brown sugar, granulated sugar and cinnamon.

Flour 1 dough disk and place between 2 sheets of waxed paper. Roll out into a round 10 inches in diameter and 1/8 inch thick. Remove the top sheet and brush the dough with the melted butter, then sprinkle with 3 tablespoons of the brown sugar mixture. Top with about 1/3 cup of the nuts (and 1/3 cup dried fruit, if using). Using a rolling pin, gently roll over the filling to help it adhere to the dough. Cut the round into 12 wedges (a pizza cutter works great). Starting at the wide end, roll up each wedge. Transfer to a prepared baking sheet (you can get 18 of them on one half-sheet pan), arranging the cookies point-side down and spacing them 1 inch apart.

To make the topping, in a small bowl, mix together the granulated sugar and cinnamon. Brush the cookies with the egg wash, then sprinkle with the cinnamon-sugar topping.

Bake until golden brown, about 20 minutes (I baked two trays at a time, rotating halfway through the baking time, and mine took 22-24 minutes). Transfer the cookies to wire racks to cool. Repeat with the remaining dough, filling and topping. Store cookies in an airtight container at room temperature for up to 5 days. Makes 4 dozen cookies.

Tuesday, December 19, 2006

Scenes from the Latter Days, Take Two

Ok, now we've gone over into going crazy! I went to check on the chickens tonight, and LOOK at what I found:

This is just the weirdest thing ever! Chickens laying at Christmas! Next, the moon will turn to blood, frogs will fall from the sky, and the locusts will swarm! (But in the meantime, we'll have delicious omelettes.)